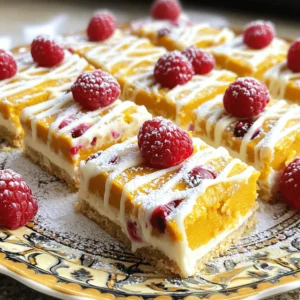
Are you ready to indulge in a sweet treat that’s also a breeze to make? These White Chocolate Raspberry Pumpkin Bars are the perfect no-bake dessert for any occasion. With a creamy filling and a blend of delicious flavors, they’ll wow your taste buds. Plus, I’ll share tips on ingredients, variations, and storage. Let’s dive into this delightful recipe that’ll surely become a favorite!

Ingredients
List of Ingredients
– 1 cup graham cracker crumbs
– 1/2 cup unsalted butter, melted
– 1/4 cup packed brown sugar
– 1 (8 oz) package cream cheese, softened
– 1 cup pure pumpkin puree
– 1/2 cup powdered sugar
– 1 teaspoon pure vanilla extract
– 1 teaspoon pumpkin spice blend
– 1 cup white chocolate chips, melted and cooled
– 1 cup fresh raspberries, rinsed
– Whipped cream for topping (optional)
Notes on Ingredient Quality
Using high-quality ingredients makes a big difference. Choose fresh raspberries for the best flavor. Make sure your cream cheese is soft for easy mixing. Use pure pumpkin puree, not pie filling, for the right taste. Freshly melted white chocolate adds a smooth texture. For the crust, opt for real graham crackers instead of pre-made crumbs.
Substitutions and Alternatives
You can swap graham crackers for crushed cookies like Oreos for a fun twist. If you want a dairy-free version, use a plant-based cream cheese. Instead of white chocolate, dark chocolate can give a richer flavor. For a sweeter touch, substitute brown sugar with maple syrup. You can also use frozen raspberries if fresh ones are not available. Just remember to thaw and drain them before use.
Step-by-Step Instructions
Preparing the Base
To start, gather your ingredients. In a medium bowl, mix 1 cup of graham cracker crumbs, 1/2 cup of melted unsalted butter, and 1/4 cup of packed brown sugar. Stir until everything blends well. Press this mixture into the bottom of a 9×9-inch baking dish. Make it even and firm. This will be the base of your bars. After pressing it down, put the dish in the fridge for about 10 minutes. This helps the crust set up nicely.
Making the Creamy Filling
Next, let’s make the filling. You’ll need a separate bowl for this. Beat 1 (8 oz) package of softened cream cheese with an electric mixer until it’s smooth. Now, add in 1 cup of pure pumpkin puree, 1/2 cup of powdered sugar, 1 teaspoon of pure vanilla extract, and 1 teaspoon of pumpkin spice blend. Mix on medium speed until everything is well combined and creamy.
Assembling and Chilling the Bars
Now, it’s time to add the white chocolate. Make sure your 1 cup of melted white chocolate chips has cooled slightly. Fold it gently into the pumpkin mixture with a spatula. Combine it until you can’t see any white chocolate. Pour this creamy mixture over the chilled crust. Spread it out evenly across the top. Next, take 1 cup of fresh raspberries and scatter them over the filling. Press each berry down lightly so they sink into the mix. Cover the dish with plastic wrap and place it back in the fridge for at least 4 hours. This allows the bars to set up properly.
Serving Suggestions
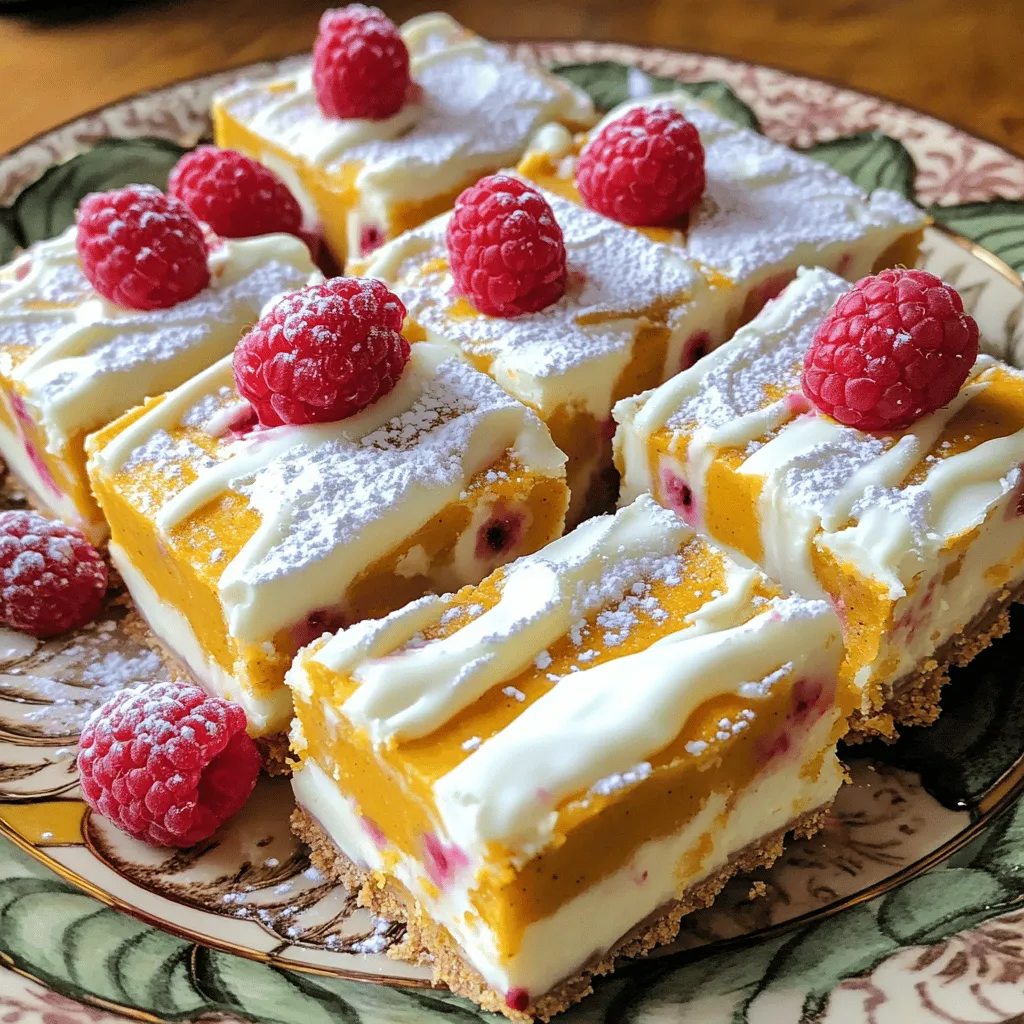
When you’re ready to serve, remove the bars from the fridge. Cut them into squares or rectangles. For a fun touch, top each bar with a dollop of whipped cream if you like. To make your dessert even more appealing, arrange the bars on a nice platter. You can drizzle some extra melted white chocolate on top and add a few more fresh raspberries as a garnish. Enjoy your delicious creation!
Tips & Tricks
Perfecting Texture and Flavor
To get the best texture, use softened cream cheese. It blends well and keeps the filling creamy. Mixing in the pumpkin puree adds moisture, making the bars rich. For flavor, add a little extra pumpkin spice. This enhances the autumn taste. If you want a fruitier kick, try more raspberries. They add tang and balance the sweetness.
How to Make Ahead
You can prepare these bars a day in advance. This gives the flavors time to meld. Chill them overnight for the best results. Just make sure to cover the dish tightly. This keeps the bars fresh and prevents drying out. When ready to serve, just cut and enjoy!
Enhancing Presentation
To make your bars look pretty, arrange them on a nice platter. Drizzle some melted white chocolate on top. This adds a shiny touch. Scatter extra fresh raspberries around the bars. It creates a lovely contrast of colors. For a final touch, add whipped cream on each piece. This makes them even more inviting!
Variations
Flavor Variations
You can change the fruit in these bars. Try using strawberries or blueberries. These fruits add a nice twist. You can also use peaches or cherries. Each fruit brings its own taste. This keeps the bars fresh and fun. Mixing and matching flavors can surprise your taste buds. You can even add zest from a lemon or orange for a citrus kick.
Dietary Adjustments
If you need gluten-free options, switch to gluten-free graham crackers. They work just as well for the crust. For vegan options, use vegan cream cheese and dairy-free white chocolate. You can replace butter with coconut oil. These swaps make the bars fit many diets. It is easy to make these bars work for you.
Altering Sweetness Levels
If you prefer less sweetness, cut back on the powdered sugar. You can also use a sugar substitute. Honey or maple syrup can add flavor without too much sugar. Just adjust to your taste. Experimenting with sweetness lets you find the right balance. This way, everyone can enjoy these tasty bars.
Storage Info
Best Practices for Storing Bars
To keep your white chocolate raspberry pumpkin bars fresh, store them in an airtight container. Place parchment paper between layers to avoid sticking. This will help preserve the creaminess and flavor. It’s best to keep them in the fridge, especially if you plan to enjoy them over several days.
Freezing Options
You can freeze these bars if you want to save some for later. Cut them into squares first. Wrap each piece in plastic wrap and then place them in a freezer-safe bag. They will stay fresh for up to three months. When you want to eat them, thaw them in the fridge overnight.
Shelf Life and Freshness Tips
In the fridge, these bars last about five days. After that, they may lose their fresh taste. Look for any changes in texture or smell to know if they are still good. If you see any signs of spoilage, it’s best to throw them away to avoid any risk.
FAQs
Can I use different chocolate varieties?
Yes, you can use dark chocolate or milk chocolate. Each type brings a new flavor. Dark chocolate adds a rich taste while milk chocolate offers a sweet touch. Just remember to melt it slowly to avoid burning.
How long do these bars need to chill?
These bars need to chill for at least 4 hours. This time helps them set up properly. If you want them firmer, chill them longer. Just keep them covered so they stay fresh.
What other toppings can I use?
You can get creative with toppings! Try crushed nuts, extra berries, or a drizzle of caramel. Shredded coconut or chocolate shavings also work well. Choose your favorite to make these bars your own!
This blog post covered key steps to create delicious bars. We discussed ingredients, offered tips for quality, and shared substitutions. You learned how to prepare the base and make the creamy filling. Tips on presentation helped enhance your bars, while variations suited different diets.
For storage, you now know the best practices to keep bars fresh. Use this guide to experiment and create your perfect treat. Enjoy making your bars, and remember to have fun in the kitchen!