WANT TO SAVE THIS RECIPE?
Are you ready for a tasty treat that’s super easy to make? This Cookies and Cream Icebox Cake combines sweet cream and crunchy cookies for the perfect dessert. You can impress your guests or simply enjoy it at home. I will show you how to layer this delicious cake step by step. Let’s dive into the ingredients and make something special that everyone will love!

Why I Love This Recipe
- Decadent Flavor: This icebox cake combines the rich taste of Oreo cookies with a creamy whipped filling, creating a delightful dessert that’s hard to resist.
- Easy Preparation: With no baking required, this recipe is simple and quick to prepare, making it perfect for beginners and busy cooks alike.
- Make-Ahead Convenience: Being able to prepare this cake in advance means you can save time on the day of your gathering, allowing you to enjoy the moment with your guests.
- Customizable Toppings: You can easily personalize this cake with your favorite garnishes, whether it’s chocolate shavings, sprinkles, or fresh berries for a pop of color.
Ingredients
Measurement of Key Components
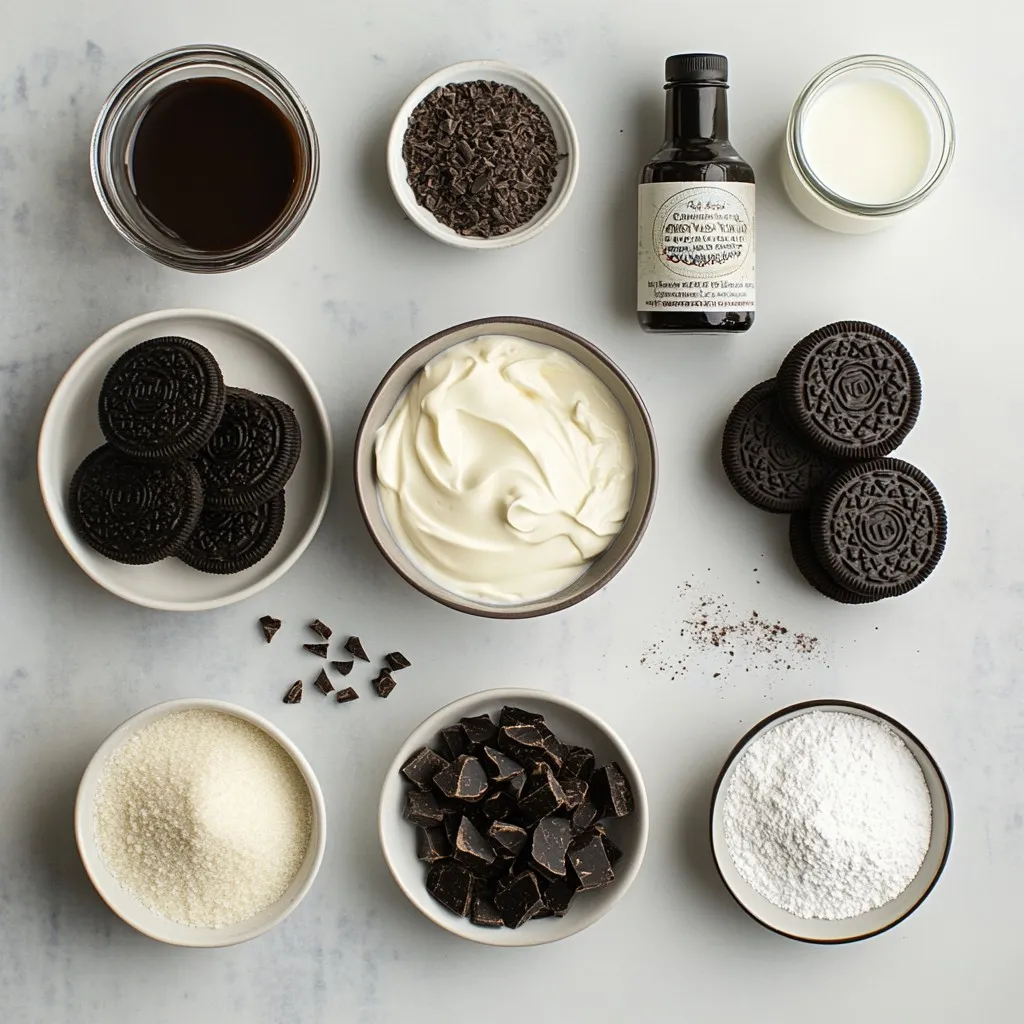
For this Cookies and Cream Icebox Cake, you will need:
– 2 cups heavy whipping cream
– 1/2 cup powdered sugar
– 1 teaspoon vanilla extract
– 18-20 Oreo cookies, crushed (plus a few extra for garnish)
– 1 cup chocolate sandwich cookies, crushed
– 1/2 cup cream cheese, softened
– 1/4 cup granulated sugar
– 1/2 cup milk
These ingredients make a rich and creamy cake. The heavy whipping cream is key for a fluffy texture. The crushed Oreo cookies add flavor and crunch.
Optional Garnishes
You can make your cake even more fun with some tasty garnishes. Consider adding:
– Chocolate shavings
– Colorful sprinkles
These toppings add a pop of color and a sweet touch. They make the cake look festive and inviting.
Notes on Ingredient Substitutions
You might want to switch out some ingredients. Here are a few ideas:
– Use low-fat cream cheese for a lighter option.
– Swap out Oreos for gluten-free cookies if needed.
– Choose a dairy-free milk for a vegan version.
These substitutions let you enjoy the cake while fitting your needs. Just remember that changes can affect the taste and texture slightly.
Step-by-Step Instructions
Preparing the Whipped Cream
Start with 2 cups of heavy whipping cream in a large bowl. Beat this cream with an electric mixer on medium speed. In just 2-3 minutes, it will thicken to soft peaks. Next, add 1/2 cup of powdered sugar and 1 teaspoon of vanilla extract. Keep mixing until stiff peaks form. This step is key for the cake’s texture. Once ready, set this whipped cream aside.
Combining Cream Cheese Mixture
In a separate bowl, take 1/2 cup of softened cream cheese and 1/4 cup of granulated sugar. Mix this with a hand mixer or whisk until it’s smooth. Make sure there are no lumps. Slowly pour in 1/2 cup of milk while mixing. Keep stirring until the mixture is smooth and well combined. This mixture adds a rich flavor to the cake.
Now, gently fold one-third of the whipped cream into the cream cheese mixture. Use a spatula to combine them well. After that, fold in the remaining whipped cream until everything is light and fluffy. This creates a lovely, airy texture for your cake.
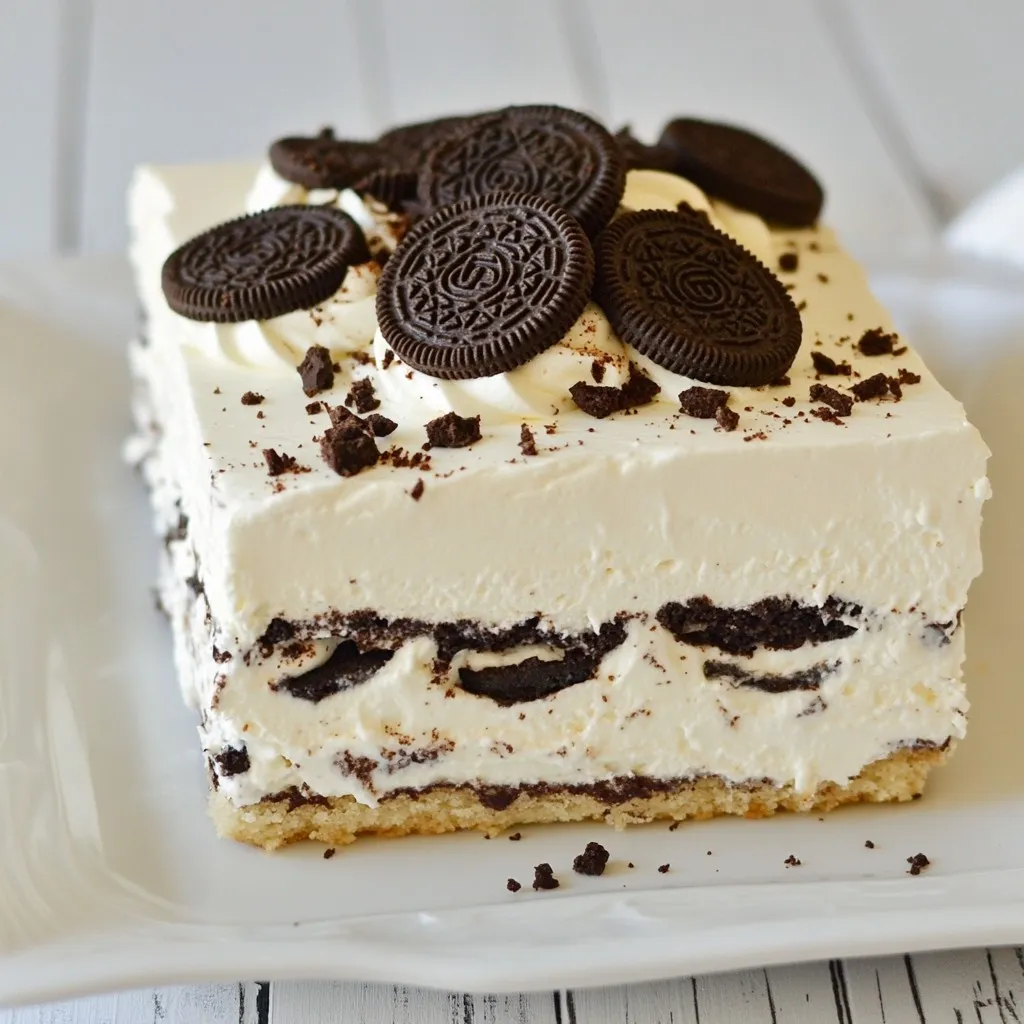
Layering the Icebox Cake
Choose a 9×13-inch baking dish for the cake. Start by dipping half of the crushed Oreo cookies in milk for about 5 seconds. This softens them. Layer these cookies evenly across the bottom of the dish. Next, spread half of the whipped cream mixture over this cookie layer. Use a spatula to smooth it out evenly.
Repeat the layering. Dip the remaining Oreo cookies in milk and place them on top. Then, spread the rest of the whipped cream mixture over this layer. Finish by sprinkling crushed chocolate sandwich cookies and extra Oreo pieces on top.
Cover the dish tightly with plastic wrap and refrigerate for at least 4 hours, or better yet, overnight. This chilling time allows the flavors to blend beautifully. When you’re ready to serve, you can add chocolate shavings or colorful sprinkles on top for decoration. Enjoy your delicious masterpiece!
Tips & Tricks
Achieving Perfect Whipped Cream
To make great whipped cream, start with cold heavy cream. Chill your mixing bowl and beaters, too. This helps the cream whip faster and stay thick. Beat the cream on medium speed until you see soft peaks. This takes about 2-3 minutes. Then, slowly add the powdered sugar and vanilla. Keep beating until stiff peaks form. Stiff peaks mean the cream holds its shape well. This step is key for a fluffy texture in your icebox cake.
Enhancing Flavor Profile
You can boost the flavor of your cake with simple tricks. Add a pinch of salt to the whipped cream. It enhances sweetness and balances the taste. You might also mix in a bit of cocoa powder into the cream cheese mixture for a deeper chocolate flavor. For a fun twist, consider using other flavored cookies. Mint Oreos or peanut butter cookies can add a unique touch. Experiment to find your favorite combo!
Successful Assembly Techniques
When layering your cake, dip the cookies in milk for just a few seconds. This makes them soft but not soggy. Start with a layer of dipped cookies in your dish. Spread half the whipped cream mix over them. Repeat this step for a solid structure. Make sure to smooth the layers well. This will help the cake hold its shape. After assembly, cover it tightly and chill it in the fridge for at least four hours. This helps all the flavors blend beautifully.
Pro Tips
- Whip to Perfection: Ensure you whip the heavy cream until it reaches stiff peaks for a light and airy texture in the cake.
- Cookie Soaking Time: Dipping the Oreo cookies in milk for just 5 seconds helps soften them perfectly without making them too soggy.
- Chill Time Matters: Allow the cake to chill overnight for the best flavor and texture, as this helps the layers meld beautifully.
- Garnish with Style: Use chocolate shavings or colorful sprinkles to add a decorative touch that enhances the cake’s visual appeal.
Variations
Flavor Alternatives
You can change up the flavor of your Cookies and Cream Icebox Cake. Try adding mint extract for a fresh twist. Just use 1/2 teaspoon of mint extract instead of vanilla. For a nutty taste, add peanut butter. Mix 1/2 cup of creamy peanut butter into the cream cheese mixture. This adds a rich, nutty flavor that pairs well with the cookies.
Dietary Adjustments
Want to make this cake gluten-free? Use gluten-free sandwich cookies instead of Oreos. Many brands offer tasty gluten-free options. If you’re looking for a vegan version, swap the heavy cream for coconut cream. Also, choose a plant-based cream cheese and dairy-free milk for the filling. This keeps the cake creamy and delicious without any animal products.
Seasonal Twists
You can give your cake a seasonal vibe, too. During the holidays, add crushed peppermint candies on top. This adds a festive touch and a pop of color. For summer, try mixing in fresh berries. Strawberries or raspberries can make the cake even more refreshing. Use a layer of berries between cookie layers for a fun surprise. These twists make the icebox cake perfect for any time of the year.
Storage Info
Best Way to Store Leftovers
Store your Cookies and Cream Icebox Cake in the fridge. Use a tight lid or plastic wrap to cover it. This keeps it fresh and prevents it from absorbing other smells. It will stay good for about 3-4 days.
Freezing Instructions
You can freeze this cake for later. Cut it into slices for easy serving. Wrap each slice in plastic wrap, then place them in a freezer-safe bag. This will help keep them fresh. The cake can last up to 2 months in the freezer. To enjoy, let the slices thaw in the fridge overnight.
Tips for Maintaining Freshness
– Always cover the cake well before storing.
– Avoid leaving it out at room temperature for long periods.
– If you use toppings like sprinkles or shavings, add them right before serving to keep them crunchy.
– Check for any signs of freezer burn if frozen. This can happen if the cake is not wrapped well.
By following these tips, your Cookies and Cream Icebox Cake will taste great even days later!
FAQs
How long can Cookies and Cream Icebox Cake be stored?
You can store Cookies and Cream Icebox Cake for up to five days in the fridge. Just keep it covered with plastic wrap. This helps it stay fresh and tasty. If you plan to keep it longer, freeze it. The cake can last for about two months in the freezer. Just remember to wrap it well to prevent freezer burn.
Can I use different cookies for this recipe?
Yes, you can use different cookies! You can try chocolate chip cookies or even mint-flavored cookies. Just make sure to use cookies that soften well in milk. This will keep the layers creamy and delicious. Feel free to mix and match your favorite flavors for a unique twist!
How do I know if the whipped cream is ready?
You will know the whipped cream is ready when it forms stiff peaks. This means it holds its shape well. When you lift the whisk out, the cream should stand tall without falling. Keep an eye on it. If it starts to look grainy, you may have over-mixed it. Stop mixing right away!
This blog post covered the key parts of making a Cookies and Cream Icebox Cake. We discussed measurements, optional garnishes, and substitutions for ingredients. I shared step-by-step instructions for preparing whipped cream, mixing, and layering. You learned tips for perfecting whipped cream and enhancing flavors. We explored variations, storage methods, and answered common questions.
Enjoy the fun of creating this treat. Remember, your cake can be as unique as you. Happy bakin
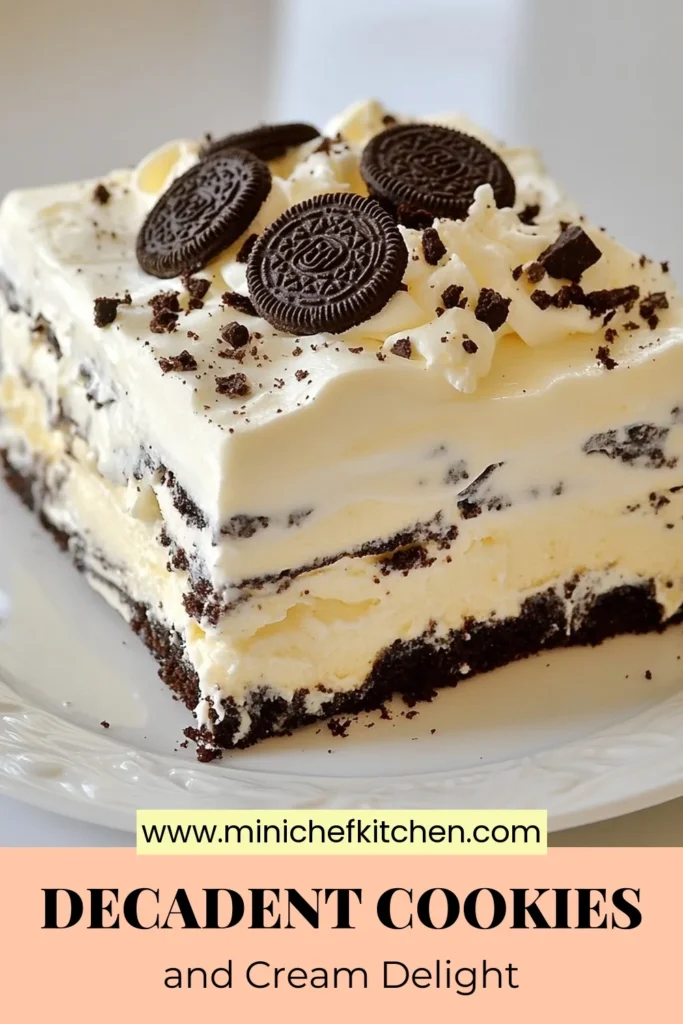
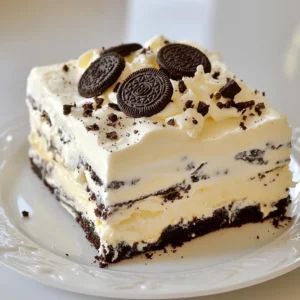
Cookies and Cream Icebox Cake
A delicious layered dessert made with whipped cream, Oreo cookies, and chocolate sandwich cookies, perfect for any occasion.
Prep Time 30 minutes mins
Total Time 4 hours hrs 30 minutes mins
Course Dessert
Cuisine American
Servings 10
Calories 350 kcal
- 2 cups heavy whipping cream
- 1/2 cup powdered sugar
- 1 teaspoon vanilla extract
- 18-20 pieces Oreo cookies, crushed (plus a few extra for garnish)
- 1 cup chocolate sandwich cookies, crushed
- 1/2 cup cream cheese, softened
- 1/4 cup granulated sugar
- 1/2 cup milk
- optional chocolate shavings or sprinkles for garnish
Begin by pouring the heavy whipping cream into a large mixing bowl. Use an electric mixer on medium speed to beat the cream until it thickens to soft peaks – this should take about 2-3 minutes.
Gradually add the powdered sugar and vanilla extract while continuing to beat the cream. Keep mixing until stiff peaks form, ensuring the whipped cream holds its shape. Once ready, set the whipped cream aside.
In a separate mixing bowl, combine the softened cream cheese and granulated sugar. Mix using a hand mixer or whisk until the mixture is smooth and creamy without any lumps.
Slowly pour in the milk while mixing, stirring until the cream cheese mixture is completely smooth and well combined.
Gently fold one-third of the whipped cream into the cream cheese mixture using a spatula until fully incorporated. Then, carefully fold in the remaining whipped cream until the entire mixture is light and fluffy.
Choose a rectangular baking dish (9x13 inches) for assembly. Start with the first layer of cookies: briefly dip half of the crushed Oreo cookies into milk for about 5 seconds to soften them, then layer them evenly across the bottom of the dish.
Spread half of the whipped cream mixture over the cookie layer, using a spatula to smooth it out evenly across the cookies.
Repeat the layering process by dipping the remaining Oreo cookies into milk and placing them on top, followed by spreading the rest of the whipped cream mixture over this layer.
Finish by sprinkling the crushed chocolate sandwich cookies and any extra crumbled Oreo pieces generously over the top of the cake.
Once assembled, cover the dish tightly with plastic wrap and refrigerate for at least 4 hours, or ideally overnight, to allow the flavors to meld and the cake to set properly.
When ready to serve, if desired, garnish the top of the icebox cake with chocolate shavings or colorful sprinkles for an extra touch of decoration.
For an elegant touch, serve the cake in slices on individual dessert plates and drizzle with chocolate sauce alongside fresh berries.
Keyword cookies and cream, dessert, icebox cake
WANT TO SAVE THIS RECIPE?