FREE DINNER EBOOK! Get your copy!
  • Cookie Policy
  • GDPR Policy
  • Disclaimer
  • Terms Of Use
  • Visit my other site: Fun Cookie Recipes
mini chef kitchen
  • Home
  • Dinner
  • Desserts
  • Drinks
  • Appetizers
  • Contact
  • About
  • Privacy Policy
  • Home
  • Dinner
  • Desserts
  • Drinks
  • Appetizers
  • Contact
  • About
  • Privacy Policy
  • Cookie Policy
  • GDPR Policy
  • Disclaimer
  • Terms Of Use
Visit my other site: Fun Cookie Recipes

HOME / CATEGORIES /

Latest

For a tasty bowl of apple pie overnight oats, gather these main ingredients: - 1 cup rolled oats - 1 ½ cups unsweetened almond milk (or your preferred milk) - 1 medium apple, peeled and diced into small chunks - 1 tablespoon apple cider vinegar - 2 tablespoons maple syrup (or substitute with honey if desired) - 1 teaspoon ground cinnamon - ½ teaspoon vanilla extract - 1 tablespoon chia seeds - Pinch of salt These ingredients work together to create a creamy, flavorful base. The oats soak up the almond milk overnight, making them soft and ready to eat. The diced apple adds a sweet crunch, while the cinnamon gives that warm, comforting flavor we all love. To make your oats even better, you can add these optional toppings and add-ins: - 1 handful of walnuts, chopped (for crunch) - Additional diced apples - A sprinkle of cinnamon - A drizzle of maple syrup These toppings add texture and make each bite more exciting. If you want extra sweetness, go for the maple syrup or honey! If you have dietary needs, don't worry! Here are some easy substitutions: - Use gluten-free oats if you avoid gluten. - Swap almond milk for any milk you like, like oat or soy milk. - Honey can replace maple syrup for a different flavor. These swaps let you enjoy apple pie overnight oats, no matter your diet. You can still taste that yummy apple pie flavor! {{ingredient_image_2}} Start by grabbing a large mixing bowl. Add 1 cup of rolled oats. Pour in 1 ½ cups of unsweetened almond milk. Next, add 1 tablespoon of apple cider vinegar. Then, mix in 2 tablespoons of maple syrup. Sprinkle in 1 teaspoon of ground cinnamon and ½ teaspoon of vanilla extract. Toss in 1 tablespoon of chia seeds and a pinch of salt. Use a whisk or spoon to blend everything well and make it smooth. Once your base is ready, it’s time for the apples. Take 1 medium apple, peel it, and cut it into small chunks. Gently fold these diced apples into the oat mixture. This helps spread the apple flavor throughout. If you want some crunch, add a handful of chopped walnuts. Mix them in gently, so they don’t break apart. Now, divide the oat mixture into two jars or bowls. Make sure to share it evenly. Seal the containers tightly to keep air out. Place them in the fridge to chill overnight. This step is crucial. It allows the oats and chia seeds to absorb the liquid and become soft. In the morning, take them out and stir well. If you like, splash in some extra milk for a creamier texture. Enjoy your tasty apple pie overnight oats! To get creamy oats, use enough liquid. I suggest sticking to the 1 ½ cups of almond milk. This amount helps your oats soften well. If you want it creamier, add a splash more milk in the morning. Stir well to blend everything together. You can mix in more spices for added flavor. Try nutmeg, cardamom, or even ginger. Just add a pinch, so it does not overpower the dish. Remember, spices should enhance the apple pie flavor, not mask it. To serve, use clear jars to show off the layers. This makes your dish look lovely and inviting. Top with extra apple pieces and a dusting of cinnamon. A drizzle of maple syrup adds a sweet touch. Adding a mint sprig makes it pop with color. Pro Tips Use Old-Fashioned Rolled Oats: Quick oats may become mushy after soaking overnight, while rolled oats maintain a pleasant texture. Choose the Right Apple: For a balanced flavor, use a mix of tart and sweet apples, such as Granny Smith and Honeycrisp. Make It Vegan: Substitute maple syrup with agave nectar or brown rice syrup for a fully plant-based version. Prep in Batches: Double or triple the recipe and store the extra jars in the fridge for quick breakfasts throughout the week. {{image_4}} You can use many types of milk for your oats. Almond milk gives a nice nutty taste. If you like creaminess, try coconut milk. Regular cow's milk works great too. Each milk changes the flavor a bit. Just pick your favorite! Maple syrup is my go-to sweetener, but you can switch it up. Honey adds a floral note. Agave syrup is also a good choice. For less sugar, try mashed banana or unsweetened apple sauce. Each option brings a unique flavor twist. Want to mix it up? Add nuts like pecans or almonds for crunch. Dried fruit, such as raisins or cranberries, adds chewiness. For a spice kick, try nutmeg or ginger. You can even toss in a scoop of protein powder. These add-ins make your oats even more fun and tasty! Store any leftover overnight oats in airtight containers. Glass jars work great for this. Ensure the lids are on tight to keep the oats fresh. You can keep them in the fridge for easy access. These oats taste great cold or can be warmed up. In the refrigerator, your apple pie overnight oats last for about three days. After this time, the oats may lose their flavor and texture. If you notice a sour smell or change in color, it's best to toss them. Fresh is always best! You can freeze apple pie overnight oats for later use. To freeze, place them in freezer-safe jars. Leave some space at the top for expansion. Do not add any fresh toppings before freezing. When ready to eat, thaw overnight in the fridge. Reheat or enjoy them cold. Avoid refreezing after thawing to keep them safe and tasty. Yes, you can use quick oats. They will soak up liquid faster. This may change the texture a bit. Quick oats will be softer. If you like a chewier bite, stick to rolled oats. You can keep them for up to five days. Just make sure to seal them well. The oats may get softer over time. If you notice any off smell, don’t eat them. If your oats are too thick, add more milk. Stir well to combine. You can also add yogurt for creaminess. Adjust the thickness to your liking before serving. Yes, these oats can be vegan. Just use almond milk or any plant-based milk. Maple syrup is already vegan. No need to change anything else in the recipe. Enjoy a delicious vegan treat! In this blog post, we explored how to make tasty Apple Pie Overnight Oats. You learned about the key ingredients, fun toppings, and simple swaps for different diets. I shared easy steps for making and storing your oats, plus tips for creaminess and spices. Variations let you pick your milk and sweeteners. Lastly, I answered FAQs to help you with any concerns. Try these oats for a quick breakfast. Enjoy the mix of flavors and textures!

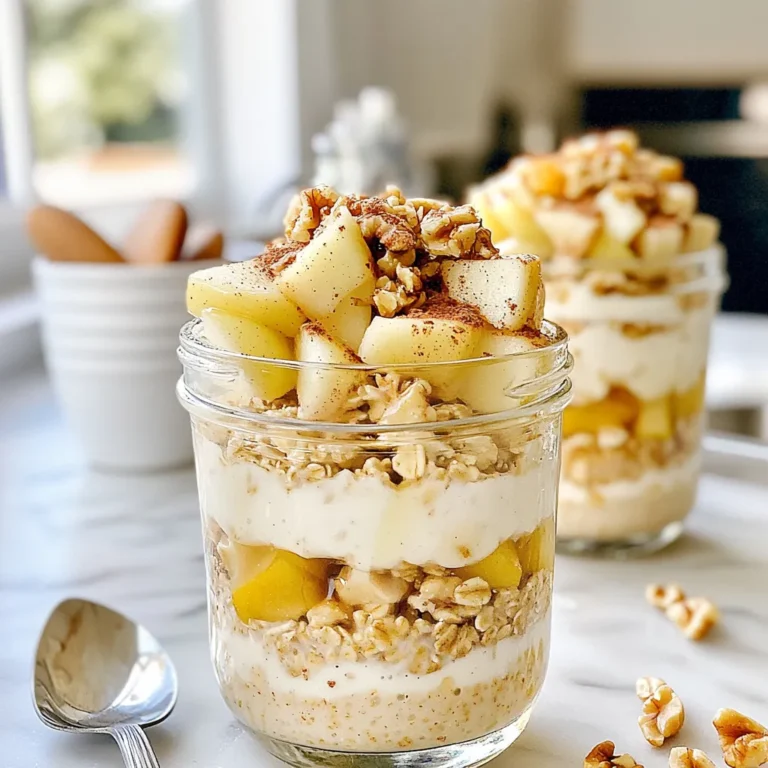
Apple Pie Overnight Oats Tasty and Easy Recipe

- 2 cups cooked jasmine rice - 1 cup shrimp, peeled and deveined - 1 cup fresh pineapple, diced - 1/2 cup peas and carrots - 1/2 onion, diced - 2 cloves garlic, minced - 2 tablespoons soy sauce - 1 tablespoon sesame oil - 1 tablespoon olive oil - Salt and pepper to taste The first step to making shrimp fried rice is gathering your ingredients. This dish shines with fresh flavors and simple items. Start with jasmine rice. Two cups of cooked jasmine rice work best. If you have leftover rice, that’s even better! It helps the dish stay fluffy. Next, you need shrimp. One cup of shrimp should be peeled and deveined. Fresh shrimp gives the best taste. If you prefer, frozen shrimp works too. Just make sure to thaw it well. Pineapple adds a sweet twist. You will want one cup of fresh pineapple. Dice it into small chunks for easy mixing. For added crunch and color, include 1/2 cup of peas and carrots. You can use fresh or frozen. You will also need 1/2 onion, diced finely. Onions bring flavor and depth. Don’t forget 2 cloves of garlic, minced. Garlic adds a nice aroma. Finally, season your dish well. You need 2 tablespoons of soy sauce for saltiness. Add 1 tablespoon of sesame oil for a nutty flavor. Use 1 tablespoon of olive oil for cooking. Adjust salt and pepper to your taste. With these ingredients ready, you are set for a tasty meal that your family will love! {{ingredient_image_2}} Using day-old rice is key for great fried rice. It has a firmer texture, which helps avoid mushiness. If you only have fresh rice, spread it on a tray to cool. This keeps the grains separate and helps them fry better. Start by heating olive oil in your skillet over medium-high heat. Once hot, add the diced onion and minced garlic. Cook them until the onion turns clear and you smell the garlic's nice scent. This should take about two minutes. Next, add the shrimp to the skillet. Cook them until they change to a lovely pink color, which takes about three to four minutes. Don’t forget to season with a bit of salt and pepper. This adds flavor to the shrimp. Now it's time to stir in the diced pineapple along with the peas and carrots. Stir everything together and cook for two more minutes. This makes the veggies tender and mixes in all those bright colors. Add the cooled jasmine rice to the skillet. Break up any clumps with your spatula. It’s important to mix everything well. Then, drizzle soy sauce and sesame oil over the rice mixture. Stir it well to coat the rice evenly. Cook for an extra three to four minutes, so everything is hot. Fold in the chopped green onions. Taste the dish and adjust the salt or pepper if needed. For a nice presentation, use a ring mold to shape the rice on a plate. Garnish with fresh cilantro and lime wedges for a pop of flavor. Using leftover rice gives you the best texture. Freshly cooked rice can clump together. Spread fresh rice out on a tray to cool. This helps keep the grains separate. A hot skillet is key to good fried rice. Heat your skillet to medium-high before adding oil. This step seals in flavors. You can use various seasonings to boost flavor. Soy sauce is a must for that savory taste. Try adding sesame oil for depth. If you want some heat, add a dash of chili sauce or red pepper flakes. This gives your dish a spicy kick. To make this dish vegetarian, swap shrimp for tofu. Firm tofu works best because it holds its shape. You can also use tempeh or seitan as alternatives. Adjust your cooking time for vegetables. Cook them until they are tender but still crisp. This keeps the dish vibrant and fresh. Pro Tips Use Day-Old Rice: Day-old jasmine rice has a firmer texture that prevents it from becoming mushy when fried, making it ideal for this dish. Customize Your Veggies: Feel free to add or substitute with your favorite vegetables such as bell peppers, broccoli, or corn for added flavor and nutrition. Adjust the Seasoning: Always taste your dish before serving and adjust the seasoning with salt, pepper, or more soy sauce to suit your preference. Garnish Creatively: Use fresh herbs like cilantro or mint and lime wedges for a vibrant presentation that enhances the dish’s tropical theme. {{image_4}} You can make shrimp fried rice even more fun by adding tropical fruits. Try mixing in mango or bell peppers. These fruits give the dish a sweet and vibrant twist. The juicy mango adds a burst of flavor, while bell peppers bring a nice crunch. Just chop them into small pieces and stir them in with the other ingredients. If you want a change from shrimp, consider other proteins. You can use chicken or beef instead. For chicken, use bite-sized pieces and cook them until they are golden. For beef, thin strips work best. Just make sure to adjust the cooking time. Both options still make a great fried rice meal. Want to pack in more veggies? You can add a variety of them! Try broccoli, snap peas, or even carrots. Chop them into small bits so they cook evenly. Add them when you stir in the pineapple. This not only makes your dish more colorful but also boosts the nutrition. Remember, the more veggies, the better! To keep your shrimp fried rice fresh, follow these steps: - Cool it down: Let the rice cool to room temperature before storing it. This helps prevent moisture build-up. - Use airtight containers: Store leftovers in airtight containers. This keeps out air and moisture, which can spoil the rice. In the fridge, shrimp fried rice lasts 3 to 4 days. Make sure to eat it within this time for the best taste and safety. You can reheat shrimp fried rice in two ways: - Stovetop method: Heat a pan over medium heat. Add a little oil or water. Then, add the rice. Stir often for even heating. This method keeps the texture nice. - Microwave method: Place the rice in a microwave-safe bowl. Add a splash of water to help steam it. Cover with a lid or a damp paper towel. Heat in short bursts, stirring in between, until hot. Both methods will bring your fried rice back to life, but the stovetop keeps the texture best. Enjoy your meal! Yes, you can use frozen shrimp! Just thaw them first. Place them in cold water for about 15-20 minutes. This helps keep the shrimp juicy. After thawing, pat them dry with a paper towel. This step is key. If they are wet, they will steam instead of sear. Cook them in the skillet until they turn pink. Jasmine rice is the best choice for fried rice. It has a light and fluffy texture. Using day-old rice gives you the best results. Freshly cooked rice can clump together. If you have to use fresh rice, let it cool on a tray. Spread it out to dry for better frying. Yes, you can make shrimp fried rice ahead of time. Cook it fully, then cool it down. Store it in an airtight container in the fridge. It will last for about 3 days. When ready to eat, reheat it in a skillet. Add a splash of soy sauce to refresh the flavors. This dish pairs well with many sides. Try serving it with a fresh salad. A cucumber salad adds a nice crunch. You can also serve egg rolls or spring rolls for extra texture. For a light touch, lime wedges brighten the dish. Enjoy your meal with family and friends! In this blog, we explored how to make delicious shrimp fried rice. We covered essential ingredients, step-by-step cooking methods, and tips for the best results. Remember to use day-old rice for perfect texture, and don’t skip on flavors like soy sauce and sesame oil. You can customize the recipe with different proteins or veggies. With these techniques, you can enjoy a tasty dish that’s easy to make and store. Happy cooking!

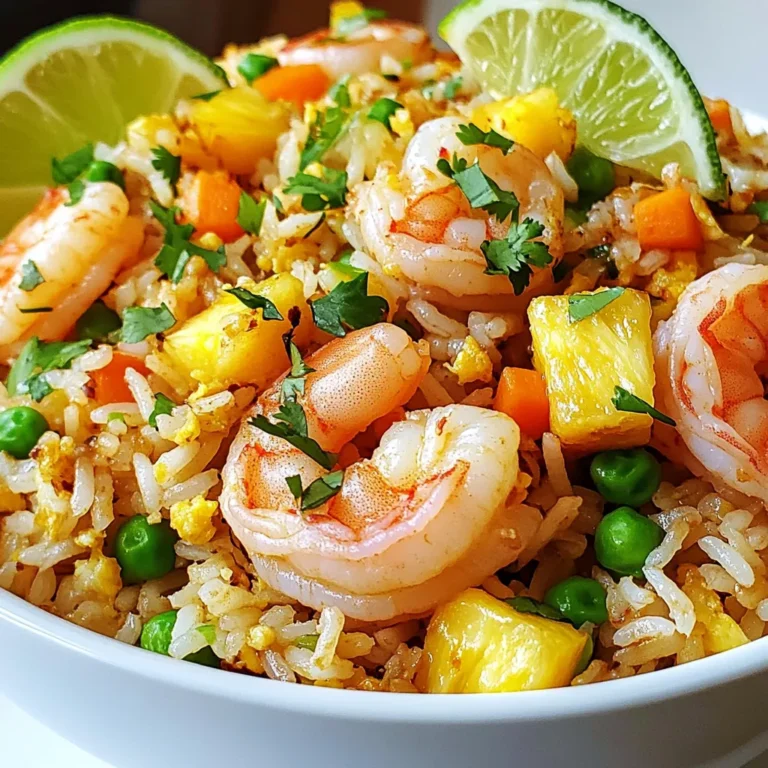
Shrimp Fried Rice Perfectly Easy Family Meal

- 2 cans of premium tuna packed in olive oil, thoroughly drained - 1 cup vibrant cherry tomatoes, halved - 1/2 English cucumber, diced into small cubes - 1/4 red onion, finely minced - 1/4 cup Kalamata olives, pitted and sliced for easy eating - 1/4 cup feta cheese, crumbled into delectable chunks - 1/4 cup fresh parsley, finely chopped for a burst of flavor - 2 tablespoons capers, rinsed and drained - Juice of 1 zesty lemon - 3 tablespoons extra virgin olive oil for richness - Salt to taste - Freshly cracked black pepper to taste When choosing tuna, look for high-quality, premium brands. Tuna packed in olive oil has a rich taste. Always check for good packaging. Cans should not be dented or rusted. Freshness is key. If you can, opt for tuna that is sustainably sourced. This adds to the overall taste and helps the planet. {{ingredient_image_2}} Start by gathering your ingredients. In a large bowl, add the drained tuna. Next, toss in the halved cherry tomatoes, diced cucumber, minced red onion, sliced Kalamata olives, crumbled feta cheese, chopped parsley, and capers. Mix gently. Be careful not to mash the tuna. This salad is all about fresh flavors and textures. In a small bowl, combine the juice of one lemon, extra virgin olive oil, salt, and cracked black pepper. Whisk them together until well mixed. This dressing brings all the flavors to life. You want it to be bright and zesty, enhancing the salad without overpowering it. Drizzle the dressing over your salad mixture. Now, fold everything together gently. Keep the tuna pieces intact for the best texture. Taste your salad and adjust the salt and pepper if needed. Once you've got the right flavor, cover the bowl with plastic wrap. Chill it in the fridge for at least 30 minutes. This helps the flavors blend beautifully. Serve it chilled or at room temperature on greens or in crusty bread. Enjoy the fresh delight! To keep the tuna intact, you must handle it with care. After draining, add it to the bowl last. This way, you can mix other ingredients first. When you combine everything, gently fold the tuna in. Avoid stirring too hard, or it will break apart. The chunks should stay whole for a great texture. You can enhance flavors in your Mediterranean tuna salad easily. Add fresh herbs, like basil or dill, to give a new twist. Try mixing in a splash of red wine vinegar for a zing. If you like heat, add a pinch of red pepper flakes. Each addition creates a unique flavor that makes your salad stand out. Your tuna salad is great for many occasions. Serve it at picnics on a bed of greens. It also works well as a filling for sandwiches or wraps. For a more formal event, use a large, shallow bowl and garnish it. Add extra parsley and whole Kalamata olives for a beautiful look. Pair it with crusty bread for a delightful meal. Pro Tips Quality Tuna: Choose high-quality tuna packed in olive oil for a richer flavor and better texture, enhancing the overall taste of your salad. Chill for Flavor: Allowing the salad to chill for at least 30 minutes in the refrigerator helps the flavors meld together, resulting in a more delicious dish. Adjust Seasoning: Always taste your salad before serving and adjust the seasoning to your preference; a pinch more salt or pepper can elevate the dish significantly. Fresh Herbs: Using fresh parsley not only adds flavor but also a vibrant color; consider experimenting with other fresh herbs like dill or basil for a unique twist. {{image_4}} You can make this salad even more colorful by adding extra veggies. Try bell peppers for crunch or radishes for a peppery bite. Carrots add a sweet note, while avocados bring creaminess. You can even toss in some spinach or arugula for greens. Just chop them up and mix them in with the tuna. Remember to keep the ratios balanced so the tuna stays the star. If you want a twist, consider swapping tuna for another protein. Canned salmon works well and adds a different flavor. For a vegetarian option, use chickpeas or white beans. They are hearty and fill you up. Just rinse and drain them well before adding to the salad. Each choice changes the taste but keeps it just as tasty. Cheese can change the whole vibe of the salad. Feta gives a briny, rich taste, but you might enjoy goat cheese for a tangy kick. If you want a milder flavor, try mozzarella balls. You can also use a dairy-free cheese for a vegan option. Just crumble or chop the cheese and fold it in gently. Each cheese brings its own flair to the dish. To keep your Mediterranean tuna salad fresh, place it in an airtight container. Make sure to seal it tightly. This helps keep moisture out and flavors in. If you have leftovers, store them right after serving. You want to avoid letting them sit out too long. When stored well, the salad lasts about 2 to 3 days in the fridge. Check for any off smells or changes in color before eating. If you see any, it's best to toss it. For the best taste, enjoy your salad within this time frame. Freezing tuna salad is not the best idea due to the textures. The ingredients may change when thawed. If you want to freeze it, do so without the dressing. Store the salad without dressing in a freezer-safe bag. It can last up to a month. Thaw in the fridge overnight before serving. Add the dressing fresh when you’re ready to eat. I recommend using premium tuna packed in olive oil. This type tastes rich and adds great flavor. You can find it in cans at most grocery stores. Look for brands that use sustainable fishing practices. They often have a better taste and texture. Yes, you can make this salad ahead of time. It stays fresh in the fridge for up to two days. The flavors will meld and taste even better after a few hours. Just cover it well with plastic wrap. Remember to stir it gently before serving to keep it fresh. For a low-carb version, skip the feta and capers. You can add more fresh vegetables like bell peppers or zucchini. Instead of olives, try using avocado for creaminess. Replace the dressing with a mix of lemon juice and olive oil, keeping it light and fresh. This blog post covered fresh ingredients and pantry staples for the perfect tuna salad. You learned how to prepare the salad base, make a tasty dressing, and combine everything just right. I shared tips to keep the tuna intact and enhance flavors for any occasion. You also discovered fun variations and storage tips to keep your salad fresh. Now, you can confidently create a delicious tuna salad for any time. Enjoy your cooking and impress your friends and family with your new skills!

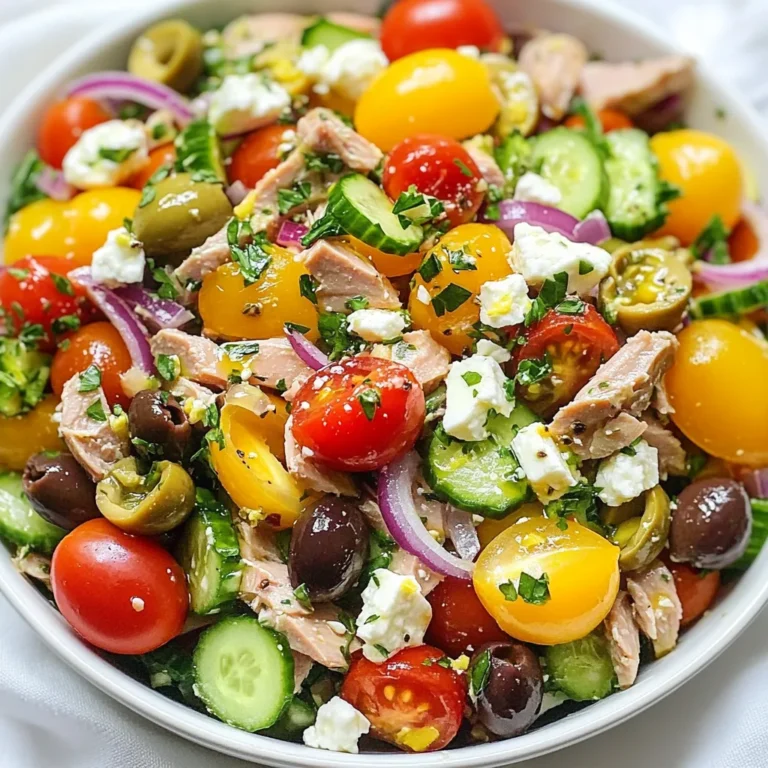
Mediterranean Tuna Salad Simple and Fresh Delight

- 1 can (15 oz) chickpeas, drained and rinsed - 1 cup cooked quinoa or bulgur wheat - 1 cup cherry tomatoes, halved - 1 cucumber, diced into bite-sized pieces - 1/4 red onion, thinly sliced - 1 ripe avocado, sliced - 1/4 cup fresh parsley, finely chopped - 2 tablespoons extra virgin olive oil - 2 teaspoons ground cumin - 2 teaspoons ground coriander - 1 teaspoon smoked paprika - 1 teaspoon garlic powder - 1/2 teaspoon cayenne pepper (adjust to your heat preference) - Sea salt and freshly cracked black pepper to taste - 1/4 cup tahini sauce (store-bought or homemade) - Juice of 1 medium-sized lemon - Additional vegetables like bell peppers or carrots - Toppings such as feta cheese or nuts {{ingredient_image_2}} To start, you need to preheat your oven to 425°F (220°C). Next, grab a mixing bowl. In this bowl, combine the drained chickpeas with olive oil, ground cumin, ground coriander, smoked paprika, garlic powder, cayenne pepper, sea salt, and freshly cracked black pepper. Stir everything well until the chickpeas are fully coated in the spice mix. Now, it’s time to roast the chickpeas! Spread the seasoned chickpeas in a single layer on a baking sheet. Place this sheet in your preheated oven. Roast the chickpeas for 25 to 30 minutes. Shake the pan halfway through to ensure even roasting. You want them to be crispy and golden brown. While the chickpeas roast, focus on cooking the base. You can use either quinoa or bulgur. Follow the package instructions for the grain you choose. When it's done, fluff it gently with a fork and set it aside to cool slightly. This fluffy base is key to making your bowl hearty and filling. Now comes the fun part: assembling your bowl! Start by putting a generous scoop of the fluffy quinoa or bulgur as your base layer in each serving bowl. Next, layer the crispy chickpeas on top of the grain. Then, add the halved cherry tomatoes, diced cucumber, thinly sliced red onion, and elegant avocado slices. This colorful mix makes the bowl look vibrant and fresh. For the finishing touches, generously drizzle tahini sauce over everything. This creamy sauce adds a rich flavor. To give it more color and taste, sprinkle freshly chopped parsley on top. Finally, squeeze fresh lemon juice over the entire bowl. This adds a zesty brightness that takes the flavors to the next level. To make crispy chickpeas, preheat your oven to 425°F (220°C). This high heat helps them get golden and crunchy. Spread the seasoned chickpeas in a single layer on a baking sheet. Roast them for 25-30 minutes. Make sure to shake the pan halfway through for even cooking. This way, you avoid soggy bits and get a perfect crunch. You can adjust flavors and ingredients to suit your taste. If you want a milder flavor, use less cayenne pepper. You can also add more spices like turmeric or coriander. For a vegan option, this recipe is already plant-based! To make it gluten-free, use quinoa instead of bulgur wheat. Both grains work well in this dish. To make your bowl look great, arrange the ingredients neatly. Start with quinoa as the base and layer on chickpeas, tomatoes, and cucumbers. Place the avocado slices on top for a pop of color. Drizzle tahini sauce on the bowl and finish with a sprinkle of parsley. Adding lemon wedges on the side adds a nice touch. A sprinkle of smoked paprika can enhance the look too. Pro Tips Perfectly Roasted Chickpeas: Ensure that your chickpeas are completely dry before tossing them in oil and spices. This will help them achieve that desired crunchiness during roasting. Customizable Heat Levels: Feel free to adjust the cayenne pepper according to your spice tolerance. You can also substitute with paprika for a milder flavor. Freshness Matters: Use fresh lemon juice and high-quality tahini for the best flavor. The freshness will elevate the entire dish and enhance the taste of each ingredient. Ingredient Prep Ahead: Chop your vegetables and prepare the tahini sauce in advance. This will save you time during assembly and make it easy to whip up a delicious meal quickly! {{image_4}} You can add grilled chicken or tofu to your bowl. Chicken gives a nice, hearty flavor. It pairs well with the spices. Tofu is a great choice for a plant-based meal. Just grill or sauté it with some spices for extra taste. You can switch up the base grains or greens. Try brown rice, farro, or even leafy greens. Each option adds a unique flavor and texture to your bowl. Quinoa is light and fluffy, but don’t be afraid to experiment! For a twist, you might want to try some Southwest-inspired ingredients. Add black beans, corn, or avocado for a fresh spin. You can also focus on Mediterranean flavors. Consider olives, feta cheese, or za’atar seasoning. Each change makes the dish your own! Store your Chickpea Shawarma Bowl in an airtight container. This keeps it fresh longer. Glass or BPA-free plastic containers work best. You can keep it in the fridge for up to three days. For best taste, separate the chickpeas from the veggies. The chickpeas stay crunchy this way. To reheat roasted chickpeas, use an oven or air fryer. Preheat your oven to 350°F (175°C) and spread the chickpeas on a baking sheet. Heat them for 10 minutes. This helps them stay crispy. For the bowl, use the microwave for the quinoa or bulgur. Heat it for 30 seconds, stirring after each interval. Add chickpeas and veggies after reheating. Get ready by prepping your ingredients in advance. Drain and rinse the chickpeas a day before. You can also chop the veggies ahead of time. Store them in separate containers. Cook your quinoa or bulgur and cool it before storing. When you’re ready to eat, just assemble everything in minutes. This makes meals quick and easy! If you don't have tahini, you can use peanut butter or sunflower seed butter. Both will add a creamy texture. You can also blend sesame seeds with a bit of oil for a homemade option. Each choice will bring its own flavor to your bowl. Yes, you can prepare the chickpeas and grains ahead of time. Store them in the fridge for up to three days. Chop the vegetables and keep them in separate containers to keep them fresh. Assemble your bowl just before serving for the best taste. To adjust spice, simply change the amount of cayenne pepper. If you want it milder, use less cayenne or omit it. For more heat, add extra cayenne or a dash of hot sauce. Everyone has different spice preferences, so make it yours! - Is this recipe suitable for meal prep? Yes, this recipe is perfect for meal prep! You can portion out the ingredients into containers for quick meals. Just reheat your chickpeas and grains, and add fresh veggies when you're ready to eat. - What are some side dishes to serve with it? Some great sides include hummus with pita, a simple green salad, or roasted vegetables. A refreshing yogurt sauce can also complement the flavors nicely. Feel free to mix and match to find your favorite pairings! You’ve learned how to create a tasty veggie bowl with chickpeas, quinoa, and fresh veggies. We covered spices, cooking methods, and creative toppings. Remember, you can customize your bowl to suit your taste. Use my tips for perfect roasting and storing your leftovers. Enjoy your meal prep and all the delicious variations available. With these steps, you're ready to impress yourself and others with this flavorful dish. Your kitchen skills will shine through each bite!

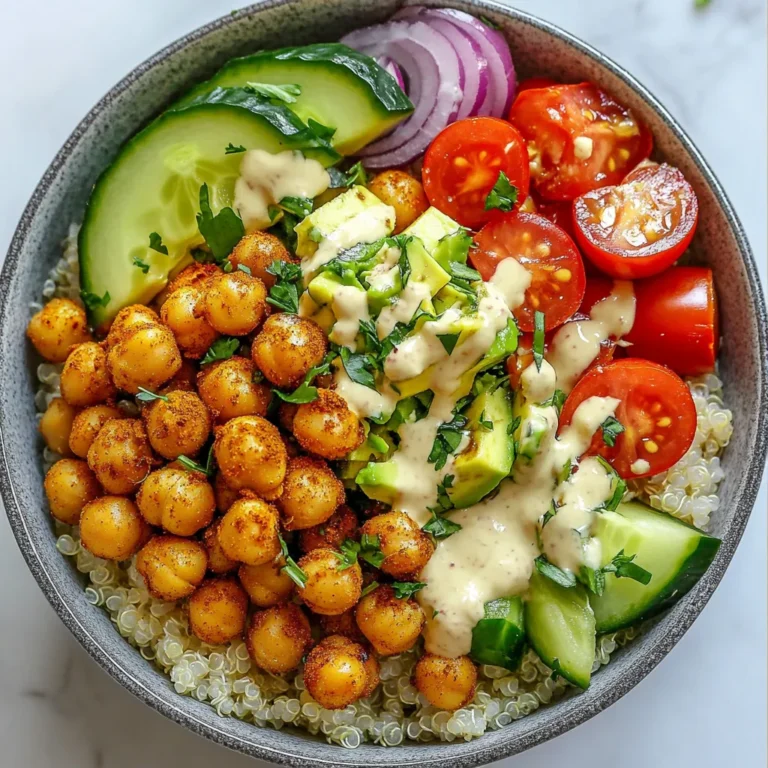
Chickpea Shawarma Bowl Packed with Flavorful Goodness

- 2 large sweet potatoes, peeled and cut into bite-sized cubes - 1 can (15 oz) black beans, thoroughly drained and rinsed - 1 can (14 oz) fire-roasted diced tomatoes, including juices - 1 medium onion, finely chopped - 3 cloves garlic, minced - 1 bell pepper (red or green), diced - 2 cups vegetable broth (homemade or store-bought) - 2 tablespoons extra virgin olive oil - 1 tablespoon chili powder - 1 teaspoon ground cumin - 1 teaspoon smoked paprika - Salt and freshly ground black pepper, to taste - Fresh cilantro, chopped (for garnish) - Creamy avocado slices (for topping) When picking sweet potatoes, look for firm ones. They should not have any soft spots. A smooth skin is best. Avoid potatoes with cuts or blemishes. The color should be vibrant, indicating freshness. If possible, choose organic sweet potatoes for better taste and health benefits. If using canned black beans, check the label for low sodium options. Rinse the beans well before use. This removes excess salt and can improve taste. Look for beans that are whole and not mushy. If using dried beans, soak them overnight for the best texture. Cook them until they are tender before adding to the chili. {{ingredient_image_2}} Start by heating the extra virgin olive oil in a large pot over medium heat. Once it glistens, add the finely chopped onion. Sauté the onion for about five minutes. You want it soft and translucent. Next, toss in the minced garlic and diced bell pepper. Stir this mix for two to three minutes. The aroma will fill your kitchen, and the bell pepper will soften a bit. This fragrant base sets the stage for your chili. Now, it's time for the sweet potatoes. Add the bite-sized cubes to the pot. Cook them for around five minutes, stirring occasionally. This process starts to soften them. Then, sprinkle in the chili powder, ground cumin, and smoked paprika. Don’t forget to add salt and freshly ground black pepper. Stir everything well to coat the sweet potatoes and vegetables in those spices. This step adds depth and flavor. Pour in the vegetable broth and the can of fire-roasted diced tomatoes, including their juices. Bring the mix to a gentle simmer. Once it bubbles, reduce the heat to low. Cover the pot with a lid and let it simmer for 20 to 25 minutes. You want the sweet potatoes to be fork-tender. After that, stir in the black beans and let the chili heat through for another five to ten minutes. Taste your chili and adjust the seasoning if needed. Serve hot, topped with fresh cilantro and creamy avocado slices. Enjoy the warm, hearty goodness of your sweet potato black bean chili! To boost the flavor of your chili, try these tips: - Use fresh spices. They add more depth. - Toast spices in the pot before adding veggies. This brings out their oils. - Add a splash of lime juice just before serving. It brightens the dish. - Top with creamy avocado slices. They bring a rich taste. Here are some mistakes to steer clear of: - Don’t skip the onion and garlic. They form a flavorful base. - Avoid overcooking sweet potatoes. They should be tender, not mushy. - Don’t forget to taste as you go. Adjust seasoning to your liking. - Skip the canned beans if you can. Dried beans need soaking and longer cooking time. To check if sweet potatoes are done, use these methods: - Use a fork. It should slide in easily. - Cut a piece in half. The inside should be soft and creamy. - If you’re unsure, taste a cube. It should be sweet and tender. Pro Tips Choose Sweet Potatoes Wisely: Look for firm, smooth-skinned sweet potatoes without any blemishes or soft spots for the best texture and flavor. Customize the Heat: Adjust the chili powder and add fresh jalapeños or cayenne pepper if you prefer a spicier chili. Make it Ahead: This chili tastes even better the next day! Make it ahead of time, refrigerate, and reheat to enhance the flavors. Top it Off: Experiment with toppings! Try adding shredded cheese, lime juice, or your favorite hot sauce for an extra kick. {{image_4}} If you want to switch up the protein in your chili, try using lentils or chickpeas. Both options add great texture. Lentils cook quickly and absorb the spices well. Chickpeas bring a nutty flavor and a nice bite. You can even add diced tofu for a plant-based protein boost. Just make sure to adjust the cooking time as needed. Want your chili to pack more heat? Add jalapeños or serrano peppers. You can chop them finely and sauté them with the onions. If you prefer less spice, use a bell pepper or omit them altogether. For a milder flavor, try adding a touch of smoked paprika. It gives a warm taste without the heat. This chili can easily fit your diet needs. To keep it vegetarian, the recipe already works great with veggie broth. For a vegan twist, ensure the vegetable broth and toppings are plant-based. You can use coconut yogurt instead of sour cream for a creamy topping. Let your taste guide you in these swaps, and enjoy the result! To store leftover Sweet Potato Black Bean Chili, let it cool first. Once cooled, transfer it to an airtight container. This keeps moisture and air out. Label the container with the date. Make sure to store it in the refrigerator. It is best to eat leftovers within three to four days. You can freeze this chili if you have more than you can eat. Use freezer-safe containers. Leave some space at the top, as the chili expands when frozen. It can last in the freezer for up to three months. When ready to eat, thaw it overnight in the fridge. Reheat it on the stove over medium heat, stirring often. You can also use a microwave for quick reheating. Just cover it to keep moisture in. Homemade Sweet Potato Black Bean Chili lasts about three to four days in the fridge. If frozen, it stays good for about three months. Always check for signs of spoilage before eating. Look for off smells or changes in color. If it looks or smells bad, throw it away. Enjoy your chili fresh to get the best flavors! Yes, you can use fresh tomatoes in this chili. Fresh tomatoes can add bright flavor. Use about 4-5 medium ripe tomatoes. Chop them and add them at the same time you would add canned tomatoes. Just remember to adjust the cooking time. Fresh tomatoes may need a bit longer to break down and blend with the other ingredients. This recipe is mostly gluten-free already. Ensure your vegetable broth is gluten-free. Some brands may add gluten. Also, check your spices for any hidden gluten. If you keep these in mind, you can enjoy this dish without worry. There are many tasty sides to pair with this chili. Here are a few ideas: - Cornbread: Soft, sweet cornbread complements the chili well. - Rice: Serve it over brown or white rice for a filling meal. - Salad: A fresh green salad adds crispness and balances the chili's warmth. - Tortilla chips: Crunchy chips are great for dipping in the chili. These sides will enhance your meal and make it even more enjoyable. This blog post covered everything you need for a delicious Sweet Potato Black Bean Chili. We discussed key ingredients, tips for selecting quality produce, and the step-by-step cooking process. I also shared best practices to avoid common mistakes and enhance flavors. You learned about variations, storage tips, and answered common questions. In essence, this chili is versatile, tasty, and easy to make. With these tools, you can create a warming meal any day. Enjoy your cooking journey!

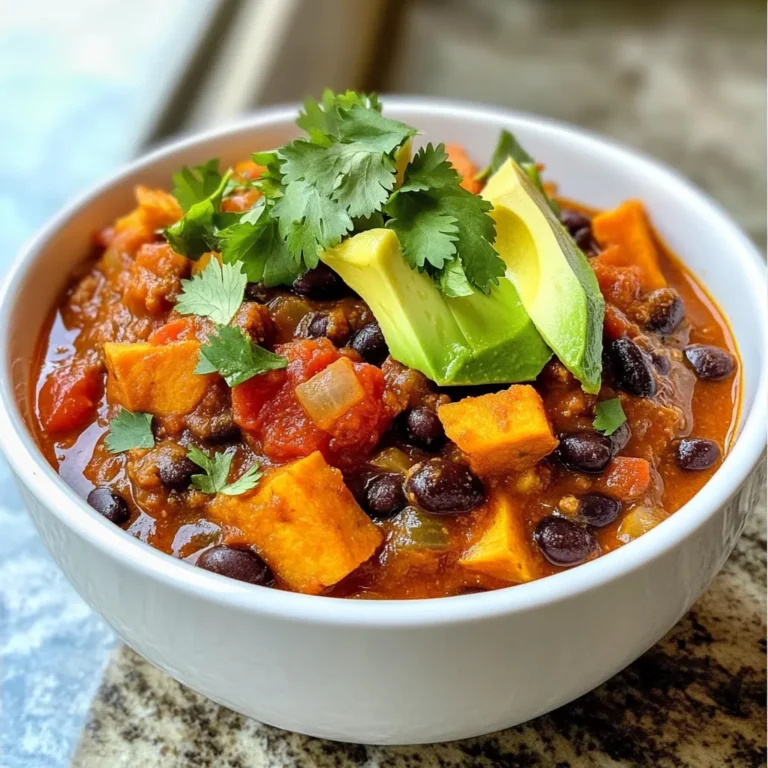
Sweet Potato Black Bean Chili Flavorful and Filling Dish

- 1 cup pumpkin puree (canned or homemade) - 1/2 cup vegetable oil - 1 cup brown sugar, packed - 1/2 cup granulated sugar - 2 large eggs - 1 tsp vanilla extract - 1 1/2 cups all-purpose flour - 1 tsp baking soda - 1/2 tsp baking powder - 1/2 tsp salt - 1 tsp ground cinnamon - 1/2 tsp ground nutmeg - 1/4 tsp ground ginger - 1 cup chocolate chips (semi-sweet or dark) - 1/2 cup chopped walnuts or pecans (optional) You can swap pumpkin puree with mashed banana or applesauce. This change gives a different taste but keeps it moist. Instead of vegetable oil, you can use melted coconut oil or unsweetened applesauce for a lighter version. If you want less sugar, use honey or maple syrup. For a gluten-free option, substitute all-purpose flour with almond flour or a gluten-free blend. You might add nuts like walnuts or pecans for a crunch. Dried fruit, like cranberries or raisins, can bring a nice touch too. You can also mix in spices like cardamom for extra warmth. For a richer flavor, try using dark chocolate chips instead of semi-sweet. {{ingredient_image_2}} Start by preheating your oven to 350°F (175°C). Take a 9x5 inch loaf pan and grease it lightly or line it with parchment paper. This helps the bread come out easily after baking. In a large bowl, mix 1 cup of pumpkin puree, 1/2 cup of vegetable oil, 1 cup of brown sugar, and 1/2 cup of granulated sugar. Whisk them until smooth. Then, add 2 large eggs, one at a time, beating well after each. Stir in 1 teaspoon of vanilla extract for flavor. In another bowl, sift together 1 1/2 cups of all-purpose flour, 1 teaspoon of baking soda, 1/2 teaspoon of baking powder, 1/2 teaspoon of salt, 1 teaspoon of ground cinnamon, 1/2 teaspoon of ground nutmeg, and 1/4 teaspoon of ground ginger. This step helps mix the dry ingredients evenly. Now, gently fold the dry mixture into the wet mix until just combined. You want a few lumps, so don’t overmix. Finally, fold in 1 cup of chocolate chips and optional nuts if you like. Pour the batter into your prepared loaf pan. Use a spatula to smooth the top. Place the pan in the oven and bake for 55-65 minutes. Check for doneness by inserting a toothpick into the center. If it comes out clean, your bread is ready. This baking time allows the flavors to meld perfectly. Once done, remove the pan from the oven. Let it cool in the pan for about 10 minutes. Then, transfer the bread to a wire rack to cool completely. For serving, slice the bread and enjoy it warm. A dollop of butter or cream cheese makes it even better. For a lovely touch, sprinkle some cinnamon and extra chocolate chips on top. Enjoy this sweet and savory delight with family and friends! To get the best texture in your chocolate chip pumpkin bread, you need to mix well. Start with the wet ingredients. Make sure the pumpkin puree, oils, and sugars blend smoothly. This helps create a moist base. When you add the dry mix, fold gently. Overmixing makes the bread tough. You want a soft, tender crumb. A few small lumps in the batter are okay! One common mistake is using cold eggs. Room temperature eggs blend better and help the bread rise. Another error is not measuring the flour correctly. Too much flour can dry out your bread. Always spoon flour into the cup and level it off with a knife. Lastly, don’t skip the cooling step. Letting the bread cool before slicing helps it set. When mixing, use a large bowl. This gives you space to stir without spilling. Start by whisking your wet ingredients until they shine. Then, add the dry mix in parts. Gently fold it in using a spatula. This keeps air in the batter. When you add chocolate chips or nuts, fold them in lightly. This ensures even flavor without breaking the chips. Pro Tips Use Fresh Pumpkin: If possible, use fresh pumpkin instead of canned for a richer flavor. Roast and puree your own pumpkin for the best results. Measure Flour Accurately: Use the spoon and level method to measure your flour. This prevents the bread from becoming dense or dry. Check for Doneness: Every oven is different; check your bread a few minutes before the recommended baking time to avoid overbaking. Customize Add-ins: Feel free to substitute the chocolate chips or nuts with your favorite mix-ins like dried cranberries or white chocolate for a unique twist. {{image_4}} You can change the flavor of your chocolate chip pumpkin bread easily. Add spices like allspice or cardamom for a warm twist. You can also mix in different types of chips, such as white or peanut butter chips. Each choice adds a new taste and keeps things fun. If you need a gluten-free version, swap the all-purpose flour for a gluten-free blend. Make sure the blend has xanthan gum for better texture. You might want to add a bit more liquid to keep the bread moist. This way, everyone can enjoy a slice. Adding nuts can elevate your bread's taste and texture. Chopped walnuts or pecans work well. You can also include dried fruits, like cranberries or raisins, for a sweet surprise. Each add-in brings a new layer of flavor, making every bite special. To keep your chocolate chip pumpkin bread fresh, wrap it tightly. Use plastic wrap or aluminum foil. You can also place it in an airtight container. Store it at room temperature for up to three days. If you want to save it longer, consider freezing. To freeze your bread, first let it cool completely. Wrap it well in plastic wrap. Then, wrap it again in foil or place it in a freezer bag. Label the bag with the date. You can keep it in the freezer for up to three months. When you are ready to eat it, just thaw it overnight in the fridge. To reheat your chocolate chip pumpkin bread, preheat your oven to 350°F (175°C). Remove the wrap and place the bread in the oven. Heat it for about 10-15 minutes. This warms it through and restores its moist texture. You can also microwave a slice for 20-30 seconds. Enjoy it warm with butter or cream cheese for an extra treat! You can check if the bread is done by using a toothpick. Insert the toothpick into the center of the loaf. If it comes out clean, the bread is ready. If there is wet batter on the toothpick, it needs more time. Bake it for another 5-10 minutes, then check again. The top should also look golden brown. Yes, you can use fresh pumpkin. Start by roasting a small pumpkin. Cut it in half, remove the seeds, and place it face down on a baking sheet. Roast it at 350°F (175°C) for about 45 minutes. Once it cools, scoop out the flesh and puree it. Use this puree in place of canned pumpkin. Fresh pumpkin adds a nice flavor and texture. If you need an egg substitute, try using applesauce. Use 1/4 cup of unsweetened applesauce for each egg. You can also use flaxseed meal. Mix 1 tablespoon of flaxseed meal with 2.5 tablespoons of water. Let it sit for about 5 minutes until it thickens. Both options will help bind the bread and keep it moist. We've covered ingredients, steps, tips, variations, and storage for chocolate chip pumpkin bread. Now, you have a clear guide to bake your own delicious bread. Remember to try different flavors or make it gluten-free. Avoid common mistakes to get the best texture. Store leftovers well to keep them fresh. With these insights, I hope you enjoy baking and sharing this treat!

Chocolate Chip Pumpkin Bread Savory and Moist Delight

- 1 cup cornmeal - 1 cup all-purpose flour - 1/4 cup granulated sugar - 1 tablespoon baking powder - 1/2 teaspoon salt - 1 cup milk - 2 large eggs - 1/4 cup unsalted butter, melted - 1/3 cup honey - 1/4 teaspoon ground cinnamon (optional) Each ingredient plays a key role in making the cornbread tasty and fluffy. Cornmeal gives it a nice texture and flavor. The all-purpose flour adds structure, making the bread rise well. Sugar adds sweetness, which balances the corn's natural flavor. Baking powder acts as a leavening agent, making the cornbread light and airy. Salt enhances all the flavors, making them pop. Milk adds moisture, which keeps the cornbread tender. Eggs bind the ingredients together and help with rise. Melted butter adds richness and depth, while honey brings a sweet touch. Lastly, ground cinnamon can add warmth and warmth to the flavor. For the best flavor and texture, I suggest using: - Cornmeal: Look for medium or fine ground cornmeal, such as Bob's Red Mill or Quaker. - All-purpose flour: King Arthur Flour or Gold Medal are great choices. - Granulated sugar: Any brand will work, but organic sugar is a good choice for a pure taste. - Baking powder: Rumford is a reliable brand that gives good rise. - Unsalted butter: Use brands like Land O'Lakes for quality flavor. - Honey: Local honey is best for taste and freshness. If not available, try clover honey or wildflower honey. Choosing quality ingredients will make your Honey Butter Cornbread truly special! {{ingredient_image_2}} Start by preheating your oven to 400°F (200°C). This step warms the oven, which helps the cornbread rise well. Next, grease an 8-inch square baking pan or a cast-iron skillet with butter or cooking spray. This keeps the cornbread from sticking and makes serving easy. In a large mixing bowl, combine the dry ingredients. Measure 1 cup of cornmeal, 1 cup of all-purpose flour, 1/4 cup of granulated sugar, 1 tablespoon of baking powder, and 1/2 teaspoon of salt. If you want a hint of spice, add 1/4 teaspoon of ground cinnamon. Use a whisk or a wooden spoon to mix them well. This ensures even flavor in your cornbread. In a separate bowl, whisk together the wet ingredients. Pour in 1 cup of milk, add 2 large eggs, 1/4 cup of melted unsalted butter, and 1/3 cup of honey. Make sure these are well mixed. This blend of ingredients adds moisture and sweetness to the cornbread. Gently pour the wet mixture into the dry ingredients. Use a spatula or wooden spoon to stir them together. Mix until just combined. It’s okay if a few lumps remain. Overmixing can make the cornbread tough. You want a nice, tender texture. Now, transfer the batter to your greased baking pan or skillet. Use a spatula to smooth the top. Place the pan in the preheated oven and bake for 20-25 minutes. Check for doneness by looking for a golden brown top. Insert a toothpick into the center, and if it comes out clean, your cornbread is ready. While the cornbread cools, make the honey butter. In a small bowl, blend 1/4 cup of softened butter with 2 tablespoons of honey. Mix until smooth and airy. This sweet spread will perfectly complement the warm cornbread, enhancing each bite. Enjoy your Honey Butter Cornbread warm, topped with the honey butter for a delicious treat! To keep cornbread moist, use the right ratio of wet to dry ingredients. The milk and eggs add moisture, while butter gives flavor. I recommend adding a bit more honey for extra sweetness and moisture. Another tip is to avoid overbaking. Check the cornbread at 20 minutes. It should be golden and a toothpick should come out clean, but not dry. One mistake is overmixing the batter. This can make your cornbread tough. Mix the wet and dry ingredients until just combined. A few lumps are fine. Another mistake is using cold ingredients. Let your eggs and milk sit out for a bit to reach room temperature before mixing. This helps them blend better. When mixing, always start with dry ingredients. Whisk them well to avoid clumps. Then, mix wet ingredients in a separate bowl. This way, you ensure an even blend. When combining, pour the wet mixture into the dry slowly. Use a spatula to fold gently. This keeps the batter fluffy and light. Pro Tips Use Fresh Ingredients: Always opt for fresh cornmeal and flour for the best flavor and texture in your cornbread. Freshly ground cornmeal can elevate the taste significantly. Don’t Overmix: When combining wet and dry ingredients, mix just until combined. Overmixing can lead to dense cornbread, so a few lumps are perfectly fine. Experiment with Add-ins: Feel free to customize your cornbread by adding ingredients like jalapeños, cheddar cheese, or corn kernels for added flavor and texture. Store Properly: To keep leftover cornbread fresh, wrap it tightly in plastic wrap or aluminum foil and store it in an airtight container at room temperature for up to 2 days. {{image_4}} You can switch honey for other sweeteners. Maple syrup works well, adding rich flavor. Agave syrup is another option; it's lighter and less sweet. Adjust the amount based on your taste. Use the same amount or a little less to keep the balance right. Experimenting with these can make your cornbread unique. Adding cheese makes cornbread extra tasty. Cheddar cheese melts and gives a sharp flavor. For a spicy kick, add jalapeños. Chop them finely and mix in before baking. You can also top the batter with cheese before baking for a cheesy crust. Both options add a fun twist to the classic recipe! If you're gluten-free, you can still enjoy this cornbread. Replace all-purpose flour with gluten-free flour blends. Make sure the blend you choose has a good mix of starches and fibers. You can also add a bit of xanthan gum to help with texture. This way, you’ll get a fluffy, delicious cornbread without gluten. To keep your cornbread fresh, store it in an airtight container. This will keep moisture in and prevent it from drying out. If you have a lot left, wrap it tightly in plastic wrap first. Then, place it in a container. This method helps keep the cornbread soft and tasty for a few days. If you want to store cornbread for longer, freezing is a great option. First, let the cornbread cool completely. Cut it into squares for easy serving. Wrap each piece in plastic wrap. Then, place them in a freezer bag. Make sure to squeeze out as much air as you can. Label the bag with the date. You can freeze it for up to three months without losing flavor. When you're ready to enjoy your cornbread again, reheating properly is key. For best results, use the oven. Preheat the oven to 350°F (175°C). Place the cornbread on a baking sheet. Cover it loosely with aluminum foil. Heat for about 10-15 minutes, or until warm. If you prefer, you can microwave it. Just heat for 15-20 seconds at a time. This will keep it soft and delicious. Enjoy your cornbread warm with a bit of honey butter for that fresh taste! Yes, you can make Honey Butter Cornbread ahead of time. Bake it and let it cool. Wrap it well in plastic wrap or foil. Store it at room temperature for a day. For longer storage, freeze it for up to three months. When ready to eat, thaw it overnight in the fridge. Reheat it in the oven for the best texture. The best way to serve cornbread is warm. Slice it into squares and add honey butter on top. This sweet spread melts into the warm bread, creating a tasty treat. You can also serve it with chili or soup. For an extra touch, drizzle honey over the slices or sprinkle cinnamon for flavor. Yes, you can substitute some ingredients. For a gluten-free version, use gluten-free flour instead of all-purpose flour. You can swap honey for maple syrup or agave nectar if you prefer. If you want a richer taste, use buttermilk instead of regular milk. These swaps will still give you a delicious cornbread. In this post, we explored how to make Honey Butter Cornbread. We discussed key ingredients, their importance, and brand tips. You learned step-by-step instructions, from preheating to baking. We shared ways to keep your cornbread moist and some common mistakes to avoid. You can even try variations like using maple syrup or adding cheese. Finally, we covered storage tips to keep your cornbread fresh. Enjoy this simple recipe and impress your family with your baking skills!

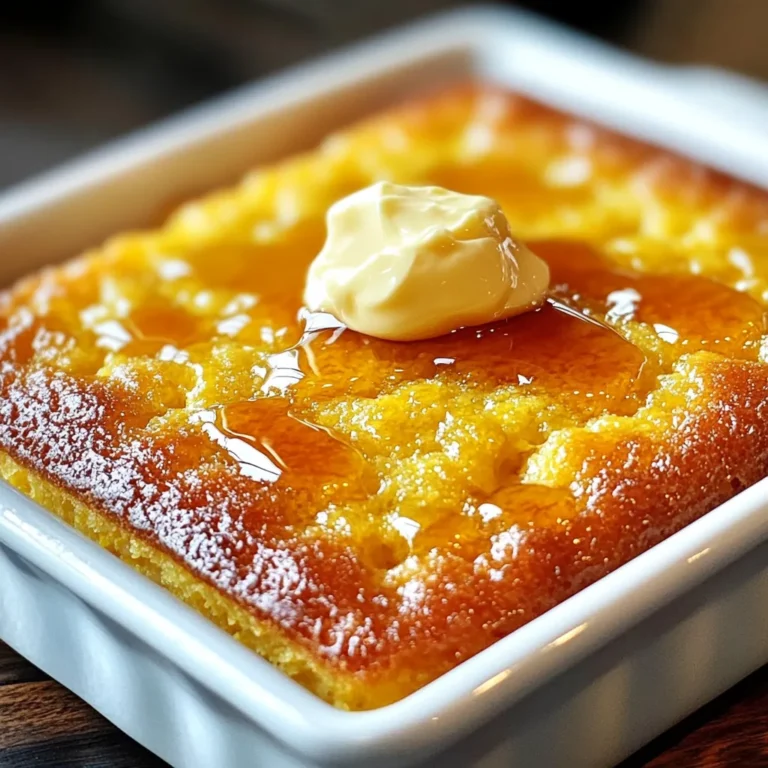
Honey Butter Cornbread Irresistible Flavor and Texture

- Fresh spinach - Store-bought gnocchi - Heavy cream - Olive oil - Garlic - Parmesan cheese - Nutmeg - Sun-dried tomatoes - Seasoning (salt and pepper) Gather these ingredients for a rich and tasty meal. The fresh spinach adds color and nutrients. The store-bought gnocchi makes it easy and quick. Heavy cream gives the dish its creamy texture. You will need olive oil to sauté the garlic and spinach. Garlic adds a nice flavor that pairs well with the cream. Freshly grated Parmesan cheese is a must. It melts beautifully and enhances the dish. A pinch of nutmeg adds warmth and depth. If you want to get creative, consider adding sun-dried tomatoes. They give a sweet and tangy flavor. Don't forget the salt and pepper to taste. These simple seasonings help bring all the flavors together. Feel free to adjust the ingredients to fit your taste. This recipe is all about making it your own while enjoying a warm bowl of creamy spinach gnocchi. {{ingredient_image_2}} Start by boiling a large pot of salted water. Bring it to a strong boil. Add 1 pound of store-bought gnocchi to the pot. Cook the gnocchi for about 2 to 3 minutes. They are ready when they float to the surface. Once cooked, drain the gnocchi and set them aside in a bowl. In a large skillet, pour in 1 tablespoon of extra virgin olive oil. Heat it over medium heat until it is warm. Add 1 clove of finely minced garlic to the pan. Sauté the garlic for about 30 seconds. Watch closely so it does not burn. The garlic should smell great and turn light gold. Next, add 2 cups of roughly chopped fresh spinach to the skillet. Stir it into the garlic oil. Cook the spinach for about 2 to 3 minutes. You want it to wilt and turn bright green. If you want to add sun-dried tomatoes, do it now and mix well. Now, it’s time for the cream! Reduce the heat to low. Slowly pour in 1 cup of heavy cream. Stir gently as the cream starts to simmer. This helps to avoid splattering. Gradually add 1/2 cup of freshly grated Parmesan cheese. Mix until the cheese melts and the sauce is creamy. Add 1/4 teaspoon of ground nutmeg for flavor. Finish with sea salt and freshly cracked black pepper to taste. Carefully fold the cooked gnocchi into the creamy spinach sauce. Toss gently to coat each piece well. Heat everything together for an extra 2 to 3 minutes. This will warm the gnocchi and combine the flavors. Serve the creamy spinach gnocchi in bowls for a cozy dinner. To avoid separation of the cream, keep the heat low once you add the cream. This helps the sauce stay smooth. Stir the cream gently as it heats. Adding cheese too quickly can cause clumps. Gradually sprinkle your Parmesan into the sauce, mixing as you go. This ensures it melts evenly and creates a rich, creamy texture. Adjust your seasoning for a burst of flavor. I like to add a pinch of red pepper flakes for a mild heat. Fresh herbs like basil or parsley can brighten the dish. Add these herbs just before serving to keep their bright taste. A squeeze of lemon juice can also lift the flavors nicely. Serve your creamy spinach gnocchi in shallow, wide bowls. This shows off the vibrant colors and creamy sauce. For garnish, sprinkle extra cracked black pepper and a dusting of Parmesan. Adding finely chopped herbs brings a fresh touch. Pair with garlic bread for a complete meal that looks as good as it tastes. Pro Tips Use Fresh Ingredients: Fresh spinach and high-quality Parmesan cheese will elevate the flavor of this dish significantly, making it more vibrant and delicious. Don’t Overcook the Gnocchi: Cooking the gnocchi just until they float ensures a perfect texture; overcooking can lead to a mushy consistency. Add a Zesty Twist: For an extra flavor boost, consider adding a squeeze of lemon juice or a dash of red pepper flakes to the sauce. Leftover Storage: Store any leftovers in an airtight container in the fridge for up to 2 days. Reheat gently on the stove with a splash of cream to restore the sauce's creaminess. {{image_4}} You can swap heavy cream for several options. Try using coconut milk for a dairy-free choice. Cashew cream adds a rich texture and flavor too. For a tangy twist, use Greek yogurt instead of cream. When it comes to cheese, Parmesan is classic, but you can mix it up. Try goat cheese for a creamy and zesty flavor. Feta cheese also works well, adding a nice salty kick. You can add protein to your creamy spinach gnocchi for more heartiness. Cooked chicken works well; simply chop it into bite-sized pieces and mix it in. Shrimp is another great option. Sauté them briefly in olive oil before adding to your dish. If you prefer vegetarian options, consider adding chickpeas or lentils. They are tasty and packed with protein. Tofu is a great choice too; just sauté it until golden. For a twist on the greens, use kale instead of spinach. Kale holds up well in the sauce and adds a nice texture. You can also try Swiss chard or arugula for a different flavor. When it comes to seasonal veggies, think about adding asparagus in spring or roasted squash in fall. These changes keep your dish fresh and exciting. To keep your creamy spinach gnocchi fresh, follow these tips: - Allow the dish to cool to room temperature. - Store it in an airtight container. - Place the container in the fridge. - Use the leftovers within 3 days for best taste. For longer storage, you can freeze the gnocchi. Just remember: freezing may change the texture. You can reheat your creamy spinach gnocchi in two ways: microwave or stovetop. Here’s how: Microwave: - Place your gnocchi in a microwave-safe dish. - Add a splash of cream or water to keep it moist. - Cover the dish with a lid or plastic wrap. - Heat for 1-2 minutes, stirring halfway through. Stovetop: - Heat a non-stick skillet over low heat. - Add the gnocchi and a little cream. - Stir gently until warmed through. - This method helps keep the creaminess intact. Both methods can work, but the stovetop is best for taste and texture. Enjoy your dish again! To make gnocchi from scratch, you need potatoes, flour, and eggs. Start by boiling potatoes until soft. Mash them well and let them cool. Mix the mashed potatoes with flour and a beaten egg. Knead until smooth. Roll the dough into ropes and cut into small pieces. Use a fork to shape them. Boil them in salted water until they float. Yes, you can use frozen gnocchi. It cooks quickly, often in about 2-3 minutes. Just drop them in boiling water without thawing. They will be ready when they rise to the top. This saves time and makes dinner easier. You can use half-and-half or whole milk as a substitute for heavy cream. For a lighter option, use coconut milk or unsweetened almond milk. These alternatives can give a different flavor. Adjust the amount of cheese to keep the dish creamy. Yes, creamy spinach gnocchi is great for meal prep. You can cook it ahead and store it in the fridge. Keep it in an airtight container. It reheats well and still tastes delicious. Just add a splash of cream when reheating to keep it creamy. Creamy spinach gnocchi lasts about 3 to 5 days in the fridge. Store it in a sealed container to maintain freshness. If you notice any off smells or colors, it's best to throw it out. Always trust your nose and eyes when checking for freshness. This blog explained how to make creamy spinach gnocchi from simple ingredients. We covered the cooking steps, tips for your sauce, and variations to try. You'll impress friends and family with this easy dish. Remember to adjust flavors and be creative with add-ins. Enjoy every bite of your delicious meal, and don't forget to store or reheat leftovers properly. With practice, you will master this recipe and make it your own. Happy cooking!

Creamy Spinach Gnocchi Comforting Dinner Delight

- 2 cups brewed coffee, cooled - 1 cup milk (dairy or non-dairy) - 1/2 cup sweetened condensed milk - 1/4 cup unsweetened cocoa powder - 1 tablespoon pure vanilla extract - 1/4 cup chocolate chips (optional) You can easily swap milk for any dairy-free option, like almond or oat milk. If you want less sugar, try using honey or maple syrup instead of sweetened condensed milk. For extra flavor, add a pinch of cinnamon or nutmeg. These simple changes keep the treat fun and fresh! {{ingredient_image_2}} 1. Start with a large mixing bowl. 2. Pour in 2 cups of brewed coffee. Make sure it is cooled to room temp. 3. Add 1 cup of milk. You can use dairy or a non-dairy option. 4. Next, add 1/2 cup of sweetened condensed milk. 5. Sprinkle in 1/4 cup of unsweetened cocoa powder for rich flavor. 6. Finally, add 1 tablespoon of pure vanilla extract. 7. Use a whisk to mix until the blend is smooth. If you like chocolate, you can add 1/4 cup of chocolate chips. Gently fold them into the mixture. This adds a fun texture to your popsicles. 1. Grab your popsicle molds. 2. Carefully pour the coffee mixture into each mold. Fill them about three-quarters full. This space helps the popsicles expand. 3. Next, insert popsicle sticks into the molds. Make sure they stand upright. 1. Place the molds upright in the freezer. 2. Freeze the popsicles for at least 6 hours. They need to be fully solid before you eat them. 3. To remove the popsicles, run lukewarm water over the outside of the molds. This helps loosen them. Be careful not to soak the molds. 4. Gently pull the popsicles out when they are ready. Enjoy your tasty mocha iced coffee popsicles! To make a smooth mocha iced coffee popsicle, you must mix well. Start with cooled brewed coffee in a bowl. Add milk, sweetened condensed milk, cocoa powder, and vanilla extract. Use a whisk to blend all the ingredients until they are fully combined. A smooth mixture ensures even freezing and a delightful texture. If you decide to add chocolate chips, fold them in gently. This way, you avoid clumping but still get that extra chocolatey bite. Removing popsicles from their molds can be tricky. First, run lukewarm water over the outside of the molds. Do this for a few seconds, but don’t soak them. This method helps loosen the popsicles without melting them. After a quick rinse, gently pull the popsicles out. If they stick, try twisting the mold slightly. This will help release the popsicles smoothly, giving you a perfect treat. Serving your popsicles can be fun. For an appealing display, place them on a colorful platter. A drizzle of chocolate sauce on top makes them even more tempting. You can also add whipped cream and a sprinkle of cocoa powder. This adds both flavor and visual appeal. Enjoy showcasing your delicious mocha iced coffee popsicles at your next gathering! Pro Tips Use Fresh Coffee: For the best flavor, use freshly brewed coffee. If possible, let it cool to room temperature naturally instead of refrigerating it, as this can affect the taste. Experiment with Sweeteners: If you prefer a different level of sweetness, feel free to adjust the amount of sweetened condensed milk or substitute with your favorite sweetener. Try Different Milks: Explore using various types of milk, like almond, oat, or coconut, to create unique flavor profiles and cater to dietary preferences. Storage Tips: Keep your popsicles stored in an airtight container after freezing to prevent freezer burn and maintain their delicious taste. {{image_4}} You can easily change the flavors of your mocha iced coffee popsicles. Adding different flavor extracts can create a new taste. Almond or hazelnut extracts give a unique twist. Just add a teaspoon to the mix before freezing. You can also play with spices. A pinch of cinnamon or nutmeg gives warmth and depth. Each spice adds a fun layer to your popsicle experience. Mixing in different types of chocolate can enhance flavor. Dark, milk, or white chocolate all work well. Choose your favorite and stir it in with the coffee. You can also add fruits for a fresh touch. Bananas or strawberries blend wonderfully with the coffee. Just mash them up and mix them in before pouring the mixture into molds. This will add sweetness and a fruity kick. If you want a lighter version, consider using low-fat or non-dairy milk. Almond or oat milk are great choices that keep the taste rich. You can also lower the sugar content. Natural sweeteners like honey or maple syrup work perfectly. They add flavor without the extra sugar. Making these small changes keeps the popsicles tasty and healthier for everyone. Store your mocha iced coffee popsicles in a freezer-safe container. Use an airtight container to keep them fresh. Make sure to seal it well to prevent freezer burn. If you don’t have a container, wrap them in plastic wrap. This helps avoid ice crystals from forming on the popsicles. The best storage duration is about 2 to 3 months. After this time, they can lose flavor and texture. Always label your container with the date. This will help you track how long they have been stored. To thaw your popsicles quickly, run them under lukewarm water. Hold the mold in your hand and let the water flow over it. This will help loosen the popsicle without melting it too much. Avoid using hot water, as it can cause them to melt too fast. If you have time, just leave them at room temperature for a few minutes. This will slowly soften them and make them easier to remove. Mocha iced coffee popsicles can last up to two months in the freezer. Store them in an airtight container to keep them fresh. This way, you can enjoy a treat whenever you want! Yes, you can use decaf coffee for these popsicles. The flavor will be just as good without the caffeine kick. This option is great for kids or anyone who wants to avoid caffeine. You can add many fun toppings to your popsicles. Here are some ideas: - Whipped cream - Chocolate sauce - Shaved chocolate - Nuts or sprinkles These toppings can make your popsicles even more delicious and fun to eat! Yes, these popsicles are great for kids. They have a sweet taste and a fun texture. Just watch the amount of caffeine if your kids are sensitive. Otherwise, they will love this treat! Absolutely! You can substitute sweetened condensed milk with other ingredients. Try using regular sugar or honey to sweeten the mix. You can also use coconut milk for a unique flavor. Just adjust the amount to your taste preference. Making mocha iced coffee popsicles is simple and fun. Start with brewed coffee and milk, then mix in sweetened condensed milk and cocoa powder. Customize your pops with flavors or different milks. Follow the steps to pour, freeze, and enjoy. In the end, you can store these treats for a chill later. Experiment with flavors and enjoy creative combinations. You’ll impress everyone, and they’ll love the taste. These popsicles are a great way to cool off and enjoy coffee in a new way.

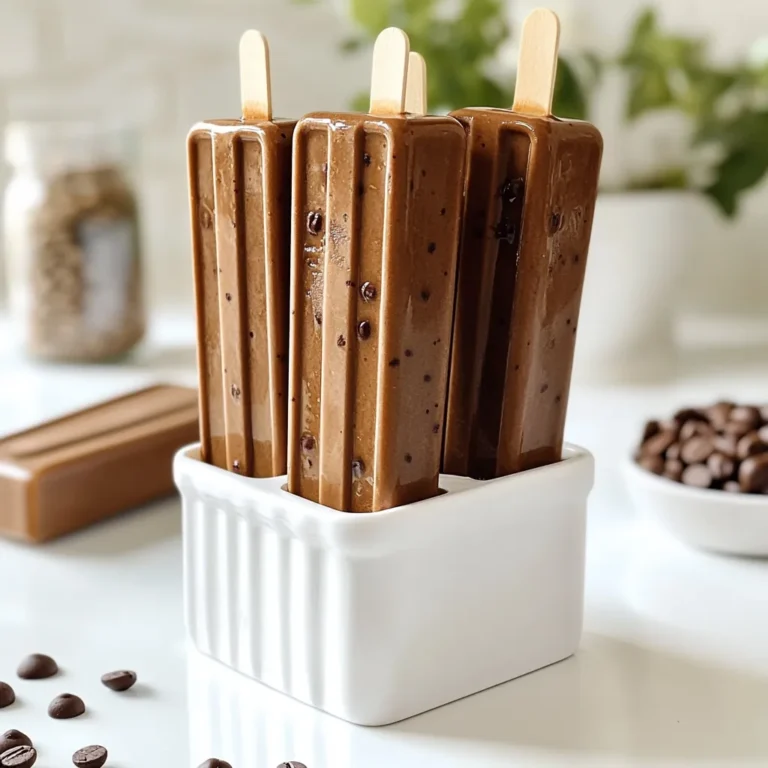
Mocha Iced Coffee Popsicles Tasty Frozen Treat

- 1 lb (450g) boneless chicken thighs, thinly sliced - 2 tablespoons vegetable oil - 4 cloves garlic, finely minced - 2-3 bird's eye chilies, finely chopped - 1 red bell pepper, sliced into thin strips - 1 cup fresh Thai basil leaves, packed - 2 tablespoons soy sauce - 1 tablespoon oyster sauce (optional) - 1 tablespoon fish sauce - 1 teaspoon sugar - Cooked jasmine rice, for serving You can add a few extra ingredients to boost flavor. Try using: - A splash of lime juice for brightness - Chopped green onions for freshness - Peanuts for crunch Don’t have everything on hand? Here are some swaps: - Chicken thighs can be replaced with chicken breast or tofu for a lighter option. - For a gluten-free option, use tamari instead of soy sauce. - If you can’t find Thai basil, use regular basil or mint for a different taste. {{ingredient_image_2}} First, gather all your ingredients. You need: - 1 lb boneless chicken thighs, thinly sliced - 2 tablespoons vegetable oil - 4 cloves garlic, finely minced - 2-3 bird's eye chilies, finely chopped - 1 red bell pepper, sliced into thin strips - 1 cup fresh Thai basil leaves - 2 tablespoons soy sauce - 1 tablespoon oyster sauce (optional) - 1 tablespoon fish sauce - 1 teaspoon sugar - Cooked jasmine rice for serving Next, wash the basil leaves and set them aside. Slice the chicken and bell pepper. Mince the garlic and chilies. This prep makes cooking smooth and quick. Heat the vegetable oil in a large skillet over medium-high heat. Wait until it shimmers. Add the minced garlic and chopped chilies. Stir them for about 30 seconds. Watch closely to avoid burning the garlic. Now, add the sliced chicken. Stir often for 5-7 minutes. The chicken should turn brown and lose its pink color. Once done, toss in the sliced red bell pepper. Sauté for another 2-3 minutes. You want the peppers to soften a bit. In a small bowl, mix soy sauce, oyster sauce, fish sauce, and sugar. Stir until the sugar dissolves. Pour this sauce into the skillet. Mix well to coat the chicken and peppers. Cook for another minute to let the flavors blend. Remove the skillet from the heat. Gently fold in the fresh Thai basil leaves. Stir just until they wilt. This keeps their bright color. To serve, spoon the spicy Thai basil chicken over jasmine rice. For an extra touch, garnish with whole basil leaves and a slice of lime. This adds a fresh pop of flavor. Enjoy your meal! To sauté chicken well, use a hot skillet. Start with vegetable oil. Heat it until it shimmers. Add the chicken in a single layer. This way, it cooks evenly. Stir frequently. Cook until the chicken is browned and no longer pink. This takes about 5 to 7 minutes. If you like it spicy, use more chilies. For less heat, use fewer bird's eye chilies. You can also remove the seeds. They hold most of the heat. Taste as you cook. This helps you find your perfect spice level. You can prep this dish in advance. Slice the chicken and chop the veggies early. Store them in the fridge. When ready to cook, just heat the oil and sauté. The dish takes about 20 minutes to finish. This makes it great for busy nights. Pro Tips Choosing the Right Chicken: Use boneless chicken thighs for a juicier, more flavorful dish compared to chicken breasts. Adjusting Heat Levels: Modify the number of bird's eye chilies based on your spice tolerance; start with fewer if you're unsure. Fresh Basil is Key: Always use fresh Thai basil for the best flavor; dried basil won't provide the same aromatic quality. Serving Suggestions: Serve with lime wedges to enhance the flavors; a squeeze of fresh lime juice adds a delightful brightness. {{image_4}} You can easily make a vegetarian or vegan version of Spicy Thai Basil Chicken. Replace the chicken with tofu or tempeh. Both options absorb flavors well. Use firm or extra-firm tofu for the best texture. Cut it into bite-sized cubes and sauté it until golden. Swap the fish sauce with soy sauce or a vegan fish sauce. This keeps the dish savory and tasty. Feel free to add more veggies to your dish. Sliced carrots, baby corn, or snap peas work well. Just toss them in after the chicken is cooked. This adds color and nutrition. The key is to cook them until slightly tender but still crisp. This keeps the dish fresh and bright. You can switch up the protein in this recipe. Pork or beef can replace chicken. Thinly slice the meat and follow the same cooking steps. Shrimp is another great option. Cook shrimp for just a few minutes until they turn pink. Each protein will bring its own flavor to the dish. Experiment with what you love most! Store your leftover spicy Thai basil chicken in an airtight container. Make sure to cool it to room temperature first. It can last in the fridge for about three to four days. If you want to keep it fresh, avoid letting it sit out for long. You can freeze spicy Thai basil chicken, but make sure to do it right. Place the cooled chicken in a freezer-safe container or bag. Remove as much air as possible to prevent freezer burn. It will stay good for up to three months. When you are ready to eat it, just thaw it in the fridge overnight. Reheating is simple! You can use a microwave or a skillet. If using a microwave, heat it for one to two minutes. Stir halfway through to ensure even heating. If you prefer a skillet, warm it over low heat until hot, stirring often. This keeps the chicken juicy and flavorful. Spicy Thai Basil Chicken, or Pad Krapow Gai, comes from Thailand. It's a popular street food dish. Thai cooks use fresh basil and chilies to create bold flavors. The dish reflects Thai culture, focusing on fresh herbs and spices. It highlights the balance of sweet, salty, and spicy tastes. You can use dried basil, but fresh is better. Fresh Thai basil has a unique flavor. It adds a fragrant, aromatic quality to the dish. If you must use dried, use less. Dried herbs are stronger, so about one-third the amount of fresh will work. Serve Spicy Thai Basil Chicken over cooked jasmine rice. The rice soaks up the sauce well. You can also serve it with a side of steamed vegetables. A fresh cucumber salad adds a nice crunch and balances the heat. To make this dish less spicy, reduce the number of bird's eye chilies. You can also remove the seeds from the chilies. If you want a milder flavor, add more bell peppers. Mixing in a touch of sugar can help balance the heat too. This blog post explored Spicy Thai Basil Chicken, covering key ingredients and cooking steps. We discussed optional flavors, substitutions, and tips for cooking chicken just right. I shared variations for vegetarians and how to store leftovers. Remember, this dish is versatile and can suit your tastes. Experiment with it and make it your own. Enjoy cooking and have fun with your meals!

Spicy Thai Basil Chicken Flavorful and Easy Recipe

PREV 1 … 15 16 17 18 NEXT
mini chef kitchen

explore

DessertsDinnerAppetizersDrinks

Our Policies

  • Cookie Policy
  • Copyright Policy
  • Disclaimer
  • GDPR Policy
  • Terms Of Use
Back to Top
  • About
  • Contact Us
  • Privacy Policy
© 2025 mini chef kitchen