FREE DINNER EBOOK! Get your copy!
  • Cookie Policy
  • GDPR Policy
  • Disclaimer
  • Terms Of Use
  • Visit my other site: Fun Cookie Recipes
mini chef kitchen
  • Home
  • Dinner
  • Desserts
  • Drinks
  • Appetizers
  • Contact
  • About
  • Privacy Policy
  • Home
  • Dinner
  • Desserts
  • Drinks
  • Appetizers
  • Contact
  • About
  • Privacy Policy
  • Cookie Policy
  • GDPR Policy
  • Disclaimer
  • Terms Of Use
Visit my other site: Fun Cookie Recipes

HOME / CATEGORIES /

Latest

To make the best watermelon mint sorbet, you need: - 4 cups seedless watermelon, cut into 1-inch cubes - 1/2 cup fresh mint leaves, packed - 1/4 cup freshly squeezed lime juice - 1/4 cup agave syrup or honey - A pinch of salt These fresh ingredients give the sorbet its bright taste and refreshing feel. The watermelon adds sweetness, while the mint brings a cool touch. Lime juice gives a zesty kick, balancing the flavors perfectly. You can add some fun twists to your sorbet. Here are some ideas: - Fresh basil leaves for a new herb flavor - A splash of coconut milk for creaminess - A few berries, like strawberries or raspberries, for extra color and taste Feel free to mix and match these options. They let you create a sorbet that fits your taste. If you can't find an ingredient, don’t worry! Here are some swaps: - Use honey instead of agave syrup if you prefer - Lemon juice works well if you do not have lime juice - If you don’t have fresh mint, try using mint extract (just a few drops) These substitutions keep the essence of the sorbet while making it easier for you to prepare. Enjoy experimenting! {{ingredient_image_2}} Start by cutting the seedless watermelon into 1-inch cubes. This size helps the blender work better. Make sure to remove any seeds you find. Place the cubes in the blender. Blend until the watermelon is smooth and pureed. This process will take about 30 seconds. Next, add the fresh mint leaves to the blender. Fresh mint gives the sorbet a cool taste. Then, pour in the freshly squeezed lime juice. This adds a nice zing. Add the agave syrup or honey for sweetness. A pinch of salt enhances the flavors. Blend again until everything is mixed well. Taste the mixture to see if it’s sweet enough. If you want it sweeter, add more agave syrup or honey. Blend briefly to combine. Pour the mixture into a shallow dish or silicone mold. Spread it evenly. Cover the dish tightly with plastic wrap or a lid. This prevents freezer burn. Place the dish in the freezer and let it freeze for about 4 to 6 hours. Check if it’s firm to the touch. When ready to serve, take it out of the freezer. Let it sit for 5 to 10 minutes to soften slightly. This makes scooping easier. Use a scoop or spoon to dish the sorbet into bowls or dessert cups. For a nice touch, add fresh mint leaves or watermelon slices on top. To get the best texture, use ripe watermelon. It should be sweet and juicy. Blend the watermelon until it is smooth. This step is key for a creamy sorbet. After blending, chill the mixture before freezing. This helps it freeze faster and more evenly. Taste the mixture before freezing. If it’s not sweet enough, add more agave syrup or honey. Blend again to mix it in well. Remember, the sweetness can change when frozen. So, it’s best to make it a bit sweeter than you think. You can add extra flavors to make your sorbet unique. Try adding a splash of coconut milk for creaminess. A hint of ginger gives a nice kick. Fresh lime zest can brighten the flavor too. Play around and find what you love! Pro Tips Choose Ripe Watermelon: Make sure to select a ripe watermelon for the best flavor. Look for a uniform shape, a creamy yellow spot, and a hollow sound when tapped. Mint Freshness: Use fresh mint leaves for a vibrant flavor. If possible, add the mint right before blending to retain its essential oils and freshness. Adjust Sweetness: Taste the mixture before freezing. If it's not sweet enough, you can add more agave syrup or honey to suit your preference. Serving Tip: Let the sorbet sit at room temperature for a few minutes before scooping. This will make it easier to serve and enhance the overall texture. {{image_4}} You can add fun flavors to your watermelon mint sorbet. Try mixing in fresh basil for a herbal twist. A hint of ginger gives it a spicy kick. You may also blend in some coconut milk for a creamy texture. If you want a tropical feel, add pineapple. Each option keeps the sorbet light and fresh. Serve the sorbet in fun bowls or cups. You can use watermelon rinds as natural bowls for a colorful touch. Garnish with fresh mint leaves or small fruit pieces. Consider pairing it with a scoop of vanilla ice cream for a creamy contrast. Adding a drizzle of lime juice boosts the flavor too. This sorbet is vegan, as it uses only plant-based ingredients. For a low-sugar version, replace agave syrup with a sugar-free sweetener. You can also skip the sweetener if your watermelon is very ripe. This makes it both healthier and still very tasty. Enjoy this refreshing dessert without worry! To keep your watermelon mint sorbet fresh, store it in an airtight container. A shallow dish works best as it helps the sorbet freeze evenly. Make sure to cover it tightly with plastic wrap or a lid. This prevents ice crystals from forming and keeps its texture smooth. Watermelon mint sorbet can last in the freezer for about 2 to 3 weeks. After this time, it may lose some flavor and texture. To maintain its taste, avoid frequent opening of the container. Try to scoop only what you need, then close it right away. If your sorbet becomes too hard, let it sit at room temperature for 5 to 10 minutes. This softening makes it easier to scoop. If you have leftovers, you can refreeze them. Just remember to pack it tightly to avoid air exposure. If the sorbet has ice crystals, blend it again for a smoother texture. It takes about 4 to 6 hours to freeze watermelon mint sorbet. This time allows the sorbet to become firm and scoopable. For the best texture, check it after 4 hours. If it feels too soft, leave it in longer. Yes, you can use frozen watermelon for this recipe. Just let it thaw slightly before blending. This helps achieve the smooth texture we want. Keep in mind that frozen watermelon may make the sorbet a bit icier. Watermelon mint sorbet pairs well with many treats. You can serve it with fresh fruits like berries, or a drizzle of chocolate sauce. For a special touch, try adding a splash of sparkling water on top for a refreshing twist. To make this sorbet without a blender, you can mash the watermelon by hand. Use a fork or potato masher to break it down. Then mix in the mint, lime juice, and sweetener until well combined. This method takes more effort but still yields a tasty sorbet. This blog post covered how to make flavorful watermelon mint sorbet. You learned about the main and optional ingredients. I shared steps to prepare, blend, and freeze the sorbet perfectly. Tips for the best texture and sweetness adjustments help you customize your treat. Variations offer new tastes, and I provided storage advice for keeping sorbet fresh. Enjoying this easy recipe lets you beat the heat. Dive in and make your own refreshing sorbet today!

Watermelon Mint Sorbet Refreshing Summer Delight

- 4 salmon fillets (approximately 6 ounces each) - 1/4 cup low sodium soy sauce - 1/4 cup honey - 2 tablespoons rice vinegar - 1 tablespoon sesame oil - 2 cloves garlic, finely minced - 1 teaspoon fresh ginger, finely grated - 1 teaspoon sesame seeds (for garnish) - 2 green onions, finely chopped (for garnish) To make teriyaki glazed salmon, you need simple, fresh ingredients. First, you will use salmon fillets. I prefer using four fillets, each about six ounces. They cook evenly and taste great. Next, you will need soy sauce and honey. These two give the salmon its sweet and salty flavor. I use low-sodium soy sauce to keep it healthier. You will also need rice vinegar, sesame oil, garlic, and ginger. These add depth and a unique twist to the glaze. Garlic brings warmth, while ginger adds brightness. For garnishes, sesame seeds and green onions will make your dish pop. They add nice texture and color, making the plate look beautiful. {{ingredient_image_2}} To start, grab a mixing bowl. Add the following ingredients: - 1/4 cup low sodium soy sauce - 1/4 cup honey - 2 tablespoons rice vinegar - 1 tablespoon sesame oil - 2 cloves garlic, finely minced - 1 teaspoon fresh ginger, finely grated Whisk these together. Make sure to blend them until smooth. A good mix helps the flavors combine well. Next, pour the marinade into a medium saucepan. Set your heat to medium and bring it to a gentle simmer. Stir it often to avoid burning. Then, take your cornstarch slurry, which is 1 tablespoon of cornstarch mixed with 2 tablespoons of water. Gradually stir this into the simmering marinade. Cook for 2-3 minutes. This will thicken the glaze and make it shiny. Once thick, remove it from heat and set it aside. Now, preheat your grill or broiler. Ensure it gets nice and hot. Lightly oil the grates or broiler pan. This step stops the salmon from sticking. Place the salmon fillets skin-side down on the grill or broiler. Brush a generous amount of teriyaki glaze on each fillet. Cook the salmon for 4-5 minutes on each side. Halfway through, baste the salmon with more glaze. It is done when it flakes easily with a fork and has a nice caramelized look. Let the salmon rest for about one minute after cooking. This helps keep the juices inside. To get the best flavor, you can adjust the sweetness or saltiness of the marinade. If you like it sweeter, add more honey. For saltiness, try a bit more soy sauce. I recommend marinating the salmon for at least 30 minutes. If you have time, let it sit for an hour. This helps the flavors soak in. You can grill or broil the salmon. Both methods work well. Grilling gives a nice smoky taste, while broiling cooks it fast. No matter which you choose, make sure your grill or broiler is hot. This helps cook the salmon evenly. Flip the fillets halfway through and baste with more glaze for added flavor. Pair your teriyaki glazed salmon with steamed rice or sautéed veggies. These sides add color and nutrition. For a beautiful presentation, serve the salmon on a white plate. Drizzle extra glaze over the top. Finish with a sprinkle of sesame seeds and chopped green onions for a fresh look. Pro Tips Marinate for Maximum Flavor: Allow the salmon to marinate for at least 30 minutes before cooking to enhance the flavor profile. If you have more time, marinating for up to 2 hours will yield even better results. Check for Freshness: When selecting salmon, look for vibrant color and a fresh smell. Avoid any fillets with a dull appearance or strong fishy odor. Use a Meat Thermometer: To ensure perfectly cooked salmon, use a meat thermometer. The internal temperature should reach 145°F (63°C) for optimal tenderness. Experiment with Garnishes: Feel free to add other garnishes such as chopped cilantro or lime wedges for an extra zing. They can elevate the dish's presentation and flavor. {{image_4}} You can change the sweetness in your teriyaki glaze. Try using maple syrup or agave instead of honey. Both options add unique flavors. You can also mix in spices like black pepper or red pepper flakes for heat. Adding citrus juice, like orange or lime, gives a fresh twist. These small changes can make a big difference in taste. If you want to switch up the fish, use trout or mahi-mahi instead of salmon. These fish have a similar texture and will soak up the glaze well. If you prefer meat, chicken thighs work great too. Just adjust the cooking time since chicken needs more heat to cook through. For a plant-based meal, try using tofu or tempeh. Both absorb flavors and give a good texture. You can also use vegetables like eggplant or zucchini. Just brush them with the glaze and grill or roast until tender. This way, you can enjoy the tasty teriyaki flavor without fish or meat. To store your teriyaki glazed salmon, first let it cool. Place the salmon in an airtight container. It will last for up to three days in the fridge. Make sure to keep the glaze separate to avoid sogginess. If you want to freeze it, wrap each fillet in plastic wrap. Then, place the wrapped fillets in a freezer bag. This way, they can last up to three months. When you are ready to eat, simply thaw them overnight in the fridge. When reheating salmon, the goal is to keep it moist. The best method is to use an oven. Preheat the oven to 275°F (135°C). Place the salmon on a baking sheet and cover it with foil. Heat for about 15-20 minutes. The fish will warm up gently without drying out. If you use a microwave, place the salmon on a microwave-safe plate. Cover it with a damp paper towel. Heat it in short bursts of 30 seconds. Check frequently to avoid overheating. Homemade teriyaki glaze can last in the fridge for up to a week. Store it in a clean jar with a tight lid. This way, you can use it for future meals. When you're ready to use it, give it a good shake or stir. You can also freeze the glaze in ice cube trays. Once frozen, pop them into freezer bags. This method allows you to use the glaze in small portions later. It’s perfect for quick dinners or adding flavor to stir-fries. You can serve teriyaki glazed salmon with many tasty sides. Here are some great ideas: - Steamed broccoli - Jasmine rice - Sautéed bok choy - Roasted asparagus - Crunchy coleslaw These sides complement the sweet glaze and add color to your plate. The cooking time depends on the thickness of your salmon. Here are some quick tips: - For fillets about 1 inch thick, grill or broil for 4-5 minutes on each side. - For thicker fillets, add an extra minute or two. - The salmon is done when it flakes easily with a fork. This ensures a moist and tender piece of fish. Yes, you can use store-bought teriyaki sauce. Here are some pros and cons: Pros: - Saves time in meal prep. - Some brands offer good flavor. Cons: - Store-bought sauces may have added sugar or preservatives. - Homemade sauce is fresher and can be adjusted to taste. Using your sauce lets you control the flavor and ingredients. This blog post covered how to create a delicious teriyaki glazed salmon. We discussed key ingredients, from salmon to garnishes, ensuring a tasty result. The step-by-step guide simplified making the marinade, glaze, and cooking the salmon. I shared tips for perfecting flavors and cooking techniques. We also explored variations and storage tips to help you adapt recipes. In your kitchen, you can apply these ideas to create meals your whole family will love. Enjoy exploring different flavors and cooking methods with teriyaki salmon!

Teriyaki Glazed Salmon Easy Recipe for Dinner

- 1 ½ cups all-purpose flour - 1 tablespoon poppy seeds - 1 teaspoon baking powder - ½ teaspoon baking soda - ¼ teaspoon salt - ½ cup unsalted butter, softened - 1 cup granulated sugar - 2 large eggs, at room temperature - Zest of 1 large lemon - ½ cup buttermilk (or ½ cup milk + 1 teaspoon lemon juice) - 1 teaspoon pure vanilla extract - ½ cup powdered sugar (for glaze) - 2 tablespoons fresh lemon juice (for glaze) You can make a few swaps if you need to. Use Greek yogurt instead of buttermilk for a thicker texture. You can also replace unsalted butter with coconut oil for a dairy-free option. If you don’t have poppy seeds, try chia seeds instead. They add a nice crunch, too. For a lighter loaf, use egg whites instead of whole eggs. Using fresh ingredients is key for great flavor. Fresh lemons give a bright taste that dried or bottled juice can’t match. Choose high-quality butter as it adds a rich, creamy texture. The flour should be fresh and not expired for the best results. Remember, great ingredients lead to a great loaf! {{ingredient_image_2}} First, set your oven to 350°F (175°C). This step is key for even baking. Next, grab a 9x5-inch loaf pan. Grease it well to prevent sticking. Line the bottom with parchment paper for easy removal later. In a medium bowl, whisk together 1 ½ cups of all-purpose flour, 1 tablespoon of poppy seeds, 1 teaspoon of baking powder, ½ teaspoon of baking soda, and ¼ teaspoon of salt. Mixing these dry ingredients well is important for even flavor throughout the loaf. In a large bowl, use an electric mixer to beat ½ cup of softened unsalted butter and 1 cup of granulated sugar. Mix on medium speed until the mixture is light and fluffy. This should take about 3 to 4 minutes. This step adds air to the batter, helping the loaf rise. Now, add 2 large eggs, one at a time, to the creamed butter mixture. Beat well after each addition. Then, mix in the zest of 1 large lemon. Next, gradually add the dry mixture to the wet ingredients. Alternate this with ½ cup of buttermilk. Start and end with the flour mixture, mixing just until combined. Transfer the batter to your prepared loaf pan. Smooth the top with a spatula for an even bake. Place it in the oven and bake for about 50 to 60 minutes. To check for doneness, insert a toothpick into the center. It should come out clean when the loaf is ready. After baking, let the loaf cool in the pan for about 10 minutes. Then, move it to a wire rack to cool completely. For the glaze, mix ½ cup of powdered sugar with 2 tablespoons of fresh lemon juice in a small bowl. Whisk until smooth. Drizzle this glaze over the cooled loaf for a sweet finish. To get a moist loaf, use room-temperature ingredients. Cold butter or eggs can lead to a dense loaf. The right mix of butter and sugar is key. Beat them until light and fluffy. This step adds air, making your loaf soft. Also, use fresh lemon zest. It boosts flavor and aroma. Overmixing can make the loaf tough. Mix just until you see no flour. It’s okay if there are a few lumps. Alternate adding dry and wet ingredients. Start and end with dry. This method helps keep the batter light. Remember, less is more when mixing! After baking, let the loaf cool for ten minutes in the pan. This step helps it set. Use a knife to gently loosen the edges. Then, flip it onto a wire rack. Cooling it fully helps with slicing. A warm loaf can crumble. Enjoy the process and the sweet smell in your kitchen! Pro Tips Use Fresh Ingredients: Always opt for fresh lemons and high-quality buttermilk to enhance the flavor of your loaf. Fresh ingredients make a noticeable difference in taste. Room Temperature Eggs: Ensure your eggs are at room temperature before mixing. This helps them incorporate better into the batter, resulting in a fluffier loaf. Don’t Overmix: When combining wet and dry ingredients, mix just until incorporated. Overmixing can lead to a dense loaf instead of a light and airy one. Check Doneness: Use a toothpick to check for doneness, but also observe the color of the crust. A golden-brown crust indicates the loaf is likely done. {{image_4}} You can make your loaf even better by adding fruits or nuts. Chopped walnuts or almonds add a nice crunch. Dried cranberries or blueberries bring a sweet burst of flavor. Add about ½ cup of your chosen fruit or nuts to the batter. Make sure to fold them in gently to keep the loaf fluffy. If you need a gluten-free option, swap the all-purpose flour for a gluten-free blend. Look for a blend that has xanthan gum for better texture. You may also want to check the baking powder to ensure it is gluten-free. This way, everyone can enjoy your loaf without worry. Want to switch things up? You can add almond or coconut flavors. For almond flavor, replace the vanilla extract with almond extract. This gives a nutty twist. If you love coconut, mix in ½ cup of shredded coconut into the batter. Both options add a unique taste that works great with lemon. To keep your Glazed Lemon Poppy Seed Loaf fresh, wrap it well. Use plastic wrap or aluminum foil. You can also place it in an airtight container. Store it at room temperature for up to three days. This method keeps the loaf moist and tasty. If you live in a hot area, put it in the fridge to prevent spoilage. If you want to save some for later, freezing is great. First, let the loaf cool completely. Then, slice it for easy servings. Wrap each slice tightly in plastic wrap. Place the wrapped slices in a freezer bag. Remove as much air as you can before sealing. You can freeze the loaf for up to three months. When you're ready to eat, let it thaw in the fridge overnight. The Glazed Lemon Poppy Seed Loaf stays fresh for about three days at room temperature. In the fridge, it lasts about a week. For best taste, enjoy it within this time. If it starts to smell sour or looks dry, it's time to toss it. Always check for mold or any changes in color. This way, you can enjoy this delightful treat safely! Yes, you can use bottled lemon juice. However, fresh lemon juice has a brighter taste. Fresh lemons give your loaf a zestier flavor. If you choose bottled juice, use the same amount. Keep in mind, the loaf might lack some freshness. You can check if the loaf is done by using a toothpick. Insert the toothpick into the center of the loaf. If it comes out clean, your loaf is ready. If the toothpick has batter on it, bake it a bit longer. Usually, it takes about 50-60 minutes to bake. This loaf pairs well with tea or coffee. You can also serve it with fresh fruit or a dollop of whipped cream. For a twist, try adding a scoop of vanilla ice cream. Each of these options enhances the sweet, tangy flavors of the loaf. This blog post covered all you need for a great Lemon Poppy Seed Loaf. I shared the key ingredients, simple steps, and tips to ensure success. You can also experiment with variations and learn smart storage methods. Remember, using quality ingredients makes a big difference. Enjoy baking and sharing your delicious loaf! Happy cooking!

Glazed Lemon Poppy Seed Loaf Simple and Moist Recipe

To make Hawaiian BBQ chicken wraps, you need some key ingredients: - 2 cups cooked chicken, shredded - ½ cup Hawaiian BBQ sauce - 1 cup fresh pineapple, diced - 1 red bell pepper, thinly sliced - 1 cup shredded carrots - ½ cup red cabbage, finely shredded - 4 large whole wheat or spinach tortillas - ½ cup cilantro, chopped - 1 avocado, sliced - Salt and pepper to taste These ingredients bring a tasty mix of flavors and textures. The chicken is juicy and pairs well with the sweet BBQ sauce. The fresh pineapple adds a bright, fruity note. The veggies add crunch and color. You can enhance your wraps with these optional ingredients: - Lime wedges for garnish - Jalapeños for heat - Cheese for creaminess Feel free to swap or add ingredients based on your taste. You can use different veggies or pick your favorite tortilla type. Explore and have some fun! If you can't find something, here are some substitutes: - Use pulled pork instead of chicken. - Swap pineapple for mango for a different flavor. - Use red lettuce instead of red cabbage. - Choose corn tortillas if you want a gluten-free option. These substitutes keep the dish fresh and exciting. Don't hesitate to adjust based on what you have at home. {{ingredient_image_2}} Start by mixing the shredded chicken with the Hawaiian BBQ sauce in a large bowl. Make sure to coat every piece well. This sauce gives your chicken a tasty, sweet, and smoky flavor. It will bring the whole wrap together. Next, prepare your fresh veggies. Slice the red bell pepper into thin strips. Dice the fresh pineapple into small pieces. In another bowl, mix the diced pineapple, sliced bell pepper, shredded carrots, and red cabbage. Toss this mix gently. Season it with a pinch of salt and pepper to bring out the flavors. Now, lay one tortilla flat on a clean surface. Spoon about ½ cup of the BBQ chicken mixture into the center of the tortilla. Spread it out evenly. Then, add a generous amount of the fresh vegetable mix on top. Don’t forget a few slices of avocado and some chopped cilantro for extra flavor! To add some crispiness, heat a skillet over medium heat. Grill each wrap for 2-3 minutes on both sides. You want them to be hot and slightly crispy. This step makes the wraps even more delicious. Slice each wrap diagonally in half for easy eating. Serve them on a plate with lime wedges on the side. The lime adds a nice zesty kick! You can also pair these wraps with chips or a salad for a complete meal. Enjoy! To get the best grill marks, heat your skillet well. Use medium heat, so the wraps crisp without burning. Lightly oil the skillet before adding the wraps. This step helps them crisp nicely. Grill each wrap for 2-3 minutes per side. Look for a golden-brown color. Flip them gently to keep the filling inside. Add lime juice to the chicken mix for zing. This brightens the BBQ flavor and makes it pop. Fresh cilantro adds a great touch too. If you love spice, add sliced jalapeños. They bring heat and flavor. For a sweet twist, try adding mango chunks. This makes your wraps even more tropical. Keep leftover wraps in an airtight container. Place parchment paper between layers to avoid sticking. Store them in the fridge for up to three days. When ready to eat, heat them in a skillet. This keeps them crispy and warm. Reheating in the microwave may make them soggy. Enjoy your tasty wraps later! Pro Tips Use Fresh Ingredients: Opt for fresh vegetables and ripe avocado for the best flavors and textures in your wraps. Customize Your Wraps: Feel free to add other ingredients like jalapeños for heat or cheese for creaminess, based on your preference. Grill for Extra Crunch: Grilling the wraps not only warms them but adds a lovely crispness to the tortillas, enhancing the overall experience. Serve with Dipping Sauce: Consider serving these wraps with extra BBQ sauce or a tangy yogurt sauce for dipping to elevate the meal. {{image_4}} You can easily make Hawaiian BBQ chicken wraps vegetarian. Just swap out the chicken for a plant-based option. Use shredded jackfruit or tofu for a great texture. You can marinate the jackfruit in BBQ sauce for added flavor. This keeps the dish tasty and fun. If you want to try different proteins, there are many choices. You can use grilled shrimp, pork, or beef instead of chicken. Each protein adds its own unique flavor. Just cook the protein thoroughly and mix it with the BBQ sauce before wrapping it up. Switching up the sauce can change the whole wrap. Instead of Hawaiian BBQ sauce, try teriyaki or sweet chili sauce. For a spicy kick, add sriracha or a spicy mayo. These options give your wraps a whole new taste while keeping them delicious. To store leftover wraps, place them in an airtight container. This keeps them fresh. You can also wrap them in plastic wrap. Make sure to seal them well. Store the wraps in the fridge for up to three days. If you want to keep them longer, freezing is a great option. To freeze your Hawaii BBQ chicken wraps, first wrap each one tightly in plastic wrap. Then, place them in a freezer-safe bag. Squeeze out as much air as possible. This helps prevent freezer burn. You can freeze the wraps for up to three months. Just label the bags with the date. When you are ready to eat the wraps, you can reheat them easily. For best results, use an oven or skillet. Preheat your oven to 350°F (175°C). Place the wraps on a baking sheet and cover with foil. Heat for about 15-20 minutes. If using a skillet, heat it on medium-low. Cook each wrap for about 3-4 minutes on each side. This makes them warm and crispy again. Enjoy your tasty wraps! The best way to warm up Hawaiian BBQ chicken wraps is in a skillet. Heat the skillet over medium heat. Place the wraps in the skillet and cook for 2-3 minutes on each side. This will make them warm and slightly crispy. You can also use a microwave. Wrap each one in a damp paper towel and heat for 30 seconds. Check if they are warm enough and heat longer if needed. Yes, you can make Hawaiian BBQ chicken wraps ahead of time. Prepare the chicken and veggies and store them in separate containers. When you are ready to eat, simply assemble the wraps. This method keeps the tortillas from getting soggy. You can also wrap them tightly in plastic wrap or foil and store them in the fridge for a day. Hawaiian BBQ chicken wraps pair well with several sides. Here are some ideas: - Fresh fruit salad - Sweet potato fries - Coleslaw - Chips and salsa - A light green salad These sides add color and flavor to your meal. Yes, you can use gluten-free tortillas for this recipe. Many stores sell gluten-free wraps made from rice or corn. Check the label to ensure they are truly gluten-free. You can also make your own using gluten-free flour. This way, everyone can enjoy the Hawaiian BBQ chicken wraps! Hawaiian BBQ chicken wraps are tasty and fun to make. We covered key ingredients, step-by-step instructions, and useful tips. You learned about variations and how to store wraps. Enjoy your cooking adventure and feel free to experiment with flavors! These wraps can please anyone's taste. Whether you share them with friends or savor them alone, they are sure to satisfy. Dive into making your wraps and enjoy every bite!

Hawaiian BBQ Chicken Wraps Tasty and Easy Recipe

- Chicken and Sauce Components - 1 lb boneless, skinless chicken breast, thinly sliced into strips - 2 tablespoons honey - 4 cloves garlic, finely minced - 1 tablespoon soy sauce - 1 tablespoon sesame oil - Vegetables Used - 1 bell pepper (red or yellow), sliced into thin strips - 1 cup broccoli florets, washed and trimmed - 1 cup snap peas, trimmed - 1 medium carrot, julienned - Garnishes and Seasoning - 2 tablespoons vegetable oil (divided) - Salt and black pepper, to taste - Sesame seeds, for garnish - 2 green onions, chopped, for garnish Gather these fresh ingredients to make your honey garlic chicken stir fry. The chicken gives a great base, while the honey and garlic create a tasty sauce. The colorful veggies like bell pepper, broccoli, snap peas, and carrot add crunch and nutrition. Finally, the sesame seeds and green onions will dress your dish beautifully. With these ingredients, you set the stage for a vibrant, flavorful meal that’s simple to prepare and sure to impress! {{ingredient_image_2}} In a small bowl, mix 2 tablespoons of honey with 4 minced garlic cloves. Add 1 tablespoon of soy sauce and 1 tablespoon of sesame oil. Whisk until it blends well. Set this sauce aside for later. Heat 1 tablespoon of vegetable oil in a large skillet over medium-high heat. Once the oil is hot, add 1 pound of thinly sliced chicken breast. Season with salt and black pepper. Stir-fry the chicken for about 5 to 7 minutes. Cook until it turns golden brown and is fully cooked. Once done, take the chicken out and place it on a plate. In the same skillet, add another tablespoon of vegetable oil. Toss in the sliced bell pepper, broccoli florets, snap peas, and julienned carrot. Stir-fry these veggies for 3 to 4 minutes. You want them to be bright and tender but still crunchy. Put the cooked chicken back into the skillet with the veggies. Pour your honey garlic sauce over everything. Stir well to coat all the ingredients evenly. Cook for another 2 to 3 minutes. This lets the sauce thicken a bit and cover everything nicely. Take the skillet off the heat. Before serving, sprinkle sesame seeds and chopped green onions on top. This adds both taste and a nice look. Serve your stir fry hot, either in a big bowl or on individual plates. Enjoy it with steamed rice or noodles for a complete meal! To make the chicken great, start with thin slices. This helps it cook fast and evenly. Use medium-high heat for a nice sear. Keep the chicken moving in the pan. Stir-frying it for about 5-7 minutes gives it a golden color. Make sure it is cooked through for safety. When stir-frying veggies, always use fresh ones. Cut them into similar sizes for even cooking. Start with the hardest vegetables first. In this recipe, add the bell pepper and carrot before the broccoli and snap peas. Stir-fry them for about 3-4 minutes. They should be bright and crisp, not mushy. The key to a tasty sauce is balance. Honey gives sweetness, while garlic adds depth. Soy sauce brings saltiness, and sesame oil gives a nutty flavor. Taste the sauce before adding it to the stir-fry. Adjust it by adding more honey for sweetness or soy sauce for saltiness. This ensures that every bite is packed with flavor. Pro Tips Marinate the Chicken: For enhanced flavor, consider marinating the chicken strips in the honey, garlic, and soy sauce mixture for at least 30 minutes before cooking. Use Fresh Vegetables: Fresh vegetables not only taste better, but they also add a vibrant color to your dish. Try to use seasonal produce for the best results. High Heat is Key: Stir-frying is best done at high heat to achieve that perfect sear on the chicken and keep the vegetables crisp. Make sure your skillet or wok is hot before adding ingredients. Customize Your Veggies: Feel free to swap out the vegetables based on your preference or what's available. Zucchini, mushrooms, or even baby corn work great in stir-fries! {{image_4}} You can switch the chicken for other proteins. If you want a lighter meal, use shrimp. Shrimp cooks fast and soaks up flavors well. Tofu is a great option for a vegetarian dish. It adds protein and absorbs the honey garlic sauce nicely. You can also use beef or pork, sliced thinly. Just adjust cooking time to ensure all meats are cooked through. Feel free to get creative with the veggies. Zucchini or mushrooms can add a nice twist. They both cook quickly and add great texture. You can also try adding spinach or bok choy for greens. Just toss them in the pan last, so they stay bright and fresh. Carrots can be swapped with bell peppers if you prefer. Mix and match to suit your taste! Want more depth in your dish? Try adding ginger for a spicy kick. Just a small amount goes a long way. You can also sprinkle some chili flakes for heat. If you love a tangy taste, a splash of rice vinegar will do the trick. For a nutty flavor, add sliced almonds or cashews. Each addition will create a unique twist on this classic recipe. After you enjoy your honey garlic chicken stir fry, store any leftovers in the fridge. Use an airtight container to keep it fresh. It will stay good for 3 to 4 days. Make sure to cool it down before sealing the container. This helps prevent moisture build-up, which can make the chicken soggy. If you want to save some for later, freezing is a great option. Let the stir fry cool completely. Then, place it in a freezer-safe bag or container. Remove as much air as possible to avoid freezer burn. It can last up to 3 months in the freezer. When you're ready to eat, thaw it in the fridge overnight. To reheat your chicken stir fry, use a skillet for best results. Heat it over medium heat and add a splash of water or broth. This keeps it moist and flavorful. Stir it often to warm it evenly. You can also use the microwave if you’re short on time. Just cover it loosely to avoid splatters and heat in short intervals. To make the honey garlic sauce gluten-free, use tamari instead of soy sauce. Tamari is a gluten-free soy sauce that tastes great. Check labels for brands that fit your needs. This small swap keeps the flavor intact while being safe for gluten-free diets. Honey garlic chicken stir fry goes well with many sides. Here are some great options: - Steamed rice - Fried rice - Noodles - Quinoa - A fresh green salad These sides balance the sweet and savory flavors of the dish. Yes, you can use frozen vegetables. They are quick and easy. Just add them to the skillet while cooking. Cook them a little longer to ensure they heat up properly. Frozen veggies may not be as crisp, but they still taste delicious. You can tell if the chicken is cooked by its color and temperature. Cooked chicken should be white all the way through. Use a meat thermometer to check the internal temperature. It should reach 165°F (75°C) for safety. If unsure, cut into a piece to check that it’s no longer pink inside. This blog post covered the key ingredients for honey garlic chicken stir fry, from protein to veggies. I shared easy steps for making the dish, tips for perfect results, and varied options to explore. You can also find helpful storage tips and answers to common questions. In short, cooking this dish can be simple and fun. With these insights, you can create a meal that everyone will enjoy. Your kitchen adventure awaits!

Honey Garlic Chicken Stir Fry Flavorful and Simple Meal

- 1 pound boneless, skinless chicken breasts, diced - 1 can (15 oz) white beans, such as cannellini or navy - 1 medium onion, finely chopped - 2 cloves garlic, minced - 1 can (4 oz) diced green chilies, drained - 1 cup low-sodium chicken broth - 1 cup heavy cream or coconut cream - 1 teaspoon ground cumin - 1 teaspoon chili powder - 1 teaspoon dried oregano - Sea salt and freshly cracked black pepper to taste - 2 tablespoons extra-virgin olive oil - Fresh cilantro, roughly chopped - Lime wedges You can swap chicken with turkey for a lighter twist. If you want a vegetarian option, use mushrooms or tofu instead of chicken. For the beans, any white bean will work. Use vegetable broth instead of chicken broth for a vegan dish. Coconut cream offers a rich, dairy-free choice. If you need a lower-fat option, use half-and-half in place of heavy cream. This recipe is flexible. You can adjust the spices to suit your taste. Enjoy experimenting as you make this chili your own! {{ingredient_image_2}} Start by heating the olive oil in a large pot over medium heat. Once hot, add the chopped onion. Sauté the onion for about 4-5 minutes. You want it soft and translucent. Next, add the minced garlic. Stir it for about 1 minute until it smells great but does not brown. This step builds a strong flavor base. Now, add the diced chicken to the pot. Sprinkle it with salt, pepper, cumin, chili powder, and oregano. Stir the chicken so it cooks evenly. Brown the chicken on all sides for about 5-7 minutes. This adds a nice depth of flavor to the dish. Pour in the chicken broth. Then, add the drained white beans and diced green chilies. Stir to mix everything well. Increase the heat just a bit until it starts to simmer. Once it simmers, lower the heat and cover the pot. Let it cook undisturbed for about 15 minutes. This helps all the flavors blend together. After 15 minutes, take it off the heat and gently stir in the heavy cream. If you prefer coconut cream, mix that in for a fun twist. Make sure the chili is creamy and smooth. Taste it and adjust the seasoning if needed. Serve it hot in bowls, topped with cilantro and a squeeze of lime. Enjoy! To make your chili creamy, use heavy cream or coconut cream. Stir it in slowly after cooking. This keeps the texture rich. If you want it extra smooth, blend some beans before adding them. This will thicken the chili without altering the taste. For deeper flavor, add spices like smoked paprika or cayenne. These will give your chili a nice kick. Fresh herbs, like cilantro, also add brightness. Squeeze lime juice just before serving for a fresh burst. You can even add a dollop of sour cream for extra richness. You can cook this chili on the stove or use a slow cooker. If you use a slow cooker, brown the chicken first for more flavor. Set it on low and let it cook for 6-8 hours. This method allows the flavors to blend deeply. If you're in a hurry, a pressure cooker can cut the time down to about 20 minutes. Just make sure to adjust the liquid as needed. Pro Tips Choose Quality Chicken: Select fresh, high-quality chicken breasts for the best flavor and texture in your chili. Adjust the Creaminess: For a lighter version, you can substitute half of the heavy cream with low-fat milk or additional chicken broth. Spice it Up: If you enjoy heat, add diced jalapeños or a pinch of cayenne pepper to the pot along with the spices. Fresh Herbs Matter: Always use fresh cilantro for garnish; it adds a vibrant flavor that enhances the overall dish. {{image_4}} For a dairy-free option, use coconut cream instead of heavy cream. This adds a sweet and rich flavor. It also keeps the chili creamy and delicious. You can find coconut cream in most grocery stores. Just look for it in the canned goods aisle. This simple swap makes the chili perfect for those who avoid dairy. Want to add some heat? Try adding jalapeños or cayenne pepper. These will give your chili a spicy kick. You can also use hot green chilies instead of mild ones. Adjust the amount based on your spice level preference. I often add a pinch of red pepper flakes for extra warmth. This spicy twist wakes up the flavors and excites your taste buds. To make a vegetarian version, skip the chicken. Use more white beans or add diced vegetables like zucchini or bell peppers. You can also add corn for sweetness and texture. Replace chicken broth with vegetable broth to keep it flavorful. This version is just as creamy and satisfying. You’ll still get a hearty meal full of flavor and nutrients. To keep your creamy white chicken chili fresh, store it in an airtight container. This helps lock in flavors and keeps it safe to eat. Let the chili cool before sealing it. You can store it in the fridge for up to four days. When you're ready to eat, give it a good stir before reheating. You can freeze this chili if you want to save some for later. Portion it into freezer-safe containers. Leave some space at the top since it will expand when frozen. It will stay good for about three months in the freezer. Thaw it in the fridge overnight before reheating. To reheat, you can use the stove or microwave. If using the stove, warm it over low heat. Stir it often to avoid burning. If using a microwave, place it in a microwave-safe bowl. Heat in short bursts, stirring in between, until it's hot. Always check the temperature before serving to ensure it’s heated through. You can enjoy this chili with many sides. Here are some great options: - Crusty bread for dipping - Tortilla chips for crunch - Rice for a filling meal - Cornbread for a sweet touch - A fresh green salad for balance These sides add flavor and texture to your meal. They also make it more fun to eat. Yes, you can make this chili in a slow cooker. Here’s how: 1. Sauté the onion and garlic in a pan first. 2. Add all ingredients to the slow cooker. 3. Set it on low for 6-8 hours or high for 3-4 hours. 4. Stir in the cream just before serving. Using a slow cooker makes this dish even easier. It allows the flavors to blend well over time. You can easily change the spice level in this chili. Here are some tips: - Use mild green chilies for less heat. - Add a pinch of cayenne for more spice. - Taste as you go; this helps you find the right balance. - Serve hot sauce on the side for those who like it spicy. These options let you customize your chili to suit your taste. Enjoy experimenting! In this post, we explored how to make creamy white chicken chili. We covered key ingredients, step-by-step instructions, and helpful tips. You can tweak the recipe for your taste, like trying a dairy-free or spicy version. For leftovers, I shared the best ways to store and reheat your chili. This dish is great for family meals or game days. With simple tweaks, you can make it your own. I hope you enjoy making your chili just as much as I do!

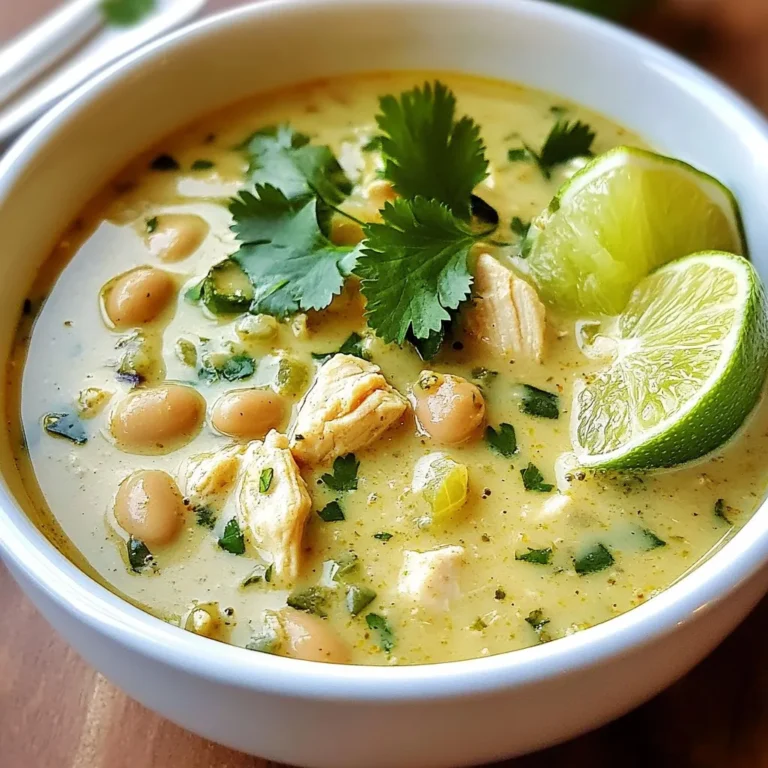
Creamy White Chicken Chili Simple and Savory Dish

- 1 ripe peach, pitted and diced - 1 ripe mango, peeled and cubed - 1 ripe banana, sliced - 1 cup Greek yogurt (or a dairy-free alternative) - 1 cup coconut water (or regular water) - 2 tablespoons honey or agave syrup (for sweetness) - 1 tablespoon chia seeds (for added nutrition) - Ice cubes (for thickness) When making your peach mango smoothie, the key is fresh fruit. Choose a ripe peach and mango. Their sweetness will shine through. Bananas add creaminess and natural sweetness. For the base, Greek yogurt gives a thick texture and a protein boost. If you prefer a dairy-free option, use coconut yogurt. Coconut water adds a nice, light flavor. If you want more sweetness, honey or agave syrup works great. Chia seeds are an excellent addition for extra nutrients. They pack a punch of fiber, omega-3s, and protein. Plus, they give a fun texture. For a thicker smoothie, ice cubes are your best friend. They chill your drink and make it refreshing. Remember, you can adjust the sweetness and thickness to fit your taste. Enjoy the process and make this smoothie your own! {{ingredient_image_2}} Start by preparing your fruits. First, take a ripe peach and pit it. Next, dice the peach into small chunks. This will help it blend well. Then, grab a ripe mango. Peel it, and cube it into bite-sized pieces. Lastly, slice the banana into rounds. These fruits will create a sweet and tasty base for your smoothie. Now, it’s time to blend! Add the diced peach, cubed mango, and sliced banana into the blender. Pour in one cup of Greek yogurt for creaminess. Next, add one cup of coconut water for a refreshing touch. If you like it sweeter, drizzle in two tablespoons of honey or agave syrup. For an extra health boost, add one tablespoon of chia seeds. They are small but packed with nutrients. Blend all your ingredients on high speed until everything is smooth. You want a creamy texture without lumps. If you like your smoothie thicker, throw in some ice cubes. Blend again until you reach your desired thickness. After blending, taste your smoothie. If it needs more sweetness, add a bit more honey or agave, and blend again. Pour the smoothie into chilled glasses for a refreshing treat. Enjoy the vibrant flavors! To get the right sweetness in your peach mango smoothie, adjust the honey or agave syrup. Start with 2 tablespoons. Blend and taste. If it needs more sweetness, add a little more. Blend again to mix well. Chia seeds are a great addition. They are tiny but powerful. They add fiber and omega-3s. For a vegan option, swap Greek yogurt with plant-based yogurt. This keeps the smoothie creamy without dairy. Serve your smoothie in chilled glasses. This makes it refreshing. For a nice touch, garnish with fresh fruit slices. You can also sprinkle chia seeds on top for a fun look. It adds color and texture to your drink. Pro Tips Choose Ripe Fruits: Ensure your peach, mango, and banana are perfectly ripe for the sweetest and most flavorful smoothie. Chill Your Ingredients: For an extra refreshing smoothie, chill your fruits and yogurt beforehand or use frozen fruit. Experiment with Flavors: Feel free to add other tropical fruits like pineapple or papaya for a unique twist on the classic recipe. Boost Your Smoothie: Add spinach or kale for a green smoothie boost without sacrificing flavor. {{image_4}} To make a vegan peach mango smoothie, swap Greek yogurt for plant-based yogurt. You can use coconut yogurt or almond yogurt. For sweetness, try maple syrup instead of honey. This keeps your smoothie creamy and tasty, while also being dairy-free. Want more protein? Add a scoop of protein powder to your smoothie. This boosts nutrition without changing the flavor much. If you prefer Greek yogurt, it’s a great choice too. It adds creaminess and loads of protein to your drink. To give your smoothie a boost, add greens like spinach or kale. They blend well and add extra nutrients without altering the taste much. You can also mix in other fruits like pineapple or berries. These fruits add a fun twist and a new flavor profile. Enjoy experimenting to find your favorite mix! To store any leftover smoothie, pour it into a clean glass jar. Seal it tightly with a lid. This helps keep it fresh. You can store it in the fridge for up to 24 hours. For the best taste and freshness, try to enjoy it within this time. The flavors change as it sits, so drink it soon. If you want to save your smoothie for later, freezing is a great option. Start by pouring the smoothie into ice cube trays or freezer-safe bags. Leave some space in the bags for expansion. To thaw, take out what you need and place it in the fridge overnight. You can also blend the frozen cubes directly into a new smoothie for a frosty treat. Use airtight containers or freezer bags for the best results. Yes, you can use frozen fruits. They are picked at peak ripeness. This means they keep most of their flavor and nutrients. Frozen fruits make smoothies colder and thicker. They also save time. Just toss them in the blender like fresh fruit. You won’t lose taste or nutrition. Absolutely! This smoothie has many healthy ingredients. It combines fruits, yogurt, and chia seeds. Fruits provide vitamins and minerals. Yogurt gives protein and calcium. Chia seeds add fiber and omega-3s. Kids love the sweet taste and bright color. It’s a fun way to get them to eat healthy. Yes, you can make this smoothie in advance. Blend it up, then store it in the fridge. It stays fresh for about 24 hours. To keep it thicker, add ice cubes right before serving. You can also freeze it. Just pour it into a container and freeze. When ready, thaw in the fridge overnight. This blog explored how to make a tasty peach mango smoothie. We covered fresh fruit, dairy, and optional add-ins. You learned step-by-step instructions to blend your ingredients for a smooth drink. Tips helped you perfect the sweetness and add nutrition. We also discussed variations like vegan and protein-packed options. Finally, storage tips kept your smoothies fresh. Enjoy crafting your own version, and don’t hesitate to experiment! Simple changes can lead to new favorites. Your smoothie journey is just beginning!

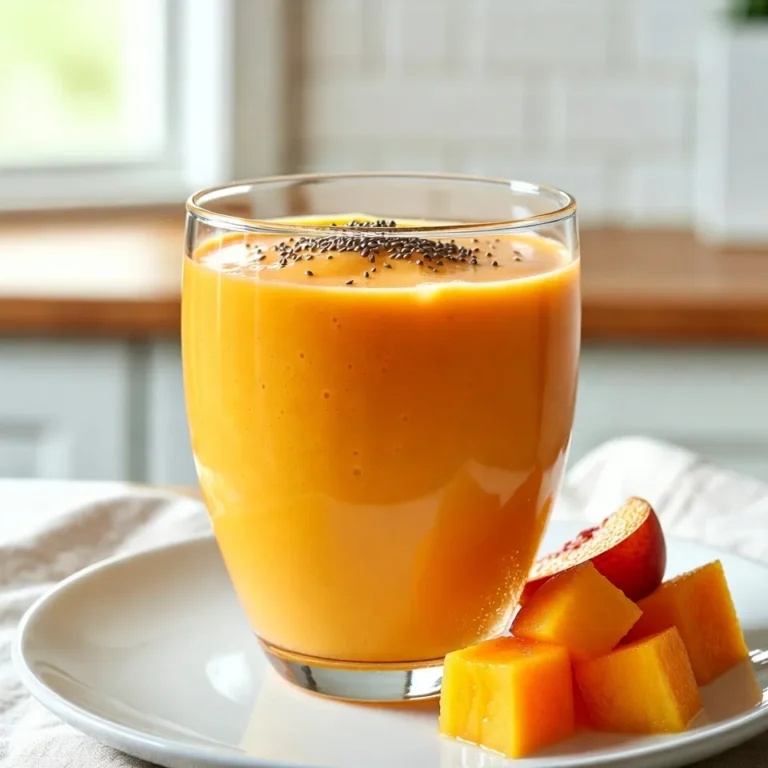
Peach Mango Smoothie Refreshing and Nutritious Recipe

- 3 medium cucumbers, thinly sliced - 2 medium carrots, cut into thin julienne strips - 1/4 cup red bell pepper, thinly sliced - 3 green onions, finely chopped - 1 tablespoon sea salt - 1/4 cup toasted sesame seeds - 1/4 cup rice vinegar - 2 tablespoons soy sauce - 1 tablespoon sesame oil - 1 tablespoon honey or maple syrup - 1/2 teaspoon freshly grated ginger - 1 clove garlic, finely minced - Fresh cilantro leaves for garnish (optional) The key to a great Asian sesame cucumber salad lies in the freshness of the ingredients. Start with three medium cucumbers. I like to slice them thinly for a nice crunch. Next, grab two carrots and cut them into thin strips. This adds color and sweetness. Don’t forget the red bell pepper; just a quarter cup will do. It adds a nice crunch and bright flavor. For the seasoning, a tablespoon of sea salt helps us draw out moisture from the cucumbers. This makes them crispier. You’ll also need some toasted sesame seeds, about a quarter cup, for that nutty flavor. Now, let’s talk about the dressing. You’ll want a quarter cup of rice vinegar for that tangy kick. Add two tablespoons of soy sauce for depth. A tablespoon of sesame oil brings richness, while a tablespoon of honey or maple syrup adds sweetness. Don’t skip the half teaspoon of freshly grated ginger and the minced garlic; they give the salad a bold kick. Lastly, if you want to brighten up your dish, add some fresh cilantro leaves as a garnish. This adds a fresh note that ties everything together. Enjoy gathering these ingredients; they are the heart of this refreshing salad! {{ingredient_image_2}} Start with the cucumbers. Slice three medium cucumbers thinly. Place them in a large mixing bowl. Sprinkle one tablespoon of sea salt over the cucumbers. Mix gently so all slices get coated. Let the cucumbers rest for 15-20 minutes. This step helps draw out moisture, making them crispier. After the time is up, pour the cucumbers into a colander. This allows excess water to drain out. Use paper towels to pat them dry. Make sure to remove extra salt and moisture. In a medium bowl, whisk together the dressing ingredients. You will need 1/4 cup of rice vinegar, 2 tablespoons of soy sauce, and 1 tablespoon of sesame oil. Add 1 tablespoon of honey or maple syrup. Then, mix in 1/2 teaspoon of freshly grated ginger and 1 clove of minced garlic. Whisk until everything blends well. Now, return to your cucumbers. Add the julienned carrots and sliced red bell pepper. Toss in the finely chopped green onions as well. Mix gently to combine all the veggies. Drizzle the dressing over the mixture and toss to coat each piece. Just before serving, sprinkle 1/4 cup of toasted sesame seeds over the salad. Toss lightly to keep the seeds crunchy. Allow the salad to rest for at least 10 minutes. This lets the flavors blend nicely. To boost the taste of your Asian sesame cucumber salad, try adding fresh herbs. Cilantro and mint bring bright, fresh notes. You can also sprinkle in some crushed red pepper for heat. Let the salad rest for 10 minutes after mixing. This allows the flavors to blend well and create a more delicious dish. To keep your cucumbers crisp, salt them well before mixing. Salting draws out extra water. After resting, drain and pat them dry. This helps keep the salad from getting soggy and ensures a great crunch with every bite. For a beautiful presentation, use a wide, shallow bowl. Layer the salad so you can see all the colorful veggies. Garnish with fresh cilantro leaves and a sprinkle of toasted sesame seeds. You can also add thin cucumber slices on top to enhance the look. This makes the dish inviting and fun to eat! Pro Tips Salt the Cucumbers: Salting the cucumbers is crucial as it draws out excess moisture, resulting in a crisper texture for your salad. Customize Your Veggies: Feel free to add other vegetables such as radishes or snap peas for more crunch and flavor variety. Let It Marinate: Allowing the salad to sit for at least 10 minutes before serving enhances the flavor as the veggies absorb the dressing. Garnish Wisely: Garnish with fresh herbs like cilantro or mint for an aromatic touch that complements the dish beautifully. {{image_4}} For a vegan option, swap honey for maple syrup. This keeps the sweet taste while making it plant-based. If you need a gluten-free alternative, use tamari instead of soy sauce. This small change ensures everyone can enjoy the salad without worry. Want to make this salad more filling? You can add proteins like grilled chicken or tofu. Grilled chicken adds a nice smoky flavor. Tofu gives a great texture, especially if you press it first. Both options mix well with the crunch of the cucumbers. You can also think beyond cucumbers. Try adding radishes for a peppery kick. Bell peppers can add even more color and sweetness. Carrots give crunch, but you can also use zucchini. Mixing in these veggies makes the salad fun and fresh. To store leftovers, place the salad in an airtight container. Keep it in the fridge. This helps maintain its freshness for a few days. Always use a clean spoon to serve. This avoids contamination. If you notice excess liquid, drain it out to keep the salad crunchy. You can freeze some parts of the salad. However, cucumbers do not freeze well. They become mushy when thawed. Instead, freeze the dressing in ice cube trays. This allows you to use it later for other salads or dishes. The salad stays fresh in the fridge for about three days. After that, the cucumbers lose their crunch. The flavors may also fade. If you see any signs of spoilage, it’s best to toss it. Always trust your senses when checking food freshness. Yes, you can prepare this salad a few hours ahead. Just keep it covered in the fridge. The cucumbers will stay crunchy and fresh. However, I recommend adding the dressing just before serving. This keeps the vegetables crisp. If you need a substitute for sesame oil, try peanut oil or sunflower oil. Both oils add a nice flavor. You can also use olive oil for a different taste. Just keep in mind that the flavor might change a bit. Yes, this salad is already low in carbs. Cucumbers are low in carbs, making them great for low-carb diets. You can also skip the honey or maple syrup if you want to reduce carbs even more. Serve this salad in a big, shallow bowl. This helps show off the colors and textures. You can garnish it with fresh cilantro and extra sesame seeds. Add a few cucumber slices on top for a nice touch. Yes, you can skip the carrots or any other veggies you don’t like. This salad is flexible. Feel free to add your favorite vegetables instead. Bell peppers, radishes, or even snap peas work well too! In this blog post, I shared a detailed guide on making a fresh salad. You learned about key ingredients, from crisp cucumbers to flavorful dressings. I outlined easy steps to prepare and combine everything. I also included tips to enhance taste and maintain crunch, along with variations for different diets. As you explore this salad, remember its versatility. Feel free to adjust ingredients based on your taste and needs. Enjoy creating your perfect salad that delights your palate!

Asian Sesame Cucumber Salad Fresh and Crunchy Delight

- 1 cup rolled oats - 1 cup almond milk - 1 tablespoon chia seeds - 1 teaspoon pure vanilla extract - 1 tablespoon maple syrup or honey These essential ingredients create a creamy, tasty base for your overnight oats. Rolled oats soak up the almond milk, giving you a soft texture. The chia seeds add healthy fiber and help thicken the mix. Pure vanilla extract brings that sweet, warm flavor we all love. A touch of maple syrup or honey sweetens it just right. - 1/4 cup Greek yogurt - 1/4 cup sliced almonds - Fresh fruits for topping - 1/4 teaspoon almond extract - A pinch of Himalayan salt Optional ingredients let you customize your oats. Greek yogurt makes them creamier and adds protein. Sliced almonds add a nice crunch and boost nutrition. Fresh fruits like berries or bananas give color and flavor. Almond extract enhances the nutty taste. A pinch of Himalayan salt balances the sweetness, making each bite pop. {{ingredient_image_2}} - Mixing the ingredients Start by taking a medium bowl. Add 1 cup of rolled oats, 1 cup of almond milk, and 1 tablespoon of chia seeds. Then, pour in 1 teaspoon of pure vanilla extract and 1 tablespoon of pure maple syrup. Next, include 1/4 teaspoon of almond extract and a pinch of Himalayan salt. If you want creaminess, add 1/4 cup of Greek yogurt. Use a whisk or spoon to mix everything well. Make sure the oats soak up the liquid. - Covering and refrigerating After mixing, cover the bowl with a lid or plastic wrap. Place the bowl in the fridge. Leave it there overnight or for at least 4 hours. This soaking time helps the oats soften and absorb flavors. - Stirring before serving In the morning, take the bowl out of the fridge. Give the oats a good stir. If you want a creamier texture, add a splash of almond milk and mix again. - Layering in jars or bowls You can serve the oats in clear jars or bowls. This makes the layers look pretty. Start by adding the oat mix and then layer it with fresh fruits and sliced almonds. - Topping options Top your oats with fresh fruits like berries, banana slices, or apple wedges. For extra sweetness, drizzle more maple syrup over the top. - Adding extra almond milk If the oats seem too thick, you can add more almond milk. Just a splash will do. This keeps the oats moist and easy to eat. - Creating a creamier texture For a richer taste, mix in Greek yogurt. It makes the oats thicker and creamier, giving you a delightful bite. To make perfect overnight oats, ensure the oats are fully submerged in the liquid. This helps them soak up the almond milk and flavors. Aim for a soaking time of at least 4 hours, but overnight is best. It gives the oats time to soften fully and blend well. You can adjust the sweetness to your liking. If you prefer a sweeter taste, add more maple syrup or honey. For those on a dairy-free or vegan diet, simply skip the Greek yogurt. The oats will still be creamy and delicious with almond milk. For a stunning look, serve your overnight oats in clear jars. This lets the layers of oats, nuts, and fruits shine. You can garnish with a sprig of fresh mint on top. This adds a pop of color and a touch of freshness to your dish. Pro Tips Use Steel-Cut Oats for Extra Chewiness: If you prefer a heartier texture, substitute rolled oats with steel-cut oats. Just be aware that they may require a longer soaking time to soften. Customize Your Sweetness: Adjust the amount of maple syrup or honey based on your taste preferences. You can also experiment with different flavored extracts for a unique twist. Add More Protein: To boost the protein content, mix in a scoop of your favorite protein powder or add more Greek yogurt to the mixture. Mix and Match Toppings: Get creative with your toppings! Try different combinations of nuts, seeds, and fruits to keep your overnight oats exciting every morning. {{image_4}} You can easily change the flavor of your vanilla almond overnight oats. Here are two delicious ideas: - Chocolate almond overnight oats: Add two tablespoons of unsweetened cocoa powder to your mix. This will give your oats a rich, chocolatey taste. You can also top them with chocolate chips for more sweetness. - Fruity almond variations: Mix in your favorite fruits before soaking. Try mashed bananas, diced apples, or even chopped peaches. This adds natural sweetness and a fun twist to your breakfast. You don’t have to stick to just one type of milk or nut. Here are some swaps: - Different types of milk: You can use any milk you love. Cow’s milk, oat milk, or soy milk all work well. Each type brings a unique flavor and texture. - Nut or seed replacements: If you’re allergic to nuts, use sunflower seeds or pumpkin seeds instead of almonds. They still add great crunch and nutrition. Toppings can make your overnight oats even better. Here are some fun options: - Seasonal fruit options: Use fresh fruits that are in season. Berries, peaches, or even citrus slices brighten up your dish. - Nut butter selections: Drizzle your oats with almond butter, peanut butter, or sunflower seed butter. This adds creaminess and a boost of protein to your meal. I recommend using glass jars for your overnight oats. Glass helps keep the oats fresh. It also allows you to see the layers of ingredients. Plastic containers can work, but they may trap odors. Always seal your jars tightly. This keeps air out and locks in flavors. You can keep your vanilla almond overnight oats in the fridge for up to five days. After that, they may start to lose flavor. If you notice any strange smells or colors, it’s best to toss them out. Freshness is key for delicious oats. To prepare for a busy week, make several jars in advance. You can batch cook them on a Sunday. Just mix all your ingredients and store them in jars. This way, you have a quick, healthy breakfast ready to go. You can also switch up flavors for variety. Yes, you can use quick oats. They will absorb liquid faster. However, they may become mushy. Rolled oats keep a nice texture after soaking. If you prefer softer oats, quick oats are fine. These oats last up to five days in the fridge. Make sure to store them in an airtight container. The flavors deepen over time, making them even tastier! Yes, you can make them gluten-free. Just choose certified gluten-free rolled oats. This ensures no cross-contamination with gluten. Enjoy your tasty oats worry-free! Many toppings work great! Here are some ideas: - Sliced bananas - Mixed berries - Crisp apple wedges - Chopped nuts - A sprinkle of cinnamon Yes, you can freeze overnight oats. Use freezer-safe containers. They can last up to three months. Just thaw them in the fridge overnight before eating. Enjoy your quick breakfast! This blog post covered everything you need to know about making vanilla almond overnight oats. We explored essential and optional ingredients, step-by-step preparation, serving ideas, and tips for perfecting your oats. You now know how to store and customize your oats with different flavors and toppings. Overnight oats are simple, tasty, and offer endless possibilities. Enjoy creating your perfect bowl today!

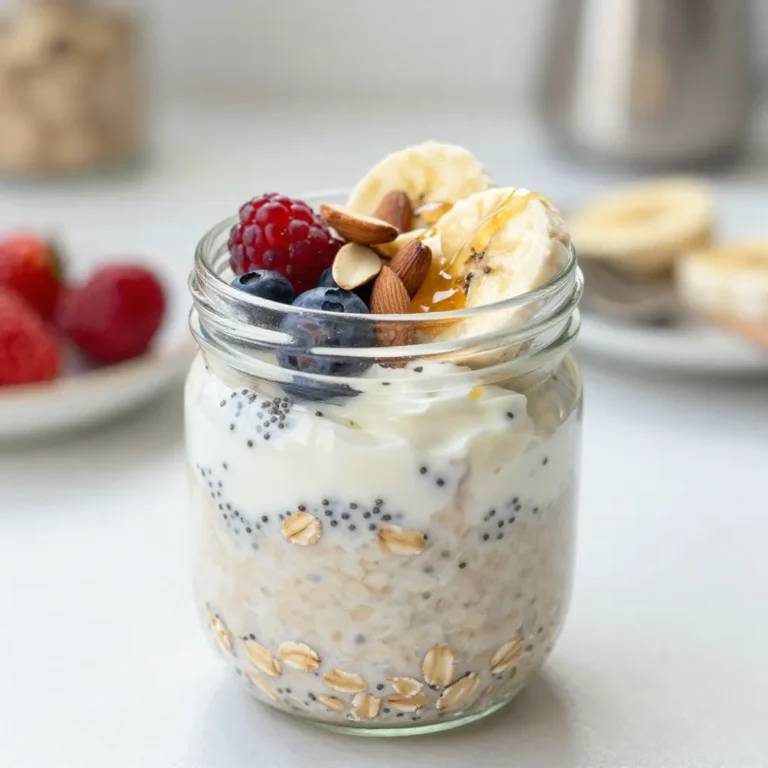
Vanilla Almond Overnight Oats Easy and Tasty Meal

To make these tasty honey Sriracha chicken meatballs, you will need: - 1 lb ground chicken - 1/4 cup breadcrumbs - 1/4 cup grated Parmesan cheese - 1/4 cup finely chopped green onions (plus extra for garnish) - 2 cloves garlic, minced - 1 large egg, beaten - 1 tablespoon soy sauce - 1 teaspoon sesame oil - Salt and pepper to taste - 1/4 cup honey - 3 tablespoons Sriracha sauce - 1 tablespoon rice vinegar - 1 tablespoon cornstarch (optional for thickening) These main ingredients bring a blend of sweet and spicy to every bite. You can add a few optional ingredients for more depth: - Fresh ginger, minced - Red pepper flakes for extra heat - Chopped cilantro for a fresh touch These choices can take your meatballs to the next level. To finish your dish, consider these garnishes: - Extra chopped green onions - A sprinkle of sesame seeds - A drizzle of extra honey for sweetness These garnishes make your honey Sriracha chicken meatballs look and taste amazing. {{ingredient_image_2}} First, you need to preheat your oven to 400°F (200°C). This step is crucial for getting those meatballs nice and golden. To make cleanup easier, line a baking sheet with parchment paper. It will catch any drips and keep your pan clean. In a large bowl, combine these ingredients: - 1 lb ground chicken - 1/4 cup breadcrumbs - 1/4 cup grated Parmesan cheese - 1/4 cup finely chopped green onions (plus extra for garnish) - 2 cloves garlic, minced - 1 large egg, beaten - 1 tablespoon soy sauce - 1 teaspoon sesame oil - Salt and pepper to taste Use your hands or a spatula to mix everything well. Make sure all the ingredients blend. This ensures each meatball has all the flavors. Take portions of the mixture and roll them into small meatballs, about 1 inch wide. Place each meatball on the baking sheet. Make sure there’s space between them. This helps them cook evenly. Bake in the oven for 20-25 minutes. They should be cooked through and golden brown. While the meatballs bake, let’s make the sauce. In a small saucepan, whisk together: - 1/4 cup honey - 3 tablespoons Sriracha sauce - 1 tablespoon rice vinegar - 1 tablespoon cornstarch (optional for thickening) Heat this mixture over medium heat. Stir constantly until it simmers. Cook for about 5 minutes. The sauce will thicken slightly. Once the meatballs are done, take them out of the oven. In a large bowl, toss the meatballs with the honey Sriracha sauce. Make sure every meatball is coated well in that sweet and spicy glaze. Serve your honey Sriracha chicken meatballs warm. You can garnish with extra chopped green onions or a sprinkle of sesame seeds. Enjoy this tasty dish! To make your meatballs juicy, use fresh ground chicken. This meat has a lot of moisture. Don't overmix the meatball mixture. Just blend until combined. Adding breadcrumbs helps keep them soft. The egg also adds moisture. Make sure to bake them until they are golden brown but not dry. Cooking time can change based on your oven. Check the meatballs at 20 minutes. If they aren't golden brown yet, give them a few more minutes. Always use a meat thermometer. The inside should reach 165°F (75°C) for safe eating. If you make bigger meatballs, add five more minutes to the baking time. For the best sauce, mix honey and Sriracha well. If the sauce is too thin, add cornstarch. Dissolve cornstarch in a bit of water before adding it to the sauce. This will help it thicken nicely. Heat the sauce slowly, stirring all the time. Once it simmers, it will become thicker. If it gets too thick, add a splash of water to adjust. Pro Tips Use Fresh Ingredients: Fresh ground chicken and organic produce will elevate the flavor of your meatballs significantly. Adjust the Heat: Feel free to modify the amount of Sriracha based on your heat preference. Start with less and add more to taste. Minimize Stickiness: Wet your hands while shaping the meatballs to prevent the mixture from sticking to your fingers. Let Them Rest: Allow the meatballs to rest for a few minutes after baking before tossing them in the sauce to help them hold their shape. {{image_4}} You can switch the ground chicken for other meats. Ground turkey works well, too. It has a mild taste and stays juicy. If you want a plant-based choice, try ground beef or even lentils. Lentils add fiber and protein. Just make sure to adjust cooking times for different proteins. Want more heat? Add extra Sriracha to the sauce. You can also mix in red pepper flakes. If you prefer less spice, reduce the Sriracha. You can replace it with sweet chili sauce for a milder kick. This keeps the sweet flavor without the heat. The honey Sriracha sauce is great, but you can change it up. Try adding lime juice for a zesty twist. A splash of soy sauce adds depth to the flavor. For a smoky touch, mix in some chipotle sauce. Each variation brings a new taste experience to your meatballs. After enjoying your honey Sriracha chicken meatballs, let them cool down. Place them in an airtight container. This keeps them fresh for up to three days. If you want to keep them longer, freezing is a great option. To reheat the meatballs, use the microwave or oven. For the microwave, place the meatballs on a plate and cover them. Heat for about one to two minutes. For the oven, preheat it to 350°F (175°C). Bake for 10-15 minutes until warm. This ensures they stay juicy and tasty. If you want to freeze the meatballs, do it before adding the sauce. Shape them and place them on a baking sheet. Freeze until firm, then move them to a freezer bag. This way, you can thaw and cook them when you're ready. They keep well for up to three months. When you are ready to eat, just cook them from frozen or thaw in the fridge overnight before baking. You can use ground turkey or ground pork. Both options offer great taste and texture. If you want a vegetarian option, try using lentils or a meat substitute like chickpea or tofu. These choices will give you a different flavor but can still create tasty meatballs. Yes, you can make these meatballs gluten-free! Use gluten-free breadcrumbs instead of regular ones. Also, check your soy sauce. Many brands offer gluten-free versions. This way, you can enjoy these meatballs without worry. To tone down the heat in the sauce, reduce the Sriracha. Start with one tablespoon instead of three. You can also add more honey to balance the spice. Mixing in a bit of ketchup can also help. This will give you a milder, sweeter sauce. These meatballs go great with rice or quinoa. You can also serve them with steamed veggies or a fresh salad. For a fun twist, try serving them in lettuce wraps. They make a great appetizer or main dish. Leftovers can last up to four days in the fridge. Store them in an airtight container to keep them fresh. When you want to eat them, just reheat in the microwave or oven. Enjoy those tasty bites again! Honey Sriracha chicken meatballs are simple yet packed with flavor. We covered the key ingredients, the step-by-step method for cooking, and great tips to keep them juicy. Variations let you play with protein and spice levels, while storage info helps you save leftovers. Remember, these meatballs shine when paired with the right sides. Enjoy creating this dish and experimenting with flavors. You will impress everyone at your next meal!

Honey Sriracha Chicken Meatballs Flavorful Delight

PREV 1 2 3 … 49 NEXT
mini chef kitchen

explore

DessertsDinnerAppetizersDrinks

Our Policies

  • Cookie Policy
  • Copyright Policy
  • Disclaimer
  • GDPR Policy
  • Terms Of Use
Back to Top
  • About
  • Contact Us
  • Privacy Policy
© 2026 mini chef kitchen