FREE DINNER EBOOK! Get your copy!
  • Cookie Policy
  • GDPR Policy
  • Disclaimer
  • Terms Of Use
  • Visit my other site: Fun Cookie Recipes
mini chef kitchen
  • Home
  • Dinner
  • Desserts
  • Drinks
  • Appetizers
  • Contact
  • About
  • Privacy Policy
  • Home
  • Dinner
  • Desserts
  • Drinks
  • Appetizers
  • Contact
  • About
  • Privacy Policy
  • Cookie Policy
  • GDPR Policy
  • Disclaimer
  • Terms Of Use
Visit my other site: Fun Cookie Recipes

HOME / CATEGORIES /

Latest

- 2 pounds baby potatoes, halved - 1/4 cup high-quality olive oil - 4 cloves garlic, finely minced - 1 tablespoon dried oregano - 1 tablespoon dried thyme - 1 tablespoon dried rosemary - Salt and freshly cracked pepper to taste - Zest of 1 lemon, finely grated - Fresh parsley, chopped, for garnish Using high-quality olive oil is key. It brings out the best flavor. A good oil adds richness and depth. Look for extra virgin olive oil for the best taste. Baby potatoes are also important. They are naturally creamy and tender. Their small size ensures even cooking. You want potatoes that are firm and unblemished. You can play with herbs and spices. Consider adding fresh basil or sage for a twist. Want some heat? A pinch of red pepper flakes works well. For extra acidity, a splash of balsamic vinegar is great. These options let you customize your dish to your taste. {{ingredient_image_2}} First, preheat your oven to 425°F (220°C). This step is important for roasting. Next, gather your ingredients. You will need baby potatoes and olive oil among others. To properly half baby potatoes, grab a sharp knife. Place a potato on a cutting board. Cut it in half lengthwise. Make sure to apply even pressure. Repeat this for all the potatoes. Now, take a large mixing bowl. Add the halved potatoes into the bowl. Pour in the olive oil and minced garlic. Then add the dried oregano, thyme, and rosemary. Sprinkle salt and pepper to taste. Finally, add the lemon zest. Use your hands or a spoon to mix. Toss the potatoes well until they are covered in the herb mix. Take a large baking sheet and arrange the potatoes. Lay them in a single layer. Make sure to leave space between each piece. This helps them cook evenly. Roast the potatoes in the oven for 25-30 minutes. Halfway through, flip the potatoes. This helps them get crispy on all sides. When done, they should feel tender inside and golden outside. To check for doneness, pierce a potato with a fork. It should slide in easily. Cook the potatoes until they are golden brown and tender inside. Ovens can vary, so keep an eye on the time. If your oven runs hot, reduce the heat by 25°F. For slow ovens, add five more minutes. Using fresh herbs makes a big difference. Fresh oregano, thyme, and rosemary add more depth. If you use dried herbs, make sure they are fresh. Older dried herbs may lose their flavor. You can also add toppings like grated Parmesan or a sprinkle of paprika for extra kick. These roasted potatoes pair well with grilled chicken or beef. They also work great in a salad with greens and vinaigrette. For a fun twist, serve them in a bowl with a dollop of sour cream or a squeeze of lemon juice. This adds a tasty and fresh finish. Pro Tips Choose the Right Potatoes: For the best texture and flavor, opt for waxy baby potatoes like Yukon Gold or new potatoes, as they hold their shape well during roasting. Don't Skip the Zest: Lemon zest adds a bright, fresh flavor that elevates the dish. Be sure to use a microplane to finely grate the zest for even distribution. Mix It Up: Feel free to experiment with the herbs! Fresh herbs can be substituted for dried ones, or you can add herbs like basil or dill for a different flavor profile. Mind the Space: Ensure the potatoes are in a single layer on the baking sheet. Crowding them can lead to steaming rather than roasting, resulting in less crispy potatoes. {{image_4}} You can change the flavor of these potatoes easily. Try adding other herbs like basil or sage. These herbs can bring a fresh taste to your dish. If you like heat, add red pepper flakes for a spicy kick. A little goes a long way, so start small. You can always add more later. Want to cook faster? Use an air fryer. It cooks the potatoes quickly while still making them crispy. Preheat the air fryer to 400°F (200°C). Cook for about 15-20 minutes, shaking the basket halfway through. You can also use a skillet for stovetop cooking. Heat some oil in the skillet, add the potatoes, and cover. Cook on medium heat, flipping occasionally until golden. Making these potatoes vegan is simple. Just stick to the original recipe, as all the ingredients are plant-based. For gluten-free needs, you’re in luck! This recipe is already gluten-free. Always check your ingredients to be sure. To keep your Italian herb roasted potatoes fresh, place them in an airtight container. This helps to lock in moisture and flavor. You can also wrap them tightly in plastic wrap. Store the container in the fridge for up to three days. When you're ready to enjoy your leftovers, the oven is best. Preheat it to 375°F (190°C). Spread the potatoes on a baking sheet. Heat them for about 10 to 15 minutes until warm and crispy. If you use a microwave, place the potatoes in a safe dish. Heat them for 1 to 2 minutes. This method may make them softer, so the oven is better for crispiness. Yes, you can freeze Italian herb roasted potatoes! Let them cool completely. Place the cooled potatoes in a freezer-safe bag or container. Remove as much air as possible. They will last for up to three months. To thaw, leave them in the fridge overnight. Reheat them in the oven for the best texture. Italian Herb Roasted Potatoes are a simple side dish. They come from Italy and use fresh herbs. This dish features baby potatoes, olive oil, garlic, and herbs like oregano and rosemary. The flavors blend well and create a tasty treat. Roasting brings out the natural sweetness of the potatoes. Yes, you can prep these potatoes in advance. Cut and season them a few hours before cooking. Store them in the fridge until you're ready to roast. This saves time during busy meals. Just remember to bring them to room temperature before baking. These potatoes pair well with many dishes. Serve them with grilled chicken or steak. They also taste great with fish or as a part of a salad. For a hearty meal, add some roasted vegetables too. You can even drizzle extra olive oil or lemon juice on top for extra flavor. To get crispy potatoes, start with dry potatoes. Make sure to coat them evenly with oil. Arrange them in a single layer on your baking sheet. Flipping them halfway through roasting helps too. Roast at a high temperature, around 425°F. This allows the outside to get golden and crunchy while the inside stays tender. Italian Herb Roasted Potatoes offer rich flavor and easy preparation. We explored simple ingredients, like quality olive oil and fresh herbs. The step-by-step instructions make roasting fun and successful. Tips for crispiness and variations keep it exciting and adaptable. In the end, you can enjoy this versatile dish with countless meals. Whether you make them spicy or savory, these potatoes will surely impress. Happy cooking!

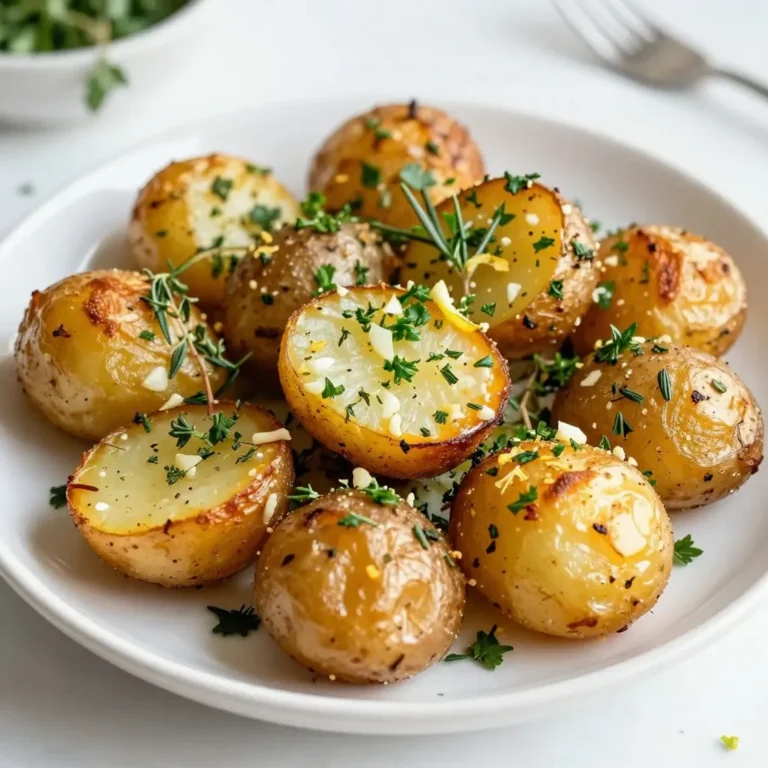
Italian Herb Roasted Potatoes Simple and Flavorful Dish

To make Keto Taco Casserole, you need the following items: - 1 lb (450g) ground beef - 1 small onion, finely diced - 2 cloves garlic, minced - 1 bell pepper, diced - 1 can (14 oz) diced tomatoes (no sugar added) - 1 can (4 oz) diced green chilies - 2 tablespoons taco seasoning (sugar-free) - 1 cup shredded cheddar cheese - 1 cup shredded mozzarella cheese - 1 cup cauliflower rice (fresh or frozen) - 1/2 cup sour cream - Salt and pepper, to taste - Fresh cilantro, chopped, for garnish - Sliced jalapeños, for garnish (optional) You can swap out some ingredients if you need to. Here are a few ideas: - Ground beef: Use ground turkey or chicken for a lighter option. - Cauliflower rice: Swap with zucchini noodles for a different texture. - Cheese: Try pepper jack for extra spice or goat cheese for a tangy flavor. - Taco seasoning: Make your own mix with cumin, paprika, and chili powder. This dish is not only tasty but also fits your keto diet. Here’s the breakdown per serving: - Calories: 400 - Fat: 28g - Protein: 30g - Carbohydrates: 8g - Fiber: 3g - Net Carbs: 5g This meal keeps you full and satisfied while sticking to your low-carb goals. Enjoy cooking! {{ingredient_image_2}} 1. Gather all your ingredients. You will need ground beef, onion, garlic, bell pepper, diced tomatoes, green chilies, taco seasoning, cheeses, cauliflower rice, sour cream, salt, and pepper. 2. Preheat your oven to 375°F (190°C). This step is key for perfect baking. 3. Dice the onion and bell pepper. Mince the garlic. This adds flavor to your dish. 4. Measure out your taco seasoning. Use sugar-free seasoning for the best results. 1. In a large skillet over medium heat, brown the ground beef. Break it apart with a spatula while cooking. 2. Drain any excess fat from the beef. This keeps your casserole from being greasy. 3. Add the diced onion and minced garlic to the skillet. Sauté for 3-4 minutes until the onion is soft and fragrant. 4. Stir in the diced bell pepper, canned tomatoes (with juices), green chilies, taco seasoning, and cauliflower rice. Mix well. 5. Season with salt and pepper to taste. Cook for 5-7 minutes until everything is hot and combined. 1. Transfer the mixture to a greased 9x13 inch baking dish. Spread it out evenly. 2. Add dollops of sour cream on top of the beef mixture. Spread it gently for even coverage. 3. Sprinkle shredded cheddar and mozzarella cheese on top. Make sure it covers the entire dish. 4. Bake in your preheated oven for 25-30 minutes. Look for melted, bubbling cheese as a sign it’s done. 5. Remove from the oven and let it cool for a few minutes. This makes slicing easier. 6. Garnish with chopped cilantro and sliced jalapeños, if desired, for a fresh touch. To make your Keto Taco Casserole burst with flavor, use fresh ingredients. Fresh garlic and onion bring a bright taste. Choose colorful bell peppers for a vibrant look and rich taste. Use taco seasoning that is sugar-free. You can make your own mix at home. A blend of cumin, paprika, and chili powder works wonders. Don’t forget to season with salt and pepper. Taste as you cook. Adjust the spices until it suits your palate. One mistake is overcooking the beef. Cook it just until browned and no longer pink. Another error is not draining excess fat. This can make your casserole greasy. Be careful with the cheese too. Use a good mix of cheddar and mozzarella for the best melt. Avoid using too much sour cream, or it may overpower the dish. Lastly, don’t skip the garnish! Fresh cilantro and jalapeños add a great finish. Serve the casserole warm in squares. A drizzle of sour cream on top makes it richer. Sprinkle fresh cilantro over each plate for color and taste. You can also add sliced jalapeños if you like heat. Pair it with a simple green salad for balance. This dish is perfect for family dinners or meal prep. Store leftovers in the fridge for quick lunches. Enjoy your flavorful Keto Taco Casserole! Pro Tips Choose Your Beef Wisely: Opt for lean ground beef to reduce the fat content, or use ground turkey or chicken for a lighter version. Add More Veggies: Incorporate additional vegetables like zucchini or mushrooms for added nutrition and flavor. Make it Spicy: Adjust the heat level by adding more diced jalapeños to the mix or using a spicier taco seasoning. Meal Prep Friendly: This casserole can be made ahead of time and stored in the refrigerator for up to 3 days or frozen for longer storage. {{image_4}} If you want to skip meat, try using a mix of veggies. You can add mushrooms, zucchini, or spinach. For a protein boost, use black beans or lentils. Replace ground beef with crumbled tofu or tempeh. These swaps keep the dish filling and tasty. Cheese adds a lot of flavor to the casserole. If you want to mix it up, use pepper jack for a kick. You can also try a blend of gouda and cheddar for a rich taste. If you need a dairy-free option, use vegan cheese. Just check that it melts well. To control the heat, adjust the spices. For mild flavor, skip the jalapeños or use sweet bell peppers. If you like it hot, add more diced green chilies or some cayenne pepper. You can also sprinkle in red pepper flakes for an extra kick. This way, you can make the dish just right for your taste. To store leftovers, let the casserole cool first. Then, place it in an airtight container. This keeps it fresh and tasty for up to five days in the fridge. Make sure to cover it well to avoid drying out. To reheat, take a portion of the casserole. You can use a microwave or oven. If using a microwave, heat for about 1-2 minutes. If using an oven, set it to 350°F (175°C) and heat for about 10-15 minutes. Cover it with foil to keep it moist. You can freeze the casserole for up to three months. Cut it into serving sizes for easy thawing. Wrap each piece in plastic wrap, then place it in a freezer bag. When ready to eat, thaw it overnight in the fridge before reheating. Keto Taco Casserole is a tasty, low-carb meal. It combines ground beef, veggies, and cheese. The dish has bold taco flavors while being keto-friendly. You get a hearty meal without the carbs from tortillas. This casserole is rich, filling, and perfect for any taco lover. Yes, you can make this dish ahead of time. Prepare the casserole and store it in the fridge. You can keep it for up to two days before baking. This makes it easy for busy days. Just bake it when you are ready to eat. To make your casserole spicier, add more taco seasoning. You can also mix in diced jalapeños or hot sauce. Consider using spicy diced tomatoes instead of regular ones. This will give your dish a nice kick. Adjust spice levels to fit your taste buds. Absolutely! Keto Taco Casserole is great for meal prep. You can portion it into containers for easy meals. It tastes just as good reheated. This dish fits well into a low-carb meal plan. Enjoy it throughout the week without hassle. We discussed everything you need to know about making a tasty Keto Taco Casserole. You learned about the key ingredients, how to prepare, and bake the dish. I also shared tips to boost flavor and avoid mistakes. Plus, you found variations to suit your taste and dietary needs. Remember to store leftovers correctly for later enjoyment. With all this, you can confidently create a delicious meal that fits your lifestyle. Enjoy your cooking and sharing this dish with friends and family!

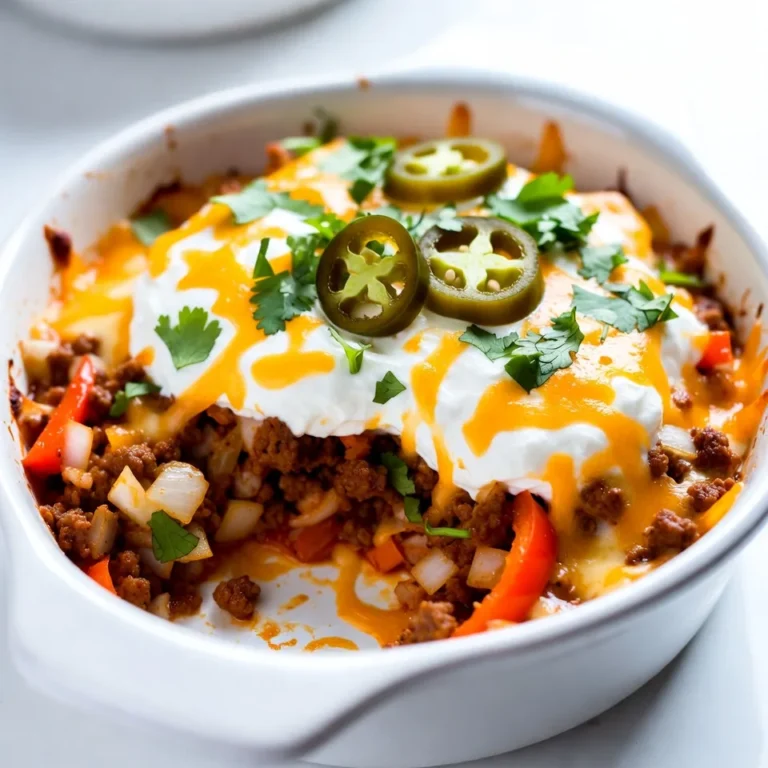
Keto Taco Casserole Tasty and Satisfying Meal

- Shrimp selection and preparation I use one pound of large shrimp for these tacos. Look for shrimp that are fresh and firm. They should be peeled and deveined before cooking. This makes them easy to eat. You want shrimp that are bright and smell like the ocean. - Seasoning components For flavor, mix two tablespoons of extra virgin olive oil with lime zest and juice from two limes. Add two teaspoons of chili powder, one teaspoon of ground cumin, and one teaspoon of garlic powder. A pinch of salt and pepper brings it all together. These spices give a nice kick to the shrimp. - Fresh vegetables and garnishes Fresh toppings make these tacos pop. Use one cup of thinly sliced red cabbage for crunch. Slices of ripe avocado add creaminess. Fresh cilantro leaves on top bring a burst of flavor. Don’t forget lime wedges for a zesty squeeze! - Tortilla options I prefer using small corn tortillas. They are soft and hold the shrimp well. You can heat them in a skillet for about 30 seconds on each side. This makes them warm and pliable. - Equipment for cooking shrimp A grill or a non-stick skillet works best for cooking shrimp. Make sure it’s hot before adding the shrimp. This helps them cook evenly and get that nice sear. - Tools for assembling tacos Use a large spatula to flip shrimp easily. Have a clean kitchen towel ready to keep the tortillas warm. You may also need a cutting board and knife for slicing toppings. {{ingredient_image_2}} To start, grab a large bowl. Add the shrimp, olive oil, lime zest, lime juice, chili powder, cumin, garlic powder, and some salt and pepper. Mix gently until every shrimp is well-coated. Next, you need to cook the shrimp. You can grill them or use a skillet. If you grill, heat it to medium-high. Place the shrimp in a single layer, cooking for about 2-3 minutes on each side. They will turn pink and opaque when done. If using a skillet, follow the same cooking time. Once cooked, take them off the heat. Now, let’s warm the corn tortillas. Use a separate skillet over medium heat. Heat each tortilla for about 30 seconds on each side. This makes them soft and easy to fold. To keep them warm, cover them with a clean kitchen towel as you heat them. Now it's time to build your tacos! Take a warm tortilla and place a handful of red cabbage in the center. Next, add a few shrimp on top. Slice up your avocado and place a few pieces on the shrimp. Finish with fresh cilantro for that extra flavor. For a bright presentation, serve the tacos on a colorful platter. Add lime wedges and extra cilantro around them to make it inviting. Enjoy! How to avoid overcooking shrimp: To keep shrimp tender, cook them for only 2 to 3 minutes on each side. Watch closely as they change color. Remove them from heat as soon as they turn pink and opaque. This helps prevent a rubbery texture. Signs of perfectly cooked shrimp: Perfectly cooked shrimp should be bright pink with no gray spots. They will also curl slightly but not too tightly. If they are firm to the touch, they are ready to eat. Adding heat: spicy variations: If you like spice, add diced jalapeños or a pinch of cayenne pepper. You can also try a dash of hot sauce when serving. This adds a fun kick without overpowering the shrimp. Balancing flavors with additional toppings: Top your tacos with fresh ingredients like diced tomatoes or crunchy radishes. A drizzle of yogurt or sour cream can help cool the heat. This mix of flavors creates a tasty balance. Best ways to plate chili lime shrimp tacos: Arrange the tacos on a bright platter. Stack them slightly askew for a casual look. Add lime wedges and cilantro sprigs around the tacos. This makes the dish pop and look inviting. Pairing drinks with the dish: For drinks, serve a cold beer or a refreshing limeade. A light white wine also goes well with these tacos. The right drink enhances the flavors and makes the meal even more enjoyable. Pro Tips Marinate Longer for Flavor: For an even deeper flavor, consider marinating the shrimp for at least 30 minutes in the refrigerator before cooking. This allows the spices and lime to penetrate the shrimp more thoroughly. Perfect Tortilla Technique: To avoid tearing, heat your corn tortillas just until they're warm and pliable. Wrapping them in a clean kitchen towel after heating helps keep them soft until you're ready to serve. Add a Crunch: For extra texture, try adding thinly sliced radishes or jicama along with the cabbage. This will give your tacos a delightful crunch that complements the shrimp beautifully. Customize Your Toppings: Feel free to personalize your tacos with additional toppings like diced tomatoes, spicy salsa, or a drizzle of chipotle mayo for a smoky kick! {{image_4}} You can switch the shrimp for other proteins. Chicken works great. Just cut it into small pieces. Marinate it the same way as shrimp. Cook until golden brown. Fish is another option. Use a firm fish like tilapia or cod. Cook it just like shrimp. If you want a vegetarian option, try grilled portobello mushrooms. Slice them thick and marinate just like shrimp. They add a nice meaty flavor. Another idea is to use chickpeas. Toss them in the same spices and roast until crispy. Get creative with spices. Try smoked paprika for a deeper flavor. You can also add cayenne pepper for heat. For something sweeter, mix in some mango or pineapple. These fruits add a burst of freshness. Dice them up and sprinkle on top of the tacos. Another fun idea is to use fresh herbs. Try mint or basil for a twist. These herbs can brighten the dish. You can choose between soft and crispy tacos. Soft corn tortillas are classic. They wrap around the filling well. For crispy tacos, bake the tortillas until golden. You can use taco shells too. If you want gluten-free options, look for corn tortillas without added wheat. They are easy to find. Just make sure to check the label. Enjoy the same great flavors without the gluten! To keep your chili lime shrimp tacos fresh, store them in an airtight container. Place extra shrimp, tortillas, and toppings separately. This helps maintain texture and flavor. You can refrigerate them for up to three days. After that, the shrimp and tortillas may lose their quality. When it’s time to enjoy your leftovers, reheat the shrimp on the stovetop. Use medium heat to warm them gently. Stir occasionally to ensure even heating. For the tortillas, warm them in a skillet for about 20 seconds on each side. This keeps them soft and pliable, just like when you first made them. Yes, you can freeze prepared tacos, but it’s best to freeze shrimp and toppings separately. To freeze shrimp, place them in a freezer bag, removing as much air as possible. For toppings, store them in separate containers. You can freeze shrimp for up to three months and toppings for one month. When ready to use, thaw in the fridge overnight before reheating. I recommend grilling shrimp for tacos. Grilling adds a nice smoky flavor. You can also use a stovetop. A skillet works well too. Just make sure to preheat it. Cook shrimp for 2-3 minutes on each side. Look for the shrimp to turn pink and opaque. This means they are done. Yes, you can make the shrimp ahead of time. Just store it in the fridge. Ideally, consume it within one day. This keeps the shrimp fresh and tasty. When ready to eat, just reheat gently. Avoid overcooking, as it can make them tough. Try serving these tacos with a crisp salad. A simple lettuce mix pairs well. You can also add lime wedges on the side. Chips and salsa make a great side too. Consider a refreshing drink like agua fresca or a light beer. These will enhance the taco's flavors. You’ve learned how to make delicious chili lime shrimp tacos. We explored key ingredients, cooking methods, and essential tools you need. I shared tips for perfect shrimp texture and vibrant flavor. Feel free to get creative with toppings or try new fillings. Remember, these tacos are versatile and great for any occasion. Enjoy making them your own!

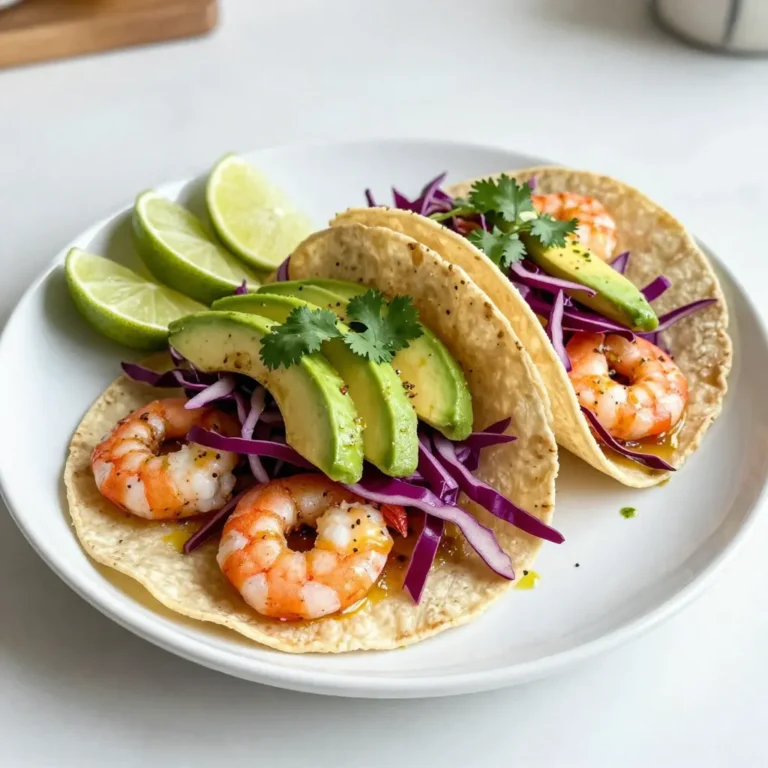
Chili Lime Shrimp Tacos Flavorful and Zesty Delight

To make Oreo stuffed brownies, you need these key ingredients: - 1 cup unsalted butter, melted - 2 cups granulated sugar - 4 large eggs - 1 teaspoon pure vanilla extract - 1 cup all-purpose flour - 1 cup unsweetened cocoa powder - 1/2 teaspoon baking powder - 1/4 teaspoon fine sea salt - 20 Oreo cookies, whole - 1 cup chocolate chips (optional) Each ingredient plays an important role in creating a rich, fudgy brownie. The butter adds moisture and flavor, while sugar gives sweetness. Eggs provide structure and help with leavening. Cocoa powder brings deep chocolate flavor, and flour gives the brownies their texture. You can enhance your brownies with optional add-ins: - 1 cup chocolate chips - Nuts, such as walnuts or pecans - A pinch of sea salt on top Chocolate chips add extra richness, while nuts give crunch. A sprinkle of sea salt on top balances the sweetness. If you need to make changes, here are some tips: - For dairy-free, use coconut oil instead of butter. - Replace granulated sugar with coconut sugar for a lower glycemic index. - Use gluten-free flour as a substitute for all-purpose flour. These substitutions keep the brownies delicious while fitting your dietary needs. Always measure carefully for best results. {{ingredient_image_2}} First, preheat your oven to 350°F (175°C). Grease a 9x13 inch baking pan. Line it with parchment paper. Leave some paper hanging over the edges. This helps you lift the brownies out later. In a large bowl, mix the melted butter and sugar. Use a whisk to combine them well. I whisk for about 2 minutes. The mix should be smooth and shiny. In a separate bowl, whisk together the flour, cocoa powder, baking powder, and salt. Be sure they mix well. This step helps the brownies rise and taste great. Pour half of the brownie batter into your pan. Spread it evenly across the bottom. Next, lay 10 whole Oreo cookies on top, spaced out nicely. This is where the magic begins! Now, add the rest of the brownie batter. Spread it over the Oreos, covering them completely. Finally, place the last 10 Oreos on top and press them down a bit. Now it’s time to bake! Place the pan in the oven and bake for 25-30 minutes. Check for doneness with a toothpick. It should come out with a few moist crumbs. When done, let the brownies cool in the pan for 15 minutes. Use the parchment paper to lift them out. Transfer to a wire rack to cool completely. Once cool, cut them into squares. To keep your brownies light and fluffy, avoid overmixing. When you combine the wet and dry ingredients, mix until just combined. This means some flour pockets may still show. If you mix too much, the brownies can turn out tough. Remember, gentle folding is key! For the best brownie texture, pay attention to your baking time. Bake them until a toothpick has a few moist crumbs. If it comes out clean, they might be overcooked. Also, let them cool before cutting. This helps them set and makes them easier to slice. To present your brownies beautifully, use a decorative platter. Dust them with powdered sugar before serving. A scoop of vanilla ice cream on the side adds a creamy touch. Drizzle with chocolate sauce for that extra wow factor. Enjoy these treats with friends or family for a fun dessert experience! Pro Tips Brownie Texture: For fudgy brownies, avoid overmixing the batter after adding the flour. Mix until just combined. Oreo Placement: Press the Oreos gently into the batter before baking to ensure they stay in place and absorb some of the brownie moisture. Cooling Time: Allow the brownies to cool completely before cutting to achieve clean, even squares without crumbling. Serving Suggestion: For an extra indulgent treat, serve with a scoop of vanilla ice cream and a drizzle of hot fudge sauce. {{image_4}} You can switch up the Oreos in your brownies for fun. Try using mint Oreos for a fresh twist. Red Velvet Oreos add a lovely color and flavor. Peanut Butter Creme Oreos bring a rich, nutty taste. You can even mix and match different Oreos for a unique blend. Just remember to keep the total at 20 cookies. Think about adding some extra flavors to make these brownies shine. A handful of chopped nuts can add crunch. You could also add a teaspoon of espresso powder for a deeper chocolate flavor. Drizzling caramel sauce on top before baking gives a sweet surprise. If you love a bit of spice, add a dash of cinnamon or chili powder for warmth. You can make these brownies gluten-free easily. Just swap regular flour for gluten-free flour. For a dairy-free version, use coconut oil in place of butter. You can also choose dairy-free chocolate chips if you want that extra layer. These changes let everyone enjoy this tasty treat, no matter their diet. Store your Oreo stuffed brownies in an airtight container. This keeps them fresh and moist. Place a piece of parchment between layers to prevent sticking. Keep them at room temperature for up to four days. If you want them to last longer, put them in the fridge. They stay good for about a week when chilled. To freeze brownies, first cut them into squares. Wrap each piece tightly in plastic wrap. Then, place them in a freezer-safe bag or container. Label the bag with the date. These brownies can last up to three months in the freezer. When you're ready to enjoy them, simply thaw in the fridge overnight. To reheat, preheat your oven to 350°F (175°C). Place the brownies in an oven-safe dish. Cover them with foil to keep them from drying out. Heat for about 10-15 minutes. You can also microwave them. Heat on medium power for about 15-20 seconds. Enjoy them warm for that fresh-baked taste! Yes, you can use other cookies. Try chocolate sandwich cookies, peanut butter cookies, or even graham crackers. Each will change the flavor but still taste great. Experiment with your favorites for fun twists! Check the brownies at 25 minutes. Insert a toothpick in the middle. If it comes out with a few moist crumbs, they are done. If it’s wet, bake for a few more minutes. Keep an eye on them to avoid overbaking. You can make brownie bites! Pour the batter into mini muffin tins. Bake for about 15 minutes for tasty little treats. You can also save the batter in the fridge for a day or two. Just cover it well. To make brownies fudgier, use more butter or add an extra egg. You can also use less flour or add a bit of cream cheese. Baking them for less time can also help keep them soft and gooey. Enjoy your fudgy goodness! Oreo stuffed brownies combine simple ingredients for a fun treat. You learned about key ingredients, optional add-ins, and how to mix them. Following my step-by-step guide helped you layer the batter and Oreos for baking. I shared tips to keep your brownies perfect and ideas for tasty variations. Remember, proper storage keeps your brownies fresh longer. With the right methods, your brownies will shine. Enjoy sharing your delicious treats and experimenting with flavors!

Oreo Stuffed Brownies Rich and Decadent Indulgence

- Apples: I recommend using Granny Smith or Honeycrisp apples. They give a great mix of tart and sweet. Peel, core, and slice them into thin pieces. This helps them cook evenly. - Sweeteners: We use both brown sugar and granulated sugar. Brown sugar adds a rich flavor, while granulated sugar helps balance the sweetness. - Dry Ingredients: For the crumble, you need rolled oats, all-purpose flour, ground cinnamon, and a pinch of nutmeg. These add texture and warmth to the dish. - Butter: Cold unsalted butter is key. It helps create a crumbly topping. Cut it into small cubes before mixing. This keeps the butter cold and helps form those nice crumbs. {{ingredient_image_2}} - Preheat the oven: Start by setting your oven to 350°F (175°C). This gives it time to heat up while you prepare the apples. - Prepare the apple mixture: In a large bowl, combine 4 sliced apples with 1 tablespoon of lemon juice, 1 teaspoon of ground cinnamon, and 1/4 cup of brown sugar. Toss well so all apple slices get coated. Pour this mixture into a greased 9-inch pie dish. - Mixing dry ingredients: In a separate bowl, whisk together 1/2 cup of rolled oats, 1/2 cup of all-purpose flour, 1/4 cup of brown sugar, 1/4 cup of granulated sugar, 1/4 teaspoon of sea salt, and 1/4 teaspoon of ground nutmeg if you choose to add it. This will create a flavorful base for your topping. - Incorporating the butter: Cut 1/2 cup of cold unsalted butter into small cubes. Add it to the dry mixture. Use a pastry cutter or fork to mix until you see coarse crumbs. Some butter pieces should be the size of peas. - Layering the apple and crumble: Spread the crumble topping evenly over the apple layer in your baking dish. Make sure to cover all the apples well. This will create a nice crunchy layer on top. - Baking time and temperature: Place the dish in the oven and bake for 35-40 minutes. Look for tender apples and a golden-brown topping. This shows it's ready to enjoy. For a great crumble texture, you need to focus on blending the butter well. I like to use my fingertips to mix the cold butter into the dry ingredients. This helps keep small chunks of butter, which is key. Aim for a mix that looks like coarse crumbs. Baking time is also important. Bake your crumble for 35 to 40 minutes. You want the apples to be soft and the topping to be golden brown. If it browns too fast, cover it with foil. You can boost the flavor with different spices. Try adding a touch of ginger or cloves for a twist. If you want a deeper flavor, mix in some ground nutmeg. You can also switch up the toppings. Toasted nuts or shredded coconut add great texture and taste. Mix-ins can make your crumble special too. Consider adding raisins or dried cranberries for a fruity kick. They pair nicely with the apple and cinnamon. Serving this crumble warm is a must. I love pairing it with vanilla ice cream. The cold ice cream melts into the warm crumble, creating a perfect combo. Whipped cream is another great choice if you prefer something lighter. For garnishing, you can sprinkle a little cinnamon on top. Thin apple slices make a pretty touch too. A sprig of mint can add a fresh look and hint of flavor. Enjoy your delicious dessert! Pro Tips Choose the Right Apples: Using a mix of tart and sweet apples, like Granny Smith and Honeycrisp, will give your crumble a delightful flavor balance. Keep Butter Cold: Ensure your butter is cold to achieve a flaky, crumbly topping. This will create that perfect texture when baked. Don’t Overmix: When combining the butter with the dry ingredients, mix just until crumbly. Overmixing can lead to a dense topping. Let it Cool: Allow the crumble to cool for a few minutes before serving. This helps the flavors meld and makes it easier to scoop. {{image_4}} You can use different fruits for your crumble. Pears are a great choice. They add a sweet flavor. Berries, like blueberries or raspberries, work well too. They give a nice tartness. When using these fruits, adjust the sugar. Berries are sweeter, so use less sugar. For pears, you might want to add a touch more lemon juice. This keeps them from browning too quickly. If you need a gluten-free version, don't worry! You can swap the all-purpose flour. Use almond flour or a gluten-free blend instead. These options work well. Also, you can use gluten-free oats. Check the package to ensure they are certified gluten-free. This way, everyone can enjoy your crumble. For a healthier dessert, try reducing the sugar. You can cut the brown sugar in half. Use natural sweeteners like maple syrup or honey instead. They add a unique flavor. Adding nuts or seeds is another great idea. Chopped walnuts or flaxseeds can boost nutrition. They add crunch and healthy fats. This makes your crumble tasty and good for you. To keep your Cinnamon Apple Crumble fresh, store it in the fridge. Use an airtight container to avoid moisture. It stays fresh for about 3 to 5 days. You can also cover it with plastic wrap or aluminum foil. Always let it cool completely before storing. If you want to freeze your crumble, first let it cool down. Then, wrap it tightly in plastic wrap. Place it in a freezer-safe bag or container. It can last for up to 3 months in the freezer. When you’re ready to eat it, thaw it in the fridge overnight. Reheat it in the oven at 350°F until warm. This keeps the topping nice and crunchy. Yes, you can make it ahead! Prepare the apple filling and topping separately. - Mix the apples with lemon juice, cinnamon, and sugar. - Store the filling in the fridge for up to one day. - Prepare the crumble topping and keep it in a separate bowl. - When ready to bake, combine them and follow the baking steps. This way, you save time and can enjoy fresh crumble later! For the best flavor, use tart apples. I recommend: - Granny Smith: They add a nice tartness. - Honeycrisp: These are sweet and crisp, great for balance. - Fuji: They are sweet and hold their shape well. Using a mix of apples can add depth to the taste. To check if your crumble is ready: - Look for a golden brown topping. - Check if the apples are tender by poking with a fork. - You can also smell the sweet aroma filling your kitchen! Baking usually takes about 35-40 minutes at 350°F (175°C). Enjoy that warm, comforting scent! Cinnamon apple crumble is a delightful dessert made with fresh apples and a crunchy topping. We covered ingredients, baking steps, and tips for the best texture. Remember to use cold butter and adjust spices for flavor. You can even try seasonal fruits for variety. Store your leftovers properly to enjoy later. With this guide, you can bake a perfect crumble every time. Enjoy making this tasty treat!

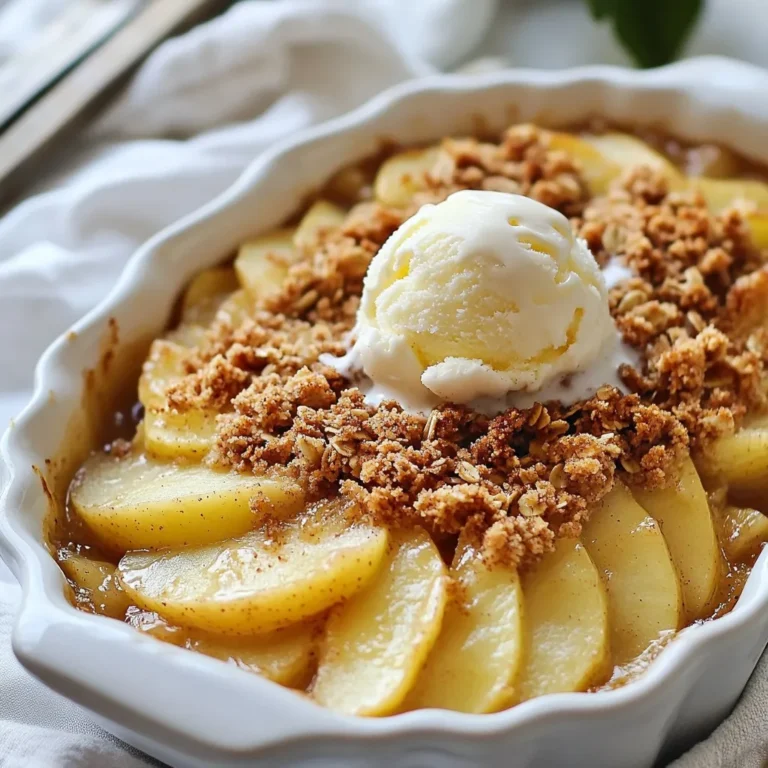
Cinnamon Apple Crumble Delightful and Easy Recipe

- 1 lb baby carrots, peeled - 3 tablespoons unsalted butter - 1/4 cup brown sugar - 1 teaspoon ground cinnamon - 1/4 teaspoon ground nutmeg - 1/4 teaspoon cayenne pepper (optional for an extra kick) - Salt and freshly cracked pepper to taste - 2 tablespoons fresh parsley, finely chopped (for garnish) - Baby Carrots: These are sweet and tender. They cook quickly and look great on a plate. - Unsalted Butter: It adds a rich flavor and helps the sugar melt. - Brown Sugar: This gives the carrots their sweet glaze. It caramelizes well when heated. - Ground Cinnamon and Nutmeg: These warm spices enhance sweetness and add depth. - Cayenne Pepper: This optional spice gives a nice kick. It balances the sweetness. - Salt and Pepper: These enhance all the flavors and make the dish pop. - Fresh Parsley: It adds a fresh touch and bright color when served. - Honey: You can use honey instead of brown sugar for a different sweetness. - Maple Syrup: This can replace brown sugar for a unique flavor twist. - Other Vegetables: You could add parsnips or sweet potatoes for variety. - Dried Herbs: Thyme or rosemary could be fun to try instead of parsley. - Nuts: Chopped walnuts or pecans can add crunch and flavor. Feel free to mix and match these ideas. Cooking should be fun and creative! {{ingredient_image_2}} Start with fresh baby carrots. If you have whole carrots, wash them well. Cut them into sticks that are about 2 inches long. This helps them cook evenly. Peeling the carrots keeps them tender and sweet. Next, boil the carrots in salted water. Fill a medium pot with water and bring it to a boil. Add a pinch of salt to the water. Once boiling, add the peeled baby carrots. Boil them for about 5 to 7 minutes. You want them slightly tender but still crisp. Drain the carrots and set them aside. In a large skillet, melt 3 tablespoons of unsalted butter over medium heat. Once the butter is melted and bubbling, add 1/4 cup of brown sugar. Sprinkle in 1 teaspoon of ground cinnamon and 1/4 teaspoon of ground nutmeg. For a spicy kick, add 1/4 teaspoon of cayenne pepper. Stir the mixture until the sugar dissolves. Once bubbly, your glaze is ready. Now, add the drained carrots to the skillet. Toss them gently in the glaze to coat them well. Cook for another 5 to 8 minutes. Stir occasionally until the carrots become caramelized and glossy. This step makes them sweet and flavorful. Season your glazed carrots with salt and freshly cracked pepper. Taste them to adjust if needed. Once seasoned, remove the skillet from the heat. Transfer the shiny carrots to a serving dish. Garnish with 2 tablespoons of finely chopped fresh parsley for a pop of color. Enjoy this sweet and spicy side dish with your favorite main course! - Select Fresh Carrots: Use fresh baby carrots for the best flavor and texture. - Cut Evenly: If using whole carrots, cut them into sticks. This helps them cook evenly. - Don’t Overboil: Boil carrots just until tender. They should remain crisp for a nice bite. - Watch the Glaze: Stir the glaze often to prevent burning. You want it smooth and bubbly. - Garnish Wisely: Use fresh parsley for color and flavor. It brightens the dish. - Skipping Seasoning: Don’t forget to add salt and pepper. It balances the sweetness. - Overcooking Carrots: If they get too soft, they won't hold their shape. - Ignoring the Glaze: If the glaze isn't bubbling, it won’t coat the carrots well. - Using Cold Carrots: Make sure the carrots are warm when adding them to the glaze. - Meats: These carrots pair well with roasted chicken or glazed ham. - Grains: Serve with rice or quinoa for a balanced meal. - Salads: They complement fresh salads, adding a sweet crunch. - Holiday Dinners: Perfect for Thanksgiving or Christmas feasts. Pro Tips Choose Fresh Carrots: Selecting fresh, vibrant baby carrots will enhance the flavor and presentation of your dish. Don’t Overcook: Keep an eye on the boiling time; you want the carrots to be slightly tender but still retain a bit of crunch. Adjust Sweetness: Feel free to adjust the amount of brown sugar according to your taste preference; you can add more for a sweeter glaze. Garnish Wisely: A sprinkle of freshly chopped parsley not only adds color but also a fresh contrast to the sweet glaze. {{image_4}} You can make your brown sugar glazed carrots even sweeter. Try adding honey to the glaze. Use about two tablespoons of honey instead of some brown sugar. The honey adds a nice floral taste. It also helps the carrots caramelize nicely. This will enhance the sweet flavor and create a deeper glaze. For those who love heat, increase the cayenne pepper in your recipe. You can add up to half a teaspoon for a stronger kick. The heat from the cayenne pairs well with the sweetness of the brown sugar. You can also try adding a dash of chili powder. This will give your carrots a unique twist and a fun flavor. Roasting offers a different texture and taste for your carrots. To roast, preheat your oven to 425°F (220°C). Toss the peeled carrots with butter and seasonings. Then, spread them on a baking sheet. Roast for about 20 minutes, stirring halfway. Once they are tender and lightly browned, drizzle the brown sugar glaze over them. This method brings out natural sweetness and gives a nice caramelized look. To store leftover glazed carrots, let them cool to room temperature. Place them in an airtight container. Make sure to seal it tightly. Keep the container in the fridge. They will last for about 3 to 5 days. When you want to reheat the glazed carrots, take them out of the fridge. You can use a microwave or a skillet. If using the microwave, heat on medium power for about 1 to 2 minutes. Stir halfway through to warm evenly. For a skillet, add a splash of water and heat over medium heat. Stir gently until heated through. You can freeze glazed carrots if you want to keep them longer. First, let them cool completely. Then, place them in a freezer-safe bag or container. Remove as much air as possible to prevent freezer burn. Label the bag with the date. They can be frozen for up to 3 months. When ready to eat, thaw in the fridge overnight before reheating. Yes, you can use frozen carrots. Just remember to thaw them first. This helps the carrots cook evenly. You may need to adjust the cooking time a bit. To make this dish vegan, swap the butter for a plant-based option. Use coconut oil or vegan butter instead. The glaze will still taste sweet and delicious! These glazed carrots pair well with many dishes. Try serving them with roasted chicken or grilled fish. They also go great with quinoa or rice dishes. To change the sweetness, add more or less brown sugar. For a sweeter taste, increase the sugar by a tablespoon. If you prefer it less sweet, cut back on the sugar. You can also add a splash of vinegar for a tangy twist! This blog post covered everything you need to make perfect brown sugar glazed carrots. We explored essential ingredients, step-by-step instructions, and tips for success. You learned about sweet and spicy variations, plus smart storage ideas. Enjoy creating this simple, tasty dish. With the right technique, you can wow your guests or family. Remember, small changes can lead to exciting flavors. Happy cooking!

Brown Sugar Glazed Carrots Flavorful Side Dish Recipe

To make the best strawberry cheesecake dip, you need a few simple ingredients. Here’s what you will need: - 1 cup cream cheese, softened - ½ cup powdered sugar, sifted - 1 teaspoon pure vanilla extract - ½ cup sour cream, at room temperature - 1 cup fresh strawberries, hulled and diced - ¼ cup crushed graham crackers - Fresh mint leaves for garnish Each ingredient plays an important role in the dip. The cream cheese gives it that rich and creamy base. The powdered sugar adds just the right sweetness. Vanilla extract brings in a warm flavor, while sour cream adds a slight tang. Fresh strawberries are key for that fruity taste. Crushed graham crackers add a bit of crunch, and mint leaves make it look pretty! You can find these ingredients at any grocery store. Make sure to choose ripe strawberries for the best flavor. This dip is quick to prepare, taking only about 10 minutes. Once you have everything ready, you can start mixing and enjoy this delightful treat! {{ingredient_image_2}} - Mixing cream cheese and powdered sugar Start by taking a medium bowl. Add 1 cup of softened cream cheese. Then, sprinkle in ½ cup of sifted powdered sugar. Use a hand mixer to blend them on medium speed. Mix until the blend is smooth and creamy, with no lumps. This step is key for a rich flavor. - Adding vanilla extract and sour cream Next, add 1 teaspoon of pure vanilla extract to the mix. Then, scoop in ½ cup of sour cream. Continue mixing on medium speed for about 2-3 minutes. You want the mixture to be fluffy and well combined. This adds a nice depth of flavor to your dip. - Folding in fresh strawberries Now, prepare 1 cup of fresh strawberries. Make sure to hull and dice them first. Gently fold them into the cream mixture with a spatula. Be careful not to mash the strawberries. This keeps the lovely pieces intact for a burst of freshness. - Serving suggestions Spoon the creamy dip into a decorative bowl for a nice touch. Sprinkle ¼ cup of crushed graham crackers on top. This creates a fun layer that adds crunch. For a pop of color, add fresh mint leaves as a garnish. Serve the dip right away. Pair it with crisp apple slices, extra graham crackers, or pretzels. You can also chill it for about 30 minutes for a refreshing twist. Enjoy! - Achieving the right creaminess Start with room temperature cream cheese. This helps it blend smoothly with the sugar. Beat the mixture well until it’s lump-free. If you want extra creaminess, add a bit more sour cream. This will add a nice texture to your dip. - Properly folding in strawberries When you add the strawberries, use a spatula. Gently fold them in to keep the fruit intact. This keeps the dip looking beautiful and fresh. You want to see those bright red pieces throughout. - Presentation and serving Use a decorative bowl to serve your dip. It makes a big difference! Sprinkle crushed graham crackers on top. This adds a nice crunch and looks great. Garnish with mint leaves for a splash of color. Serve with apple slices, pretzels, or extra graham crackers. This mix of flavors and textures makes for a fun treat! Pro Tips Use Room Temperature Ingredients: Allow your cream cheese and sour cream to come to room temperature before mixing. This helps achieve a smoother and creamier texture in your dip. Fresh Strawberries are Key: Use fresh, ripe strawberries for the best flavor. Frozen strawberries can release excess moisture, making the dip watery. Chill for Extra Refreshment: Refrigerating the dip for 30 minutes not only enhances the flavors but also makes it a refreshing treat, especially on a warm day. Experiment with Dippers: While apple slices and graham crackers are classic dippers, consider using pretzels, cookie sticks, or even fruit skewers for a fun variety. {{image_4}} You can make this dip even more fun with some flavor twists. Here are a few ideas: - Chocolate Strawberry Cheesecake Dip: Just add 1/4 cup of cocoa powder to the mix. This gives the dip a rich chocolate taste. The chocolate pairs well with the strawberries. It feels like dessert and is perfect for chocolate lovers. - Citrus-infused Strawberry Dip: Add the zest of one lemon or orange. This brightens up the dip with a fresh taste. The citrus cuts through the creaminess, making each bite refreshing. - Adding different fruits or nuts: You can mix in other fruits like blueberries or raspberries. Chopped nuts like almonds or walnuts give a crunchy texture. These additions make the dip unique and personal to your taste. Experiment with these ideas and find your favorite. Each variation brings a new twist to the classic strawberry cheesecake dip! After enjoying your Strawberry Cheesecake Dip, you might have some left. Here’s how to keep it fresh: - Refrigeration guidelines: Store the dip in an airtight container. It keeps well in the fridge for up to three days. Make sure to cover it tightly to avoid any air exposure. - Freezing suggestions: You can freeze the dip for up to a month. Use a freezer-safe container and leave some space at the top. The dip may change texture when thawed, so it’s best to enjoy it fresh. - Best practices for maintaining flavor and texture: When you want to serve it again, let it thaw in the fridge overnight. Stir gently to restore creaminess. If needed, add a bit of sour cream to help revive its smooth texture. Can I use low-fat cream cheese? Yes, you can use low-fat cream cheese. It still gives you a smooth dip. The taste may be a bit different, but it will work well. How long can I store Strawberry Cheesecake Dip? You can store this dip in the fridge for up to three days. Make sure to keep it in an airtight container. This helps keep it fresh and tasty. What are the best dippers to serve with this dip? Some great dippers are apple slices, pretzels, and graham crackers. You can also try fresh fruit like bananas or blueberries. The crunch pairs well with the dip's creaminess. Can I prepare the dip in advance? Yes, you can make the dip a few hours ahead. Just cover it and chill in the fridge. This lets the flavors blend nicely. Is there a vegan version of Strawberry Cheesecake Dip? Yes, you can make a vegan version. Use vegan cream cheese and dairy-free yogurt. It will still taste great and be creamy! This blog post covered a delicious Strawberry Cheesecake Dip recipe. We explored the key ingredients, step-by-step instructions, and helpful tips for perfecting your dip. We also shared creative flavor variations and storage advice to keep it fresh. In conclusion, this dip is simple, tasty, and fun to make. You can easily customize it for your taste. Enjoy making this treat for yourself or at your next gathering!

Strawberry Cheesecake Dip Rich and Creamy Delight

To make chocolate chip banana pancakes, you need the following items: - 1 cup all-purpose flour - 2 tablespoons granulated sugar - 1 tablespoon baking powder - 1/2 teaspoon fine sea salt - 1 cup whole milk - 1 large ripe banana, thoroughly mashed - 1 large egg, lightly beaten - 2 tablespoons unsalted butter, melted (plus extra for frying) - 1/2 cup semi-sweet chocolate chips - 1/2 teaspoon pure vanilla extract These ingredients blend together to create delicious pancakes. Each item plays a role in flavor and texture. The mashed banana adds sweetness and moisture. The chocolate chips give a rich, sweet touch. You can elevate your pancakes with these tasty toppings: - Fresh sliced bananas - Fluffy whipped cream - Warm maple syrup Adding these toppings makes each bite extra special. They also add more flavor and texture. If you need to change an ingredient, here are some ideas: - Use whole wheat flour instead of all-purpose flour for a healthier option. - Almond milk can replace whole milk for a dairy-free choice. - If you don’t have chocolate chips, try chopped nuts or dried fruit. These substitutions keep the pancakes tasty and fun. Feel free to experiment and find your favorite combinations! {{ingredient_image_2}} Start by gathering your ingredients. In a large bowl, add 1 cup of all-purpose flour. Next, mix in 2 tablespoons of granulated sugar. Then, add 1 tablespoon of baking powder. Finally, sprinkle in 1/2 teaspoon of fine sea salt. Use a whisk to blend these dry ingredients until smooth. This step is key to a light and fluffy pancake. In another bowl, mash 1 large ripe banana until it is very smooth. Add 1 cup of whole milk to the mashed banana. Then, crack in 1 large egg and lightly beat it. Pour in 2 tablespoons of melted unsalted butter along with 1/2 teaspoon of pure vanilla extract. Whisk this mixture until it is creamy and well combined. This will add flavor and moisture to your pancakes. Now, pour the wet mixture into the dry ingredients. Stir gently with a spatula until just combined. It’s okay if there are a few lumps. Overmixing will make your pancakes tough. Next, fold in 1/2 cup of semi-sweet chocolate chips carefully. Preheat a non-stick skillet over medium heat. Add a small pat of butter to coat the skillet. Pour about 1/4 cup of batter for each pancake. Cook until bubbles form, about 2-3 minutes. Flip the pancake and cook for another 1-2 minutes until golden brown. Continue with the rest of the batter, adding more butter as needed. Enjoy your warm, fluffy pancakes! To make your pancakes fluffy, do not overmix the batter. When you combine the dry and wet ingredients, stir gently. Leave some lumps in the batter. This helps keep air bubbles, which make pancakes rise. Also, use fresh baking powder. Old baking powder may not work well. To prevent sticking, always use a non-stick skillet. Heat the skillet to medium before adding batter. Once hot, add a small pat of unsalted butter. Let it melt and coat the pan. If you see the butter bubbling, it’s ready. Flip the pancakes gently to keep them intact. If you have leftovers, let the pancakes cool completely. Stack them with parchment paper between each pancake. Place them in an airtight container and store in the fridge for up to three days. To reheat, use a microwave or toaster oven. Heat until warm, not hot, to keep them soft. Pro Tips Use Ripe Bananas: The riper the banana, the sweeter your pancakes will be. Look for bananas with plenty of brown spots for maximum flavor. Don’t Overmix: When combining wet and dry ingredients, mix until just combined. A few lumps are okay; overmixing can result in tough pancakes. Keep the Heat Moderate: Cooking on medium heat allows the pancakes to cook evenly without burning. Adjust the heat as necessary to maintain an even cooking temperature. Experiment with Mix-ins: Feel free to customize your pancakes by adding nuts, dried fruit, or a sprinkle of cinnamon for an extra flavor boost. {{image_4}} You can easily make these pancakes nut-free. Just skip any nut toppings. Use sunflower seed butter instead of traditional nut butter if you want a spread. This keeps the flavor rich without adding nuts. To make this recipe dairy-free, swap whole milk with almond milk or oat milk. You can use coconut oil instead of butter. This gives your pancakes a tasty twist while keeping them soft and fluffy. Want to mix things up? Add spices like cinnamon or nutmeg to the batter. You can also fold in fruits like blueberries or strawberries. For a fun twist, try adding peanut butter chips or white chocolate. These variations create new flavors every time! To keep your leftover pancakes fresh, stack them neatly on a plate. Use parchment paper between the pancakes to prevent sticking. Cover with plastic wrap or aluminum foil. You can store them in the fridge for up to three days. This way, they stay soft and tasty for your next meal. Freezing pancakes is simple and smart. First, let the pancakes cool down completely. Then, stack them with parchment paper in between. Place the stack in a freezer-safe bag or container. They can last up to three months in the freezer. When you’re ready to enjoy them, just pull out what you need! To reheat pancakes, you have a few options. The microwave is quick: just heat for 20-30 seconds. If you want them crispy, use a skillet. Heat a little butter in the pan and warm the pancakes for about one minute on each side. You can also use an oven at 350°F. Wrap pancakes in aluminum foil and heat for about 10 minutes. Enjoy them warm for a delightful breakfast! Yes, you can make these pancakes ahead of time. Cook the pancakes and let them cool. Stack them with parchment paper between each pancake. Place the stack in an airtight container. Store it in the fridge for up to three days. You can also freeze them for up to two months. To reheat, use a toaster or microwave. This keeps them warm and tasty. If you want to switch things up, use different mix-ins. Try chopped nuts, like walnuts or pecans. You can also use dried fruits, like raisins or cranberries. For a fun twist, add peanut butter chips or white chocolate chips. Each option gives you a unique flavor in your pancakes. Watch for bubbles on the pancake's surface. When you see bubbles forming, it's time to flip. Cook the other side until it turns golden brown, about one to two minutes. A toothpick can help too. Insert it into the center of the pancake. If it comes out clean, they are done cooking. This blog post covered how to make perfect pancakes from start to finish. You learned about the essential ingredients and fun toppings. I shared tips for fluffy pancakes and how to avoid sticking. You can adapt the recipe for dietary needs and store leftovers easily. My final thought is that cooking should be fun and tasty. Enjoy making pancakes that suit your style!

Chocolate Chip Banana Pancakes Tasty Morning Treat

- 1 cup all-purpose flour - 1/2 teaspoon baking soda - 1/4 teaspoon salt - 1/2 cup unsalted butter, softened - 3/4 cup packed brown sugar - 1/4 cup granulated sugar - 2 teaspoons vanilla extract - 1 cup mini chocolate chips - 1/4 cup milk (adjust as needed) - 1 cup semisweet chocolate chips, for coating - 1 tablespoon coconut oil (optional) - Mixing bowls - Electric mixer - Spatula - Baking sheet - Parchment paper - Microwave-safe bowl - Fork or dipping tool - Use whole wheat flour for a healthier option. - Swap unsalted butter with coconut oil for a dairy-free treat. - Replace mini chocolate chips with chopped nuts for added crunch. - Use dark chocolate chips for a richer flavor in the coating. - If you’re out of vanilla, try almond extract for a different taste. {{ingredient_image_2}} To start, gather your ingredients. In a medium bowl, whisk together these items: - 1 cup all-purpose flour - 1/2 teaspoon baking soda - 1/4 teaspoon salt Make sure they mix well. Set this bowl aside for later. Next, take a large mixing bowl. Add in these ingredients: - 1/2 cup unsalted butter, softened - 3/4 cup packed brown sugar - 1/4 cup granulated sugar Use an electric mixer on medium speed. Mix until light and fluffy, which takes about 2 to 3 minutes. This step is key for a great texture. Now, pour in 2 teaspoons of vanilla extract. Mix again until fully blended with the butter and sugars. Time to combine the mixtures. Gradually add the dry ingredients to the wet mix. Use a spatula or the mixer on low speed. Don’t overmix; just combine until it’s smooth. If the dough looks too dry, add 1/4 cup of milk, one tablespoon at a time. You want it soft but moldable. Now, gently fold in 1 cup of mini chocolate chips. Make sure they are evenly spread in the dough. For forming, take a tablespoon or cookie scoop. Portion out the dough and roll it into small balls, about 1-inch wide. Place these on a lined baking sheet. Chill the dough balls in the fridge for 30 minutes. This helps them firm up. While they chill, melt 1 cup of semisweet chocolate chips in a microwave-safe bowl. You can add 1 tablespoon of coconut oil to make it smoother. Microwave in 30-second bursts, stirring each time until smooth. Once melted, use a fork to dip each chilled dough ball in the chocolate. Make sure it’s fully coated. Let any extra chocolate drip back into the bowl. Then place them back on the lined sheet. Chill the coated truffles for another 15-20 minutes. This allows the chocolate to set firm. Enjoy your sweet truffles once the chocolate is firm! To get the right dough, you need to mix well. Start by whisking the dry ingredients. This helps the flour, baking soda, and salt blend evenly. When mixing the butter and sugars, make sure it’s light and fluffy. If your dough feels too dry, add milk slowly. A little at a time helps you find the perfect soft texture. The dough should feel moldable but not sticky. When melting chocolate, patience is key. Use a microwave-safe bowl to avoid mess. Heat the chocolate in short bursts, about 30 seconds at a time. Stir well between each burst. This helps prevent burning and keeps the chocolate smooth. If you want a shiny finish, add coconut oil. It makes the coating look great and feel nice too. For even-sized truffles, use a tablespoon or cookie scoop. This ensures each ball is the same size. Roll the dough gently between your hands to shape it. If the dough sticks, slightly dampen your hands to help. Place the formed truffles on parchment paper. Refrigerate them to firm up before dipping. This step makes coating easier and cleaner. Pro Tips Chill the Dough: Refrigerating the dough before rolling it into balls helps to firm it up, making it easier to shape and coat. Use High-Quality Chocolate: For the best flavor, opt for high-quality semisweet chocolate chips for coating your truffles. Experiment with Flavors: Try adding a pinch of sea salt or a splash of espresso powder to the dough for a unique flavor twist. Keep Coating Warm: If the chocolate starts to harden while dipping, gently reheat it in the microwave in short intervals to keep it smooth. {{image_4}} You can change the flavor of your truffles to keep things fun. Here are a few ideas: - Nutty: Add chopped nuts, like walnuts or pecans, to the dough. - Minty: Mix in mint extract for a fresh taste. - Spiced: Add a pinch of cinnamon or nutmeg for warmth. These small changes can create a whole new treat! The chocolate coating is key to your truffles. Here are some options: - White Chocolate: This adds a sweet and creamy layer. - Dark Chocolate: For a richer flavor, use dark chocolate chips. - Sprinkles: Roll the truffles in colorful sprinkles for a fun touch. Experiment with these coatings to find your favorite! You can make these truffles a bit healthier too. Try these tips: - Reduced Sugar: Cut back on the sugars in the dough. - Gluten-Free: Use gluten-free flour instead of all-purpose flour. - Nut Butter: Swap some butter for almond or peanut butter for added protein. These tweaks can make your treats a little lighter while still being delicious! To keep your cookie dough truffles fresh, place them in an airtight container. You can stack them gently to save space. I recommend separating layers with parchment paper. This method helps prevent them from sticking together. Store the container in the fridge for best taste and texture. If you want to save some truffles for later, freezing is a great option. First, let the truffles cool completely. Then, place them in a single layer on a baking sheet. Freeze them for about an hour until solid. After that, transfer them to a freezer-safe bag. Be sure to remove as much air as possible. They can last up to three months in the freezer. When stored properly in the fridge, your cookie dough truffles can last about one week. If you freeze them, they will stay fresh for three months. Just remember to label the container with the date. This way, you can enjoy your sweet treat at its best! Yes, you can eat the cookie dough raw. However, it is important to note that raw flour can carry bacteria. To make it safer, heat the flour first. Spread it on a baking sheet and bake at 350°F for about five minutes. Let it cool before using it in your dough. This step helps kill any bacteria and makes the dough safer to eat. The best way to melt chocolate is in the microwave. Place your chocolate chips in a microwave-safe bowl. Heat them in 30-second bursts. After each burst, stir the chocolate well. This method helps prevent burning. You can also use a double boiler on the stove. Just place a bowl over simmering water. Stir until melted. Both methods work well to get smooth chocolate for coating. These truffles can last up to one week in the fridge. Store them in an airtight container. If you want them to last longer, you can freeze them. Just place them in a freezer-safe container. They can stay fresh for up to three months in the freezer. When you're ready to eat them, thaw in the fridge overnight. Enjoy these sweet delights! Making cookie dough truffles is fun and simple. You learned about the key ingredients, tools, and how to substitute if needed. I shared clear steps for mixing and rolling the dough. Tips helped ensure your truffles have the right texture. You also discovered tasty variations and how to store them properly. Remember, these truffles are versatile. Enjoy experimenting with flavors and coatings. Follow these tips, and you will impress everyone with your homemade treats!

Chocolate Chip Cookie Dough Truffles Sweet Delight

- 1 large head of cauliflower, cleaned and cut into florets - 1 medium onion, finely diced - 4 cloves of garlic, minced - 3 cups vegetable broth (homemade or store-bought) - 1 cup coconut milk (or heavy cream for a richer taste) - 2 tablespoons extra virgin olive oil - 1 teaspoon ground cumin - 1/2 teaspoon ground turmeric - Salt and freshly ground black pepper, to taste - Juice of 1/2 fresh lemon - Fresh chives or parsley, chopped for garnish I love using fresh ingredients. They make the soup shine. The star here is the cauliflower. It gives a rich, creamy base. You want to start with a large head of cauliflower. Cut it into small florets. This helps it roast evenly. Aromatics are key. I use one medium onion and four cloves of garlic. Chop these finely. They add sweet and savory notes. Next, the broth. You can use homemade vegetable broth or store-bought. Either works well. For creaminess, I add one cup of coconut milk or heavy cream. Coconut milk is great for a dairy-free option. Seasonings bring out flavors. I add two tablespoons of extra virgin olive oil, one teaspoon of ground cumin, and half a teaspoon of ground turmeric. Don't forget salt and black pepper to taste. Lastly, finish with fresh herbs. I love using chives or parsley for garnish. They add a pop of color and flavor. Enjoy gathering these ingredients! They set the stage for a warm, comforting soup. {{ingredient_image_2}} Cleaning and Cutting Start by rinsing the cauliflower under cold water. Remove any dirt or grit. Cut the head into florets. Make sure they are of similar size. This helps them cook evenly. Seasoning and Arranging on Baking Sheet In a bowl, mix the florets with olive oil, salt, pepper, cumin, and turmeric. Toss them well. Spread the seasoned florets on a large baking sheet. Keep them in a single layer for best roasting. Oven Temperature and Timing Preheat your oven to 425°F (220°C). This hot temperature helps the cauliflower brown nicely. Roast for 25-30 minutes. The florets should be golden brown and soft. Importance of Turning Florets About halfway through roasting, turn the florets. This ensures even cooking and browning. It helps all sides get that delicious roasted flavor. Sautéing Onion and Garlic In a large pot, heat some oil over medium heat. Add the diced onion and cook for about 5 minutes. Stir often until the onion turns soft and clear. Then, add the minced garlic. Cook for 1-2 minutes more. Make sure the garlic does not burn. Combining Ingredients Once the cauliflower is done roasting, add it to the pot. Pour in the vegetable broth. Bring this mixture to a gentle simmer. Let it cook for 5-10 minutes to blend the flavors. Using an Immersion Blender Take your immersion blender and blend the soup until smooth. This creates a creamy texture. If you don’t have one, you can use a regular blender. Transferring to a Standard Blender If using a standard blender, let the soup cool a bit. Blend in batches if needed. Return the blended soup to the pot afterward. Incorporating Coconut Milk or Heavy Cream Stir in the coconut milk or heavy cream. This gives the soup a rich taste. Add the juice of half a lemon for brightness. Adjusting Seasoning and Temperature Taste the soup. Add more salt or pepper if needed. Heat it gently until warm. Avoid boiling to keep the flavors fresh. Achieving the Ideal Texture To make great soup, start with the perfect roast. Roast cauliflower at 425°F (220°C). This gives it a nice, crisp texture. Spread the florets out on a baking sheet. Make sure they are not crowded. This helps them roast evenly. Toss them with olive oil, salt, and spices. The cumin and turmeric add a warm flavor. Roast for 25-30 minutes. It should be golden brown and tender. Flavor Enhancements To boost flavor, add spices before roasting. Ground cumin gives warmth, while turmeric adds a golden hue. You can also mix in some garlic. Just a few cloves can make a big difference. If you want a hint of zest, squeeze fresh lemon juice in the soup. It brightens the flavor and lifts the dish. Using the Right Equipment Use an immersion blender for smooth soup. It is easy and keeps everything in one pot. If you don’t have one, a regular blender works too. Just be careful. Blend in small batches to avoid spills. Avoiding Over-Blending Blend just until smooth. If you blend too long, the soup can get too thin. Aim for a creamy texture that coats your spoon. This makes each bite feel rich and satisfying. Pairing with Bread Serve your soup with warm bread. A crusty baguette or soft rolls work well. They add a nice contrast to the creamy soup. You can dip the bread or enjoy it on the side. Presentation Ideas Make your soup look special. Use bowls that show off the color. Garnish with fresh chives or parsley. This adds a pop of green and makes the dish inviting. A drizzle of coconut milk on top can also look nice. Enjoy your meal and impress your guests! Pro Tips Roasting for Flavor: Roasting the cauliflower until golden brown enhances its natural sweetness and adds a depth of flavor to the soup. Texture Matters: For a creamier soup, ensure that you blend the mixture thoroughly until smooth. An immersion blender makes this process simple and mess-free. Experiment with Garnishes: Fresh herbs like chives or parsley not only add color but also brighten the flavor of the soup. Try adding a drizzle of olive oil or a sprinkle of chili flakes for an extra kick. Adjusting Creaminess: If you prefer a richer soup, substitute the coconut milk with heavy cream or add more coconut milk for a dairy-free option. {{image_4}} - Using coconut milk gives the soup a creamy texture without dairy. Coconut milk adds a slight sweetness, which balances the flavors. You can swap heavy cream with one cup of coconut milk. This choice makes the soup vegan-friendly too. If you want more richness, use full-fat coconut milk. - Spices and herbs for flavor: You can play with spices like smoked paprika or curry powder. Fresh herbs like thyme or rosemary can add depth. Just add a teaspoon of your choice when cooking the onions and garlic. They will blend well with the roasted cauliflower. - Incorporating other vegetables: Consider adding carrots or potatoes for extra nutrition. Chop them small and roast them with the cauliflower. This will enhance the soup’s texture and flavor. - Adding potatoes or nuts: If you want a thicker soup, try adding potatoes. Peel and chop them, then cook with the cauliflower. Alternatively, blend in cashews or almonds. Soak them in water first to soften. Both options will give your soup a nice creamy texture. How long does the soup last? The creamy roasted cauliflower soup stays fresh in the fridge for about 3 to 5 days. Store it in a clean container. What are proper storage containers? Use airtight containers to keep the soup fresh. Glass jars or plastic containers work well. Label them with the date to track how long they have been stored. What are the best practices for freezing? For freezing, let the soup cool completely before transferring it to freezer-safe containers. Leave some space at the top, as soup expands when frozen. It stays good for 2 to 3 months. What are thawing and reheating tips? To thaw, place the soup in the fridge overnight. You can also use the microwave on low power. When reheating, do it slowly on the stove. Stir often so it heats evenly. Adjust seasoning if needed before serving. Yes, you can use frozen cauliflower. Just keep in mind it may have more water. This can change the soup’s texture a bit. If using frozen, skip the roasting step. You can add it directly to the pot with the broth. Cook for about 10-15 minutes, until tender. Then blend as usual. You can use chicken broth or water if you prefer. If you want a richer flavor, try using homemade broth. You can also mix in some herbs or spices to boost the taste. Just make sure to check for salt, as some broths can be salty. Yes, this recipe is vegan-friendly. Use coconut milk as your cream. This gives a rich flavor without dairy. Just ensure your vegetable broth is also vegan. Some store-bought broths may have animal products, so read the label. To add spice, include red pepper flakes or a dash of hot sauce. You can also add fresh jalapeños while cooking the onions. Start with a small amount, then taste as you go. This way, you can control the heat level to your liking. Yes, you can make this soup ahead of time. Just let it cool completely before storing it. Keep it in a sealed container in the fridge for up to 3 days. You can reheat it on the stove or in the microwave. Just stir well and check the temperature before serving. This post guides you through making a delicious cauliflower soup. We covered key ingredients, step-by-step instructions, and helpful tips. You learned how to roast cauliflower, blend the soup, and even variations to try. Remember, proper storage helps maintain freshness. With these insights, you can craft a tasty bowl of soup to enjoy. Keep experimenting with flavors and sharing your creations! Great cooking lets your creativity shine.

Creamy Roasted Cauliflower Soup Easy and Delicious Recipe

PREV 1 … 43 44 45 … 49 NEXT
mini chef kitchen

explore

DessertsDinnerAppetizersDrinks

Our Policies

  • Cookie Policy
  • Copyright Policy
  • Disclaimer
  • GDPR Policy
  • Terms Of Use
Back to Top
  • About
  • Contact Us
  • Privacy Policy
© 2026 mini chef kitchen