FREE DINNER EBOOK! Get your copy!
  • Cookie Policy
  • GDPR Policy
  • Disclaimer
  • Terms Of Use
  • Visit my other site: Fun Cookie Recipes
mini chef kitchen
  • Home
  • Dinner
  • Desserts
  • Drinks
  • Appetizers
  • Contact
  • About
  • Privacy Policy
  • Home
  • Dinner
  • Desserts
  • Drinks
  • Appetizers
  • Contact
  • About
  • Privacy Policy
  • Cookie Policy
  • GDPR Policy
  • Disclaimer
  • Terms Of Use
Visit my other site: Fun Cookie Recipes

HOME / CATEGORIES /

Latest

For a creamy and rich vanilla bean rice pudding, gather these key ingredients: - 1 cup Arborio rice - 4 cups full-fat milk - 1 cup creamy coconut milk - 1 fragrant vanilla bean (split and seeds scraped) - 1/2 cup granulated sugar - 1/4 teaspoon fine sea salt - 1/2 teaspoon ground cinnamon (optional) - 1 teaspoon pure vanilla extract These ingredients work together to create a dreamy texture and flavor. The Arborio rice gives it a nice creaminess, while the vanilla bean adds a lovely aroma. To make your pudding even more special, you can add these garnishes: - Fresh berries (like strawberries, blueberries, or raspberries) - Crunchy toasted coconut flakes These toppings add freshness and a delightful crunch to each bite. If you want to switch things up, consider these substitutions: - Use almond milk or oat milk instead of full-fat milk for a lighter option. - Swap the granulated sugar with maple syrup or honey for a natural sweetness. - For a different flavor, try adding a dash of nutmeg or cardamom in place of cinnamon. These changes can make the pudding fit your taste or dietary needs while keeping it delicious. {{ingredient_image_2}} Start by rinsing the Arborio rice. Use cold water and let it run until clear. This step removes extra starch. It helps make the pudding creamy. In a large saucepan, add the rinsed rice. Pour in the full-fat milk and coconut milk. Split the vanilla bean and scrape the seeds into the pot. Add the pod too. The mix of milks gives rich flavor. Stir in the sugar and sea salt. Mix well to combine everything. Set the heat to medium and bring the mix to a gentle boil. Once it boils, lower the heat. Stir occasionally to keep the rice from sticking. Let it simmer gently for about 30-35 minutes. The rice should be soft, and the pudding creamy. If it gets too thick, add more milk. After the rice is cooked, take the pot off the heat. Remove the vanilla bean pod. Stir in ground cinnamon and pure vanilla extract if you want extra flavor. Let the pudding cool a bit before serving. You can enjoy it warm or chilled. For a great presentation, use individual bowls or glass cups. Top each serving with fresh berries and toasted coconut flakes. This adds color and crunch. Enjoy your creamy delight! To get that creamy texture, start with Arborio rice. This rice has a high starch content that helps thicken the pudding. Rinse the rice well before cooking. This removes excess starch and keeps the pudding from becoming too sticky. When cooking, combine full-fat milk and coconut milk. This mix adds richness. Stir the pudding often and cook it on low heat. Slow cooking is key to creaminess. If it thickens too much, just add a splash of milk. You can easily change the flavor of your rice pudding. Try adding a pinch of nutmeg for warmth. A splash of almond extract can also add a nice twist. For a fruity touch, mix in some lemon zest. If you love chocolate, consider adding cocoa powder or chocolate chips. Fresh berries make great toppings, too. They add color and freshness to each bite. Avoid cooking the rice on high heat. This can burn the bottom and ruin your pudding. Don't skip rinsing the rice, as it helps with texture. If you cook the pudding for too long, it can become too thick. Always check the consistency towards the end. Lastly, remember to remove the vanilla bean pod before serving. It adds flavor, but you don’t want to bite into it. Pro Tips Rinse the Rice: Rinsing Arborio rice before cooking helps remove excess starch, leading to a creamier texture in your pudding. Adjust Consistency: If the pudding thickens too much during cooking, add a splash of milk to reach your desired creaminess. Enhance Flavor: For an extra layer of flavor, consider adding a pinch of nutmeg or a splash of almond extract along with the vanilla. Serving Suggestions: Serve warm or chilled; both are delicious! Garnish with fresh berries and toasted coconut for added texture and visual appeal. {{image_4}} You can make a chocolate twist on this rice pudding. Start by adding 1/2 cup of cocoa powder to the rice and milk mixture. This adds rich chocolate flavor. Stir it well before you heat the mix. The cocoa will blend nicely with the vanilla. You can also add chocolate chips as a topping. This gives a sweet touch that chocolate lovers will enjoy. For a fruity version, you can add fresh fruits during cooking. Try adding 1 cup of diced apples or pears. You can also use berries like strawberries and blueberries. Add the fruit in the last 10 minutes of cooking. This allows the fruit to soften but still keep its shape. It adds freshness and color to your dish. For a tropical vibe, consider adding diced mango or pineapple. To make this rice pudding vegan, swap dairy milk for plant-based milk. Use almond, soy, or oat milk instead of full-fat milk. You can keep the coconut milk for creaminess. For sweetening, use maple syrup or agave nectar in place of sugar. This keeps it sweet and plant-based. Follow the same steps for cooking. Enjoy this delicious vegan option that everyone can savor! Store your vanilla bean rice pudding in an airtight container. It keeps well in the fridge for about 4 days. Make sure to let it cool before sealing. This helps prevent extra moisture from forming inside the container. If you see any skin forming on top, just stir it in before serving. You can freeze rice pudding for longer storage. Use a freezer-safe container for this. Leave some room at the top for expansion. It can last up to 3 months in the freezer. When you’re ready to enjoy it, move it to the fridge overnight to thaw. To reheat, gently warm the rice pudding on the stove over low heat. Stir in a splash of milk if it seems too thick. You can also use the microwave. Heat in short intervals, stirring in between. This keeps the pudding creamy and delicious. Yes, you can use different types of rice. Arborio rice is great for creaminess. You can also try short-grain white rice. Long-grain rice works too, but it may not be as creamy. If you prefer a nuttier flavor, consider using brown rice. Just note that cooking times will change. Brown rice takes longer to cook. Rice pudding stays good in the fridge for about four to five days. Make sure to store it in an airtight container. If you see any signs of spoilage, like off smells or mold, throw it away. Always check it before you dig in! Yes, you can make rice pudding ahead of time. It’s perfect for meal prep or special events. Just follow the cooking directions and let it cool before storing. When ready to serve, you can reheat it on the stove or in the microwave. Add a splash of milk if it seems too thick. Enjoy it warm or chilled! This blog post covered the main ingredients, step-by-step instructions, and tips for making vanilla bean rice pudding. You learned about optional garnishes, cooking methods, and common mistakes to avoid. We explored tasty variations like chocolate and vegan options. Finally, I shared storage tips and answered key FAQs. Making rice pudding is fun and rewarding. With this guide, you can easily create a creamy, delicious dessert. Enjoy your cooking!

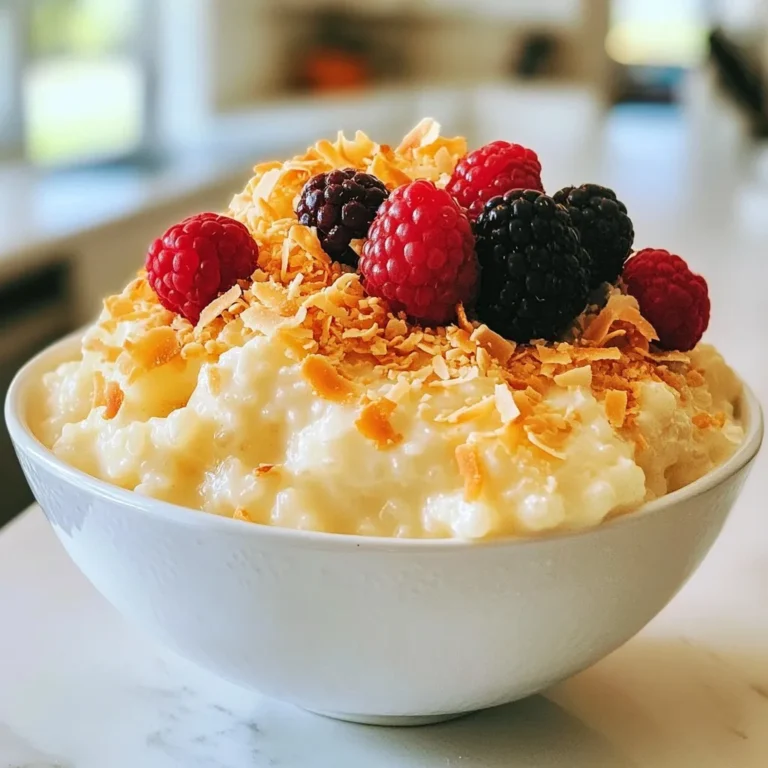
Vanilla Bean Rice Pudding Creamy Delight Recipe

- 12 large portobello or cremini mushrooms, stems carefully removed - 2 cups fresh spinach, finely chopped - 1 cup cream cheese, softened to room temperature - 1/2 cup mozzarella cheese, freshly shredded - 1/4 cup Parmesan cheese, finely grated I love using portobello or cremini mushrooms for this recipe. They have a nice shape and a rich flavor. The fresh spinach adds color and nutrition. Cream cheese gives the filling a creamy texture. Mozzarella and Parmesan cheeses bring a great taste and help the filling melt beautifully. - 2 cloves garlic, minced - 1/4 teaspoon red pepper flakes (optional, for a hint of heat) - 1 tablespoon extra virgin olive oil - Salt and freshly cracked pepper, to taste Garlic adds a lovely aroma to the mushrooms. If you like a little heat, the red pepper flakes give a nice kick. Olive oil helps to sauté the garlic and spinach. Always use fresh salt and pepper to season the filling. - Fresh parsley, finely chopped Fresh parsley makes a lovely garnish. It adds a pop of color and a fresh taste. Sprinkling it on top right before serving makes the dish look fancy. These ingredients come together to create a tasty and satisfying appetizer. Cheesy spinach stuffed mushrooms are a hit at any gathering! {{ingredient_image_2}} Preheat the Oven Start by setting your oven to 375°F (190°C). This hot oven will help cook the mushrooms perfectly. Sauté Garlic and Spinach In a large skillet, heat one tablespoon of olive oil over medium heat. Once the oil is hot, add two minced cloves of garlic. Cook this for about one minute, stirring often. You want the garlic to smell nice but not burn. Next, add two cups of finely chopped fresh spinach. Sauté for about two to three minutes. The spinach should turn bright green and wilted. When done, remove the skillet from heat and let it cool for a bit. Mixing Cheese Ingredients In a mixing bowl, combine one cup of softened cream cheese, half a cup of shredded mozzarella cheese, and a quarter cup of grated Parmesan cheese. Then, add the sautéed spinach and garlic from earlier. Seasoning the Mixture If you like a bit of spice, add a quarter teaspoon of red pepper flakes. Season your cheese mixture with salt and freshly cracked pepper. Stir everything well until it’s creamy and mixed together. Stuffing the Mushrooms Take twelve large portobello or cremini mushrooms. Carefully remove their stems. Using a spoon, fill each mushroom cap with the cheese mixture. Press down gently to fill them nicely. Preparing for Baking Line a baking sheet with parchment paper. Place the stuffed mushrooms on the sheet, making sure they have some space around them. This space helps them cook evenly. Baking Time and Temperature Now, put the baking sheet into your preheated oven. Bake the mushrooms for about 20 to 25 minutes. You’ll know they’re ready when the mushrooms are tender and the cheese is bubbly and golden on top. Enjoy your delicious cheesy spinach stuffed mushrooms! - How to Achieve Even Cooking: To cook mushrooms evenly, space them apart on the baking sheet. This allows hot air to flow around each one. Avoid overcrowding, as that can lead to steaming instead of roasting. - Importance of Mushroom Selection: Choose large portobello or cremini mushrooms. They are sturdy and can hold the cheesy filling well. Check for fresh, firm mushrooms without dark spots or wrinkles. - Storing Leftovers: Store any leftover stuffed mushrooms in an airtight container in the fridge. They will stay fresh for up to three days. Make sure they cool completely before sealing them. - Reheating Recommendations: To reheat, place the mushrooms on a baking sheet and warm them in a preheated oven at 350°F (175°C) for about 10-15 minutes. This keeps the filling creamy and the mushrooms tender. - Presentation Ideas: Serve stuffed mushrooms on a rustic wooden platter. Drizzle with balsamic glaze for a gourmet touch. A sprinkle of fresh parsley adds a bright, fresh look. - Pairing with Other Dishes: These mushrooms pair well with a light salad or crusty bread. They also make a great appetizer for a dinner party or a fun game night snack. Pro Tips Choose the Right Mushrooms: Opt for large portobello or cremini mushrooms for the best stuffing experience, as their size holds more filling and provides a meaty texture. Fresh Spinach is Key: Always use fresh spinach instead of frozen for a vibrant color and better texture in your filling. Customize Your Cheeses: Feel free to experiment with different cheeses like feta or goat cheese for a unique twist on the flavor profile. Keep an Eye on Baking Time: Every oven is different, so start checking your mushrooms at the 20-minute mark to prevent overcooking and ensure the cheese is perfectly bubbly. {{image_4}} You can easily switch up the cheese in this recipe. Cream cheese adds great creaminess, but you can try goat cheese for a tangy twist. Feta cheese works well too, giving a Mediterranean flavor. Mozzarella is mild, while sharp cheddar adds boldness. Adding protein can turn these mushrooms into a heartier dish. Crumbled bacon adds a smoky taste. Shredded chicken gives a satisfying bite. Both options pair well with the creamy filling. Seasoning can take your stuffed mushrooms to new heights. Try adding Italian herbs like oregano or basil. A pinch of thyme provides a lovely aroma. You can also go for a zesty kick with lemon zest. Switching between vegetarian and meat versions is simple. Keep it meatless for a lighter treat or load it up with proteins. Both options taste great and please any crowd. For gluten-free options, ensure your cheese and other ingredients are certified gluten-free. Most cheeses are naturally gluten-free, but always check the labels. Serve these mushrooms with gluten-free bread for a complete meal. If you want to make it vegan, use a plant-based cream cheese. Nutritional yeast can replace Parmesan for a cheesy flavor. Add sautéed mushrooms or nuts for protein. These changes help you enjoy the dish while sticking to your diet. How do I make Cheesy Spinach Stuffed Mushrooms ahead of time? You can prepare the stuffed mushrooms in advance. Stuff the mushrooms and place them on a baking sheet. Cover them with plastic wrap and store in the fridge for up to 24 hours. When ready to serve, simply bake them at 375°F for about 25 minutes. Can I freeze stuffed mushrooms? Yes, you can freeze stuffed mushrooms. After stuffing them, place them on a baking sheet and freeze until solid. Then, transfer them to a freezer bag. They can last for up to three months. Just bake them straight from the freezer, adding a few extra minutes to the cooking time. What can I serve with Cheesy Spinach Stuffed Mushrooms? These mushrooms pair well with a variety of dishes. Try serving them with a fresh salad or some toasted bread. They also work as a side for pasta dishes or grilled meats. Can I grill stuffed mushrooms instead of baking? Yes, you can grill stuffed mushrooms! Preheat your grill to medium heat. Place the mushrooms directly on the grill grates. Cook for about 10-15 minutes, until the cheese is melted and the mushrooms are tender. What type of mushrooms work best for this recipe? Portobello and cremini mushrooms are the best choices for this recipe. They are sturdy and can hold the filling well. Their rich flavor complements the cheesy spinach filling perfectly. For this recipe, one serving equals three stuffed mushrooms. Each serving contains about: - Calories: 250 - Protein: 10g - Fat: 20g - Carbohydrates: 10g These mushrooms also provide dietary fiber and essential vitamins. Each serving has about 3g of fiber and is rich in vitamins A and C. This makes them a balanced snack or starter. Benefits of Spinach: Spinach is full of iron and calcium. It helps keep your bones strong. It also has antioxidants that protect your cells. Eating spinach may help your heart and eyes too. Nutritional Benefits of Mushrooms: Mushrooms are low in calories but high in nutrients. They provide B vitamins, which help your body make energy. They also contain selenium, an important mineral for your immune system. Reducing Caloric Content: You can cut calories by using low-fat cream cheese. This swap keeps the creamy texture but lowers fat. Adding Nutrient-Dense Ingredients: Try adding chopped nuts or seeds to the filling. They add crunch and extra nutrients without many calories. You can also use herbs like basil or thyme for more flavor. This article covered how to make delicious Cheesy Spinach Stuffed Mushrooms. We explored ingredients like mushrooms, spinach, and various cheeses. The steps walked through preparation, filling, and baking to reach a perfect dish. I shared tips for cooking, storing, and serving these tasty treats. Experiment with variations to match your taste, including dietary adjustments. Enjoying healthy recipes can be simple and fun. Now it’s your turn to try this dish and savor its flavors!

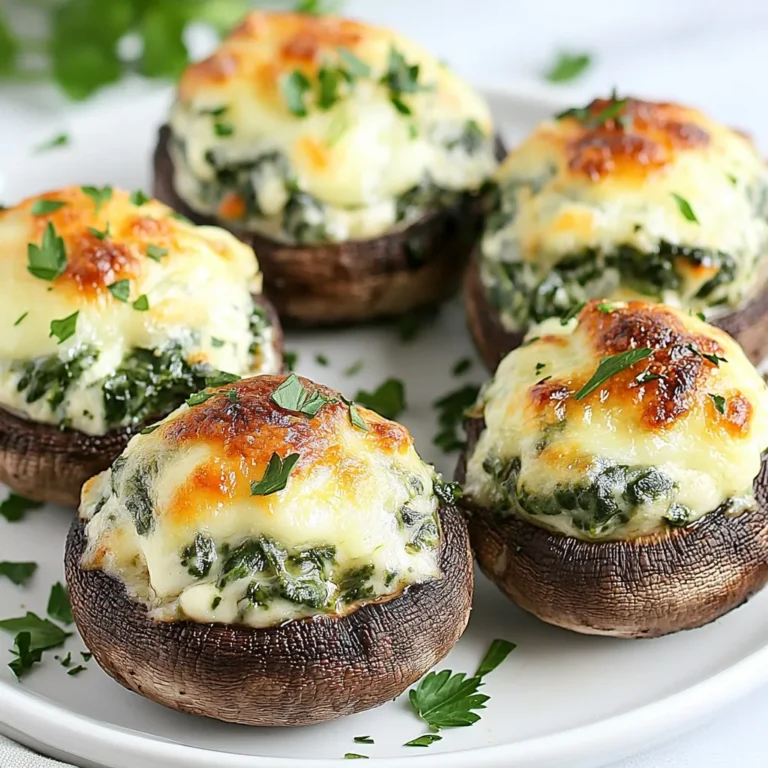
Cheesy Spinach Stuffed Mushrooms Flavorful Appetizer

For this vibrant honey lime fruit salad, gather the following fresh fruits: - 1 cup fresh pineapple, diced - 1 cup ripe mango, diced - 1 cup strawberries, sliced into thin rounds - 1 cup kiwi, peeled and diced into small chunks - 1 cup plump blueberries These fruits bring color and flavor to your salad. Use ripe fruits for the best taste. The honey-lime dressing is simple but adds great flavor. You will need: - 2 tablespoons honey, preferably raw - 2 tablespoons freshly squeezed lime juice - Zest of 1 lime - A pinch of salt This dressing balances sweetness and acidity, making the fruit shine. To make your salad pop, consider these optional garnishes: - 1/4 cup fresh mint leaves, finely chopped Mint adds a refreshing touch and enhances the overall look. You can also serve with lime slices for extra zest. {{ingredient_image_2}} To start, gather your fresh fruits. You will need: - 1 cup fresh pineapple, diced - 1 cup ripe mango, diced - 1 cup strawberries, sliced into thin rounds - 1 cup kiwi, peeled and diced into small chunks - 1 cup plump blueberries In a large mixing bowl, add the diced pineapple, mango, strawberries, kiwi, and blueberries. Mix them gently to create a colorful medley. It's important to keep the pieces intact for a nice texture. Now, let's make the honey-lime dressing. You will need: - 2 tablespoons honey - 2 tablespoons freshly squeezed lime juice - Zest of 1 lime - A pinch of salt In a small bowl, whisk together the honey, lime juice, lime zest, and salt. Mix until it's smooth and well combined. This dressing adds a sweet and tangy flavor to your fruit salad. Next, it's time to combine everything. Drizzle the honey-lime dressing over your mixed fruit. Make sure to coat every piece. Use a spatula to gently fold the dressing into the fruit. Be careful not to mash the fruits. Now, add some fresh mint leaves for extra flavor. Sprinkle them on top and mix gently once more. Cover the bowl with plastic wrap or a lid. Place it in the fridge for at least 30 minutes. This helps the flavors blend together. Before serving, give the salad a light toss. Taste it; if you want it sweeter, add a little more honey. Enjoy your beautiful honey lime fruit salad! Mixing fruits can be tricky. Start with firm fruits like pineapple and mango. Add softer fruits like strawberries and kiwi later. This way, you keep everything intact. Stir gently to avoid squishing the fruits. You want a colorful mix, not a mushy blend. Want to jazz up your salad? Consider adding a sprinkle of chili powder for heat. A splash of coconut water can add tropical flair. You might also try adding a scoop of yogurt for creaminess. Just remember, keep it simple to let the fruits shine. Serving is key to impressing your guests. Use a clear glass bowl to show off the colors. Layer the fruits for a beautiful display. Garnish with extra mint leaves and a slice of lime on the side. This adds freshness and a pop of color. A well-presented salad makes every bite more enjoyable! Pro Tips Choose Ripe Fruits: Select fruits that are at peak ripeness for the best flavor and sweetness. Look for vibrant colors and a slight give when gently pressed. Use Fresh Lime Juice: Freshly squeezed lime juice enhances the flavor profile significantly compared to bottled juice. It provides a brighter and more refreshing taste. Chill Before Serving: Allowing the salad to chill for at least 30 minutes before serving helps the flavors meld together, creating a more cohesive taste experience. Experiment with Other Fruits: Feel free to add or substitute other seasonal fruits like papaya, watermelon, or oranges to customize the salad to your taste preferences. {{image_4}} You can change the fruits in this salad. Try using peaches, grapes, or oranges. Each fruit brings its own flavor. If you want a tropical twist, add papaya or passion fruit. This keeps the salad fresh and exciting. Mix and match according to what you love! If you want to try new flavors, swap the honey-lime dressing. A yogurt-based dressing offers a creamy touch. You can also use a splash of coconut milk for a tropical vibe. A simple lime juice and agave syrup mix can work well too. Each option gives a unique taste to the fruit mix. This salad suits many events. For brunch, serve it in small cups for easy eating. At picnics, pack it in a portable container to share. For a dinner party, use a glass bowl to show off the colors. Add extra mint leaves on top for a fancy touch. To store your honey lime fruit salad, put it in an airtight container. This keeps the fruits fresh. If you have leftovers, eat them within two days. This helps maintain the taste and texture. Keep the salad in the fridge. Avoid leaving it at room temperature for too long. If you mix the dressing in, eat it quickly. If not, store the dressing separately. This keeps the fruits from getting soggy. The fruit salad lasts about three days if stored properly. After that, the fruits may lose their quality. Always check for any signs of spoilage before eating. If the fruits look or smell off, it's best to discard them. Yes, you can use canned fruit. However, fresh fruit gives the best taste. Canned fruit may have added sugar and less flavor. If you choose canned fruit, drain it well. Rinse the fruit under cold water to reduce sweetness. This way, you can still enjoy a good salad. Each fruit in this salad is a healthy choice. Pineapple helps with digestion and is rich in vitamin C. Mango is full of fiber and antioxidants. Strawberries are low in calories and high in vitamin C. Kiwi packs a punch with vitamin K and potassium. Blueberries are known for their brain benefits and antioxidants. Mint adds a fresh touch and may help with digestion. Honey provides natural sweetness and has antioxidants too. To make the salad ahead, prepare the fruit and honey-lime dressing separately. Mix them just before serving. This keeps the fruit fresh and crunchy. You can store the salad in an airtight container in the fridge. It lasts well for one day. If you want to prepare it earlier, add a little lime juice to the fruit to slow browning. In this blog post, we explored how to create a fresh fruit salad. We discussed the key ingredients, including fresh fruits and honey-lime dressing. I shared step-by-step instructions for preparing the fruit and combining it with the dressing. We looked at tips for mixing flavors and presenting the dish beautifully. I also covered variations and storage tips to keep your salad fresh. In the end, this fruit salad is simple, fun, and great for any meal. Enjoy your tasty creations!

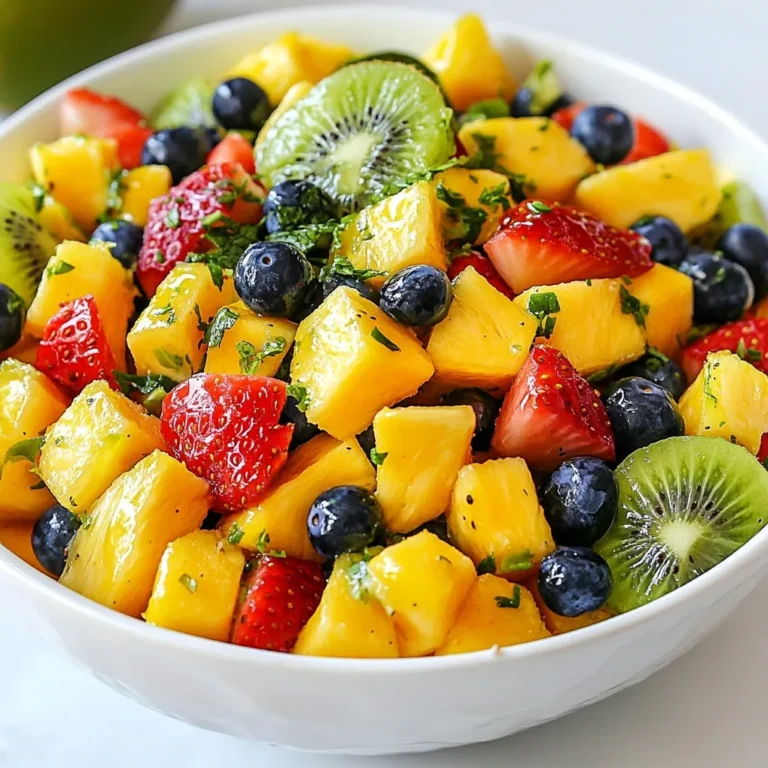
Honey Lime Fruit Salad Fresh and Simple Recipe

- 1 cup unsalted butter - 1 cup brown sugar - 1/2 cup granulated sugar - 2 cups all-purpose flour - 1 teaspoon vanilla extract - 1 can sweetened condensed milk - 1 cup mini chocolate chips Gathering the right ingredients is key to making a great treat. Here’s what you need. Start with one cup of unsalted butter. This will give your fudge a rich flavor. Use one cup of brown sugar for sweetness and depth. Then, add half a cup of granulated sugar to balance the taste. Next, you’ll need two cups of all-purpose flour. Don’t forget to heat-treat this flour first. It makes sure it’s safe to eat raw. You can do this by baking it at 350°F for 5-7 minutes. After that, let it cool. For flavor, add one teaspoon of vanilla extract. This will enhance the overall taste of your fudge. You also need one can of sweetened condensed milk. This ingredient adds creaminess to your fudge. Lastly, use one cup of mini chocolate chips. These will melt into the fudge, adding delicious bites of chocolate. With these ingredients, you're ready to create a delightful treat! {{ingredient_image_2}} To make this fudge safe, we need to heat-treat the flour. Start by preheating your oven to 350°F (175°C). Spread the all-purpose flour evenly on a baking sheet. Bake it for 5-7 minutes. This process kills any harmful bacteria. After baking, let the flour cool completely before using it. Next, we’ll make the cookie dough mixture. In a large mixing bowl, use an electric mixer to cream the softened butter with both sugars. Mix until the mixture turns light and fluffy. This step adds air and makes the fudge soft. Add the pure vanilla extract and blend until it is well mixed. Now, it’s time to bring it all together. Gradually add the cooled, heat-treated flour to the butter-sugar blend. Mix on low speed to combine. Stop to scrape down the bowl's sides as needed. This ensures that everything is mixed well. Once the flour is combined, we will add the sweetened condensed milk. Pour it in and stir until you have a cohesive dough. It might feel a bit sticky, and that’s just fine! Next, gently fold in the mini chocolate chips. Use a spatula or wooden spoon to make sure they are evenly spread throughout the dough. Let’s prepare the fudge base. Line an 8x8 inch baking dish with parchment paper. Leave some overhang so you can lift it out later. Press the cookie dough mixture firmly into the dish’s bottom. Smooth it out with a spatula until it is flat. For an extra treat, sprinkle more mini chocolate chips on top to make it look great! To make your fudge smooth, follow these mixing tips. Start by creaming the butter and sugars well. This step adds air, making the fudge light. Use a low speed when adding flour. This helps mix without lumps. After mixing in the flour, add the sweetened condensed milk. Stir until the dough is sticky but smooth. If you find it too sticky, let it chill for a bit. This will help firm it up. For an eye-catching display, arrange your fudge squares neatly on a platter. Use a sharp knife for clean cuts. Dust the top lightly with powdered sugar. This adds a nice touch and looks great. You can also sprinkle extra mini chocolate chips on top. This not only makes it pretty but adds more chocolate flavor. Finally, a gentle sprinkle of sea salt brings out the sweetness. It’s a simple way to add contrast and pop! Want to elevate your fudge? Try a sprinkle of sea salt on top. It adds a savory bite that pairs perfectly with the sweet fudge. Another option is to dust with powdered sugar for a snowy effect. You can also add more mini chocolate chips on top for an extra treat. These enhancements make your fudge even more delightful and appealing! Pro Tips Heat-Treat Flour for Safety: Always heat-treat your flour before using it in no-bake recipes to eliminate any harmful bacteria. Softened Butter is Key: Make sure your butter is at room temperature to achieve a light and fluffy texture when creaming with sugars. Chill for Perfect Texture: Allow the fudge to chill for a minimum of 2 hours to help it set properly, ensuring clean cuts and a firm texture. Customize with Mix-Ins: Feel free to add other toppings like nuts or caramel swirls to personalize your fudge and enhance flavor. {{image_4}} You can easily change the taste of your fudge. Adding nuts gives a nice crunch. Chopped walnuts, pecans, or almonds work well. You can also mix in flavors like peanut butter or butterscotch. Just make sure to keep the total mix similar to the original recipe. The type of chocolate you use can change the fudge’s taste. Dark chocolate gives a rich, bold flavor. White chocolate adds creaminess and sweetness. You can even mix different chocolates for a fun twist. Just substitute them based on your taste preference. If you need to cut sugar, try alternative sweeteners. Stevia and monk fruit are good options. Both can sweeten without extra calories. Just remember to adjust the amounts based on the sweetener you choose. This way, you can enjoy fudge that fits your diet. To keep your chocolate chip cookie dough fudge fresh, store it in an airtight container. Line the container with parchment paper for easy removal. This way, the fudge won’t stick. Keep it in a cool, dry place, away from sunlight. If you want to keep it for longer, the fridge is a great choice. Just remember to let it cool completely before sealing it up. Freezing fudge is simple. First, cut the fudge into squares. Then, wrap each piece in plastic wrap. Place the wrapped pieces in a freezer-safe bag or container. Make sure to remove as much air as possible. When you want to enjoy it again, take a piece out and let it thaw at room temperature. This usually takes about 30 minutes. At room temperature, fudge lasts about a week if stored correctly. In the fridge, it stays good for up to two weeks. If you freeze it, you can keep it for up to three months. Just remember, the longer it sits, the more it may lose its texture. Enjoy your fudge fresh for the best taste! No, you should not use regular flour. Heat-treated flour is safe to eat raw. It removes harmful bacteria. This step is crucial for safety. If you skip it, you risk foodborne illness. Always heat-treat your flour at 350°F for 5-7 minutes. This simple step makes your fudge safe and delicious. The fudge needs to chill for at least 2 hours. This time allows it to set properly. If you want firmer fudge, chill it longer. Check it after two hours. If it feels soft, give it more time. Proper chilling helps you cut clean squares later. To cut fudge perfectly, use a sharp knife. Warm the knife under hot water first. This helps create clean cuts. Wipe the knife dry after warming. Cut the fudge into even squares. You can use parchment overhang to lift it out. This makes serving easy and neat. This blog post covered how to make delicious fudge. We shared the key ingredients and step-by-step instructions, ensuring your fudge turns out perfectly. You learned tips for presentation and variations to explore. Proper storage advice will keep your fudge fresh longer. Enjoying your homemade fudge can be a fun experience. Keep experimenting with flavors and share your creations with friends. Happy baking!

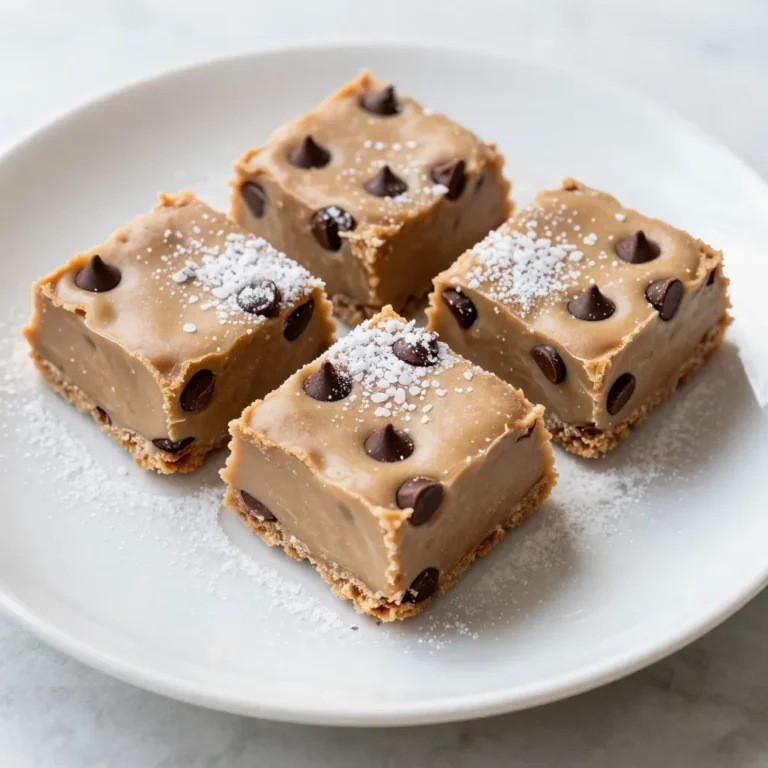
Chocolate Chip Cookie Dough Fudge Tasty and Easy Treat

- Fresh bread (preferably pull-apart or artisan) - Fresh spinach, finely chopped - Canned artichoke hearts, drained and roughly chopped - Cream cheese, softened - Shredded mozzarella cheese - Grated Parmesan cheese - Minced garlic - Onion powder - Red pepper flakes (optional) - Salt and pepper - Olive oil - Fresh parsley (for garnish) To make Spinach Artichoke Pull Apart Bread, you need fresh, simple ingredients that pack a lot of flavor. Start with a loaf of fresh bread, like pull-apart or artisan. This bread gives the best texture and taste. Next, gather fresh spinach. Chop it finely to mix well with the cheeses. Canned artichoke hearts add a nice touch. Drain them before chopping roughly. For the creamy base, you’ll need softened cream cheese. It blends well with shredded mozzarella and grated Parmesan. These cheeses create a rich, gooey filling. Don’t forget minced garlic for flavor! A sprinkle of onion powder adds depth. If you like a little heat, toss in red pepper flakes. Adjust salt and pepper to taste. Finally, grab some olive oil for drizzling on top. It adds moisture and flavor. Use fresh parsley for garnish. It gives a lovely pop of color when serving. With these ingredients, you’re ready to create an irresistible snack that everyone will love! {{ingredient_image_2}} Preheating your oven is key for even baking. When the oven is hot, your bread cooks perfectly. Set the temperature to 375°F (190°C). This heat helps the cheese melt and the bread crisp up nicely. Now, let’s make the cheesy filling. In a bowl, add: - 1 cup cream cheese, softened - 1 cup shredded mozzarella cheese - 1/2 cup grated Parmesan cheese - 2 cloves garlic, minced - 1 cup fresh spinach, finely chopped - 1 cup canned artichoke hearts, drained and chopped - 1 teaspoon onion powder - 1/2 teaspoon red pepper flakes (optional) - Salt and pepper to taste Mix all these ingredients well. You want a smooth and creamy blend. This mixture gives the bread its rich flavor. Take your loaf of bread. Use a sharp knife to cut diagonal slits about 1 inch apart. Make sure not to cut all the way through. This keeps the loaf whole. Next, gently open each slit. Use a butter knife or spoon to fill each cut with your cheese mixture. Pack it in well. The more filling, the better the taste! Drizzle 2 tablespoons of olive oil over the stuffed loaf. This adds moisture and flavor. Then, wrap the loaf in aluminum foil. Place it in your preheated oven. Bake for 15 minutes covered. After that, remove the foil. Bake for another 10-15 minutes. You want the cheese to melt and the bread to turn golden brown. Once baked, take it out and let it cool for a few minutes. This helps the cheese set. For a pop of color, sprinkle fresh parsley on top before serving. It adds flavor and looks great! To avoid overbaking, keep an eye on your bread. After 15 minutes, check if it turns golden brown. If it looks ready, take it out! You want a soft inside and a crisp crust. For the cheese, ensure it is fully melted. If you see cheese oozing out, you did it right! It should be gooey and delicious. The best way to check is by gently pulling apart the bread. Try adding different seasonings to change the taste. Garlic powder or Italian herbs can boost flavor. You can also add a squeeze of lemon for freshness. Using fresh ingredients makes a big difference. Fresh spinach and artichokes give a brighter taste. Canned artichokes work, but fresh will make your dish shine. Serve the pull-apart bread on a wooden board. Guests will love tearing off pieces. It looks rustic and inviting. Pair it with marinara sauce for dipping. The tangy sauce blends well with the cheesy bread. You could also serve it with a creamy ranch dip for a fun twist! Pro Tips Choose the Right Bread: Opt for a sturdy loaf that can hold the cheesy filling without falling apart. Artisan bread works beautifully for this recipe. Make Ahead: Prepare the filling a day in advance and store it in the refrigerator. This allows the flavors to meld, making for an even tastier pull-apart bread. Customize Your Cheeses: Feel free to mix in other cheeses like cheddar or gouda for a different flavor profile. Just ensure they melt well! Perfect Baking: For a crispier crust, bake the bread uncovered for the last few minutes to allow it to brown nicely, enhancing both texture and flavor. {{image_4}} You can make this bread even better by adding more flavors. Try different veggies like bell peppers or mushrooms. They add great taste and texture. You can also include cooked meats, such as shredded chicken or crispy bacon, for a hearty twist. Cheese lovers can play with the different cheese options. Use sharp cheddar for a bold flavor or creamy goat cheese for a tangy kick. Mixing cheeses can create a delightful depth in every bite. If you want a vegetarian version, this recipe is easy to adjust. Simply swap the cream cheese and mozzarella for plant-based versions. Look for vegan cream cheese and dairy-free mozzarella. These options keep the dish creamy and rich. To ensure your vegan bread stays flavorful, add more spices or fresh herbs. A squeeze of lemon juice can brighten the flavors too. You won’t miss the dairy in this tasty treat. For those who need a gluten-free option, choose gluten-free bread. Many stores offer gluten-free artisan bread that works well for this recipe. Just check the label to make sure it fits your needs. To enhance the taste, consider adding extra herbs or spices to the cheese mixture. This will keep your gluten-free bread just as delicious and satisfying as the original. To store your leftover Spinach Artichoke Pull Apart Bread, wrap it tightly in plastic wrap or foil. This keeps moisture in and helps maintain flavor. Place it in the fridge. It can stay fresh for up to 3 days. If you want to keep it longer, consider freezing it. Wrap it well in plastic wrap and then in foil. Frozen bread can last for about 2 months. To reheat the bread, avoid using the microwave. It can dry out the bread quickly. Instead, preheat your oven to 350°F (175°C). Unwrap the bread and place it on a baking sheet. Cover it with foil to keep it moist. Heat for about 10-15 minutes. If you want the cheese to melt again, uncover the bread for the last few minutes. This helps keep the cheesy texture you love. Yes, you can prepare this bread ahead of time. To do this, mix the cheese and veggie filling first. Then, stuff the bread and wrap it well in foil. Store it in the fridge. This keeps it fresh for up to 24 hours. When you’re ready to bake, just take it out and let it sit for 15 minutes. Preheat your oven and bake as usual. This pull-apart bread is great with many sides. Try serving it with marinara sauce for dipping. You can also add a fresh salad or a cheese platter. For drinks, consider pairing it with a crisp white wine or a light beer. Both will balance the rich flavors of the cheese and artichokes. If you want to add some heat, use more red pepper flakes in the filling. Start with one teaspoon and adjust to your taste. You can also add diced jalapeños or a splash of hot sauce. Both options will give a nice kick without overpowering the other flavors. This recipe combines fresh ingredients for a tasty pull-apart bread. You learned how to prepare the cheese mixture, stuff the bread, and bake it perfectly. Remember, the key is in the details: preheating the oven and avoiding overbaking will ensure great texture. Feel free to try different ingredients to match your taste. Whether serving it as a snack or a side, it’s sure to impress! Enjoy making and sharing this delicious dish.

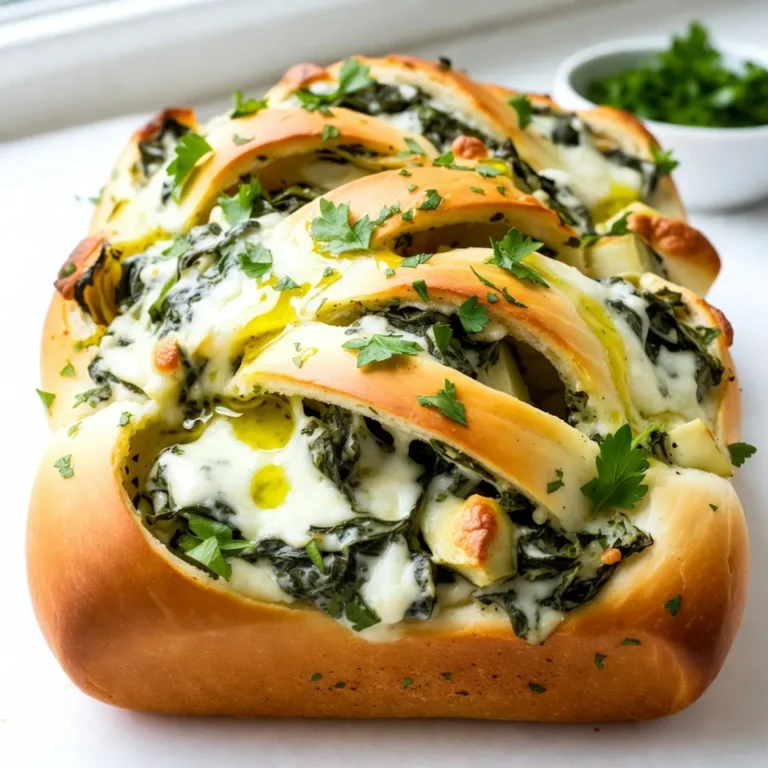
Spinach Artichoke Pull Apart Bread Irresistible Snack

To make Lemon Parmesan Brussels Sprout Pasta, you need these key ingredients: - 8 oz whole wheat pasta (spaghetti or linguine works best) - 1 lb Brussels sprouts, trimmed and halved - 3 tablespoons extra virgin olive oil - 3 cloves fresh garlic, minced - 1 large lemon (juice and zest) - ½ cup freshly grated Parmesan cheese (plus extra for serving) - 1 teaspoon red pepper flakes (adjust to your spice level) - Salt and freshly ground black pepper to taste - Fresh parsley, finely chopped (for garnish) These ingredients create a bright, flavorful dish. The whole wheat pasta adds fiber, while the Brussels sprouts give a nice crunch. You can enhance the dish with these optional ingredients: - Pine nuts for a nutty crunch - A splash of white wine for depth - Fresh herbs like basil or thyme for added aroma These extras can take the dish to another level. I often suggest a splash of white wine for a rich taste. If you don't have some ingredients, here are some swaps: - Use regular pasta instead of whole wheat if preferred. - Swap Brussels sprouts with kale or broccoli for a different veggie. - Grate another cheese, like Pecorino Romano, if you lack Parmesan. These substitutions allow flexibility while keeping the dish tasty. You can experiment and still achieve a delicious meal! {{ingredient_image_2}} First, grab a large pot and fill it with water. Put it on the stove and turn the heat to high. Add a good pinch of salt to the water. Once the water boils, add 8 oz of whole wheat pasta. You can use spaghetti or linguine. Cook the pasta until it's al dente, which usually takes about 8-10 minutes. Remember to check the package for exact times. When it's done, save 1 cup of the pasta water. Then, drain the rest and set the pasta aside. Next, take a big skillet and heat 3 tablespoons of extra virgin olive oil over medium heat. While the oil warms, prepare 1 lb of Brussels sprouts. Trim and halve them. Place the sprouts in the skillet with the cut side facing down. Let them cook without stirring for about 5-7 minutes. This helps them get a nice golden brown color. After that, they should feel a little crunchy. Now, add 3 cloves of minced garlic to the skillet with the Brussels sprouts. Stir for a couple of minutes until the garlic smells great. Be careful not to burn it. Then, add the cooked pasta to the skillet. Squeeze the juice from 1 large lemon over the pasta. Don't forget the lemon zest for extra flavor! Next, sprinkle in ½ cup of grated Parmesan cheese. Mix everything well. Slowly add some of the reserved pasta water until you get a creamy texture. Finally, season with red pepper flakes, salt, and black pepper to taste. Toss again to make sure everything is well mixed. Serve hot and enjoy your dish! To boost flavor in your Lemon Parmesan Brussels Sprout Pasta, use fresh herbs. Parsley gives a fresh taste and bright color. You can also add a pinch of red pepper flakes for heat. Just adjust the amount based on your spice preference. A squeeze of lemon juice can also brighten the dish. Season your pasta water well. This adds base flavor to the pasta itself. Always taste your dish as you go. This helps you find the right balance of salt, pepper, and spice. Remember, layering flavors makes the dish shine. Start with plenty of water in a large pot. Aim for about 4-6 quarts of water for 8 ounces of pasta. Bring it to a rolling boil before adding salt. The water should taste like the ocean. Cook your pasta according to the package instructions. Stir the pasta occasionally. This helps prevent sticking. Reserve some pasta water before draining. This starchy water can help create a creamy sauce later. Aim for al dente pasta. It should have a slight bite, giving the dish great texture. Presentation matters to make your meal pop. Serve the pasta in shallow bowls. This allows for easy mixing and adds elegance. Top with extra grated Parmesan cheese for a cheesy finish. Add a sprinkle of chopped parsley for color. This also brightens the dish visually. For an extra touch, drizzle some olive oil on top. It adds shine and flavor. Lemon wedges on the side not only look good but also enhance flavor when squeezed on the pasta. Enjoy serving this delightful dish! Pro Tips Roasting Brussels Sprouts: For an extra layer of flavor, roast the Brussels sprouts in the oven instead of sautéing them. Toss them with olive oil, salt, and pepper, and roast at 400°F (200°C) for about 20-25 minutes until crispy and caramelized. Cheese Variations: Experiment with different types of cheese such as Pecorino Romano or nutritional yeast for a vegan option. Each cheese will impart a unique flavor profile to the pasta. Cooking Pasta Perfectly: For the best texture, make sure to salt your pasta water generously. It should taste like the sea! This enhances the flavor of the pasta itself. Adding Protein: For a heartier dish, consider adding grilled chicken, shrimp, or chickpeas. This will turn your pasta into a complete meal with added protein and satisfaction. {{image_4}} You can boost your meal by adding protein. Chicken, shrimp, or tofu work well. - Chicken: Cook bite-sized chicken pieces in the skillet until golden. - Shrimp: Add shrimp after sautéing the Brussels sprouts. Cook until they turn pink. - Tofu: Use firm tofu, cubed and sautéed until crispy. These proteins add flavor and make the dish heartier. To make this dish vegan, swap out the Parmesan cheese. You can use nutritional yeast for a cheesy taste. - Vegan Cheese: Look for dairy-free cheese that melts well. - Cashew Cream: Blend soaked cashews with lemon juice for a creamy touch. These options keep the dish rich while being plant-based. You can change the flavor by adding herbs and spices. - Herbs: Fresh basil or thyme can add a unique twist. - Spices: Experiment with garlic powder or smoked paprika for depth. Adjust these elements according to your taste. Enjoy creating your perfect Lemon Parmesan Brussels Sprout Pasta! To store leftover Lemon Parmesan Brussels Sprout Pasta, let it cool first. Use an airtight container to keep it fresh. Make sure to keep it in the fridge. It will stay good for about three days. When you are ready to eat, take out your pasta. Add a splash of water or olive oil to keep it moist. Heat it in a skillet over medium heat. Stir it often to warm it evenly. You can also use a microwave. Just cover it with a damp paper towel. Heat it in short bursts, checking often. If you want to freeze leftovers, make sure they are cool first. Place the pasta in a freezer-safe container or bag. It can last for up to three months in the freezer. To thaw, leave it in the fridge overnight. Reheat as mentioned before for the best taste. Yes, you can use other pasta types. Whole wheat spaghetti or linguine works great. You can also try penne or fettuccine. Each type brings its own charm to the dish. Choose what you like best. If you need a substitute for Parmesan cheese, try using Pecorino Romano. This cheese has a similar salty flavor. Nutritional yeast is a great dairy-free option too. It adds a cheesy taste without using dairy. To spice it up, add more red pepper flakes. You can also include diced jalapeños or crushed chili. If you want it milder, cut back on the red pepper flakes. You can also leave them out entirely for a gentle flavor. This blog post shared a simple and tasty Lemon Parmesan Brussels Sprout Pasta recipe. We covered essential and optional ingredients, plus safe substitutions. You learned step-by-step cooking methods and helpful tips for flavor and presentation. We also explored fun variations and smart storage methods. In conclusion, you can easily make this dish your own. Experiment with different flavors and ingredients. Enjoy cooking, eat well, and share this recipe with others!

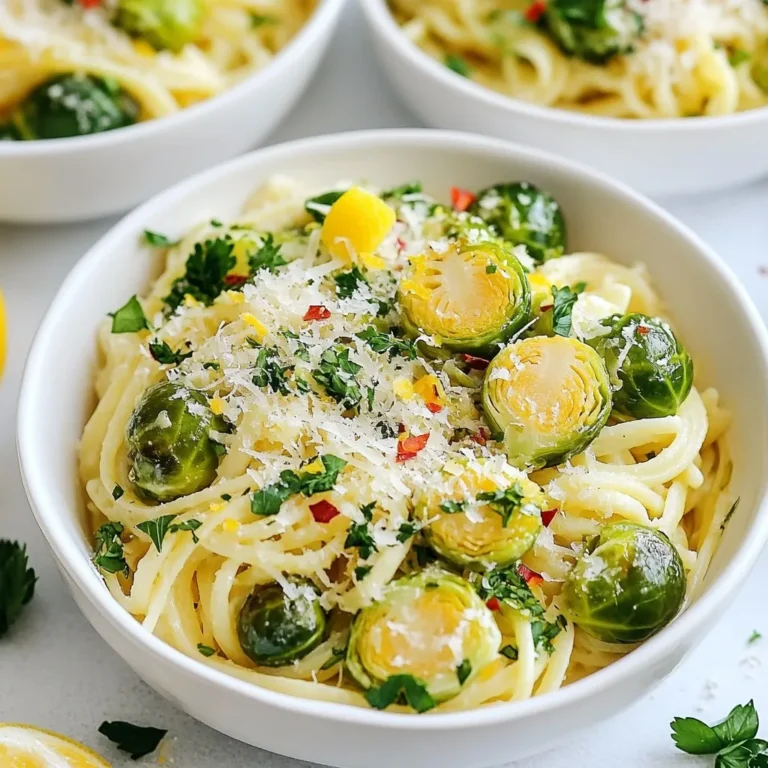
Lemon Parmesan Brussels Sprout Pasta Delight Recipe

- 2 cans (15 oz each) black beans, thoroughly rinsed and drained - 1 medium onion, finely chopped - 3 cloves garlic, minced - 1 can (14.5 oz) diced tomatoes containing green chilies - 1-2 chipotle peppers in adobo sauce, finely chopped - 4 cups vegetable broth - 1 teaspoon smoked paprika - 1 teaspoon ground cumin - 1 tablespoon olive oil - Salt and freshly ground black pepper to taste - Fresh cilantro, chopped (for garnish) - Slices of ripe avocado (for garnish) - Lime wedges (to serve alongside) To make Smoky Chipotle Black Bean Soup, you need a few key ingredients. Start with black beans. They are rich in protein and fiber. Use canned black beans for ease, but rinsing them is crucial. Rinsing removes extra sodium and improves flavor. Next, grab a medium onion and three cloves of garlic. These add depth to the soup. Chop them finely to release their natural flavors. You will also need diced tomatoes with green chilies. This will add a nice kick to your soup. Chipotle peppers in adobo sauce are the star of this recipe. They bring a smoky heat. Adjust the number of peppers based on your spice preference. For the base, use four cups of vegetable broth. This keeps the soup hearty and healthy. Don’t forget the spices: smoked paprika and ground cumin. These enhance the soup’s flavor profile. Finally, season with salt and black pepper to taste. For garnishes, fresh cilantro, avocado slices, and lime wedges add freshness and brightness. These little touches make your soup look and taste even better. Gather these ingredients, and you are ready to create a warm and comforting dish. {{ingredient_image_2}} Start by heating the olive oil in a large pot over medium heat. Wait until the oil shimmers. Add the chopped onion and sauté for about five minutes. The onion should become soft and see-through. This step builds a great base for flavor. Next, add the minced garlic. Continue to sauté for one to two minutes. You want the garlic to turn golden and smell amazing, but be careful not to burn it. Now, it's time to mix in the diced tomatoes with green chilies. These add a sweet and spicy kick. Toss in the chopped chipotle peppers along with the smoked paprika and ground cumin. Cook this mixture for three minutes. This allows the spices to blend well. You will start to notice the rich aroma filling your kitchen. After the flavors are combined, pour in the rinsed black beans and vegetable broth. Turn up the heat to bring the mix to a boil. Once it boils, reduce the heat to low and let it simmer uncovered for 20 to 25 minutes. This lets all the flavors deepen. For a creamy texture, use an immersion blender to puree part of the soup right in the pot. Leave some beans whole for a nice texture. If you prefer, you can blend half the soup in a blender. After blending, return it to the pot. Now, season your soup with salt and freshly ground black pepper to taste. Let it simmer for another five minutes to heat everything through. To boost the flavor of your smoky chipotle black bean soup, start by adjusting the spice levels. If you love heat, add more chipotle peppers. For a milder taste, reduce the amount. Taste your soup often. This helps you find the right balance. You can also add a little lime juice. This brightens the flavors and adds freshness. If the soup is too spicy, add a dollop of sour cream or yogurt. This cools the heat and adds creaminess. For a creamy soup, use an immersion blender to blend part of the soup. This keeps some beans whole, adding texture. If you prefer a chunkier soup, skip the blending. Just let the beans shine with their natural shape. If you use a traditional blender, blend half the soup until smooth. Then return it to the pot. This method gives a nice mix of creaminess and chunkiness. You can also add a splash of coconut milk for extra creaminess. It adds a unique flavor that pairs well with the spices. Pro Tips Adjust the Heat: If you prefer a milder soup, start with just one chipotle pepper and taste before adding more. You can always add more spice, but it's hard to reduce it! Enhance the Flavor: For an extra depth of flavor, consider adding a bay leaf while the soup simmers, but remember to remove it before serving. Texture Variation: If you enjoy varied textures, try adding some corn or diced bell peppers to the soup for a delightful crunch. Make it Ahead: This soup tastes even better the next day! Make a big batch and store leftovers in the fridge for an easy, flavorful meal later in the week. {{image_4}} You can switch beans for variety. Try pinto beans or kidney beans. Each will bring a new taste to your soup. You can also use homemade broth. This can add a fresh touch. Adding extra veggies boosts nutrition. Consider bell peppers, carrots, or corn. These colorful vegetables add texture and taste. You can even toss in some spinach for a healthy twist. They cook well and blend easily with the soup. If you prefer less spice, use fewer chipotle peppers. One pepper can still give you great flavor without the heat. You can also skip the smoked paprika if you want a milder taste. For extra flavor, try different peppers, like jalapeños or poblano. You can also add herbs like oregano or thyme. These can give your soup a fresh and fragrant note. Just remember to adjust the amount to fit your taste. To keep your Smoky Chipotle Black Bean Soup fresh, cool it down first. Store it in airtight containers. Glass or BPA-free plastic containers work best. Fill the container, but leave some space at the top. This helps prevent spills as the soup expands when frozen. You can keep the soup in the fridge for up to five days. If you want to enjoy this soup later, refrigerate it as soon as it cools down. Freezing this soup is a great way to save it for later. To freeze, let the soup cool completely. Use freezer-safe containers or heavy-duty freezer bags. If using bags, remove as much air as possible. This helps prevent freezer burn. You can freeze the soup for up to three months. When you want to enjoy it again, thaw the soup overnight in the fridge. To reheat, warm it on the stove over low heat. Stir it gently to ensure even heating. You can also microwave it in a microwave-safe dish. If the soup seems thick, add a little vegetable broth or water. This will help restore the creamy texture. Enjoy your flavorful, smoky soup anytime! To make the soup vegan, simply replace the vegetable broth with a homemade or store-bought vegan broth. All other ingredients, like black beans, onion, garlic, and tomatoes, are already vegan. This way, you keep the rich flavors without using any animal products. Yes, you can make this soup in a slow cooker. Start by sautéing the onion and garlic in a pan. This step adds depth to the flavor. After that, combine all ingredients in the slow cooker. Set it on low for 6-8 hours or high for 3-4 hours. Blend as you like for texture. This soup pairs well with crusty bread or tortilla chips for dipping. You can also add a fresh salad on the side for a light touch. Slices of avocado or a dollop of vegan sour cream make great toppings too. Enjoy with lime wedges for extra zing! You learned how to make Smoky Chipotle Black Bean Soup using simple steps and ingredients. From sautéing onions and garlic to simmering and blending, each step builds flavor. I also shared tips for adjusting spice levels and consistency, as well as fun variations to try. Lastly, I covered storage options to keep leftovers fresh. This recipe offers warmth and comfort, making it perfect for any meal. Enjoy the soup, and feel free to get creative with your own twists!

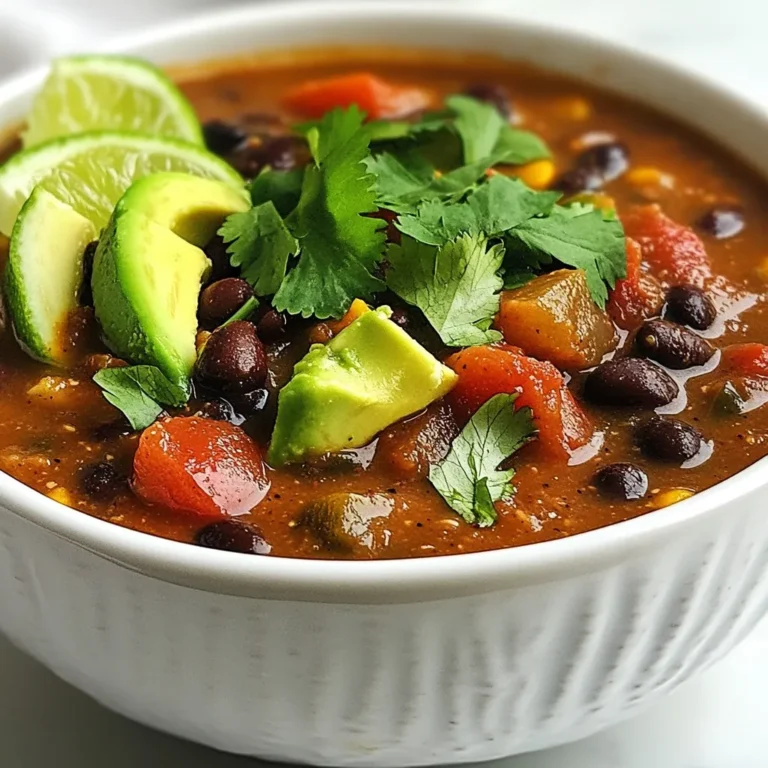
Smoky Chipotle Black Bean Soup Simple Flavor Boost

- 1 cup red lentils - 1 can (14 oz) full-fat coconut milk - 1 large onion - 3 cloves garlic - 1-inch piece of fresh ginger - Spices (curry powder, turmeric, cumin) - Olive oil - Vegetable broth - Diced tomatoes - Fresh spinach - Salt and pepper - Fresh cilantro This creamy coconut lentil curry uses simple ingredients to create a rich flavor. The red lentils are the star. They cook fast and absorb all the spices and coconut milk. I love using full-fat coconut milk. It gives a smooth and creamy texture. The large onion adds sweetness, while garlic and ginger bring warmth. The spices are key to flavor. Curry powder, turmeric, and cumin create depth. Olive oil helps sauté the onion, making it soft and sweet. Vegetable broth adds more taste. Diced tomatoes bring acidity and balance. Fresh spinach adds color and nutrients. Finally, you can season with salt and pepper to suit your taste. Don’t forget the fresh cilantro! It adds a bright touch on top. Each ingredient plays a role in making this dish special. You'll enjoy every bite! {{ingredient_image_2}} Start by warming olive oil in a spacious pot over medium heat. Once hot, add the finely chopped onion. Sauté the onion for about 5 minutes. You want it to be soft and slightly translucent. This step builds a great base for your curry. Next, add the minced garlic and grated ginger to the pot. Sauté this mixture for another 2 minutes. You will notice a lovely aroma filling your kitchen. This fragrant blend sets the stage for all the flavors to come. Now it’s time to add some spice! Sprinkle in the curry powder, ground turmeric, and cumin. Stir well to mix everything together. Cook this spice mixture for about 1 minute. Toasting the spices brings out their rich flavors. Pour in the vegetable broth, coconut milk, and undrained diced tomatoes. Increase the heat to bring the mixture to a gentle simmer. Once it’s bubbling, add the rinsed red lentils. Stir them in gently. Cover the pot and reduce the heat to low. Cook for 20-25 minutes. Stir occasionally to prevent sticking. If the curry thickens too much, add a bit more vegetable broth. After the lentils are tender, it’s time to add the fresh spinach. Fold it into the curry and let it wilt for about 5 minutes. This adds color and nutrients to your dish. Finally, season with salt and pepper to taste. Stir well to ensure the flavors mix evenly. Remove the pot from heat and let it sit for a few minutes. This will help the curry thicken slightly, making it even creamier. - Rinse red lentils well before use. This removes dirt and helps prevent foam. - If your curry is too thick, add more vegetable broth. Stir well to combine. - Try adding more spices like coriander or a dash of cayenne. This adds depth and warmth. - Adjust heat levels by adding fresh chilies or chili powder. Start small, then taste as you go. - Serve the curry in deep bowls. Garnish with fresh cilantro for a bright touch. - Pair it with jasmine rice or warm naan. This creates a complete and satisfying meal. Pro Tips Use Fresh Spices: Always opt for fresh spices for the best flavor. Ground spices lose their potency over time, so consider grinding whole spices before use. Adjust Consistency: If the curry becomes too thick while cooking, simply add a splash more vegetable broth or water to reach your desired consistency. Enhance Flavor: Add a squeeze of fresh lime juice just before serving to brighten the flavors of the curry. Storage Tips: This curry stores well in the fridge for up to 4 days and can also be frozen for future meals, making it perfect for meal prep. {{image_4}} You can change red lentils for green or brown lentils. Each type brings a unique taste and texture. Green lentils keep their shape well and add a nice bite. Brown lentils are soft and creamy. When using these lentils, adjust your cooking time. Green lentils take about 30-40 minutes, while brown lentils need 25-30 minutes. Rinse them well before adding to your dish. This creamy coconut lentil curry can fit many diets. To make it vegan, use vegetable broth and ensure all spices are plant-based. Gluten-free is easy with this recipe since it uses no wheat. Check labels for any pre-packaged ingredients to ensure they are gluten-free. This dish is great for everyone. You can add seasonal vegetables to your curry. Try carrots, bell peppers, or zucchini. These veggies add color and nutrition. You can also swap spices to change the flavor. For example, use garam masala instead of curry powder. Or, add fresh herbs like basil or mint for a twist. Feel free to experiment and find your favorite mix! To store leftover curry, let it cool first. Then, place it in an airtight container. You can keep it in the fridge for up to four days. To reheat, warm it gently on the stove or in the microwave. Stir occasionally to ensure even heating. If you want to freeze the curry, use a freezer-safe container. Make sure to leave some space at the top. This allows for expansion during freezing. The curry can last for up to three months in the freezer. To reheat, thaw it overnight in the fridge. Heat it up on the stove or in the microwave until it is hot throughout. The creamy coconut lentil curry lasts about four days in the fridge. If you freeze it, you can enjoy it for up to three months. Always check for any off smell or changes in texture before using. Store it properly to keep it fresh and tasty! Cooking lentils in curry takes about 20 to 25 minutes. Start with a gentle simmer. Check the texture after 20 minutes. They should be soft but not mushy. If you want them thicker, let them cook a bit longer. Stir occasionally to prevent sticking. Yes, you can use light coconut milk. However, it will change the flavor and texture. Light coconut milk is less rich and creamy. This may make the curry taste less bold. For the best results, I recommend full-fat coconut milk for a creamier dish. You can pair this curry with several side dishes. Jasmine rice is a great choice. It absorbs the curry's flavors well. Warm naan bread is another favorite. You can also serve it with a fresh salad or roasted vegetables for a complete meal. In this blog post, we explored how to make a delicious creamy coconut lentil curry. We covered the key ingredients and step-by-step cooking method. Then, we shared handy tips for enhancing flavors and presentation. We discussed variations to suit different diets and how to store leftovers. This dish is versatile and easy to prepare. With a few simple steps, you can create a meal that warms the heart. Enjoy experimenting with flavors and make it your own!

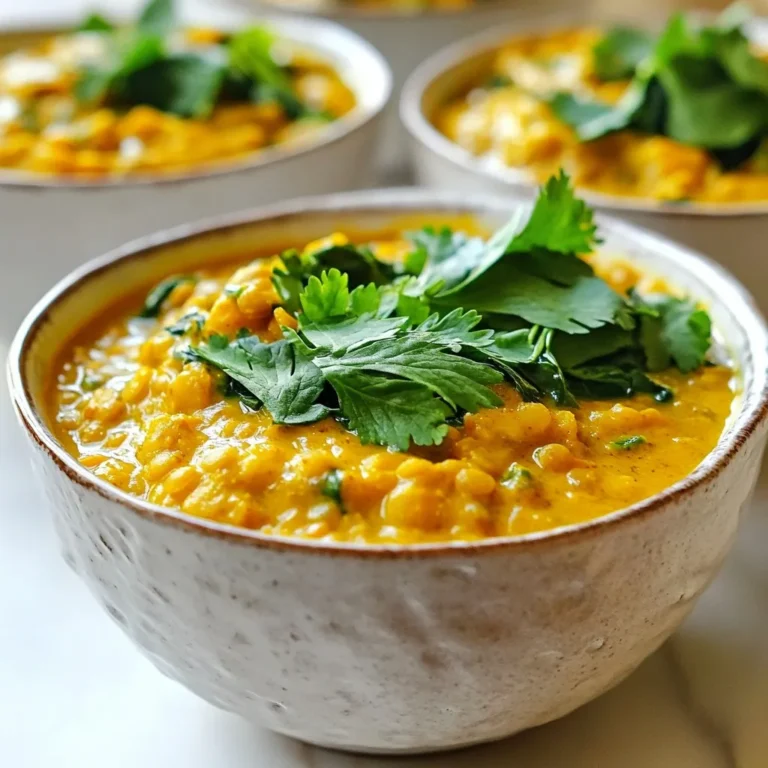
Creamy Coconut Lentil Curry Flavorful and Easy Dish

- 1 lb chicken breasts, sliced into tenders - 1 cup finely grated Parmesan cheese - 1 cup panko breadcrumbs - 1 teaspoon garlic powder - 1 teaspoon onion powder - 1 teaspoon Italian seasoning - 2 large eggs - 2 tablespoons milk - Salt and pepper, to taste - Olive oil spray or cooking oil To make Parmesan crusted chicken tenders, you need simple ingredients. Start with fresh chicken breast tenders. The chicken should be cut into uniform pieces for even cooking. You will also need finely grated Parmesan cheese. This gives the tenders a rich flavor. Panko breadcrumbs add crunch. They are lighter than regular breadcrumbs. The spices in this recipe bring out the flavor. Garlic powder adds a savory touch, while onion powder boosts the taste. Italian seasoning adds depth. Use salt and pepper to season your mix. For the egg wash, you need two large eggs and some milk. This mixture helps the coating stick to the chicken. Don’t forget the olive oil spray! A light coating helps the tenders crisp up nicely. With these ingredients, you set the stage for a delicious meal. Enjoy the process of making this tasty dish! {{ingredient_image_2}} 1. First, preheat your oven to 400°F (200°C). This helps the chicken cook evenly. 2. Now, prepare your baking sheet. Line it with parchment paper. This makes cleanup easy. 3. Next, grab a shallow bowl. Whisk together the eggs and milk. Mix until frothy. This will be your egg wash. 1. In a separate shallow bowl, mix the Parmesan cheese, panko breadcrumbs, garlic powder, onion powder, Italian seasoning, and a pinch of salt and pepper. Stir well to combine. 2. Take each chicken tender and dip it into the egg wash. Make sure it’s fully coated. 3. Allow any extra egg to drip off. Then, dredge it in the Parmesan mixture. Press lightly to help the coating stick. 1. Place your breaded chicken tenders on the lined baking sheet. Lay them in a single layer. 2. For a crisp finish, lightly spray each tender with olive oil. 3. Bake the tenders in your preheated oven for 15-20 minutes. They should be golden brown and crispy. 4. For added crunch, switch to broil for 2-3 minutes. Keep a close eye to avoid burning. 5. Once baked, let the chicken tenders rest for a few minutes. This keeps them juicy before serving. To get the crispiest texture, use panko breadcrumbs. They add extra crunch. Spray the chicken tenders lightly with olive oil before baking. This helps the coating turn golden brown. Resting time is very important. After baking, let the chicken sit for a few minutes. This locks in the juices and keeps the meat moist. If you skip this step, the chicken might dry out. For the best dips, try marinara sauce or ranch dressing. These pair well with the chicken’s flavor. You can also serve a honey mustard sauce for a sweet twist. For plating, use a colorful platter. Arrange the chicken tenders nicely. Garnish with fresh parsley for a pop of color. Add lemon wedges on the side for a zesty kick. This makes your dish look great and adds flavor! Pro Tips Choose Fresh Chicken: Opt for fresh chicken breasts for the best flavor and texture. Frozen chicken can result in a less juicy outcome. Customize the Coating: Feel free to add your favorite herbs and spices to the breadcrumb mixture for a personalized touch. Use a Wire Rack: If available, place a wire rack on your baking sheet to allow heat circulation, which helps achieve even crispiness. Rest Before Serving: Let the chicken tenders rest for a few minutes after baking. This helps retain moisture and enhances the overall flavor. {{image_4}} You can play with ingredients in this recipe. Using different cheeses adds a fun twist. Try mozzarella or cheddar for a new flavor. Each cheese brings its unique taste and texture. For gluten-free options, swap panko breadcrumbs with gluten-free breadcrumbs. Almond flour or crushed cornflakes also work well. They add crunch without gluten. Adding spices or herbs can elevate your dish. Consider paprika for a smoky flavor. Fresh herbs like thyme or rosemary add a fresh touch. Adjust the spice levels to suit your taste. If you like heat, add red pepper flakes. For a milder version, skip the heat. Tailor it to what you enjoy! To keep your Parmesan crusted chicken tenders fresh, store them properly. - Refrigeration tips: Place the cooled chicken tenders in an airtight container. You can keep them in the fridge for up to three days. Make sure they are completely cooled before sealing. If you want to keep them even longer, consider freezing. - Freezing instructions: For freezing, wrap each tender in plastic wrap or foil. Then, place them in a freezer bag. Remove as much air as possible before sealing. You can freeze them for up to three months. When it’s time to enjoy your leftovers, reheating properly is key. - Best methods for reheating: The oven is the best way to reheat these chicken tenders. Preheat your oven to 375°F (190°C). Place the tenders on a baking sheet and heat for about 10-15 minutes. This keeps them crispy and warm. - Avoiding sogginess: To avoid sogginess, do not use the microwave. Microwaving can make the coating soft. If you must use the microwave, heat for a short time and then crisp them in a skillet for a few minutes. This will help restore some crunch. How long to cook chicken tenders? You should bake chicken tenders for 15 to 20 minutes at 400°F (200°C). They cook faster than whole chicken pieces. Always check the internal temperature. It should reach 165°F (75°C) for safety. If you want them extra crispy, broil for 2 to 3 minutes at the end. Just keep an eye on them so they don’t burn. Can I make these in an air fryer? Yes, you can make Parmesan crusted chicken tenders in an air fryer! Preheat your air fryer to 400°F (200°C). Place the tenders in a single layer, ensuring they do not touch. Cook for about 10 to 12 minutes, flipping halfway through. This method gives you a nice crunch while using less oil. What sides pair best with Parmesan crusted chicken tenders? These chicken tenders go well with many sides. Here are some great options: - Fresh salad: A simple green salad with a light vinaigrette. - Vegetable sticks: Carrots and celery with ranch dip are a fun choice. - Pasta: A light pasta dish with lemon or marinara can complement the flavors. - Fries: Classic potato fries or sweet potato fries add a nice crunch. Serve them however you like for a complete meal! In this post, I shared a simple recipe for crispy Parmesan crusted chicken tenders. You learned about the right ingredients and how to prepare them for an easy meal. I gave you tips for achieving the best texture and serving ideas to impress. Also, I covered storage methods and answered common questions. With these steps and ideas, you can make tasty chicken tenders at home. Enjoy the cooking process and have fun experimenting with flavors!

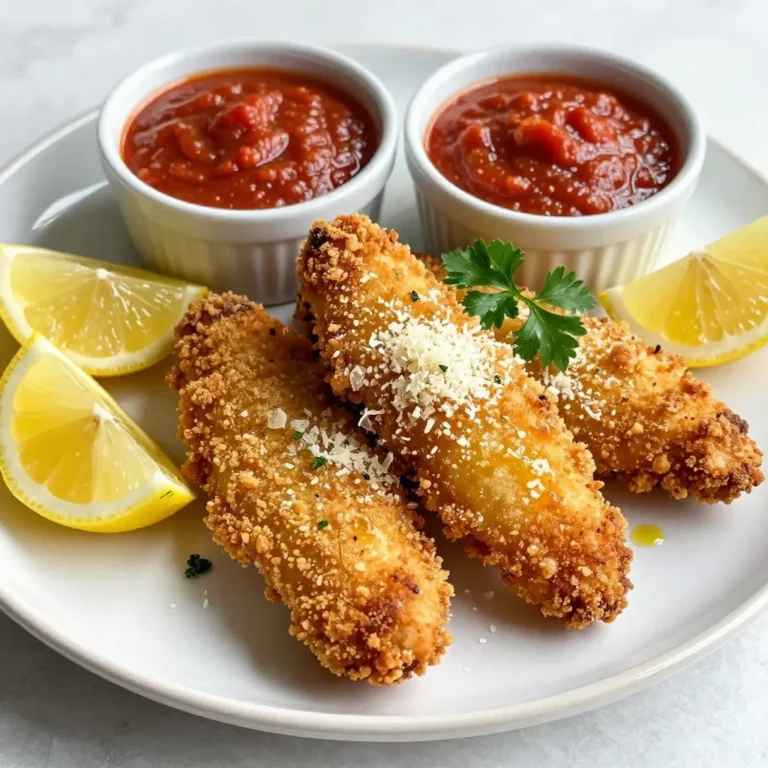
Parmesan Crusted Chicken Tenders Crispy Delight

- 1 cup creamy peanut butter - 1/2 cup unsalted butter, melted - 1 cup packed brown sugar - 1/2 cup granulated sugar - 2 large eggs - 1 teaspoon pure vanilla extract - 1 1/2 cups all-purpose flour - 1/2 teaspoon baking powder - 1/4 teaspoon salt - 1 cup mini chocolate peanut butter cups, chopped (plus extra for topping) - 1/2 cup chocolate chips (optional) You can add chocolate chips for more chocolatey goodness. Consider using sea salt for a sweet-savory taste. A dash of cinnamon can add warmth. You might also try some chopped nuts for extra crunch. If you need a dairy-free option, use a plant-based butter. Almond flour works well instead of all-purpose flour for gluten-free blondies. You can replace peanut butter with almond butter for a different flavor. If you want less sugar, use coconut sugar instead. {{ingredient_image_2}} Start by preheating your oven to 350°F (175°C). Next, grab a 9x9-inch baking pan. You can lightly grease it or line it with parchment paper. This makes removing the blondies easy when they are done. In a large bowl, combine 1 cup of creamy peanut butter with 1/2 cup of melted unsalted butter. Mix these until they are smooth and well blended. Next, add 1 cup of packed brown sugar and 1/2 cup of granulated sugar. Mix again until the texture is creamy. Then, add 2 large eggs, one at a time. Beat well after each egg. Finally, stir in 1 teaspoon of pure vanilla extract for extra flavor. In another bowl, whisk together 1 1/2 cups of all-purpose flour, 1/2 teaspoon of baking powder, and 1/4 teaspoon of salt. This helps distribute the baking powder evenly. Gradually fold the dry mixture into your wet mixture. Mix gently until just combined. Be careful not to overmix. This keeps the blondies soft. Now, add 1 cup of chopped mini chocolate peanut butter cups and 1/2 cup of chocolate chips if you like. Fold them into the batter. Pour the batter into your prepared baking pan. Spread it evenly. For a fun touch, sprinkle extra chopped peanut butter cups on top. Place the pan in the oven and bake for 25-30 minutes. The blondies will be golden brown. A toothpick should come out mostly clean with a few moist crumbs. After baking, let the blondies cool in the pan for about 10-15 minutes. Use the parchment paper to lift them out and cool completely on a wire rack. Once cool, cut them into squares. For a nice finish, dust with powdered sugar or drizzle melted chocolate on top before serving. Enjoy every delicious bite! To make the best peanut butter cup blondies, follow these key tips: - Use room temperature ingredients. This helps everything blend smoothly. - Do not overmix the batter. Mix until just combined for soft blondies. - Check your oven temperature. Ovens can vary. An oven thermometer can help. Avoid these common pitfalls: - Skipping the parchment paper. This makes removal hard and can ruin your blondies. - Overbaking. Check them early. They should be golden and moist in the center. - Not cooling before cutting. Let them cool fully to prevent crumbling. For chewy blondies: - Use more brown sugar and less flour. - Bake for a shorter time. For cake-like blondies: - Increase the flour slightly. - Add more eggs for a fluffier texture. Experiment with these tips to find your perfect blondie! Pro Tips Use Room Temperature Ingredients: Let your butter and eggs come to room temperature before mixing. This will help achieve a smoother batter and better texture in your blondies. Don’t Overmix: When combining the wet and dry ingredients, mix just until combined. Overmixing can lead to dense blondies instead of the desired soft and chewy texture. Customize Your Mix-ins: Feel free to experiment with different types of chocolate or add nuts for a crunchy texture. Chopped pretzels or toffee bits could add a delightful twist! Check for Doneness: Start checking your blondies a few minutes before the recommended baking time. They should be golden brown, and a toothpick inserted should come out with a few moist crumbs. {{image_4}} You can easily make gluten-free peanut butter cup blondies. Just swap the all-purpose flour for a gluten-free flour blend. Make sure it contains xanthan gum, which helps with texture. This swap keeps the blondies soft and chewy. Mix-ins can add fun flavors to your blondies. Try adding chopped nuts like pecans or walnuts for crunch. You can also add dried fruits like cranberries or cherries for a sweet touch. Just remember to keep the total mix-ins around one cup for the best texture. To make vegan peanut butter cup blondies, replace eggs with flax eggs. For each egg, mix one tablespoon of flaxseed meal with three tablespoons of water. Let it sit until it thickens. Use a plant-based butter or coconut oil instead of regular butter. These swaps keep the blondies delicious and plant-based. Store your leftover blondies in an airtight container. Keep them at room temperature for up to three days. If you want to keep them longer, move them to the fridge. They can last up to a week in the fridge. Make sure to let them cool completely before storing. This keeps them soft and fresh. You can freeze these blondies for later. First, cut them into squares. Wrap each square in plastic wrap. Then, place them in a freezer-safe bag. They can stay frozen for up to three months. When you are ready to eat them, just take out the number you want. To reheat your blondies, use the microwave or oven. If using a microwave, heat for 10-15 seconds. Check if they are warm enough. If you use the oven, preheat it to 350°F (175°C) and heat for about 5-10 minutes. This will help restore their soft texture. Enjoy your warm blondies with a scoop of ice cream or a drizzle of chocolate! Blondies and brownies are both delicious baked treats. The main difference is in their base. Blondies use brown sugar and butter, while brownies use cocoa powder. This makes blondies taste sweet and buttery. Brownies have a rich chocolate flavor. Both are soft and chewy, but they offer different tastes and colors. Yes, you can use crunchy peanut butter! It will add a fun texture to your blondies. The chunks of peanuts give a nice bite. If you love that extra crunch, go for it. Just remember, it may change the smoothness of the blondies a little. To check if your blondies are done, look for a golden brown top. Insert a toothpick into the center. If it comes out mostly clean with a few moist crumbs, they are ready. If it has wet batter, give them a few more minutes. Keep an eye on them to avoid overbaking. Blondies can last about 3 to 4 days at room temperature. Store them in an airtight container to keep them fresh. If they start to dry out, you can warm them a little before serving. They taste great even after a few days! Absolutely, making blondies ahead of time is a great idea! You can bake them a day or two in advance. Just let them cool and store them properly. This way, you can enjoy them fresh without last-minute baking. They also make a sweet treat for gatherings or parties! Peanut Butter Cup Blondies are simple and fun to make. We covered ingredients, step-by-step instructions, and tips for perfect results. I shared ways to change flavors and how to store leftovers. Remember: avoid overmixing to keep them chewy, and try different add-ins for variety. These blondies offer a tasty treat for everyone. Bake a batch, share with friends, and enjoy every bite. Happy baking!

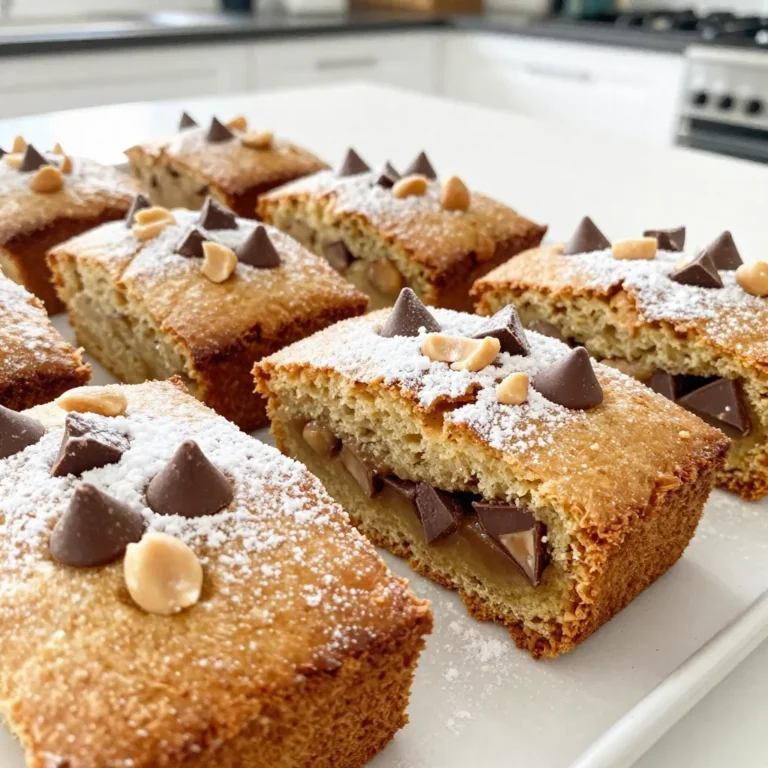
Peanut Butter Cup Blondies Delightful and Simple Treat

PREV 1 … 44 45 46 … 49 NEXT
mini chef kitchen

explore

DessertsDinnerAppetizersDrinks

Our Policies

  • Cookie Policy
  • Copyright Policy
  • Disclaimer
  • GDPR Policy
  • Terms Of Use
Back to Top
  • About
  • Contact Us
  • Privacy Policy
© 2026 mini chef kitchen