FREE DINNER EBOOK! Get your copy!
  • Cookie Policy
  • GDPR Policy
  • Disclaimer
  • Terms Of Use
  • Visit my other site: Fun Cookie Recipes
mini chef kitchen
  • Home
  • Dinner
  • Desserts
  • Drinks
  • Appetizers
  • Contact
  • About
  • Privacy Policy
  • Home
  • Dinner
  • Desserts
  • Drinks
  • Appetizers
  • Contact
  • About
  • Privacy Policy
  • Cookie Policy
  • GDPR Policy
  • Disclaimer
  • Terms Of Use
Visit my other site: Fun Cookie Recipes

HOME / CATEGORIES /

Latest

- 1 cup canned pumpkin puree (not pumpkin pie filling) - 1/2 cup vegetable oil (or melted coconut oil for a twist) - 1/2 cup packed brown sugar (light or dark, your choice) - 1/2 cup granulated sugar - 2 large eggs, at room temperature - 1 teaspoon pure vanilla extract - 1 1/2 cups all-purpose flour (or a gluten-free blend if preferred) - 1 teaspoon baking powder - 1 teaspoon baking soda - 1/2 teaspoon salt - 1 teaspoon ground cinnamon - 1/2 teaspoon ground nutmeg - 1/2 cup semi-sweet chocolate chips (or dark chocolate for a richer flavor) - Optional: 1/4 cup chopped walnuts or pecans, for added crunch Gather these ingredients before you start. Using canned pumpkin puree makes this recipe quick. Make sure it’s not pumpkin pie filling, as that has extra sugars and spices. I love using vegetable oil for moisture, but melted coconut oil works too. The sugars balance the flavors. Brown sugar adds depth, while granulated sugar helps with sweetness. Use fresh eggs for the best results. The vanilla extract enhances the taste and aroma. The dry ingredients are key to the muffin’s texture. Use all-purpose flour or a gluten-free blend if needed. Baking powder and baking soda help muffins rise. Salt and spices like cinnamon and nutmeg bring warmth. Don’t forget the chocolate chips! They melt into sweet pockets. If you want a bit of crunch, add walnuts or pecans. These ingredients come together to create a delicious treat that’s hard to resist. {{ingredient_image_2}} 1. Preheat your oven to 350°F (175°C). This helps muffins bake evenly. 2. Prepare your muffin tin with paper liners or grease each cup. This stops sticking. 3. In a large bowl, mix together the pumpkin puree, vegetable oil, brown sugar, granulated sugar, eggs, and vanilla. Whisk until everything blends well. 4. In another bowl, sift the all-purpose flour, baking powder, baking soda, salt, cinnamon, and nutmeg. This makes sure no lumps are in your dry mix. 5. Gradually add the dry mix into the wet mix. Use a spatula to fold it gently. Be careful not to overmix. This keeps muffins light and fluffy. 6. Carefully fold in the semi-sweet chocolate chips and the nuts if you want. This adds a nice crunch. 7. Use a spoon or ice cream scoop to fill the muffin cups about 2/3 full. This allows space for rising. 8. Place the muffin tin in the oven and bake for 18-20 minutes. To check if they are done, insert a toothpick in the center. It should come out clean or with a few moist crumbs. 9. Once baked, let the muffins cool in the pan for about 5 minutes. Then, transfer them to a wire rack to cool completely. Enjoy your warm muffins! To get fluffy muffins, avoid overmixing the batter. When you fold in the dry ingredients, do it gently. Stop mixing as soon as you see no more flour. This keeps air in the batter, making your muffins rise nicely. To check for doneness, use a toothpick. Stick it into the center of a muffin. If it comes out clean or with a few moist crumbs, your muffins are ready. Don’t let them bake too long, or they may dry out. You can add spices for extra flavor. Try a pinch of ground ginger or a dash of allspice. These spices add warmth to your muffins. You can also use extracts like almond or maple for a twist. For a richer taste, use dark chocolate chips instead of semi-sweet ones. You could also try white chocolate or butterscotch chips for a fun change. Mix and match your favorite flavors to make these muffins your own. Pro Tips Use Room Temperature Ingredients: Ensure your eggs and other ingredients are at room temperature for better emulsion and a lighter texture in your muffins. Don’t Overmix: Gently fold the dry ingredients into the wet mixture; overmixing can lead to tough muffins. Stop when you see a few streaks of flour. Experiment with Spices: Feel free to add other spices like ginger or cloves for a unique flavor twist that complements the pumpkin beautifully. Store Properly: Keep your muffins in an airtight container at room temperature for up to three days, or freeze them for longer storage. Reheat before serving for the best taste! {{image_4}} You can easily make these pumpkin chocolate chip muffins gluten-free. Just use a gluten-free flour blend instead of regular flour. Make sure to check the blend's measurement. Sometimes, you need to adjust the liquid in your mix. Start with the same amount of pumpkin puree and oil, then tweak as needed for a smooth batter. If you want a nut-free or vegan muffin, it’s simple! Replace the eggs with flaxseed meal or applesauce. Use plant-based milk instead of dairy. For chocolate chips, choose brands that are nut-free. This way, you still get that sweet chocolatey goodness without nuts. To keep your pumpkin chocolate chip muffins fresh, follow these simple steps: - Let the muffins cool completely on a wire rack. - Place them in an airtight container. - You can also wrap each muffin in plastic wrap for extra protection. - Store at room temperature for up to three days. If you want to keep them even longer, consider these tips: - Place a slice of bread in the container. This helps keep the muffins moist. - Avoid stacking the muffins to prevent squishing. Freezing muffins is easy and keeps them tasty. Here’s how to do it: 1. Allow muffins to cool completely. 2. Wrap each muffin tightly in plastic wrap. 3. Place the wrapped muffins in a freezer bag or container. 4. Label the bag with the date. For the best taste, use them within three months. When you’re ready to eat: - Remove a muffin from the freezer. - Unwrap it and place it on a plate at room temperature. - For a warm treat, microwave for about 15-20 seconds. Enjoy your delicious muffins any time! How can I make these muffins healthier? You can make these muffins healthier by using less sugar. You can also swap half of the oil with unsweetened applesauce. This change keeps them moist and cuts some fat. Additionally, you can use whole wheat flour instead of all-purpose flour for extra fiber. Can I use fresh pumpkin instead of canned? Yes, you can use fresh pumpkin. First, cook the pumpkin until soft. Then, puree it until smooth. Make sure to measure out one cup of the fresh puree for your muffins. What can I substitute for eggs in this recipe? You can use unsweetened applesauce as a substitute for eggs. Use 1/4 cup of applesauce for each egg. You can also use flaxseed meal mixed with water. Mix one tablespoon of flaxseed meal with three tablespoons of water. Let it sit for a few minutes until it thickens. How long do the muffins last at room temperature? These muffins last about three days at room temperature. Keep them in an airtight container to stay fresh. If you want them to last longer, store them in the fridge for up to a week. Can I double the recipe easily? Yes, you can double the recipe without any issues. Just make sure to use a larger bowl for mixing. You may need to bake them in batches, depending on your oven size. Enjoy more muffins whenever you want! In this blog, we explored how to make delicious pumpkin chocolate chip muffins. We covered essential ingredients, preparation steps, baking tips, and variations. Remember to mix wet and dry ingredients gently to keep muffins fluffy. Don't hesitate to add spices or use different chocolate chips for a unique taste. With proper storage, you can enjoy these treats for days. Whether you try gluten-free or vegan options, the key is to have fun in the kitchen. Baking is about joy, so get creative and enjoy every bite!

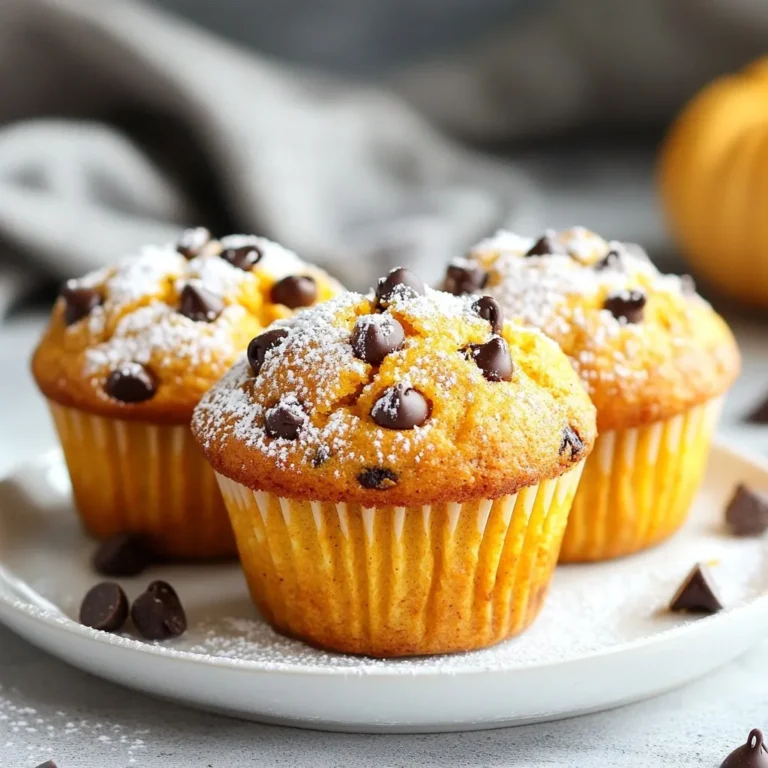
Pumpkin Chocolate Chip Muffins Tasty and Easy Treat

- 4 cod fillets (approximately 6 ounces each) - 1 cup grated Parmesan cheese - 1/2 cup breadcrumbs (preferably panko for an extra crunchy texture) - 1 teaspoon garlic powder - 1 teaspoon fresh lemon zest - 1 teaspoon dried oregano - 1/2 teaspoon paprika - Salt and freshly ground black pepper, to taste - 2 tablespoons extra virgin olive oil - 1 lemon, thinly sliced (for garnish) - Fresh parsley, finely chopped (for garnish) To make Parmesan crusted cod, these main ingredients are key. The cod provides a mild, flaky base. The Parmesan cheese gives a rich, salty flavor. Panko breadcrumbs add that lovely crunch. Garlic powder and lemon zest boost the taste. Oregano and paprika add depth. Salt and pepper enhance all flavors. - Fresh herbs like thyme or basil - A splash of hot sauce for heat - Grated lemon or lime zest for extra zing - Different cheese like cheddar or Gruyère You can mix up the recipe with these optional ingredients. Fresh herbs add brightness. Hot sauce gives it a kick. Zest from citrus adds freshness. Other cheeses can change the flavor profile too. - Baking sheet - Parchment paper - Medium-sized mixing bowl - Paper towels - Measuring cups and spoons - Fork for flaking cod These supplies make the cooking process easy. The baking sheet and parchment paper help with cleanup. A mixing bowl is perfect for combining ingredients. Paper towels help dry the cod, so the crust sticks better. Measuring cups and spoons ensure accurate ingredient amounts. A fork is essential for testing the cod's doneness. {{ingredient_image_2}} First, preheat your oven to 400°F (200°C). This is the perfect temperature for baking cod. While the oven heats, prepare a baking sheet. Line it with parchment paper. This step helps prevent sticking and makes cleanup easier. In a medium bowl, mix the following ingredients: - 1 cup grated Parmesan cheese - 1/2 cup breadcrumbs (panko works best) - 1 teaspoon garlic powder - 1 teaspoon fresh lemon zest - 1 teaspoon dried oregano - 1/2 teaspoon paprika - Salt and black pepper to taste Stir until everything is well mixed. This crust will add crunch and flavor to your cod. Take your cod fillets, about 6 ounces each, and pat them dry with paper towels. This helps the crust stick better. Place the fillets on the lined baking sheet. Drizzle 2 tablespoons of extra virgin olive oil over each fillet. This adds moisture and flavor. Press the Parmesan mixture firmly onto the top of each cod fillet. Cover the surface well for a tasty crunch. Now, place the baking sheet in the oven. Bake for about 15-20 minutes. The cod is ready when it turns opaque and flakes easily with a fork. The crust should be golden brown and crunchy. After baking, let the cod rest for a few minutes. This helps keep the juices in. Finally, garnish with fresh parsley and serve with lemon slices for a bright, zesty touch. Enjoy your delicious meal! To get that perfect crunch, use panko breadcrumbs. They create a lighter and crispier texture. Mix them well with grated Parmesan cheese and spices. Press the mixture firmly onto the cod. This helps it stick during baking. Always pat the cod fillets dry before adding the crust. This helps the crust stick better. Bake the cod at 400°F (200°C) for 15-20 minutes. The fish should flake easily when done. If you want extra crispiness, broil the cod for the last 2 minutes. Keep an eye on it to avoid burning. Serve your Parmesan crusted cod with lemon slices. The fresh juice adds brightness and flavor. For sides, consider sautéed green beans or a light salad. Both options balance the dish and make it more colorful. You can also add a sprinkle of fresh parsley for a pop of color and taste. Pro Tips Use Fresh Cod: Fresh cod fillets will provide a better flavor and texture than frozen ones. Look for fillets that are firm and have a mild scent. Customize the Crust: Feel free to add your favorite herbs or spices to the Parmesan mixture, such as thyme or cayenne pepper, for an extra kick of flavor. Check for Doneness: To ensure the cod is perfectly cooked, use a fork to test if it flakes easily. If it does, it’s ready to enjoy! Serve with Sides: Pair this dish with a light salad or steamed vegetables for a well-rounded meal that complements the rich flavor of the cod. {{image_4}} You can boost the flavor of your Parmesan crust with fresh herbs. Try adding chopped basil, thyme, or dill to the crumb mix. Each herb gives a new taste. For a spicy kick, mix in a pinch of red pepper flakes. This small change can make your dish exciting. Not a cod fan? You can use other fish like haddock or tilapia. Both have mild flavors and work well with the Parmesan crust. Salmon also tastes great, but it has a richer flavor. Adjust your cooking time for thicker fillets to ensure they cook through. Pair your Parmesan crusted fish with fresh vegetables. Roasted broccoli or green beans add color and crunch. A light side salad with lemon vinaigrette also complements the dish. For a heartier option, serve it with quinoa or rice. These sides balance the meal and add nutrition. After cooking your Parmesan crusted cod, let it cool for a bit. Place the leftovers in an airtight container. Store them in the fridge for up to three days. Keeping the cod sealed helps maintain its flavor and texture. When ready to eat, check for any off smells or changes in texture before reheating. To reheat your cod, preheat your oven to 350°F (175°C). Place the cod on a baking sheet. Heat for about 10-15 minutes. This keeps the crust crispy while warming the inside. You can also use a microwave, but the crust may become soft. If you choose the microwave, heat on low power for a few minutes. You can freeze the cooked cod if you want to save it for later. Wrap each piece tightly in plastic wrap. Then, place them in a freezer bag. Label the bag with the date and use within three months. When you’re ready to eat, thaw the cod in the fridge overnight. Reheat it in the oven for best results. You can tell cod is fully cooked when it turns opaque. Use a fork to check. If the fish flakes easily, it’s ready to eat. The crust should be golden brown and crunchy. A cooking time of 15-20 minutes at 400°F works well for tender cod. Yes, you can use other cheeses! Cheddar or Gruyère can work well. Just remember, these cheeses may change the flavor a bit. Parmesan gives a nutty taste that complements the cod nicely. You might also blend cheeses for a unique crust. This dish pairs well with many sides. Consider serving it with: - Sautéed vegetables - A light salad - Rice or quinoa - Mashed potatoes These sides enhance the meal and add color. To lower calories, use less cheese. You can also swap regular breadcrumbs for whole wheat or use less oil. Consider adding more herbs to boost flavor without extra calories. These tips keep your meal light but still tasty. In this blog post, we explored how to make delicious Parmesan crusted cod. We covered key ingredients and essential cooking supplies. You learned step-by-step instructions for perfect baking. I shared helpful tips for a crispy crust and alternative variations for this dish. Lastly, we discussed storage and reheating methods. Enjoy making this tasty meal. With simple steps, you can impress your family and friends. Happy cooking!

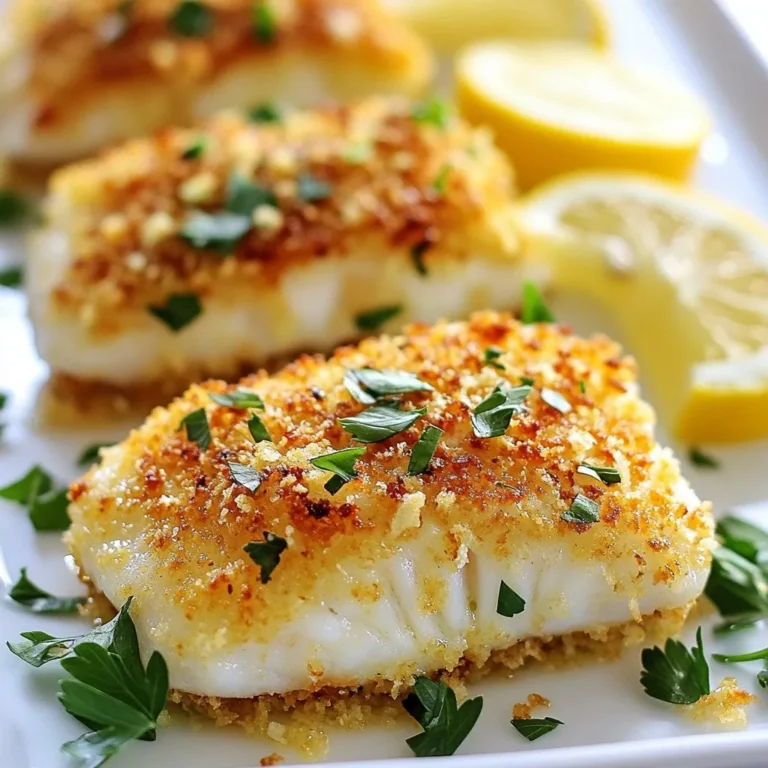
Parmesan Crusted Cod Savory and Simple Delight

- 8 oz (225g) whole wheat noodles - 3 tablespoons sesame oil - 2 tablespoons soy sauce - 1 tablespoon rice vinegar - 1 tablespoon chili paste (adjust according to your spice preference) - 1 tablespoon honey - 2 cloves garlic, finely minced - 1 inch piece of ginger, grated - 1 cucumber, julienned - 2 green onions, thinly sliced - 1 tablespoon toasted sesame seeds - Fresh cilantro leaves for garnish To make spicy sesame cold noodles, you need some key ingredients. Whole wheat noodles form the base of this dish. They add a nice chewy texture. Then, we have the sauce. The sauce has sesame oil, soy sauce, rice vinegar, chili paste, honey, garlic, and ginger. Each part brings its own flavor. The vegetables in this dish are just as important. You will use fresh cucumber and green onions for crunch. They add a refreshing feel to every bite. Finally, sprinkle toasted sesame seeds and cilantro for a burst of flavor and color. When you gather these ingredients, you set yourself up for a tasty dish. Each item plays a role in making the noodles flavorful and refreshing. Enjoy this mix of textures and tastes! {{ingredient_image_2}} To start, you need to cook the noodles. First, bring a large pot of salted water to a boil. The salt enhances the noodle flavor. When the water boils, add 8 ounces of whole wheat noodles. Cook them until they are al dente, which usually takes about 8 to 10 minutes. This means they should still have a little bite. After cooking, drain the noodles and rinse them under cold water. This halts the cooking process and cools the noodles down. Next, it’s time to make the sauce. In a medium bowl, combine 3 tablespoons of sesame oil, 2 tablespoons of soy sauce, and 1 tablespoon each of rice vinegar and honey. Add 1 tablespoon of chili paste for that spicy kick, along with 2 cloves of minced garlic and 1 inch of grated ginger. Whisk all the ingredients together until you have a smooth sauce. This is where the magic begins! Now for the fun part! Transfer the cooled noodles into a large mixing bowl. Pour the sauce over the noodles and toss gently. You want to coat every noodle with the sauce. Next, add 1 julienned cucumber and 2 thinly sliced green onions. Stir carefully to mix everything well. The fresh veggies add a nice crunch and flavor. Finally, it’s time to serve! Portion the spicy noodles into individual bowls. For a finishing touch, sprinkle each bowl with 1 tablespoon of toasted sesame seeds and a handful of fresh cilantro leaves. This not only adds flavor but also makes the dish look beautiful. Enjoy your spicy sesame cold noodles chilled for a refreshing meal! To get the best noodles, timing is key. Cook the whole wheat noodles until they are al dente, which means they should still have a little bite. The package will tell you how long this takes, so keep an eye on the clock. Once the noodles are done, drain them right away. Rinsing them under cold water stops the cooking. This step is very important because it keeps the noodles from getting too soft and sticky. You can make the sauce as spicy as you like. If you love heat, add more chili paste. If you prefer mild flavors, use less. Honey is great for sweetness, but you can try maple syrup or agave instead for a different taste. Adjust the sweetness to balance the spice and create your perfect sauce. Serve the noodles in shallow bowls for a nice look. This style makes the dish feel fancy. When you add the cucumber on top, arrange it neatly. This adds a pop of green and makes the dish more inviting. A sprinkle of sesame seeds and cilantro on top completes the visual appeal. Enjoy the beautiful and tasty dish! Pro Tips Adjust the Spice Level: Feel free to modify the amount of chili paste based on your heat tolerance. Start with a small amount and increase it gradually for the perfect kick. Chill Before Serving: Allow the noodles to sit in the refrigerator for about 30 minutes after mixing with the sauce. This enhances the flavors and provides a refreshing taste. Add Protein: For a heartier meal, consider adding cooked chicken, tofu, or shrimp. Toss them in with the noodles and sauce for added nutrition and flavor. Experiment with Vegetables: Don't hesitate to incorporate other veggies like bell peppers, carrots, or even edamame to add color and nutrition to your dish. {{image_4}} You can boost your Spicy Sesame Cold Noodles by adding protein. Grilled chicken or tofu makes a great choice. Simply slice the grilled chicken or cube the tofu, and toss them in with the noodles. This adds a nice texture and flavor. If you love seafood, try shrimp. Cook the shrimp until they turn pink, then mix them in. Both options make the dish more filling and tasty. You can also change the vegetables in your noodles. Carrots or bell peppers are excellent choices. They add crunch and sweetness. Simply julienne the carrots or slice the bell peppers thinly. Another great option is adding edamame. Toss them in for extra protein and a pop of color. Feel free to mix and match your favorite veggies! To make your dish even more exciting, consider flavor enhancements. Adding sriracha gives a spicy kick. Adjust the amount based on your spice level. A splash of fresh lime juice brightens the dish and adds zing. You can also experiment with different types of sesame seeds. Try black sesame seeds for a unique twist. These small changes can take your dish from good to great! To keep your spicy sesame cold noodles fresh, store them in an airtight container. Make sure to let the noodles cool completely before sealing. Place the container in the fridge right away. This helps prevent spoilage. Your noodles can last in the fridge for about three days. If you notice any changes in smell or texture, it’s best to toss them. To keep the flavors strong, store the sauce separately. This way, you can mix it again before serving. If you want to keep the cucumbers crunchy, add them fresh when serving. This helps maintain their texture. While I recommend enjoying these noodles fresh, freezing is an option. To freeze, first, cook the noodles and rinse them as usual. Next, toss them lightly with a bit of sesame oil. This keeps the noodles from sticking together. Portion the noodles into freezer bags, removing excess air. Label the bags with the date. You can freeze them for up to two months. When you are ready to eat, take the noodles out and thaw them overnight in the fridge. To reheat, place them in boiling water for a minute. You can also microwave them with a splash of water. Just be sure to stir them to heat evenly. After reheating, add fresh sauce and vegetables for the best flavor. Spicy Sesame Cold Noodles pair well with several dishes. You can serve them with grilled chicken, shrimp, or tofu for protein. They also go nicely with a side of steamed vegetables or a fresh salad. For a complete meal, add a bowl of miso soup. These pairings enhance the flavors and make your meal more satisfying. Spicy Sesame Cold Noodles last about three to five days in the fridge. Store them in an airtight container to keep them fresh. If you see any signs of spoilage, like off smells or discoloration, it’s best to toss them. Enjoy them cold or reheat them gently if you prefer. Yes, you can make Spicy Sesame Cold Noodles in advance! Prepare the noodles and sauce the day before your meal. Store them separately until you are ready to serve. This keeps the noodles from getting too soggy. When it’s time to eat, mix the noodles with the sauce and add your veggies. If you don’t have whole wheat noodles, you can use regular pasta or rice noodles instead. Soba noodles are a great option too. They bring a nice flavor and texture to the dish. Just be sure to adjust the cooking time based on the noodle type you choose. You now have a clear guide to making delicious Spicy Sesame Cold Noodles. We discussed key ingredients, including whole wheat noodles and fresh veggies. I shared step-by-step instructions for cooking, sauce-making, and combining everything. You learned tips for perfect texture and how to customize flavors. Remember, you can add protein or different veggies for variety. These noodles are easy to store and reheat too. Enjoy creating a tasty dish that suits your taste and impresses your friends!

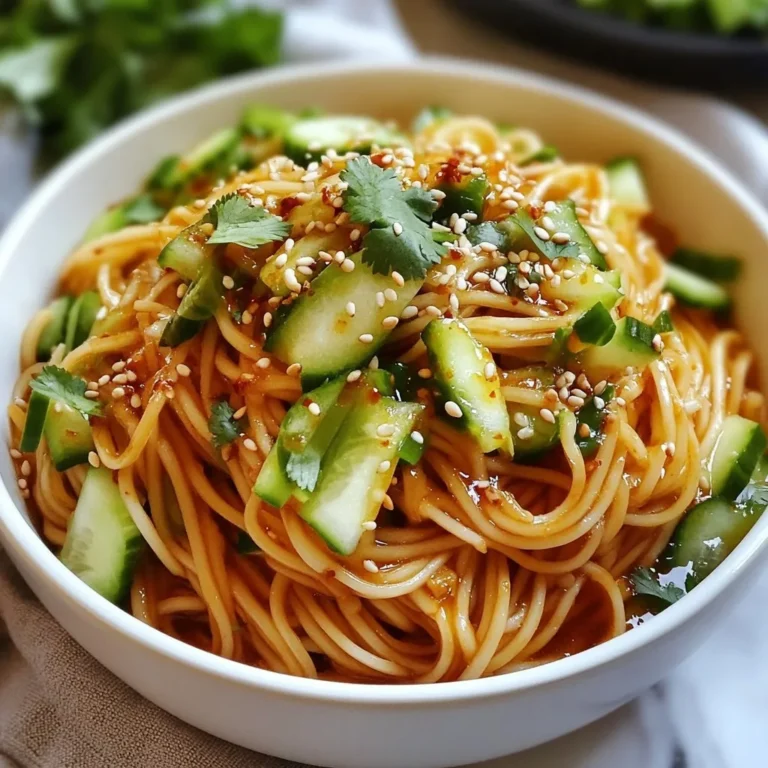
Spicy Sesame Cold Noodles Flavorful and Refreshing Dish

To make the cheesy taco rice skillet, you will need: - 1 cup long-grain white rice - 2 cups vegetable broth - 1 lb ground beef or turkey - 1 small onion, diced - 2 cloves garlic, minced - 1 packet taco seasoning - 1 can (14 oz) black beans, drained and rinsed - 1 cup corn kernels (fresh, frozen, or canned) - 1 cup diced tomatoes (fresh or canned) - 1 ½ cups shredded cheddar cheese - 1 tablespoon olive oil - Salt and pepper to taste - Fresh cilantro, chopped (for garnish) - Sour cream (for serving) - Avocado slices (for serving) If you don't have some ingredients, here are some easy swaps: - Ground beef or turkey: Try ground chicken or plant-based meat for a lighter option. - Taco seasoning: Mix chili powder, cumin, and garlic powder if you run out. - Black beans: Kidney beans or pinto beans work just as well. - Corn kernels: You can use frozen corn or even skip it if needed. - Vegetable broth: Chicken broth adds flavor if you are not vegetarian. Toppings can make this dish even better. Here are my favorites: - Sour cream: Adds creaminess and balances the spice. - Avocado slices: Creamy and fresh, they enhance the dish’s flavor. - Chopped cilantro: Brightens the dish and adds a fresh taste. - Sliced jalapeños: For those who like a spicy kick. - Lime wedges: A squeeze of lime adds zest and freshness. These ingredients and toppings will help you create a delicious and satisfying meal. Enjoy the flavors and make it your own! {{ingredient_image_2}} To cook the rice well, start with a medium pot. Pour in 2 cups of vegetable broth and bring it to a boil. Once it bubbles, add 1 cup of long-grain white rice. Turn the heat down low and cover the pot. Let it simmer for 18 to 20 minutes. The rice should soak up all the broth and become tender. After cooking, take it off the heat and keep it covered for 5 more minutes. Fluff the rice with a fork to separate the grains. This makes the rice light and fluffy. Grab a large skillet and pour in 1 tablespoon of olive oil. Heat it over medium heat. Add 1 small diced onion and 2 minced garlic cloves. Sauté for about 2 to 3 minutes until the onion looks clear and smells good. Then, raise the heat to medium-high and add 1 pound of ground beef or turkey. Use a spatula to break it up as it cooks. Cook for 5 to 7 minutes until the meat is brown. If there’s extra fat, drain it out. This step adds rich flavor to your dish. Now it’s time to mix everything together! Sprinkle a packet of taco seasoning over the browned meat. Stir it well to coat the meat with flavor. If it looks dry, add a splash of water. Next, add 1 can of black beans (drained and rinsed), 1 cup of corn (fresh, frozen, or canned), and 1 cup of diced tomatoes (fresh or canned). Finally, stir in the cooked rice. Heat everything for 2 to 3 minutes so it warms up nicely. Taste the mix and add salt and pepper to your liking. This blend brings all the flavors together. To make your cheesy taco rice skillet perfect, watch the cooking time. Overcooking the rice can make it mushy. Stick to the instructions. Cook for 18-20 minutes. Let it sit for 5 more minutes after cooking. This helps the rice fluff up nicely. When browning meat, ensure it gets good color. If it’s gray, it’s not done. Break it up as it cooks. This helps it brown evenly. Don’t skip draining excess fat; it keeps the dish light and fresh. If you use ground turkey instead of beef, the cooking time stays about the same. Ground turkey cooks quicker. Keep an eye on it, and adjust if needed. For leaner meats, the browning may take less time. Just look for a nice brown color. If you decide to use chicken, cook it longer. It needs about 10 minutes to brown well. Always check the internal temperature. It should reach 165°F for safety. To get that gooey, stretchy cheese, use low heat. After mixing the cheese in, cover the skillet. This helps the cheese melt evenly. Let it sit for about 2-3 minutes. Choose a good quality cheese. Cheddar melts well and adds great flavor. If you want a twist, try pepper jack for a kick! Always sprinkle cheese evenly across the top for a perfect melt. Pro Tips Use Homemade Taco Seasoning: For a fresher flavor, consider making your own taco seasoning with spices like cumin, paprika, and chili powder. This allows you to adjust the heat level to your preference. Vegetable Variations: Feel free to add other vegetables, such as bell peppers or zucchini, for more nutrition and flavor. Just sauté them with the onions and garlic to soften them up before adding the meat. Cheese Options: While cheddar is classic, try mixing different cheeses like Monterey Jack or Pepper Jack for a unique flavor twist. Mixing cheeses can enhance the creaminess and taste of the dish. Make it a Meal Prep: This dish stores well in the fridge for up to 3 days. Consider making a larger batch to have quick and easy meals ready for busy weeknights. {{image_4}} You can easily make this dish vegetarian. Simply swap the ground meat for a plant-based option. Use 1 cup of lentils or mushrooms. These add great texture and flavor. Also, ensure you use vegetable broth for cooking the rice. This keeps the dish rich and full of taste. If you love heat, add some spicy ingredients. Consider using spicy taco seasoning instead of regular. You can also include fresh jalapeños or diced green chilies. For an extra kick, mix in a few dashes of hot sauce. These additions will make your cheesy taco rice even more exciting. Want to pack in more veggies? You can add bell peppers, zucchini, or spinach. Just chop them up and toss them into the skillet while cooking the onions and garlic. This will boost the nutrients and make the dish colorful. Plus, it will taste fresh and delicious! To keep your cheesy taco rice fresh, let it cool first. Transfer it to an airtight container. Store it in the fridge for up to three days. Make sure to label the container with the date. This helps you remember when you made it. When you're ready to eat again, reheat in a skillet. Add a splash of water or broth to keep it moist. Cover the skillet to trap steam and heat evenly. You can also microwave it in a bowl. Just cover it with a microwave-safe lid or wrap. Heat in short bursts, stirring in between. If you want to freeze, place the rice in freezer bags. Make sure to remove as much air as possible. It can last up to three months in the freezer. To thaw, move it to the fridge overnight. Reheat it in a skillet or microwave when ready. This keeps the flavors fresh and delicious! Yes, you can use brown rice. It will change the texture and flavor. Brown rice takes longer to cook. Use about 2 ½ cups of broth for 1 cup of brown rice. Cook it for 40-45 minutes instead of 18-20 minutes. Check if it’s tender and fluffy. To add spice, use more taco seasoning. Add chopped jalapeños for heat. You can also mix in cayenne pepper or crushed red pepper flakes. Start with a small amount. Taste as you go to find your perfect level of heat. You can make your own taco seasoning. Combine chili powder, cumin, paprika, and garlic powder. Use these common spices: - 1 tsp chili powder - 1 tsp cumin - 1 tsp paprika - ½ tsp garlic powder This mix gives great flavor without a packet. You can adjust the spices to suit your taste. Cheesy Taco Rice Skillet is a fun and easy dish to make. We covered key ingredients, step-by-step cooking, and tips to avoid mistakes. You can even try variations like a vegetarian option or a spicy kick. Don’t forget storing tips to keep leftovers tasty. Cooking this dish is straightforward and rewarding. Enjoy the rich flavors and endless ways to customize it. Dive in and get cooking!

Cheesy Taco Rice Skillet Easy Family Dinner Recipe

- Rice Noodles: Start with 8 oz of rice noodles. They add texture and soak up flavor. - Fresh Vegetables: Use 1 cup each of julienned carrots, thinly sliced red bell pepper, and julienned cucumber. Toss in 1/2 cup of finely shredded red cabbage. These veggies provide color and crunch. - Dressing Components: Prepare the dressing with 3 tablespoons of soy sauce, 2 tablespoons of rice vinegar, 1 tablespoon of chili garlic sauce, and 1 tablespoon of honey or maple syrup. Add 1 teaspoon of grated fresh ginger. This mix brings heat and sweetness. - Roasted Peanuts: For extra crunch, sprinkle 1/4 cup of crushed roasted peanuts on top. - Fresh Herbs: Add 1/4 cup of chopped fresh cilantro for a burst of flavor and freshness. Each ingredient plays a role in creating a balanced dish with savory, sweet, and spicy notes. You can mix and match for your taste! {{ingredient_image_2}} To start, cook the rice noodles. Follow the package instructions carefully. Once they are soft, drain them in a colander. Rinse the noodles under cold water. This stops the cooking process and keeps them from getting sticky. Set the cooled noodles aside in a large mixing bowl. Next, prepare the chili garlic dressing. In a small bowl, combine the soy sauce, rice vinegar, chili garlic sauce, honey or maple syrup, and fresh ginger. Whisk everything together until it’s smooth. Taste your dressing and add a pinch of salt if needed. This adds depth to the flavor. Now it’s time to mix the salad. In the bowl with the cooled rice noodles, add the julienned carrots, sliced red bell pepper, julienned cucumber, shredded red cabbage, chopped scallions, and chopped cilantro. Drizzle the chili garlic dressing over the noodles and veggies. Add the sesame oil on top. Using tongs or a large spoon, gently toss everything until all the ingredients are well coated in the dressing. This ensures every bite is full of flavor. Taste the salad and adjust the seasoning if necessary. If you want it sweeter, add more honey or maple syrup. Let the salad sit at room temperature for about ten minutes. This resting time allows the flavors to blend beautifully. When ready to serve, you can sprinkle crushed roasted peanuts on top for a nice crunch. Enjoy your colorful and fresh dish! To make your Chili Garlic Asian Noodle Salad taste great, balance sweetness and saltiness. Start with the dressing. If it is too salty, add a little more honey or maple syrup. If it is too sweet, a splash of soy sauce can help. Always taste as you go. Allowing the flavors to meld is key. After mixing the salad, let it sit for about 10 minutes. This resting time lets all the flavors blend together. You will notice a big difference in taste after this step. A beautiful salad is more fun to eat. Serve it in a large bowl for family-style dining or on a colorful platter to impress guests. For garnishing, add fresh herbs like cilantro on top. This adds a nice touch of color and freshness. You can also include lemon wedges for a bright pop. If you want extra crunch, sprinkle crushed roasted peanuts over the salad right before serving. This simple touch makes the dish look and taste amazing. Pro Tips Chill the Noodles: After rinsing the noodles under cold water, let them chill for an additional 10 minutes. This will enhance the texture and prevent them from sticking together. Customize Your Veggies: Feel free to swap out or add any seasonal vegetables you have on hand, such as snap peas or radishes, to make the salad your own. Make Ahead: This salad can be made a few hours in advance. Just keep it in the refrigerator and add the crushed peanuts right before serving for the best crunch. Adjust the Spice: If you prefer a milder flavor, start with half the amount of chili garlic sauce, then gradually add more to reach your desired level of heat. {{image_4}} You can change up the veggies in your salad. Here are some ideas: - Alternative vegetables: Try adding snap peas, shredded broccoli, or sliced radishes. Each brings a fresh crunch and new flavor. - Gluten-free options: Use gluten-free rice noodles or zucchini noodles. Both work well and keep the dish light and tasty. Make the dressing your own with these simple swaps: - Vegan-friendly adaptations: Substitute honey with maple syrup for a vegan option. This keeps it sweet without any animal products. - Adjusting spice levels: If you like things mild, use less chili garlic sauce. You can also mix in some extra soy sauce for flavor without the heat. To store leftovers of your Chili Garlic Asian Noodle Salad, place it in an airtight container. This keeps it fresh and flavorful. Ensure you let the salad cool to room temperature before sealing it. This helps avoid condensation, which can make the noodles soggy. For the best taste, eat the salad within three days. The fresh vegetables will stay crispy for this time. After three days, the salad may lose its crunch and flavor. You can enjoy this salad cold or at room temperature. If you want to warm it up, use the microwave. Heat it for about 30 seconds, then stir. Check if it's warm enough. Repeat if needed. If you prefer to serve it chilled, take it out of the fridge about 10 minutes before serving. This helps the flavors pop. Remember, this salad is best enjoyed fresh, so try not to reheat more than once. Yes, you can use different noodles. If you want to switch it up, try soba, udon, or even whole wheat noodles. Rice noodles give a light texture, while soba adds a nutty flavor. Udon noodles are thicker and chewier, perfect for a hearty bite. Just be sure to cook them as needed. Drain and rinse as usual to keep them fresh. Chili garlic sauce has a medium heat level. It packs a punch but is not overwhelming. If you enjoy spice, you will love it. If you prefer milder flavors, you can use less sauce or mix in some more honey. This way, you can make it just right for your taste buds. You can make this salad ahead! Prep it up to a day before serving. Just keep the dressing separate until you are ready to eat. This keeps the noodles and veggies fresh and crunchy. Mix everything together right before serving for the best taste. Enjoy your meal prep! In this blog post, we explored how to make a delicious rice noodle salad. We discussed key ingredients, like fresh vegetables and a tasty chili garlic dressing. I shared simple steps for cooking noodles and mixing the salad. You can adjust flavors and try different ingredients for your liking. Remember to store leftovers properly and reheat them gently. This easy recipe is perfect for quick meals or gatherings. Enjoy making this salad your way!

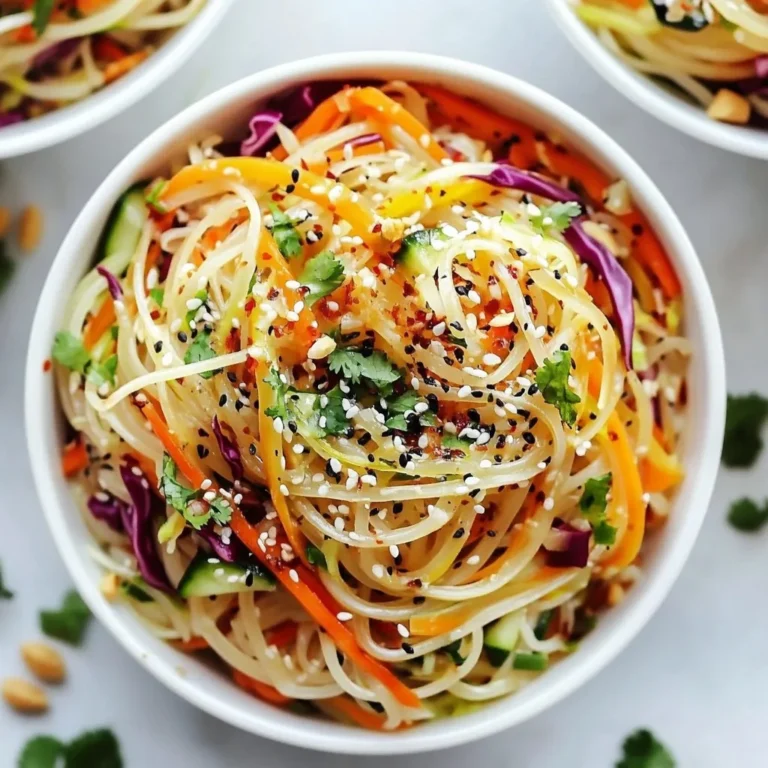
Chili Garlic Asian Noodle Salad Flavorful and Fresh Mix

For this tasty dish, you will need: - 4 medium zucchinis, sliced lengthwise into ½-inch thick strips - 4 cloves garlic, finely minced - 1/4 cup extra virgin olive oil - 1 tablespoon fresh thyme leaves (or 1 teaspoon dried thyme) - 1 tablespoon fresh parsley, finely chopped - 1 teaspoon dried oregano - 1/2 teaspoon sea salt - 1/4 teaspoon freshly ground black pepper - Zest of 1 fresh lemon - Juice of 1 fresh lemon These ingredients bring out the best in zucchini. The garlic and herbs add depth, while the lemon brightens the flavors. You can add a few optional ingredients to kick up the taste: - Red pepper flakes for heat - Grated Parmesan cheese for a savory touch - Balsamic glaze for sweetness These extras can transform your dish into something special. Try them to find your favorite combo. If you don’t have some herbs, here are good substitutes: - Use basil instead of thyme for a sweeter note - Swap parsley for cilantro for a fresh twist - Try Italian seasoning in place of oregano for a different flavor Experimenting with these options can lead to new favorites. Feel free to mix and match based on what you have. {{ingredient_image_2}} Start by gathering your ingredients. You need garlic, olive oil, thyme, parsley, oregano, salt, pepper, lemon zest, and lemon juice. In a small bowl, add 4 minced garlic cloves and 1/4 cup of extra virgin olive oil. Next, mix in 1 tablespoon of fresh thyme leaves, 1 tablespoon of chopped parsley, and 1 teaspoon of dried oregano. Add 1/2 teaspoon of sea salt and 1/4 teaspoon of black pepper. Finally, include the zest and juice from 1 lemon. Whisk these ingredients together well. This marinade will give your zucchini a burst of flavor. Take 4 medium zucchinis and slice them lengthwise into 1/2-inch thick strips. Place these strips into a large mixing bowl. Pour the prepared marinade over the zucchini. Toss the strips gently to make sure every piece gets coated. Let the zucchini marinate for at least 15 minutes at room temperature. This time helps the flavors soak in deeply. Preheat your grill to a medium-high setting. If using a grill pan, heat it to medium. Once hot, lay the marinated zucchini strips directly on the grill. Grill them for about 4-5 minutes on each side. Look for nice grill marks and tenderness. Be careful not to overcook them; you want them to stay vibrant and slightly crisp. After grilling, let the zucchini rest for a couple of minutes. This resting time allows the flavors to deepen. Serve your grilled zucchini warm and enjoy this delightful summer side! Grilling zucchini is easy if you follow some simple steps. First, slice the zucchini into ½-inch thick strips. This thickness helps them cook evenly. Make sure to preheat your grill to medium-high heat. A hot grill creates nice grill marks and keeps the zucchini tender. When placing the zucchini on the grill, leave space between each piece. This prevents steaming and ensures even cooking. To boost the flavor, try adding lemon zest and juice to your marinade. The fresh lemon brightens the taste. Fresh herbs like thyme and parsley work well, too. For extra depth, consider adding a pinch of smoked paprika or crushed red pepper flakes. These can give your zucchini a unique twist that surprises your guests. One common mistake is overcooking. Zucchini cooks fast, so grill for just 4-5 minutes per side. Check for grill marks to know when to flip. Another mistake is not marinating long enough. Let the zucchini sit in the marinade for at least 15 minutes. This allows the flavors to soak in, making every bite delicious. Lastly, avoid crowding the grill. If you pack too much on, it can steam instead of grill, affecting the taste and texture. Pro Tips Tip for Marinating: The longer you let the zucchini marinate, the more flavorful they will become. For optimal results, consider marinating them for at least 30 minutes or even overnight in the refrigerator. Tip on Grill Temperature: Ensure your grill is preheated properly before adding the zucchini. A medium-high heat will give the best grill marks and prevent sticking. Tip for Even Cooking: Try to cut the zucchini strips uniformly to ensure even cooking. This helps all pieces finish grilling at the same time. Tip for Serving: Serve the grilled zucchini warm, but they also taste great at room temperature. They can be a wonderful addition to salads or as a side dish for any meal. {{image_4}} You can mix in other veggies with your grilled zucchini. Bell peppers, eggplant, and asparagus all work great. Slice them like the zucchini for even cooking. This adds color and boosts flavors. You can also use corn on the cob cut into rounds. These extra veggies keep the dish fun and varied. To add a kick, try spices like cayenne or red pepper flakes. Just a pinch can make a big change. If you love heat, you can add sliced jalapeños to the marinade. For a smoky flavor, try smoked paprika. Adjust the spice to fit your taste. This way, every bite can surprise you. Changing the herbs gives your zucchini a new taste. If you want a fresh twist, use basil or dill instead of thyme. A mix of dill and lemon zest adds a bright flavor. For an Italian touch, use Italian seasoning. Fresh herbs like mint can give a unique profile. Explore these blends to keep things interesting. After grilling, let your zucchini cool down. Then, place it in an airtight container. You can store it in the fridge for up to three days. Make sure to separate layers with paper towels. This helps absorb any excess moisture. You can freeze grilled zucchini for later use. First, let it cool completely. Then, arrange the pieces in a single layer on a baking sheet. Place the sheet in the freezer for about an hour. Once frozen, transfer the zucchini to a freezer-safe bag. It can last up to three months in the freezer. Label the bag with the date for easy tracking. To reheat grilled zucchini, the oven is your best bet. Preheat it to 350°F (175°C). Place the zucchini on a baking sheet and heat for 10-15 minutes. This keeps the zucchini tender and tasty. You can also use a skillet on medium heat. Cook for about 5 minutes, flipping occasionally. Avoid using the microwave, as it can make the zucchini soggy. You should marinate zucchini for at least 15 minutes. This time helps the flavors soak in well. If you have more time, try to marinate it for 30 minutes. This extra time boosts the taste even more. Yes, you can use other types of squash. Yellow squash and pattypan squash work great too. Just slice them the same way as zucchini. They will soak up the flavors well. Grilled zucchini pairs well with many dishes. You can serve it with grilled chicken, fish, or steak. It also goes well with pasta or quinoa salad. Try it as a side for your summer barbecue. Absolutely! You can prepare the marinade a day ahead. Just store it in the fridge. This makes it easy for you when you are ready to grill. Yes, grilled zucchini is great for meal prep. You can make a big batch and store it. It lasts in the fridge for about 3 days. Just reheat it before serving. Zucchini is low in calories and high in vitamins. It has a lot of water, which keeps you hydrated. It also provides fiber, which is good for digestion. To enhance flavor, add more herbs or spices to your marinade. You can try red pepper flakes for heat or smoked paprika for a smoky taste. Lemon zest adds brightness too. Grilled zucchini is easy and tasty. We learned about key ingredients and how to enhance flavors. I shared simple steps to prepare and grill zucchini perfectly. Tips helped avoid common mistakes and improve grilling skills. You can try fun variations with spices and other veggies. Proper storage keeps leftovers fresh. Enjoying zippy grilled zucchini adds joy to meals. Keep experimenting to find your favorite mixes and matches!

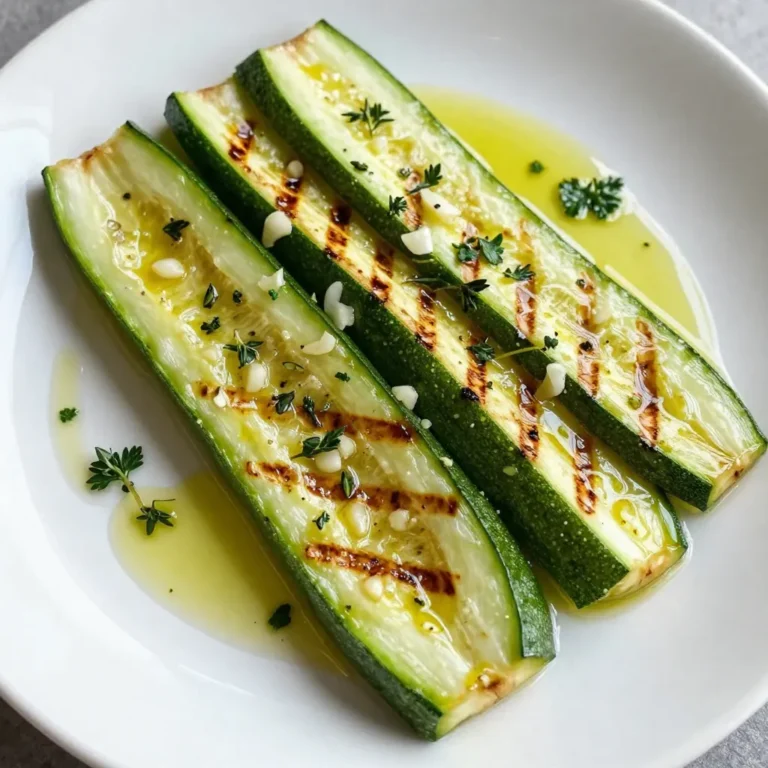
Garlic Herb Grilled Zucchini Flavorful Summer Side

- 1 cup cornmeal - 1 cup all-purpose flour - 1/4 cup granulated sugar - 1 tablespoon baking powder - 1/2 teaspoon salt - 1 cup milk - 2 large eggs - 1/4 cup unsalted butter, melted - 1/3 cup honey - 1/4 teaspoon ground cinnamon (optional) Each ingredient plays a key role in making the cornbread tasty and fluffy. Cornmeal gives it a nice texture and flavor. The all-purpose flour adds structure, making the bread rise well. Sugar adds sweetness, which balances the corn's natural flavor. Baking powder acts as a leavening agent, making the cornbread light and airy. Salt enhances all the flavors, making them pop. Milk adds moisture, which keeps the cornbread tender. Eggs bind the ingredients together and help with rise. Melted butter adds richness and depth, while honey brings a sweet touch. Lastly, ground cinnamon can add warmth and warmth to the flavor. For the best flavor and texture, I suggest using: - Cornmeal: Look for medium or fine ground cornmeal, such as Bob's Red Mill or Quaker. - All-purpose flour: King Arthur Flour or Gold Medal are great choices. - Granulated sugar: Any brand will work, but organic sugar is a good choice for a pure taste. - Baking powder: Rumford is a reliable brand that gives good rise. - Unsalted butter: Use brands like Land O'Lakes for quality flavor. - Honey: Local honey is best for taste and freshness. If not available, try clover honey or wildflower honey. Choosing quality ingredients will make your Honey Butter Cornbread truly special! {{ingredient_image_2}} Start by preheating your oven to 400°F (200°C). This step warms the oven, which helps the cornbread rise well. Next, grease an 8-inch square baking pan or a cast-iron skillet with butter or cooking spray. This keeps the cornbread from sticking and makes serving easy. In a large mixing bowl, combine the dry ingredients. Measure 1 cup of cornmeal, 1 cup of all-purpose flour, 1/4 cup of granulated sugar, 1 tablespoon of baking powder, and 1/2 teaspoon of salt. If you want a hint of spice, add 1/4 teaspoon of ground cinnamon. Use a whisk or a wooden spoon to mix them well. This ensures even flavor in your cornbread. In a separate bowl, whisk together the wet ingredients. Pour in 1 cup of milk, add 2 large eggs, 1/4 cup of melted unsalted butter, and 1/3 cup of honey. Make sure these are well mixed. This blend of ingredients adds moisture and sweetness to the cornbread. Gently pour the wet mixture into the dry ingredients. Use a spatula or wooden spoon to stir them together. Mix until just combined. It’s okay if a few lumps remain. Overmixing can make the cornbread tough. You want a nice, tender texture. Now, transfer the batter to your greased baking pan or skillet. Use a spatula to smooth the top. Place the pan in the preheated oven and bake for 20-25 minutes. Check for doneness by looking for a golden brown top. Insert a toothpick into the center, and if it comes out clean, your cornbread is ready. While the cornbread cools, make the honey butter. In a small bowl, blend 1/4 cup of softened butter with 2 tablespoons of honey. Mix until smooth and airy. This sweet spread will perfectly complement the warm cornbread, enhancing each bite. Enjoy your Honey Butter Cornbread warm, topped with the honey butter for a delicious treat! To keep cornbread moist, use the right ratio of wet to dry ingredients. The milk and eggs add moisture, while butter gives flavor. I recommend adding a bit more honey for extra sweetness and moisture. Another tip is to avoid overbaking. Check the cornbread at 20 minutes. It should be golden and a toothpick should come out clean, but not dry. One mistake is overmixing the batter. This can make your cornbread tough. Mix the wet and dry ingredients until just combined. A few lumps are fine. Another mistake is using cold ingredients. Let your eggs and milk sit out for a bit to reach room temperature before mixing. This helps them blend better. When mixing, always start with dry ingredients. Whisk them well to avoid clumps. Then, mix wet ingredients in a separate bowl. This way, you ensure an even blend. When combining, pour the wet mixture into the dry slowly. Use a spatula to fold gently. This keeps the batter fluffy and light. Pro Tips Use Fresh Ingredients: Always opt for fresh cornmeal and flour for the best flavor and texture in your cornbread. Freshly ground cornmeal can elevate the taste significantly. Don’t Overmix: When combining wet and dry ingredients, mix just until combined. Overmixing can lead to dense cornbread, so a few lumps are perfectly fine. Experiment with Add-ins: Feel free to customize your cornbread by adding ingredients like jalapeños, cheddar cheese, or corn kernels for added flavor and texture. Store Properly: To keep leftover cornbread fresh, wrap it tightly in plastic wrap or aluminum foil and store it in an airtight container at room temperature for up to 2 days. {{image_4}} You can switch honey for other sweeteners. Maple syrup works well, adding rich flavor. Agave syrup is another option; it's lighter and less sweet. Adjust the amount based on your taste. Use the same amount or a little less to keep the balance right. Experimenting with these can make your cornbread unique. Adding cheese makes cornbread extra tasty. Cheddar cheese melts and gives a sharp flavor. For a spicy kick, add jalapeños. Chop them finely and mix in before baking. You can also top the batter with cheese before baking for a cheesy crust. Both options add a fun twist to the classic recipe! If you're gluten-free, you can still enjoy this cornbread. Replace all-purpose flour with gluten-free flour blends. Make sure the blend you choose has a good mix of starches and fibers. You can also add a bit of xanthan gum to help with texture. This way, you’ll get a fluffy, delicious cornbread without gluten. To keep your cornbread fresh, store it in an airtight container. This will keep moisture in and prevent it from drying out. If you have a lot left, wrap it tightly in plastic wrap first. Then, place it in a container. This method helps keep the cornbread soft and tasty for a few days. If you want to store cornbread for longer, freezing is a great option. First, let the cornbread cool completely. Cut it into squares for easy serving. Wrap each piece in plastic wrap. Then, place them in a freezer bag. Make sure to squeeze out as much air as you can. Label the bag with the date. You can freeze it for up to three months without losing flavor. When you're ready to enjoy your cornbread again, reheating properly is key. For best results, use the oven. Preheat the oven to 350°F (175°C). Place the cornbread on a baking sheet. Cover it loosely with aluminum foil. Heat for about 10-15 minutes, or until warm. If you prefer, you can microwave it. Just heat for 15-20 seconds at a time. This will keep it soft and delicious. Enjoy your cornbread warm with a bit of honey butter for that fresh taste! Yes, you can make Honey Butter Cornbread ahead of time. Bake it and let it cool. Wrap it well in plastic wrap or foil. Store it at room temperature for a day. For longer storage, freeze it for up to three months. When ready to eat, thaw it overnight in the fridge. Reheat it in the oven for the best texture. The best way to serve cornbread is warm. Slice it into squares and add honey butter on top. This sweet spread melts into the warm bread, creating a tasty treat. You can also serve it with chili or soup. For an extra touch, drizzle honey over the slices or sprinkle cinnamon for flavor. Yes, you can substitute some ingredients. For a gluten-free version, use gluten-free flour instead of all-purpose flour. You can swap honey for maple syrup or agave nectar if you prefer. If you want a richer taste, use buttermilk instead of regular milk. These swaps will still give you a delicious cornbread. In this post, we explored how to make Honey Butter Cornbread. We discussed key ingredients, their importance, and brand tips. You learned step-by-step instructions, from preheating to baking. We shared ways to keep your cornbread moist and some common mistakes to avoid. You can even try variations like using maple syrup or adding cheese. Finally, we covered storage tips to keep your cornbread fresh. Enjoy this simple recipe and impress your family with your baking skills!

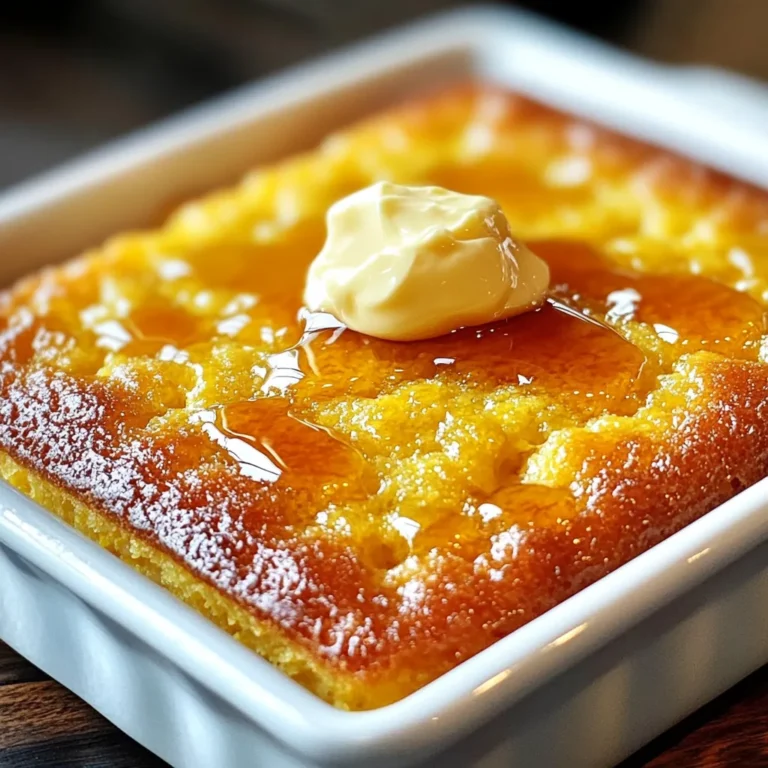
Honey Butter Cornbread Irresistible Flavor and Texture

- 4 salmon fillets (approximately 6 ounces each) - 3 tablespoons extra virgin olive oil - 2 tablespoons freshly squeezed lemon juice - Zest of 1 medium-sized lemon - 4 cloves garlic, finely minced - 1 teaspoon dried oregano - 1 teaspoon dried thyme - Salt and freshly ground black pepper to taste - Fresh parsley, finely chopped (for garnish) - Lemon wedges (for serving) The main ingredients make this dish shine. Salmon fillets are the star. They offer rich flavor and healthy fats. I use extra virgin olive oil for its fruity taste. Fresh lemon juice adds a bright kick. The zest gives extra aroma and depth. For seasoning, garlic is a must. It brings warmth and strength. Dried oregano and thyme add earthy notes. Salt and pepper enhance all the flavors. When it comes to garnishing, fresh parsley brightens the dish. It adds color and freshness. Lemon wedges on the side let you add more zing. You can’t go wrong with these choices! {{ingredient_image_2}} Start by preheating your oven to 425°F (220°C). This high heat helps to roast the salmon quickly. Next, prepare your baking sheet. You can line it with parchment paper for easy cleanup. If you prefer, you can also lightly spray it with cooking spray to prevent sticking. In a small mixing bowl, combine these ingredients: - 3 tablespoons extra virgin olive oil - 2 tablespoons freshly squeezed lemon juice - Zest of 1 medium-sized lemon - 4 cloves garlic, finely minced - 1 teaspoon dried oregano - 1 teaspoon dried thyme - Salt and freshly ground black pepper Whisk these ingredients together well. Whisking blends the flavors and makes the marinade smooth. This step is key to ensuring every bite bursts with flavor. Now, place the salmon fillets on the baking sheet. Make sure they are skin side down. This helps the skin crisp up nicely. Generously brush the lemon garlic marinade over each fillet. Ensure every piece gets an even coating. Let the salmon marinate for about 10-15 minutes. This brief time allows the flavors to soak in while the oven preheats. Once the marinade time is up, put the salmon in the preheated oven. Roast for 12-15 minutes. The salmon is done when it looks opaque and flakes easily with a fork. Watch it closely to avoid overcooking. Perfectly roasted salmon is moist and tender. After roasting, carefully take the salmon out of the oven. Let it rest for a few minutes. This resting time helps keep the salmon juicy. Finally, garnish your dish with freshly chopped parsley. This adds a pop of color and fresh flavor. Serve with lemon wedges on the side for an extra zesty touch. Enjoy your delicious lemon garlic roasted salmon! To make the best lemon garlic roasted salmon, use a great marinade. Mix the olive oil, lemon juice, lemon zest, minced garlic, oregano, and thyme well. This mix gives the fish a bright flavor. Let it sit for 10-15 minutes to soak in. You can add more zest or herbs for extra taste. If you want to switch things up, try adding a pinch of red pepper flakes. This adds some heat to the dish. You can also use fresh herbs instead of dried ones. Fresh dill or basil can be a nice touch. You can cook salmon on the grill or in the oven. Grilling gives it a smoky taste. Brush the marinade on the fish just like in the oven method. Cook it for about 6-8 minutes per side. If you prefer a skillet, heat some olive oil on medium heat. Place the salmon skin-side down and cover it. Cook for 4-5 minutes, then flip it. This method creates a nice crust. To check if the salmon is done, use a fork. If it flakes easily, it is ready. The fish should be opaque and not shiny. After cooking, let the salmon rest for a few minutes. This keeps it juicy. If you cut it right away, the juices will run out, and it may taste dry. Resting makes a big difference! Pro Tips Use Fresh Ingredients: Fresh salmon and freshly squeezed lemon juice will elevate the flavor of this dish significantly. Always opt for high-quality ingredients whenever possible. Don't Overcook the Salmon: Salmon is best when it’s still moist and flaky. Keep an eye on it while roasting and remove it from the oven as soon as it turns opaque. Marinate for Maximum Flavor: Allowing the salmon to marinate for 10-15 minutes not only enhances the flavor but also helps to tenderize the fish. Garnish for Presentation: A sprinkle of freshly chopped parsley not only adds color but also a fresh taste that complements the zesty lemon and garlic flavors. {{image_4}} You can switch the herbs to change the flavor. Try using dill or basil for a fresh taste. Combining herbs also works well. Mix oregano with thyme for a rich flavor boost. Experiment until you find your favorite blend. Adding vegetables makes the dish more colorful and tasty. Good options for roasting include zucchini, bell peppers, and asparagus. Cut the veggies into similar sizes for even cooking. Roast them for about 10 to 15 minutes, depending on their thickness. This way, they will be tender and bright. For a sweet twist, try a honey or maple syrup glaze. Brush it on the salmon before roasting for a tasty caramelized finish. If you like heat, add some chili flakes or sriracha to the glaze. This gives the salmon a spicy kick that pairs well with the lemon and garlic. To store leftover lemon garlic roasted salmon, use an airtight container. This helps keep the fish fresh. Place the salmon in the container and seal it tightly. You can keep it in the fridge for up to three days. If you want to save salmon for later, freezing is a great option. Wrap each fillet in plastic wrap. Then, place the wrapped salmon in a freezer bag. Make sure to squeeze out as much air as you can. Frozen salmon lasts for about three months. To thaw frozen salmon, simply move it to the fridge. Let it sit overnight. If you need it faster, put the sealed bag in cold water for about an hour. When it's time to enjoy leftover salmon, reheating can be simple. The best methods are using an oven or a skillet. For the oven, set it to 350°F (175°C). Place the salmon on a baking sheet and heat for 10-15 minutes. If you prefer a skillet, add a little olive oil over medium heat. Cook the salmon for about 4-5 minutes on each side. This keeps the flavor and texture just right. Enjoy your delicious meal! Yes, you can use frozen salmon. Just make sure to thaw it first. To thaw, place the salmon in the fridge overnight. If you need it faster, seal it in a bag and submerge it in cold water for about an hour. Do not use hot water, as it can cook the fish unevenly. Look for color and texture to tell if the salmon is done. The fish should turn opaque and easily flake with a fork. If it’s still translucent in the middle, it needs more time. The ideal internal temperature for salmon is 145°F (63°C). Great side dishes pair well with salmon. Here are some tasty options: - Steamed asparagus - Garlic mashed potatoes - Quinoa salad - Roasted vegetables - Rice pilaf These sides will complement the zesty flavors of the salmon. This blog post covered how to prepare lemon garlic roasted salmon. We discussed the main ingredients like salmon, olive oil, and seasonings. You learned step-by-step instructions, from marinating to roasting. Tips helped enhance flavor and avoid overcooking. Variations allowed for added creativity, while storage info ensured freshness for later. Incorporate these methods to enjoy a tasty, healthy meal. Happy cooking!

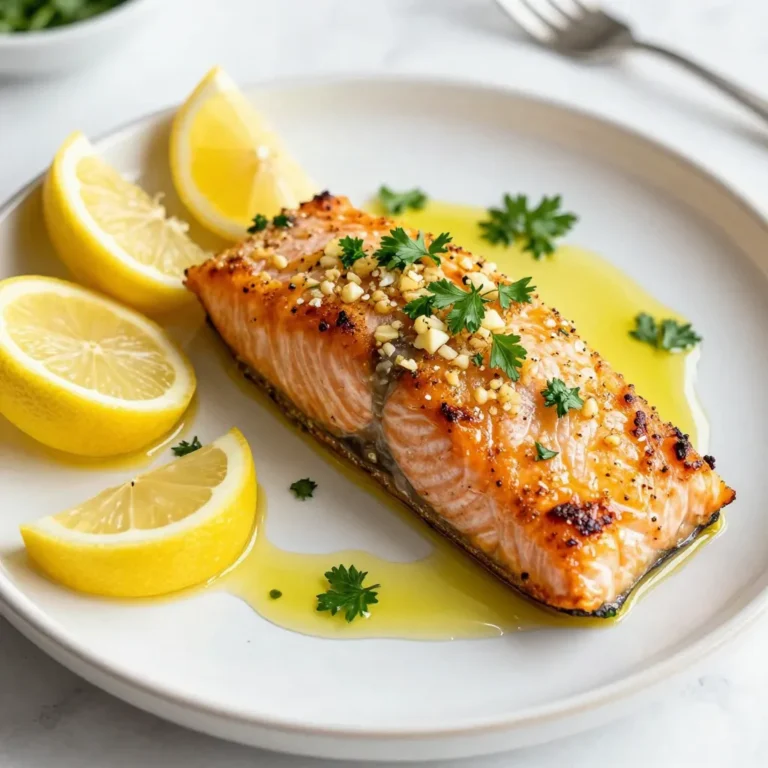
Lemon Garlic Roasted Salmon Juicy and Flavorful Dish

Here’s what you need to make this tasty blueberry banana bread: - 3 ripe bananas, well-mashed - 1 cup fresh blueberries, rinsed and drained - 1/2 cup unsalted butter, melted and slightly cooled - 1 cup granulated sugar - 2 large eggs, at room temperature - 1 teaspoon pure vanilla extract - 1 teaspoon baking soda - 1/2 teaspoon salt - 1 1/2 cups all-purpose flour - 1/2 teaspoon ground cinnamon (optional) - 1/4 cup chopped walnuts or pecans (optional) Using ripe bananas is key. They add natural sweetness and moisture. Fresh blueberries give bursts of flavor. You can use unsalted butter for a rich taste. Granulated sugar balances the flavors and helps with browning. Two large eggs provide structure and help the bread rise. Vanilla extract adds a lovely aroma. Baking soda acts as a leavening agent, helping the bread rise. Salt enhances all the flavors. All-purpose flour forms the base of the bread. Ground cinnamon adds warmth, but it’s optional. Chopped walnuts or pecans give a nice crunch, also optional. Gather these ingredients, and you're ready to bake! {{ingredient_image_2}} - Preheat the oven to 350°F (175°C). - Prepare your loaf pan by greasing it lightly or lining it with parchment paper. - In a large bowl, combine the well-mashed bananas and melted butter. Stir until creamy. - Add granulated sugar, eggs, and vanilla extract to the banana mixture. Mix well. - In another bowl, whisk together baking soda, salt, and all-purpose flour. - If you like, add ground cinnamon and chopped nuts to the dry mix. - Gently fold the dry mix into the wet mix. Don't overmix; it should be slightly lumpy. - Carefully fold in the fresh blueberries. Make sure not to crush them. - Pour the batter into the prepared loaf pan. Smooth the top with a spatula. - Bake in the oven for 60-70 minutes. Check with a toothpick for doneness. - After baking, cool the bread in the pan for 10-15 minutes. Then, move it to a wire rack. To get the best texture, don't overmix the batter. Overmixing makes the bread tough. Mix until just combined, and let the batter stay a little lumpy. Ripe bananas are key for moisture. They add sweetness and softness. Look for bananas with brown spots for the best results. Folding the blueberries into the batter needs care. Gently mix them in to avoid smashing. If you use frozen blueberries, don’t thaw them first. They can make the batter too wet. Fresh blueberries work well and add vibrant color. Set your oven to 350°F (175°C). This temperature helps the bread rise evenly. To check if it's done, use a toothpick. Insert it into the center. If it comes out clean or with a few moist crumbs, your bread is ready. Adjust baking time based on your oven. Pro Tips Use Overripe Bananas: The riper the bananas, the sweeter and more flavorful your bread will be. Look for bananas with brown spots for the best results. Don’t Overmix: To ensure a tender crumb, mix the batter until just combined. A few lumps are perfectly fine and will lead to a softer texture. Cool Before Slicing: Allow the bread to cool completely on a wire rack before slicing. This helps set the texture and keeps the slices from being gummy. Experiment with Add-ins: Feel free to get creative! Try adding in chocolate chips, shredded coconut, or different nuts for a unique twist on the classic recipe. {{image_4}} To make this bread gluten-free, swap all-purpose flour for gluten-free flour blends. They work well in this recipe. Look for blends that include xanthan gum for best results. You can find these blends in most grocery stores. For a vegan version, replace the eggs with flax eggs. Just mix one tablespoon of ground flaxseed with three tablespoons of water. Let it sit for a few minutes until it thickens. For butter, use coconut oil or a plant-based butter. You can also boost flavors by adding a pinch of nutmeg or some fresh lemon zest. You can try using other fruits like strawberries or raspberries. They add a nice tartness. If you want to make it extra special, mix in chocolate chips or cinnamon. A dash of nutmeg also brings warmth to the bread. These simple changes can make each loaf unique and fun! To keep your blueberry banana bread fresh, wrap it well. Use plastic wrap or foil. Store it at room temperature for short-term use. This keeps the bread soft for a few days. For longer storage, the freezer is your friend. Slice the bread before freezing. Place each slice in a freezer bag. Remove as much air as you can. This helps prevent freezer burn. At room temperature, your bread lasts about 3 to 4 days. If you freeze it, it stays good for up to 3 months. When you are ready to eat, reheating is key. For the best texture, use an oven. Preheat it to 350°F (175°C). Place a slice on a baking sheet. Warm it for about 10 minutes. This brings back the fresh-baked taste. You can also use a microwave. Heat for about 15-20 seconds. This is quick but may make the bread a bit soft. Enjoy your delicious blueberry banana bread fresh! Yes, you can use frozen blueberries. They work well in this recipe. Just keep a few tips in mind: - Do not thaw them: Add them straight from the freezer to the batter. This helps prevent them from bleeding into the mix. - Coat in flour: Lightly toss the frozen berries in a bit of flour before adding them. This keeps them from sinking to the bottom. - Adjust baking time: Since the batter will be colder, you might need to bake it for a few extra minutes. Using frozen blueberries can make this recipe easier and still taste great. The best bananas for this bread are very ripe. Here’s what to look for: - Color: You want bananas that are mostly brown or yellow with brown spots. - Texture: They should feel soft to the touch. The mushier, the better. - Flavor: Ripe bananas have a sweeter flavor, which adds to the bread’s taste. Using ripe bananas gives the bread moisture and natural sweetness. Absolutely! Adding nuts or other ingredients can enhance flavor and texture. Here are some ideas: - Nuts: Chopped walnuts or pecans add crunch. Use about 1/4 cup for a nice balance. - Spices: A sprinkle of cinnamon or nutmeg can give extra warmth. - Other fruits: Try adding chopped strawberries or raspberries for a fruity twist. - Chocolate chips: They add sweetness and richness. Use about 1/2 cup if you want to indulge. Feel free to mix and match based on your taste. Enjoy creating your own version of this bread! This blog post guides you through making delicious blueberry banana bread. We covered ingredients, step-by-step instructions, and helpful tips. You learned how to adjust for gluten-free and vegan diets, too. Now you have the tools to bake this tasty treat. It’s perfect for breakfast, snacks, or dessert. Remember to enjoy it fresh or share with friends. Happy baking!

Blueberry Banana Bread Savory and Simple Recipe

- Fresh spinach - Store-bought gnocchi - Heavy cream - Olive oil - Garlic - Parmesan cheese - Nutmeg - Sun-dried tomatoes - Seasoning (salt and pepper) Gather these ingredients for a rich and tasty meal. The fresh spinach adds color and nutrients. The store-bought gnocchi makes it easy and quick. Heavy cream gives the dish its creamy texture. You will need olive oil to sauté the garlic and spinach. Garlic adds a nice flavor that pairs well with the cream. Freshly grated Parmesan cheese is a must. It melts beautifully and enhances the dish. A pinch of nutmeg adds warmth and depth. If you want to get creative, consider adding sun-dried tomatoes. They give a sweet and tangy flavor. Don't forget the salt and pepper to taste. These simple seasonings help bring all the flavors together. Feel free to adjust the ingredients to fit your taste. This recipe is all about making it your own while enjoying a warm bowl of creamy spinach gnocchi. {{ingredient_image_2}} Start by boiling a large pot of salted water. Bring it to a strong boil. Add 1 pound of store-bought gnocchi to the pot. Cook the gnocchi for about 2 to 3 minutes. They are ready when they float to the surface. Once cooked, drain the gnocchi and set them aside in a bowl. In a large skillet, pour in 1 tablespoon of extra virgin olive oil. Heat it over medium heat until it is warm. Add 1 clove of finely minced garlic to the pan. Sauté the garlic for about 30 seconds. Watch closely so it does not burn. The garlic should smell great and turn light gold. Next, add 2 cups of roughly chopped fresh spinach to the skillet. Stir it into the garlic oil. Cook the spinach for about 2 to 3 minutes. You want it to wilt and turn bright green. If you want to add sun-dried tomatoes, do it now and mix well. Now, it’s time for the cream! Reduce the heat to low. Slowly pour in 1 cup of heavy cream. Stir gently as the cream starts to simmer. This helps to avoid splattering. Gradually add 1/2 cup of freshly grated Parmesan cheese. Mix until the cheese melts and the sauce is creamy. Add 1/4 teaspoon of ground nutmeg for flavor. Finish with sea salt and freshly cracked black pepper to taste. Carefully fold the cooked gnocchi into the creamy spinach sauce. Toss gently to coat each piece well. Heat everything together for an extra 2 to 3 minutes. This will warm the gnocchi and combine the flavors. Serve the creamy spinach gnocchi in bowls for a cozy dinner. To avoid separation of the cream, keep the heat low once you add the cream. This helps the sauce stay smooth. Stir the cream gently as it heats. Adding cheese too quickly can cause clumps. Gradually sprinkle your Parmesan into the sauce, mixing as you go. This ensures it melts evenly and creates a rich, creamy texture. Adjust your seasoning for a burst of flavor. I like to add a pinch of red pepper flakes for a mild heat. Fresh herbs like basil or parsley can brighten the dish. Add these herbs just before serving to keep their bright taste. A squeeze of lemon juice can also lift the flavors nicely. Serve your creamy spinach gnocchi in shallow, wide bowls. This shows off the vibrant colors and creamy sauce. For garnish, sprinkle extra cracked black pepper and a dusting of Parmesan. Adding finely chopped herbs brings a fresh touch. Pair with garlic bread for a complete meal that looks as good as it tastes. Pro Tips Use Fresh Ingredients: Fresh spinach and high-quality Parmesan cheese will elevate the flavor of this dish significantly, making it more vibrant and delicious. Don’t Overcook the Gnocchi: Cooking the gnocchi just until they float ensures a perfect texture; overcooking can lead to a mushy consistency. Add a Zesty Twist: For an extra flavor boost, consider adding a squeeze of lemon juice or a dash of red pepper flakes to the sauce. Leftover Storage: Store any leftovers in an airtight container in the fridge for up to 2 days. Reheat gently on the stove with a splash of cream to restore the sauce's creaminess. {{image_4}} You can swap heavy cream for several options. Try using coconut milk for a dairy-free choice. Cashew cream adds a rich texture and flavor too. For a tangy twist, use Greek yogurt instead of cream. When it comes to cheese, Parmesan is classic, but you can mix it up. Try goat cheese for a creamy and zesty flavor. Feta cheese also works well, adding a nice salty kick. You can add protein to your creamy spinach gnocchi for more heartiness. Cooked chicken works well; simply chop it into bite-sized pieces and mix it in. Shrimp is another great option. Sauté them briefly in olive oil before adding to your dish. If you prefer vegetarian options, consider adding chickpeas or lentils. They are tasty and packed with protein. Tofu is a great choice too; just sauté it until golden. For a twist on the greens, use kale instead of spinach. Kale holds up well in the sauce and adds a nice texture. You can also try Swiss chard or arugula for a different flavor. When it comes to seasonal veggies, think about adding asparagus in spring or roasted squash in fall. These changes keep your dish fresh and exciting. To keep your creamy spinach gnocchi fresh, follow these tips: - Allow the dish to cool to room temperature. - Store it in an airtight container. - Place the container in the fridge. - Use the leftovers within 3 days for best taste. For longer storage, you can freeze the gnocchi. Just remember: freezing may change the texture. You can reheat your creamy spinach gnocchi in two ways: microwave or stovetop. Here’s how: Microwave: - Place your gnocchi in a microwave-safe dish. - Add a splash of cream or water to keep it moist. - Cover the dish with a lid or plastic wrap. - Heat for 1-2 minutes, stirring halfway through. Stovetop: - Heat a non-stick skillet over low heat. - Add the gnocchi and a little cream. - Stir gently until warmed through. - This method helps keep the creaminess intact. Both methods can work, but the stovetop is best for taste and texture. Enjoy your dish again! To make gnocchi from scratch, you need potatoes, flour, and eggs. Start by boiling potatoes until soft. Mash them well and let them cool. Mix the mashed potatoes with flour and a beaten egg. Knead until smooth. Roll the dough into ropes and cut into small pieces. Use a fork to shape them. Boil them in salted water until they float. Yes, you can use frozen gnocchi. It cooks quickly, often in about 2-3 minutes. Just drop them in boiling water without thawing. They will be ready when they rise to the top. This saves time and makes dinner easier. You can use half-and-half or whole milk as a substitute for heavy cream. For a lighter option, use coconut milk or unsweetened almond milk. These alternatives can give a different flavor. Adjust the amount of cheese to keep the dish creamy. Yes, creamy spinach gnocchi is great for meal prep. You can cook it ahead and store it in the fridge. Keep it in an airtight container. It reheats well and still tastes delicious. Just add a splash of cream when reheating to keep it creamy. Creamy spinach gnocchi lasts about 3 to 5 days in the fridge. Store it in a sealed container to maintain freshness. If you notice any off smells or colors, it's best to throw it out. Always trust your nose and eyes when checking for freshness. This blog explained how to make creamy spinach gnocchi from simple ingredients. We covered the cooking steps, tips for your sauce, and variations to try. You'll impress friends and family with this easy dish. Remember to adjust flavors and be creative with add-ins. Enjoy every bite of your delicious meal, and don't forget to store or reheat leftovers properly. With practice, you will master this recipe and make it your own. Happy cooking!

Creamy Spinach Gnocchi Comforting Dinner Delight

PREV 1 … 45 46 47 … 49 NEXT
mini chef kitchen

explore

DessertsDinnerAppetizersDrinks

Our Policies

  • Cookie Policy
  • Copyright Policy
  • Disclaimer
  • GDPR Policy
  • Terms Of Use
Back to Top
  • About
  • Contact Us
  • Privacy Policy
© 2026 mini chef kitchen