FREE DINNER EBOOK! Get your copy!
  • Cookie Policy
  • GDPR Policy
  • Disclaimer
  • Terms Of Use
  • Visit my other site: Fun Cookie Recipes
mini chef kitchen
  • Home
  • Dinner
  • Desserts
  • Drinks
  • Appetizers
  • Contact
  • About
  • Privacy Policy
  • Home
  • Dinner
  • Desserts
  • Drinks
  • Appetizers
  • Contact
  • About
  • Privacy Policy
  • Cookie Policy
  • GDPR Policy
  • Disclaimer
  • Terms Of Use
Visit my other site: Fun Cookie Recipes

HOME / CATEGORIES /

Latest

- 2 large sweet potatoes, peeled and cut into 1-inch cubes - 3 tablespoons extra virgin olive oil - 3 tablespoons pure maple syrup - 1 teaspoon ground cinnamon - 1/2 teaspoon ground nutmeg - Sea salt and freshly ground black pepper, to taste - 4 cups mixed salad greens (such as baby spinach, arugula, and kale) - 1/2 cup walnuts, roughly chopped - 1/2 cup dried cranberries - 1/4 cup feta cheese, crumbled - 2 tablespoons apple cider vinegar To make this salad, you need to measure your ingredients carefully. Start with the sweet potatoes. Make sure to peel them well. Cut them into 1-inch cubes for even cooking. Use a large mixing bowl to combine the sweet potatoes with olive oil, maple syrup, cinnamon, nutmeg, salt, and pepper. Toss them until each cube is well coated. This step adds great flavor. While preparing the salad greens, make sure they are fresh and clean. I love using a mix of baby spinach, arugula, and kale. The greens add color and texture to the dish. For the toppings, chop the walnuts roughly. You want big pieces for crunch. The dried cranberries give a pop of sweetness. Finally, crumble the feta cheese for a creamy touch. This salad is not just tasty; it's healthy too! Sweet potatoes are full of vitamins and fiber. They provide energy and help keep you full. Walnuts add healthy fats and protein, while cranberries offer antioxidants. The feta cheese adds calcium and protein, making this dish a balanced meal. If you want to enjoy a colorful and tasty meal, this salad is a great choice. You can feel good about what you’re eating while enjoying every bite! {{ingredient_image_2}} First, set your oven to 400°F (200°C). Preheating helps the sweet potatoes roast evenly. A hot oven gives them that nice golden color. This step is key for a great texture. Take two large sweet potatoes and peel them. Cut them into 1-inch cubes. In a large mixing bowl, add the sweet potatoes. Pour in three tablespoons of extra virgin olive oil and three tablespoons of pure maple syrup. Next, add one teaspoon of ground cinnamon and half a teaspoon of ground nutmeg. Season with sea salt and freshly ground black pepper to taste. Toss everything well. Make sure each piece is coated evenly. This mix brings out the sweet flavor. Spread the sweet potato cubes on a baking sheet. Lay them in a single layer. Place the tray in the preheated oven. Roast for 25-30 minutes. Stir halfway through to cook them evenly. You want them golden brown and tender. This step gives the salad its wonderful taste and texture. To get sweet potatoes just right, start with even-sized cubes. Cut them into 1-inch pieces. This helps them cook evenly. Use extra virgin olive oil for rich taste. Toss them well in a bowl with maple syrup, cinnamon, nutmeg, salt, and pepper. Spread them out on a baking sheet. Make sure they are not crowded. This allows them to roast rather than steam. Roast at 400°F for 25-30 minutes. Stir them halfway for a golden finish. They should be tender and slightly caramelized when done. While cinnamon and nutmeg add warmth, feel free to explore other flavors. Try rosemary or thyme for a fresh twist. Both herbs pair well with sweet potatoes. You can also add a pinch of cayenne for heat. Just a little will give a nice kick. Don't forget to adjust salt and pepper based on your taste. This will help balance the sweetness from the maple syrup. Serve the salad in individual bowls for a nice touch. Add extra walnuts and cranberries on top for color and texture. This makes the dish pop visually. You can also sprinkle some feta cheese on the side for a creamy bite. If you want a cool salad, chill it for about 20 minutes. This will make it refreshing. Enjoy this salad warm or cold; it’s tasty either way! Pro Tips Choose the Right Sweet Potatoes: Select firm sweet potatoes with smooth skin for the best flavor and texture. Avoid any with soft spots or blemishes. Let Them Cool: Allow the roasted sweet potatoes to cool slightly before mixing them into the salad. This helps maintain their shape and prevents wilting the greens. Adjust the Sweetness: You can modify the amount of maple syrup based on your taste preference. Feel free to add more or less to suit your desired sweetness level. Experiment with Greens: Feel free to swap out the salad greens for your favorite varieties. This salad pairs well with mixed greens, romaine, or even kale for added crunch. {{image_4}} You can change ingredients to fit different diets. For a vegan salad, skip the feta cheese. Instead, try avocado or a vegan cheese alternative. If you want more protein, add grilled chicken or chickpeas. For a nut-free option, replace walnuts with sunflower seeds. This keeps the crunch without the nuts. You can mix in seasonal fruits or veggies. In spring, add fresh peas or asparagus for crunch. In summer, swap in ripe tomatoes or cucumbers for brightness. Fall brings roasted beets or apples, which taste great with sweet potatoes. In winter, try adding roasted Brussels sprouts or pomegranate seeds for a pop of color. You can play with dressings to change flavors. For a creamy twist, mix Greek yogurt with lemon juice. If you like spicy, add a bit of sriracha to the apple cider vinegar. A honey mustard dressing gives a sweet and tangy taste. Experiment with your favorite flavors to make it your own! To keep your Maple Roasted Sweet Potato Salad fresh, store it in an airtight container. This will help maintain its flavor and texture. Place the salad in the fridge right after serving. It is best to separate the toppings, like walnuts and feta cheese, if you can. This prevents them from getting soggy. If you want to enjoy the salad warm again, reheat the sweet potatoes only. The greens won't taste good reheated. Place the sweet potatoes in a microwave-safe dish. Heat them for about 30 seconds to a minute. Stir gently and check the temperature. You want them warm, not hot. I do not recommend freezing this salad. Freezing can make the sweet potatoes mushy. The greens and toppings may also lose their crunch. If you have leftover sweet potatoes, you can freeze them alone. Just make sure they are cooled and stored in a freezer-safe bag. Use them later in another dish, like a soup or a casserole. This salad stays fresh for up to three days in the fridge. Store it in an airtight container. The sweet potatoes may soften over time, but the flavors will still be great. Yes, you can make this salad ahead of time. Roast the sweet potatoes and let them cool. You can mix them with the greens and toppings later. Keep the salad dressing separate until serving to keep everything fresh. To serve leftovers, gently toss the salad again. You can add a splash of olive oil or vinegar for extra flavor. If the salad seems dry, this will help revive it. Enjoy it cold or at room temperature for a tasty meal. In this article, we explored how to make delicious roasted sweet potatoes. We discussed the key ingredients, preparation steps, and important tips to get them just right. I shared various ways to make them suit your needs, from flavor variations to storage tips. Remember, roasting sweet potatoes can be simple and fun. With practice, you can create tasty dishes that everyone loves. Enjoy experimenting with flavors and serving your tasty creations!

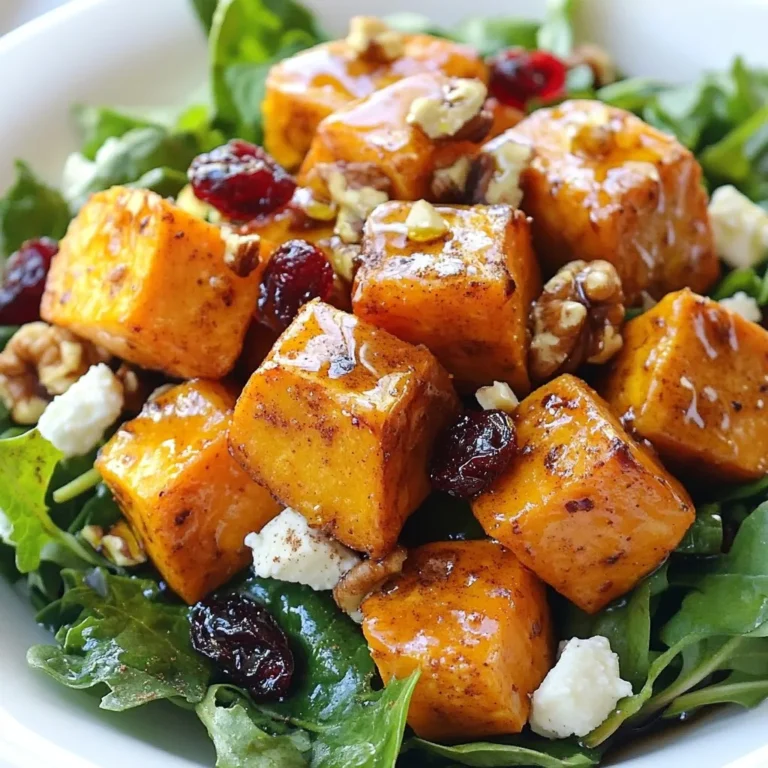
Maple Roasted Sweet Potato Salad Tasty and Colorful Dish

- 2 cups brewed coffee, cooled - 1 cup milk (dairy or non-dairy) - 1/2 cup sweetened condensed milk - 1/4 cup unsweetened cocoa powder - 1 tablespoon pure vanilla extract - 1/4 cup chocolate chips (optional) You can easily swap milk for any dairy-free option, like almond or oat milk. If you want less sugar, try using honey or maple syrup instead of sweetened condensed milk. For extra flavor, add a pinch of cinnamon or nutmeg. These simple changes keep the treat fun and fresh! {{ingredient_image_2}} 1. Start with a large mixing bowl. 2. Pour in 2 cups of brewed coffee. Make sure it is cooled to room temp. 3. Add 1 cup of milk. You can use dairy or a non-dairy option. 4. Next, add 1/2 cup of sweetened condensed milk. 5. Sprinkle in 1/4 cup of unsweetened cocoa powder for rich flavor. 6. Finally, add 1 tablespoon of pure vanilla extract. 7. Use a whisk to mix until the blend is smooth. If you like chocolate, you can add 1/4 cup of chocolate chips. Gently fold them into the mixture. This adds a fun texture to your popsicles. 1. Grab your popsicle molds. 2. Carefully pour the coffee mixture into each mold. Fill them about three-quarters full. This space helps the popsicles expand. 3. Next, insert popsicle sticks into the molds. Make sure they stand upright. 1. Place the molds upright in the freezer. 2. Freeze the popsicles for at least 6 hours. They need to be fully solid before you eat them. 3. To remove the popsicles, run lukewarm water over the outside of the molds. This helps loosen them. Be careful not to soak the molds. 4. Gently pull the popsicles out when they are ready. Enjoy your tasty mocha iced coffee popsicles! To make a smooth mocha iced coffee popsicle, you must mix well. Start with cooled brewed coffee in a bowl. Add milk, sweetened condensed milk, cocoa powder, and vanilla extract. Use a whisk to blend all the ingredients until they are fully combined. A smooth mixture ensures even freezing and a delightful texture. If you decide to add chocolate chips, fold them in gently. This way, you avoid clumping but still get that extra chocolatey bite. Removing popsicles from their molds can be tricky. First, run lukewarm water over the outside of the molds. Do this for a few seconds, but don’t soak them. This method helps loosen the popsicles without melting them. After a quick rinse, gently pull the popsicles out. If they stick, try twisting the mold slightly. This will help release the popsicles smoothly, giving you a perfect treat. Serving your popsicles can be fun. For an appealing display, place them on a colorful platter. A drizzle of chocolate sauce on top makes them even more tempting. You can also add whipped cream and a sprinkle of cocoa powder. This adds both flavor and visual appeal. Enjoy showcasing your delicious mocha iced coffee popsicles at your next gathering! Pro Tips Use Fresh Coffee: For the best flavor, use freshly brewed coffee. If possible, let it cool to room temperature naturally instead of refrigerating it, as this can affect the taste. Experiment with Sweeteners: If you prefer a different level of sweetness, feel free to adjust the amount of sweetened condensed milk or substitute with your favorite sweetener. Try Different Milks: Explore using various types of milk, like almond, oat, or coconut, to create unique flavor profiles and cater to dietary preferences. Storage Tips: Keep your popsicles stored in an airtight container after freezing to prevent freezer burn and maintain their delicious taste. {{image_4}} You can easily change the flavors of your mocha iced coffee popsicles. Adding different flavor extracts can create a new taste. Almond or hazelnut extracts give a unique twist. Just add a teaspoon to the mix before freezing. You can also play with spices. A pinch of cinnamon or nutmeg gives warmth and depth. Each spice adds a fun layer to your popsicle experience. Mixing in different types of chocolate can enhance flavor. Dark, milk, or white chocolate all work well. Choose your favorite and stir it in with the coffee. You can also add fruits for a fresh touch. Bananas or strawberries blend wonderfully with the coffee. Just mash them up and mix them in before pouring the mixture into molds. This will add sweetness and a fruity kick. If you want a lighter version, consider using low-fat or non-dairy milk. Almond or oat milk are great choices that keep the taste rich. You can also lower the sugar content. Natural sweeteners like honey or maple syrup work perfectly. They add flavor without the extra sugar. Making these small changes keeps the popsicles tasty and healthier for everyone. Store your mocha iced coffee popsicles in a freezer-safe container. Use an airtight container to keep them fresh. Make sure to seal it well to prevent freezer burn. If you don’t have a container, wrap them in plastic wrap. This helps avoid ice crystals from forming on the popsicles. The best storage duration is about 2 to 3 months. After this time, they can lose flavor and texture. Always label your container with the date. This will help you track how long they have been stored. To thaw your popsicles quickly, run them under lukewarm water. Hold the mold in your hand and let the water flow over it. This will help loosen the popsicle without melting it too much. Avoid using hot water, as it can cause them to melt too fast. If you have time, just leave them at room temperature for a few minutes. This will slowly soften them and make them easier to remove. Mocha iced coffee popsicles can last up to two months in the freezer. Store them in an airtight container to keep them fresh. This way, you can enjoy a treat whenever you want! Yes, you can use decaf coffee for these popsicles. The flavor will be just as good without the caffeine kick. This option is great for kids or anyone who wants to avoid caffeine. You can add many fun toppings to your popsicles. Here are some ideas: - Whipped cream - Chocolate sauce - Shaved chocolate - Nuts or sprinkles These toppings can make your popsicles even more delicious and fun to eat! Yes, these popsicles are great for kids. They have a sweet taste and a fun texture. Just watch the amount of caffeine if your kids are sensitive. Otherwise, they will love this treat! Absolutely! You can substitute sweetened condensed milk with other ingredients. Try using regular sugar or honey to sweeten the mix. You can also use coconut milk for a unique flavor. Just adjust the amount to your taste preference. Making mocha iced coffee popsicles is simple and fun. Start with brewed coffee and milk, then mix in sweetened condensed milk and cocoa powder. Customize your pops with flavors or different milks. Follow the steps to pour, freeze, and enjoy. In the end, you can store these treats for a chill later. Experiment with flavors and enjoy creative combinations. You’ll impress everyone, and they’ll love the taste. These popsicles are a great way to cool off and enjoy coffee in a new way.

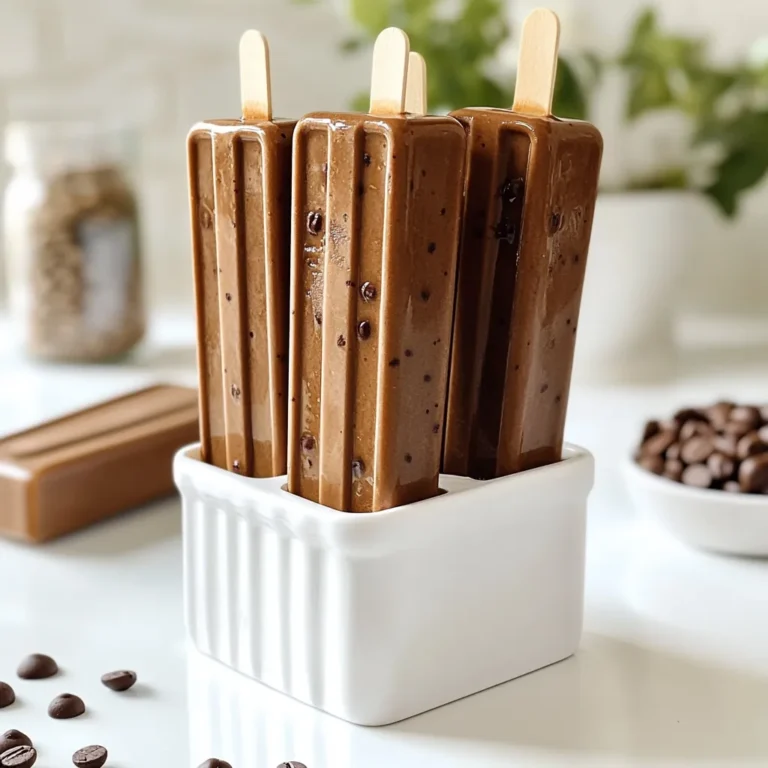
Mocha Iced Coffee Popsicles Tasty Frozen Treat

- 1 lb (450g) boneless chicken thighs, thinly sliced - 2 tablespoons vegetable oil - 4 cloves garlic, finely minced - 2-3 bird's eye chilies, finely chopped - 1 red bell pepper, sliced into thin strips - 1 cup fresh Thai basil leaves, packed - 2 tablespoons soy sauce - 1 tablespoon oyster sauce (optional) - 1 tablespoon fish sauce - 1 teaspoon sugar - Cooked jasmine rice, for serving You can add a few extra ingredients to boost flavor. Try using: - A splash of lime juice for brightness - Chopped green onions for freshness - Peanuts for crunch Don’t have everything on hand? Here are some swaps: - Chicken thighs can be replaced with chicken breast or tofu for a lighter option. - For a gluten-free option, use tamari instead of soy sauce. - If you can’t find Thai basil, use regular basil or mint for a different taste. {{ingredient_image_2}} First, gather all your ingredients. You need: - 1 lb boneless chicken thighs, thinly sliced - 2 tablespoons vegetable oil - 4 cloves garlic, finely minced - 2-3 bird's eye chilies, finely chopped - 1 red bell pepper, sliced into thin strips - 1 cup fresh Thai basil leaves - 2 tablespoons soy sauce - 1 tablespoon oyster sauce (optional) - 1 tablespoon fish sauce - 1 teaspoon sugar - Cooked jasmine rice for serving Next, wash the basil leaves and set them aside. Slice the chicken and bell pepper. Mince the garlic and chilies. This prep makes cooking smooth and quick. Heat the vegetable oil in a large skillet over medium-high heat. Wait until it shimmers. Add the minced garlic and chopped chilies. Stir them for about 30 seconds. Watch closely to avoid burning the garlic. Now, add the sliced chicken. Stir often for 5-7 minutes. The chicken should turn brown and lose its pink color. Once done, toss in the sliced red bell pepper. Sauté for another 2-3 minutes. You want the peppers to soften a bit. In a small bowl, mix soy sauce, oyster sauce, fish sauce, and sugar. Stir until the sugar dissolves. Pour this sauce into the skillet. Mix well to coat the chicken and peppers. Cook for another minute to let the flavors blend. Remove the skillet from the heat. Gently fold in the fresh Thai basil leaves. Stir just until they wilt. This keeps their bright color. To serve, spoon the spicy Thai basil chicken over jasmine rice. For an extra touch, garnish with whole basil leaves and a slice of lime. This adds a fresh pop of flavor. Enjoy your meal! To sauté chicken well, use a hot skillet. Start with vegetable oil. Heat it until it shimmers. Add the chicken in a single layer. This way, it cooks evenly. Stir frequently. Cook until the chicken is browned and no longer pink. This takes about 5 to 7 minutes. If you like it spicy, use more chilies. For less heat, use fewer bird's eye chilies. You can also remove the seeds. They hold most of the heat. Taste as you cook. This helps you find your perfect spice level. You can prep this dish in advance. Slice the chicken and chop the veggies early. Store them in the fridge. When ready to cook, just heat the oil and sauté. The dish takes about 20 minutes to finish. This makes it great for busy nights. Pro Tips Choosing the Right Chicken: Use boneless chicken thighs for a juicier, more flavorful dish compared to chicken breasts. Adjusting Heat Levels: Modify the number of bird's eye chilies based on your spice tolerance; start with fewer if you're unsure. Fresh Basil is Key: Always use fresh Thai basil for the best flavor; dried basil won't provide the same aromatic quality. Serving Suggestions: Serve with lime wedges to enhance the flavors; a squeeze of fresh lime juice adds a delightful brightness. {{image_4}} You can easily make a vegetarian or vegan version of Spicy Thai Basil Chicken. Replace the chicken with tofu or tempeh. Both options absorb flavors well. Use firm or extra-firm tofu for the best texture. Cut it into bite-sized cubes and sauté it until golden. Swap the fish sauce with soy sauce or a vegan fish sauce. This keeps the dish savory and tasty. Feel free to add more veggies to your dish. Sliced carrots, baby corn, or snap peas work well. Just toss them in after the chicken is cooked. This adds color and nutrition. The key is to cook them until slightly tender but still crisp. This keeps the dish fresh and bright. You can switch up the protein in this recipe. Pork or beef can replace chicken. Thinly slice the meat and follow the same cooking steps. Shrimp is another great option. Cook shrimp for just a few minutes until they turn pink. Each protein will bring its own flavor to the dish. Experiment with what you love most! Store your leftover spicy Thai basil chicken in an airtight container. Make sure to cool it to room temperature first. It can last in the fridge for about three to four days. If you want to keep it fresh, avoid letting it sit out for long. You can freeze spicy Thai basil chicken, but make sure to do it right. Place the cooled chicken in a freezer-safe container or bag. Remove as much air as possible to prevent freezer burn. It will stay good for up to three months. When you are ready to eat it, just thaw it in the fridge overnight. Reheating is simple! You can use a microwave or a skillet. If using a microwave, heat it for one to two minutes. Stir halfway through to ensure even heating. If you prefer a skillet, warm it over low heat until hot, stirring often. This keeps the chicken juicy and flavorful. Spicy Thai Basil Chicken, or Pad Krapow Gai, comes from Thailand. It's a popular street food dish. Thai cooks use fresh basil and chilies to create bold flavors. The dish reflects Thai culture, focusing on fresh herbs and spices. It highlights the balance of sweet, salty, and spicy tastes. You can use dried basil, but fresh is better. Fresh Thai basil has a unique flavor. It adds a fragrant, aromatic quality to the dish. If you must use dried, use less. Dried herbs are stronger, so about one-third the amount of fresh will work. Serve Spicy Thai Basil Chicken over cooked jasmine rice. The rice soaks up the sauce well. You can also serve it with a side of steamed vegetables. A fresh cucumber salad adds a nice crunch and balances the heat. To make this dish less spicy, reduce the number of bird's eye chilies. You can also remove the seeds from the chilies. If you want a milder flavor, add more bell peppers. Mixing in a touch of sugar can help balance the heat too. This blog post explored Spicy Thai Basil Chicken, covering key ingredients and cooking steps. We discussed optional flavors, substitutions, and tips for cooking chicken just right. I shared variations for vegetarians and how to store leftovers. Remember, this dish is versatile and can suit your tastes. Experiment with it and make it your own. Enjoy cooking and have fun with your meals!

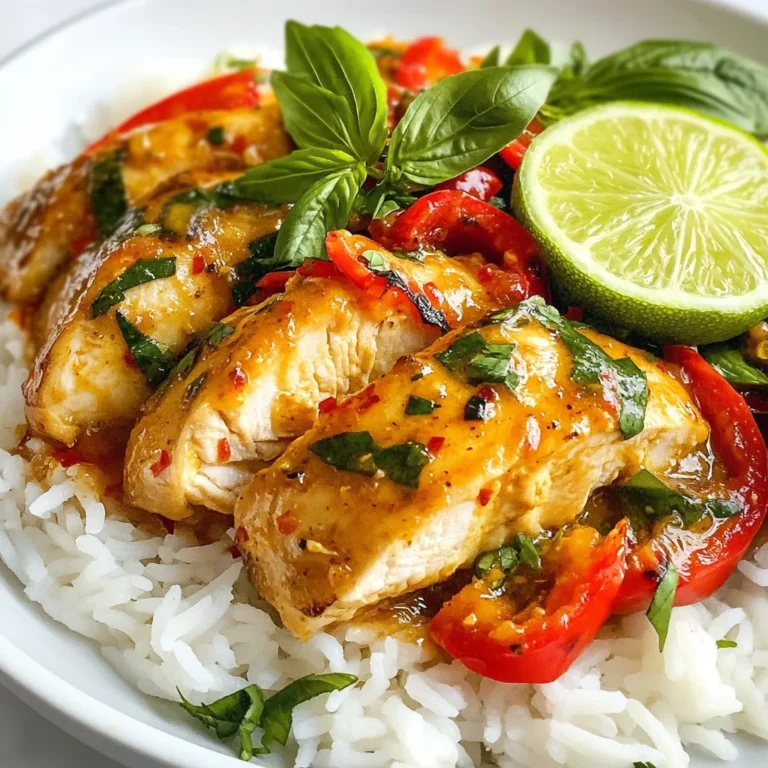
Spicy Thai Basil Chicken Flavorful and Easy Recipe

- 4 salmon fillets (approximately 6 ounces each) - 1/4 cup pure maple syrup - 2 tablespoons soy sauce - 1 tablespoon Dijon mustard - 2 cloves garlic, minced - 1 tablespoon fresh ginger, finely grated - 1 teaspoon sesame oil - Salt and freshly ground black pepper to taste - 1 tablespoon sesame seeds (for garnish) - 2 green onions, thinly sliced (for garnish) - Fresh herbs like cilantro or parsley for garnish - Lemon or lime juice for a citrus kick - Hot sauce for extra spice - Use tamari instead of soy sauce for a gluten-free option. - Maple syrup can be swapped with honey if you prefer. - You can replace fresh ginger with ground ginger, but use less (1/4 teaspoon). - If you don't have sesame oil, olive oil works in a pinch. Using these ingredients, you can create a tasty maple glazed salmon that will impress everyone at the table. The flavors blend well, making each bite a delight. Each ingredient adds its charm, especially the maple syrup, which brings a sweet touch. Enjoy cooking! {{ingredient_image_2}} First, grab a small mixing bowl. Add 1/4 cup of pure maple syrup. Next, pour in 2 tablespoons of soy sauce. If you need a gluten-free option, use tamari instead. Then, mix in 1 tablespoon of Dijon mustard. Add 2 cloves of minced garlic and 1 tablespoon of finely grated fresh ginger. Finally, drizzle in 1 teaspoon of sesame oil. Whisk everything together until it’s smooth. This marinade packs a punch with sweet and savory flavors. Now, take your 4 salmon fillets. Place them in a shallow dish or a zip-top bag. Pour the marinade over the salmon, making sure each piece is well coated. This helps all the flavors seep in. Cover the dish or seal the bag tightly. Pop it in the fridge for at least 30 minutes. If you have time, marinate it longer for deeper flavor. While the salmon marinates, preheat your oven to 400°F (200°C). Line a baking sheet with parchment paper to keep it clean. After marinating, take the salmon out of the fridge. Remove it from the dish or bag, but save any leftover marinade. Place the salmon fillets skin-side down on the baking sheet. Season them with salt and freshly ground black pepper to taste. Bake the salmon for about 12-15 minutes. It's done when it turns opaque and flakes easily with a fork. Meanwhile, pour the reserved marinade into a small saucepan. Heat it over medium-high heat until it boils. Let it bubble for 3-5 minutes. This thickens the sauce. When the salmon is ready, brush the thickened glaze on top. For a nice touch, sprinkle sesame seeds and sliced green onions before serving. Enjoy this simple yet tasty dinner! To get that shiny, sticky glaze, start with pure maple syrup. It gives the best flavor. Mix it with soy sauce, Dijon mustard, garlic, ginger, and sesame oil. Whisk them well until smooth. This mix is your magic sauce. For the glaze to stick, brush it on right after baking. This adds extra sweetness and shine. Preheat your oven to 400°F (200°C). This hot temperature helps the salmon cook fast. Bake the salmon for 12 to 15 minutes. It should be opaque and flake easily with a fork. If it cooks too long, it can dry out. Keep a close eye on it to get the best result. Choose fresh salmon for your dish. Look for fillets that are bright in color and smell like the sea. Wild-caught salmon is often tastier than farmed. If you can, buy salmon from a trusted source. You can also use skin-on fillets for added flavor and moisture during cooking. Pro Tips Choose Fresh Salmon: Opt for fresh, wild-caught salmon if possible. It offers better flavor and texture compared to farmed varieties. Marinate Longer for Depth: If time allows, marinate the salmon for up to 2 hours. This enhances the flavor and tenderness of the fish. Watch the Baking Time: Keep an eye on the salmon as it bakes. Overcooking can lead to dry fish; it should be flaky but moist. Experiment with Garnishes: Feel free to add other garnishes like chopped cilantro or a squeeze of lime for an extra burst of flavor. {{image_4}} Adding citrus to your maple glazed salmon can brighten the dish. You can use orange or lemon juice. Mix 1 tablespoon of juice into the marinade. This adds a zesty twist. It balances the sweetness of the maple syrup. You can also add zest from the fruit for extra flavor. If you want a different taste, try honey mustard. Replace Dijon mustard with honey mustard in the marinade. This change gives the salmon a sweet and tangy kick. It pairs well with the maple syrup. Use the same amount as the Dijon for best results. Pairing sides with your salmon can enhance the meal. Consider serving steamed asparagus or broccoli. Both are bright and fresh. They complement the rich flavor of the salmon. You can also serve it with a simple salad. A salad with mixed greens and a light vinaigrette works well too. Rice or quinoa can be great options too. They soak up the delicious glaze. After enjoying your maple glazed salmon, store leftovers in an airtight container. This keeps the salmon fresh. Place it in the fridge if you plan to eat it within two days. For longer storage, consider freezing. To reheat your salmon, use the oven or microwave. If using the oven, set it to 350°F (175°C). Place the salmon on a baking sheet. Cover it with foil to keep it moist. Heat for about 10 minutes. If using a microwave, place the salmon on a microwave-safe plate. Heat in short bursts of 30 seconds until warm. If you want to freeze your salmon, wrap it tightly in plastic wrap. You can also use a freezer bag. Make sure to remove as much air as possible. Freeze it for up to three months. When ready to eat, thaw it in the fridge overnight before reheating. Yes, you can use frozen salmon. Just thaw it first in the fridge overnight. This keeps the fish safe and fresh. Thawing helps the salmon absorb the marinade better. You’ll still get that tasty glaze and flavor with frozen salmon. I suggest marinating the salmon for at least 30 minutes. This time allows the flavors to soak in. For even more taste, you can marinate it for up to two hours. Just remember to keep it in the fridge while marinating. This keeps the salmon safe to eat. Maple glazed salmon pairs well with many sides. Here are some great options: - Steamed vegetables like broccoli or asparagus - A fresh green salad with a light vinaigrette - Quinoa or rice for a hearty touch - Roasted potatoes for added flavor These sides will balance the sweetness of the salmon and make your meal complete. This blog post covered how to make maple glazed salmon. I shared the main ingredients, steps to prepare and bake the salmon, and a few tips to get it just right. You also learned about variations and how to store leftovers. Remember, cooking can be fun and easy. Enjoy experimenting with flavors and find what you love. Your kitchen can create amazing meals with simple steps.

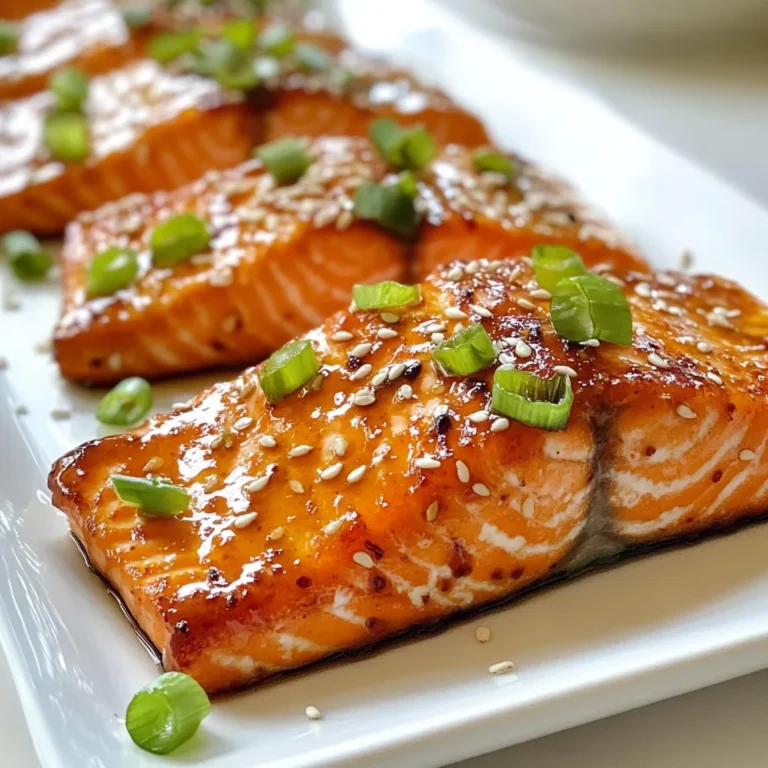
Maple Glazed Salmon Tasty and Simple Dinner Recipe

- 1 cup unsalted butter, softened at room temperature - 1/2 cup granulated sugar - 1/2 cup brown sugar, packed firmly - 1 large egg, at room temperature - 1 teaspoon almond extract - 2 cups all-purpose flour, sifted - 1 teaspoon baking powder - 1/4 teaspoon fine salt - 1/2 cup raspberry jam - Sliced almonds - 1 cup = 8 fluid ounces - 1/2 cup = 4 fluid ounces - 1 teaspoon = 5 milliliters - 1/4 teaspoon = 1.25 milliliters If you need to change measurements, just multiply or divide. For example, if you want to make half the recipe, use 1/2 cup of butter and 1/4 cup of sugar. - Butter: You can use margarine if needed. - Granulated Sugar: Brown sugar works too, but it will change the taste. - Almond Extract: You can replace it with vanilla extract. - Raspberry Jam: Any jam can work, like strawberry or apricot. - Sliced Almonds: Chopped walnuts or pecans are good alternatives. These swaps can help you create the cookies even if you lack some items! {{ingredient_image_2}} First, preheat your oven to 350°F (175°C). This step is crucial for even baking. While the oven warms up, line two baking sheets with parchment paper. This will stop the cookies from sticking. In a large mixing bowl, combine 1 cup of softened butter, 1/2 cup of granulated sugar, and 1/2 cup of packed brown sugar. Use an electric mixer or a sturdy wooden spoon to mix these until they are light and fluffy. This should take about 3-5 minutes. Then, add 1 large egg and 1 teaspoon of almond extract to the bowl. Mix everything until it is smooth and well combined. In another bowl, whisk together 2 cups of sifted all-purpose flour, 1 teaspoon of baking powder, and 1/4 teaspoon of fine salt. This helps to mix the dry ingredients evenly and makes the cookies softer. Gradually add this dry mix to the wet mixture. Stir gently until a soft dough forms. Be careful not to overmix; just mix until combined. Now, scoop out portions of dough. Roll each into a ball, about 1 inch wide. Place these dough balls on the lined baking sheets, leaving space for them to spread. Use your thumb or a small spoon to press down in the center of each ball, making an indentation. This will hold the raspberry jam later. Next, fill each indentation with about 1/2 teaspoon of raspberry jam. Make sure the jam stays in the center. For a crunchy touch, gently press a few sliced almonds around the outer edge of each cookie. Put the baking sheets in your preheated oven. Bake for 12-15 minutes. You want to see golden edges, and the centers should look set but not browned too much. Once baked, take the cookies out and let them cool on the sheets for about 5 minutes. Then, move them to a wire rack to cool completely. Enjoy making these delightful treats! To get soft and chewy cookies, start with room-temperature butter. This makes it easy to cream with sugar. When mixing, aim for a light and fluffy texture. The dough should feel soft but not sticky. If your dough feels too dry, add a tiny bit of milk. This helps keep the cookies moist. Mix the dough just until you see no dry flour. Overmixing makes cookies tough. After adding the dry ingredients, stop mixing as soon as it comes together. Use a gentle hand to fold in the flour. This keeps your cookies light and airy. Watch your cookies closely as they bake. Set your timer for 12 minutes. Check for golden edges and set centers. If they look too soft, give them a minute or two more. Every oven is different, so trust your eyes. Let them cool for a few minutes on the sheet before moving them. This helps them firm up without breaking. Pro Tips Use Room Temperature Ingredients: Ensuring that your butter and egg are at room temperature helps create a smoother batter and contributes to a better texture in the finished cookie. Don’t Overmix the Dough: Once you add the dry ingredients, mix just until combined. Overmixing can lead to tough cookies due to gluten development. Experiment with Different Jams: While raspberry jam is delicious, feel free to try other flavors like apricot or strawberry for a unique twist on this classic recipe. Store Properly: To maintain freshness, store the cookies in an airtight container at room temperature. They will stay soft for several days! {{image_4}} You can switch up the jam for fun flavors. For example, try strawberry or apricot. Each jam gives a unique taste. If you want a tart kick, go for sour cherry jam. You can even use lemon curd for a zesty twist. Just remember to keep the filling thick enough to stay in the cookie. Sliced almonds are great, but many other nuts work well too. Chopped pecans or walnuts can add a rich flavor. You could also use hazelnuts for a nice crunch. If you want something different, try pistachios. They add color and a unique taste. Whatever you choose, make sure to press them gently into the dough. If you need gluten-free options, use almond flour instead of all-purpose flour. This makes a lovely, nutty flavor. You can also try a gluten-free baking mix. Just make sure it has xanthan gum for good texture. Adjust the amount of liquid slightly if using almond flour, as it absorbs more moisture. Enjoy these tasty options! To keep your raspberry almond thumbprint cookies fresh, store them in an airtight container. This helps maintain their softness and flavor. Place a piece of parchment paper between layers to prevent sticking. Keep the container at room temperature for up to one week. You can freeze these cookies for long-term storage. Allow them to cool completely before freezing. Wrap each cookie in plastic wrap and place them in a freezer bag. They can last in the freezer for up to three months. When ready to enjoy, simply thaw them at room temperature or warm them in the oven for a few minutes. Serve the cookies fresh for the best taste. Arrange them on a pretty plate and add some fresh raspberries for color. You can also dust them lightly with powdered sugar for a touch of elegance. These cookies pair well with tea or coffee, making them perfect for gatherings. Raspberry almond thumbprint cookies are sweet treats filled with raspberry jam. They have a soft, chewy texture and a rich almond flavor. The cookies have a small indentation in the center, which holds the jam. This design makes them both cute and tasty. The combination of almond extract and raspberry jam creates a delightful taste. Yes, you can make these cookies ahead of time. You can prepare the dough and chill it in the fridge for up to 3 days. This helps the flavors blend well. You can also bake the cookies and store them in an airtight container. They stay fresh for about a week at room temperature. To keep your cookies chewy, do not overmix the dough. Mix until just combined. Also, bake them until the edges are golden but the centers are soft. Let them cool on the baking sheet for a few minutes. This helps them set without getting too hard. You can use extra raspberry jam in many ways. Spread it on toast or pancakes for breakfast. Mix it into yogurt for a sweet snack. You can also use it to top ice cream or blend it into smoothies. The possibilities are endless! This blog post shared all you need to make raspberry almond thumbprint cookies. We covered the key ingredients, steps, handy tips, tasty variations, and storage methods. Remember to follow the mixing and baking tips for the best results. Feel free to get creative with flavors and substitutes. You now have the tools to enjoy these cookies fresh or stored. Happy baking!

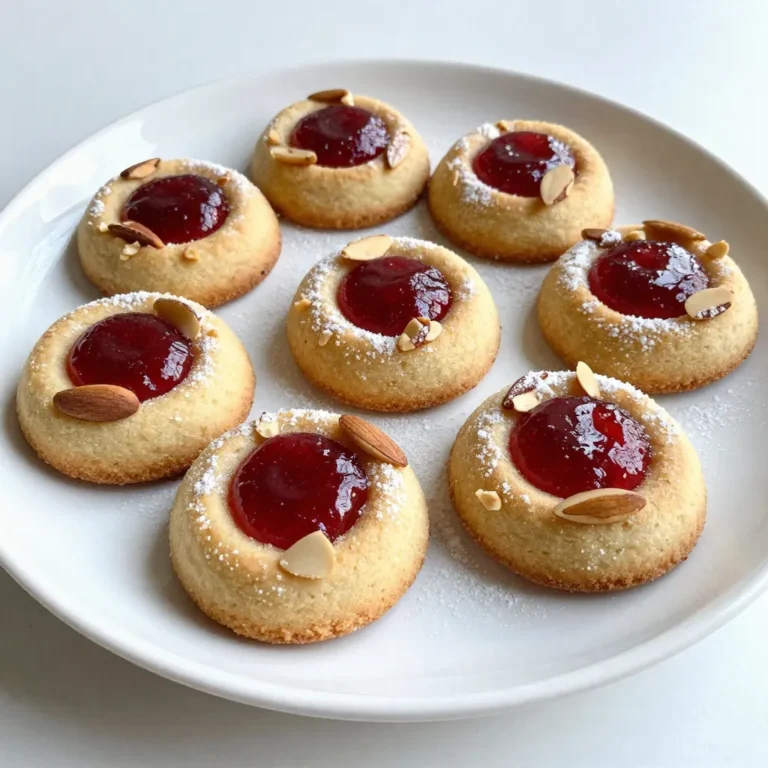
Raspberry Almond Thumbprint Cookies Delightful Treat

- 1 pound large shrimp, peeled and deveined - 1/4 cup honey - 4 cloves garlic, minced - 2 tablespoons low-sodium soy sauce - 1 tablespoon freshly grated ginger - 1 tablespoon freshly squeezed lemon juice - 1 tablespoon olive oil - Salt and pepper to taste - Fresh chives or parsley for garnish - Wooden skewers (soaked) - Metal skewers To make Honey Garlic Glazed Shrimp Skewers, you need a few key ingredients. First, large shrimp are the star of this dish. They provide a sweet and juicy base. Honey adds a delightful sweetness. It balances the savory flavors from garlic and soy sauce. Garlic, minced finely, gives a rich aroma. Low-sodium soy sauce enhances the umami taste without being too salty. Next, some extra ingredients bring more flavor. Fresh ginger adds a zing. Lemon juice brightens up the dish. Olive oil keeps shrimp moist while cooking. Don't forget salt and pepper to taste. They help bring out the best flavors. Finally, fresh chives or parsley make a lovely garnish. When it comes to skewers, you have options. Wooden skewers need soaking in water first. This helps them not to burn on the grill. Metal skewers are great, too. They are reusable and sturdy. Choose what fits your cooking style best. With these ingredients, you are set to create a flavorful delight. The combination of sweet, savory, and fresh notes will make your meal shine. {{ingredient_image_2}} Soaking wooden skewers is key to preventing burning. Place them in water for at least 30 minutes. This keeps them safe on the grill. If you use metal skewers, you can skip this step. When threading shrimp onto skewers, ensure you space them well. Aim for 4-5 shrimp per skewer. This helps them cook evenly. In a mixing bowl, combine the honey, minced garlic, soy sauce, ginger, lemon juice, and olive oil. Use a whisk to mix everything until smooth. Make sure there are no lumps. This marinade gives shrimp a rich flavor. Once your marinade is ready, add the peeled shrimp. Stir gently to coat each shrimp with the mix. Cover the bowl with plastic wrap. Refrigerate for at least 30 minutes, but no more than 1 hour. This time lets the shrimp soak up the tasty marinade. While the shrimp marinates, preheat your grill to medium-high heat. This step is crucial for a nice sear. After marinating, place shrimp on the soaked skewers. Grill the skewers for 2-3 minutes on each side. Look for the shrimp to turn opaque and slightly charred. After grilling, remove the skewers from heat. Let them rest for a few minutes. This resting time keeps the shrimp juicy. For a lovely finish, sprinkle chopped chives or parsley on top. Serve hot and enjoy the sweet and savory flavors! To make your honey garlic marinade shine, adjust spice and sweetness. If you like it spicy, add some chili flakes. For extra sweetness, drizzle in more honey. You can also add a splash of lime juice for a tangy twist. Try adding sesame oil for a nutty flavor. Grilling brings out the best flavors in these shrimp. Preheat your grill for a nice sear. Keep the grill at medium-high heat for perfect cooking. If you don't have a grill, you can broil the skewers in the oven. Set the oven to high broil and place the skewers on a baking sheet. Cook for about 2-3 minutes per side. Pair the shrimp skewers with fluffy rice or a fresh salad. Add steamed veggies for a colorful plate. For a nice touch, serve on a wooden board with lemon wedges. This adds a pop of color and freshness. Sprinkle chopped chives or parsley on top for a beautiful finish. Pro Tips Soak the Skewers: For wooden skewers, soaking them in water for at least 30 minutes prevents them from burning on the grill, ensuring your shrimp cook evenly. Marinate Longer for Flavor: Allowing the shrimp to marinate for up to an hour enhances the flavor, making each bite more delicious and infused with the honey garlic mixture. Use Fresh Ingredients: Fresh garlic and ginger amplify the taste of the marinade, giving your shrimp a vibrant flavor that dried spices cannot replicate. Don’t Overcook: Grill the shrimp just until they are opaque and slightly charred, usually around 2-3 minutes per side, for a tender and juicy texture. {{image_4}} You can change sweeteners in this recipe. Maple syrup or agave work well instead of honey. They still give a nice sweetness. If you want to use different shrimp, that is fine too. Medium or small shrimp can work, but cooking times may change. Adding spices can make these skewers even better. Try chili flakes for heat or paprika for a smoky taste. You could also switch up the marinade. For example, use teriyaki sauce or a citrus-based mix for a new flavor. Serving these skewers on rice or salad adds a nice touch. The rice soaks up the sauce well. If you want more nutrition, skewer veggies like bell peppers or zucchini with the shrimp. This adds color and crunch to your meal. To keep your honey garlic glazed shrimp skewers fresh, follow these tips: - Store leftovers in an airtight container. - Refrigerate them within two hours of cooking. - Use a container that fits the skewers without bending. For best taste, eat leftovers within two days. Shrimp can lose flavor and texture if kept too long. Reheating shrimp skewers properly is key to keeping them juicy. Here are some methods: - Microwave: Place skewers on a microwave-safe plate. Heat in 30-second intervals until warm. - Oven: Preheat the oven to 350°F (175°C). Place the skewers on a baking sheet. Heat for about 10 minutes. - Skillet: Heat a skillet over medium heat. Add a little olive oil and warm the skewers for 3-4 minutes, turning often. Whichever method you choose, avoid overheating. Overcooked shrimp can become rubbery and dry. You can freeze shrimp skewers before or after grilling. Here’s how: - Before Grilling: Marinate the shrimp, then thread them onto skewers. Place them in a freezer bag, removing as much air as possible. - After Grilling: Allow the skewers to cool. Wrap them in plastic wrap and place them in a freezer bag. To thaw, move the skewers to the fridge overnight. If you're in a hurry, use the microwave's defrost setting. Never refreeze thawed shrimp. You can use scallops or chicken instead of shrimp. Both options will soak up the honey garlic flavor. Firm fish like salmon works well too. For a vegetarian option, try tofu or mushrooms. Just cut them into bite-sized pieces to match the shrimp size. Yes, you can make the marinade ahead! Mix all the ingredients in a bowl and store it in the fridge. It will keep well for up to three days. This way, you save time when you're ready to cook. Just add the shrimp before grilling. Shrimp are fully cooked when they turn pink and opaque. They should curl into a C shape. If they look gray or translucent, they need more time. Usually, 2-3 minutes on each side is enough on a hot grill. Yes, you can grill them in the oven! Use a broiler pan and preheat your oven to high. Place the skewers on the pan and broil for about 2-3 minutes on each side. Keep a close eye to avoid burning. Pair these skewers with rice or quinoa for a filling meal. A fresh salad adds a nice crunch. Steamed veggies like broccoli or asparagus also work well. For a fun twist, serve on skewers with bell peppers or zucchini. Honey garlic glazed shrimp skewers are simple and delicious. We covered the essential ingredients, marinades, cooking tips, and variations. You can customize flavors or swap ingredients easily. Proper storage and reheating keep leftovers tasty. I hope this guide inspires you to grill up these shrimp skewers. Enjoy the blend of sweet and savory flavors next time you cook. Your friends and family will love them!

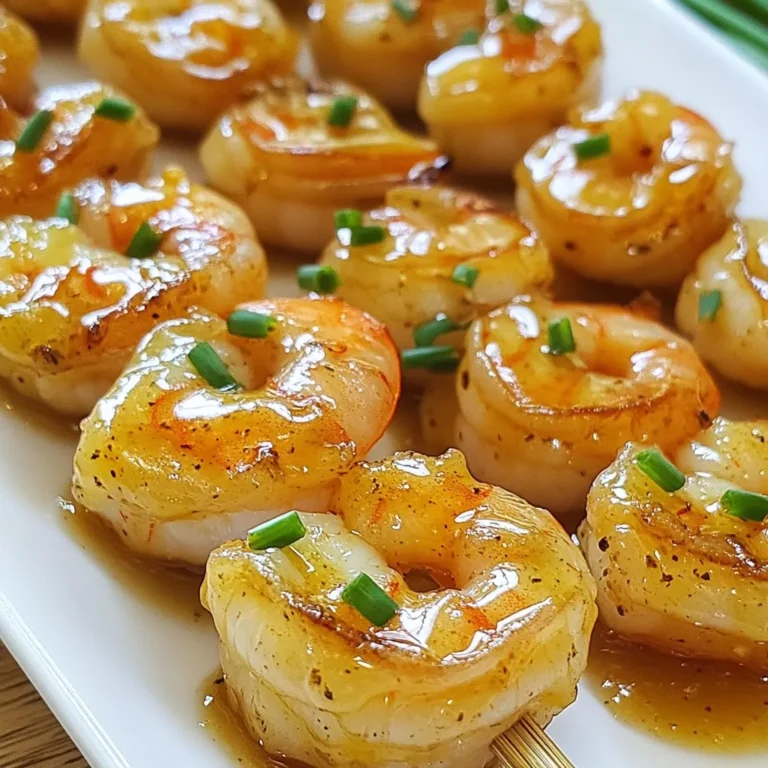
Honey Garlic Glazed Shrimp Skewers Flavorful Delight

- 14 oz firm tofu, well-pressed and cut into cubes - 3 tablespoons honey or agave nectar - 2 tablespoons soy sauce, low-sodium recommended - 2 cloves garlic, finely minced - 1 tablespoon rice vinegar - 1 tablespoon cornstarch - 1 teaspoon sesame oil - 1/2 teaspoon red pepper flakes, optional - 2 green onions, thinly sliced for garnish - Sesame seeds for garnish - Air fryer - Mixing bowl - Whisk - Knife and cutting board I love using firm tofu for this dish. It holds its shape well and soaks up flavor. Pressing the tofu removes extra moisture. This step helps it become crispy and tasty. You can use honey for sweetness, but agave nectar works too for a vegan option. Soy sauce gives a savory kick. Garlic adds depth, while rice vinegar brings a nice tang. Cornstarch is key for a crispy texture. Just a light coat makes a big difference. Sesame oil gives a rich flavor, while red pepper flakes add a hint of spice. Green onions and sesame seeds are perfect for garnish. They add color and crunch to the final dish. You’ll need an air fryer for this recipe. It cooks the tofu to perfection. A mixing bowl and whisk are essential for blending your marinade. A knife and cutting board help you prep your ingredients quickly. With these tools and ingredients, you are ready for a fun cooking adventure! {{ingredient_image_2}} Start by pressing the firm tofu for at least 30 minutes. This step is key. Pressing removes extra moisture. Less moisture means better texture. After pressing, cut the tofu into bite-sized cubes. Aim for even pieces to cook uniformly. In a mixing bowl, combine the honey, soy sauce, minced garlic, rice vinegar, sesame oil, and optional red pepper flakes. Whisk these ingredients together. You want a smooth blend that coats the tofu well. Gently place the tofu cubes in the marinade. Toss them carefully to ensure each piece is coated. Let the tofu marinate for 15 to 30 minutes. This step lets the flavors soak in and makes the tofu tasty. After marinating, sprinkle cornstarch over the tofu cubes. Toss them lightly again to coat each piece evenly. This is the secret to getting that crispy outside when you cook it. Preheat your air fryer to 375°F (190°C). Place the tofu cubes in the air fryer basket in a single layer. If you have too much, cook in batches. Air fry for 15 to 20 minutes. Shake the basket halfway through to ensure even cooking. The tofu should be golden and crispy. Once the tofu is done, take it out of the air fryer. Put it back into the bowl with any leftover marinade. Toss the tofu gently to coat it in the glaze. This adds a nice shine and extra flavor before serving. Pressing the tofu is key. It removes excess water, which helps it turn crisp. To press tofu, use a clean kitchen towel and a heavy object. Let it sit for at least 30 minutes. This step makes a big difference in texture. After pressing, cornstarch is your best friend. It coats the tofu cubes and creates a crunchy outer layer. Sprinkle the cornstarch over the marinated tofu and toss gently. Each piece should be coated evenly. This is the secret to crispiness! Want to kick up the flavor? Try adding spices like ginger, cumin, or even a dash of smoked paprika. These can boost the taste without overpowering the honey and garlic. Balancing sweetness and savory flavors is crucial. The honey adds a sweet touch, while the soy sauce brings in saltiness. You can adjust the honey if you prefer it less sweet. Just remember to keep the harmony between sweet and savory for the best taste. Honey garlic tofu pairs well with fluffy rice or stir-fried veggies. For a colorful plate, serve it on a bed of rice. You can also add some steamed broccoli or snap peas. For presentation, think about garnishing with green onions and sesame seeds. It not only looks great but also adds texture. A drizzle of extra honey on top can give a lovely shine. This makes your dish pop and tastes even better! Pro Tips Press Tofu Thoroughly: Ensure your tofu is pressed well to remove excess moisture. This step is crucial for achieving a crispy texture when air frying. Adjust Marinade to Taste: Feel free to tweak the marinade ingredients based on your preferences. Adding more garlic or a splash of lime juice can enhance the flavor profile. Shake During Cooking: Remember to shake the air fryer basket halfway through the cooking time. This promotes even cooking and prevents sticking. Garnish Generously: Don't skimp on the garnishes! Fresh green onions and sesame seeds not only add flavor but also make the dish visually appealing. {{image_4}} To make this dish vegan, you can easily swap honey for agave nectar. Agave nectar is sweet and works well in marinades. You can also try maple syrup for a different flavor. Both options keep the dish plant-based and delicious. For flavor, consider using miso paste. Miso adds a rich umami taste that complements the tofu. You can also add ginger for a fresh kick. This will give your honey garlic tofu a unique twist. There are many ways to change up the flavor of your tofu. You can add sauces like teriyaki or sriracha to your marinade. This adds a sweet or spicy note that makes every bite exciting. You can also mix in vegetables while air frying. Think about bell peppers, broccoli, or snap peas. These not only add color but also boost nutrition. Toss them in the same marinade for a well-rounded dish. If you like heat, adjusting red pepper flakes is easy. Add more for a stronger kick, or leave them out for a milder taste. You can also explore hot sauces or chili paste. These can add depth and heat to your dish. Just a little goes a long way, so start small and adjust to your taste. Enjoy experimenting with these options to find your perfect balance! To keep your leftover honey garlic tofu fresh, store it in an airtight container. This helps keep moisture out and flavors in. You can place it in the fridge for up to five days. Make sure it cools down before sealing to avoid condensation. For best taste, enjoy it within three days. If you want to save your honey garlic tofu for later, freezing is a great option. First, let the tofu cool completely. Then, place it in a freezer-safe container or bag. Be sure to squeeze out excess air. You can freeze it for up to three months. When you're ready to eat, thaw it in the fridge overnight. To reheat, air fry at 375°F (190°C) for about 10 minutes. This will help regain its crispiness. In the fridge, your honey garlic tofu lasts about five days. After that, check for signs of spoilage. Look for changes in texture, color, or smell. If it feels slimy or has an off odor, it's best to throw it away. To enjoy the best flavors, aim to eat your leftovers within three days. This way, you get the most delicious experience! Yes, you can use extra-firm tofu. Extra-firm tofu has less water, which gives it a denser texture. This means it holds its shape well during cooking. It also absorbs flavors nicely, making it a great choice. Just remember to press it if it's packed in water. This helps to remove any extra moisture. To make honey garlic tofu gluten-free, you can swap soy sauce for tamari. Tamari is a gluten-free soy sauce alternative. You can also check that your rice vinegar is gluten-free. For the honey, if you want a vegan option, use agave nectar. This keeps it tasty and safe for those with gluten allergies. You can serve honey garlic tofu with many sides. Here are a few ideas: - Steamed rice or jasmine rice - Sautéed vegetables like bell peppers and broccoli - Quinoa or couscous for a healthy addition - A fresh salad with sesame dressing - Noodles tossed with veggies and soy sauce These sides balance the tofu's sweetness with crunch and freshness. Yes, you can still make this recipe without an air fryer. You can bake the tofu in the oven instead. Preheat your oven to 400°F (200°C). Spread the marinated tofu cubes on a baking sheet. Bake for about 25-30 minutes, flipping halfway through. This method will give you a nice crispy texture. You can also pan-fry the tofu in a skillet over medium heat. Use a little oil to help it crisp up. This article covered how to make honey garlic tofu step by step. We discussed key ingredients, tools, and cooking tips. You now know how to prepare, marinate, and air fry the tofu for the best texture and flavor. Remember to customize your dish with various spices or ingredients. Enjoy experimenting with serving ideas and variations to make it your own. With these methods, you can create a tasty, satisfying meal that fits your needs. Happy cooking!

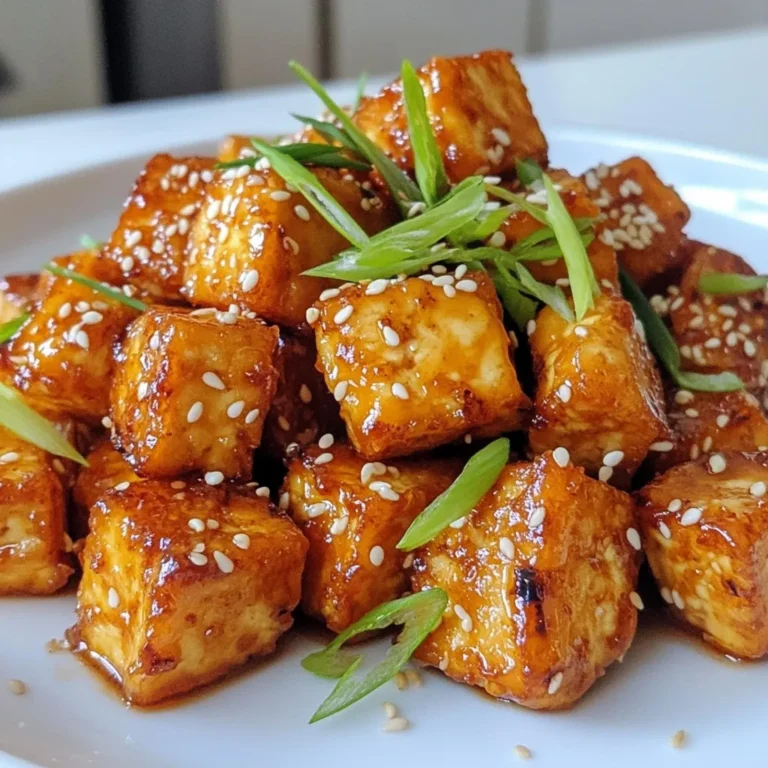
Air Fryer Honey Garlic Tofu Crisp and Flavorful Meal

- 2 cups semi-sweet chocolate chips - 1 cup sweetened condensed milk - 1/4 cup unsalted butter - 1 teaspoon vanilla extract - 1 tablespoon ground ginger - 1 tablespoon ground cinnamon - 1/2 teaspoon nutmeg - 1/4 teaspoon allspice - 1 teaspoon instant coffee granules (or espresso powder) - 1/4 cup crushed gingerbread cookies - A pinch of salt Gathering the right ingredients is key to making great Gingerbread Latte Fudge. First, you want semi-sweet chocolate chips. They melt beautifully and give a rich flavor. Sweetened condensed milk adds creaminess and sweetness. Unsalted butter helps to blend everything smoothly. Don’t skip the vanilla extract; it adds depth to the taste. Ground ginger and cinnamon give that warm holiday vibe. Nutmeg and allspice enhance the spiced notes. Instant coffee granules bring a nice kick, mimicking the latte experience. Finally, the crushed gingerbread cookies add texture and crunch. The pinch of salt balances the sweetness. With this list ready, you can create a treat that tastes just like a cozy holiday drink. {{ingredient_image_2}} First, you need to get your pan ready. Line an 8x8 inch baking dish with parchment paper. Make sure the paper hangs over the edges. This overhang helps you lift the fudge out later. It also gives you a non-stick surface to work with. Now, let’s melt the ingredients. In a medium saucepan, combine 2 cups of semi-sweet chocolate chips, 1 cup of sweetened condensed milk, and 1/4 cup of unsalted butter. Heat this mixture over low heat. Stir it often with a spatula. This keeps the chocolate from burning. You want everything to melt until smooth and creamy. Once the mixture is melted, take it off the heat. Stir in 1 teaspoon of vanilla extract, 1 tablespoon of ground ginger, 1 tablespoon of ground cinnamon, 1/2 teaspoon of nutmeg, 1/4 teaspoon of allspice, and 1 teaspoon of instant coffee granules. Don’t forget a pinch of salt. Mix well to blend the flavors into the fudge. Next, pour the mixture into your prepared pan. Use a spatula to spread it out evenly. Make sure it reaches all corners. Now, place the pan in the fridge. Chill it for at least 2 hours. This time helps the fudge set and become firm. After chilling, lift the fudge out of the pan using the parchment paper overhang. Place it on a cutting board. Use a sharp knife to cut it into small squares. This recipe makes about 36 pieces. Enjoy the rich flavors and festive touch of your gingerbread latte fudge! You can change the chocolate in this fudge. If you like sweeter treats, use milk chocolate. It will make the fudge creamier and more decadent. Dark chocolate gives a rich taste. It also adds a hint of bitterness, balancing the sweetness. Each choice changes the flavor, so feel free to experiment. Want to add more texture? You can mix in nuts or dried fruits. Chopped walnuts or pecans give a nice crunch. Dried cranberries or cherries add a fruity twist. These additions make each bite unique and fun. Just remember to chop them small, so they blend well into the fudge. To make this fudge gluten-free, swap out the gingerbread cookies. Use gluten-free cookies instead. You can also find gluten-free chocolate chips. Always check labels to ensure everything is safe. This way, everyone can enjoy this tasty treat without worry. Pro Tips Use Quality Chocolate: The flavor and texture of your fudge will greatly depend on the quality of chocolate chips you use. Opt for a high-quality brand for the best results. Room Temperature Ingredients: Ensure that your butter and any other dairy ingredients are at room temperature before starting. This helps them melt more evenly and blend smoothly. Chill Properly: Allow enough time for the fudge to set in the refrigerator. Rushing this step can lead to a soft and gooey texture rather than a firm fudge. Experiment with Spices: Feel free to adjust the amounts of spices to suit your taste. Adding extra cinnamon or ginger can enhance the flavor profile if you love those spices. {{image_4}} To keep your fudge fresh, store it in an airtight container. This helps prevent it from drying out. You can place a piece of wax paper between layers. This keeps the fudge from sticking together. Keep it in a cool, dry place. Avoid direct sunlight. If you live in a warm area, the fridge might be best. The cold helps maintain its shape. Freezing fudge is a great way to save some for later. First, cut the fudge into squares. Wrap each piece tightly in plastic wrap. Then, place the wrapped pieces in a freezer bag. Make sure to remove as much air as possible. When you want to enjoy it, take out a piece and let it thaw in the fridge. This keeps the texture smooth and tasty. When stored properly, your fudge can last up to two weeks at room temperature. If you keep it in the fridge, it can last about a month. In the freezer, it will stay good for about three months. Always check for any signs of spoilage before enjoying. If it looks or smells off, it’s best to toss it. Yes, you can! If you want to skip the espresso, try using extra ground coffee. You can also use a strong brewed coffee. Another option is to use a bit of vanilla extract for flavor. Just remember, it won't have the same coffee kick. You can add more spices to keep the flavor bold. Absolutely! Gingerbread latte fudge makes a great gift. To package the fudge, cut it into neat squares. Place the pieces in a cute box or a clear bag. You can tie it with a festive ribbon for a nice touch. Adding a little note with the recipe is also a fun idea. If your fudge is too soft, it might need more chilling time. Check after two hours. If it still doesn't set, try placing it in the freezer for a bit. If it’s still too gooey, you might need to melt it down again and add more chocolate. This helps thicken it up. In this post, we explored making Gingerbread Latte Fudge, covering ingredients, steps, and tips. You learned how to create a rich and spiced treat, including variations and storage methods. With simple tweaks, you can make it your own. Remember, practice makes perfect. Enjoy sharing this delicious fudge with friends or family. This recipe is fun and easy, perfect for any occasion. Dive into your kitchen, gather your ingredients, and craft this delightful fudge today!

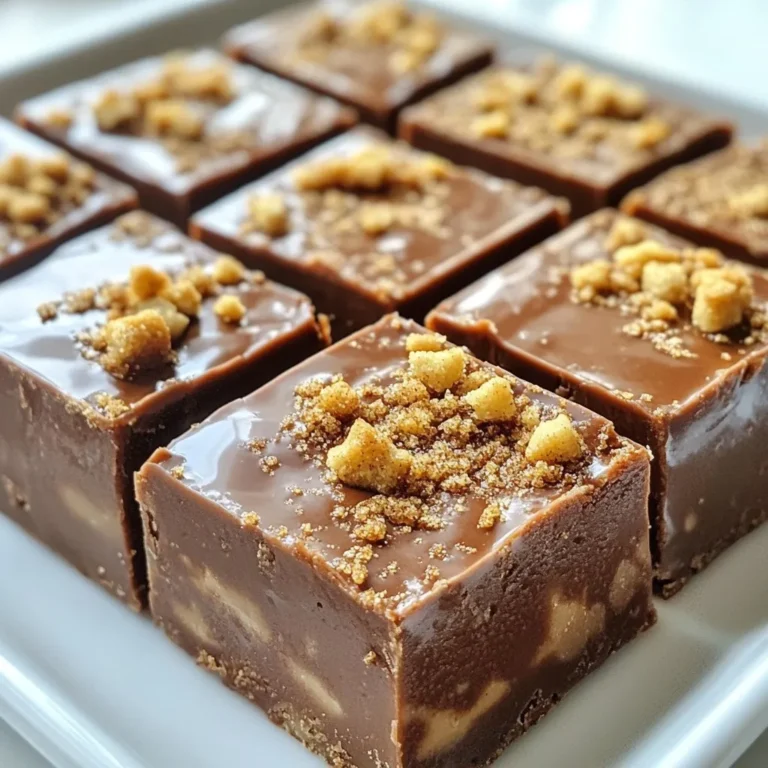
Gingerbread Latte Fudge Decadent Holiday Delight

- 1 cup unsalted butter, softened to room temperature - 1/2 cup powdered sugar, plus extra for dusting - 2 cups all-purpose flour - 1/2 teaspoon salt - 1 cup dried cranberries, roughly chopped - Zest from 1 large orange - 2 tablespoons freshly squeezed orange juice - 1 teaspoon pure vanilla extract - 1/4 teaspoon almond extract (optional) You can swap unsalted butter for salted butter. Just cut the added salt by half. For a sweeter taste, you can use brown sugar instead of powdered sugar. If you need a gluten-free version, use a gluten-free flour blend. Dried cranberries can be replaced with raisins or cherries for a fun twist. Fresh zest can enhance the flavor, but you can skip the almond extract if you prefer. Using fresh ingredients makes a big difference. Fresh cranberries add a tart taste that dried ones can’t match. Fresh orange juice and zest provide a bright flavor. They make the bars taste lively and delicious. If your butter is soft, it mixes well and creates a light texture. Always check the expiration dates on your ingredients. Fresh items lead to better results and a more enjoyable treat. {{ingredient_image_2}} First, set your oven to 350°F (175°C). This step is crucial for even baking. Grab a 9x9-inch baking pan. You can grease it lightly or line it with parchment paper. Lining helps remove the bars easily later. In a large bowl, add 1 cup of softened butter and 1/2 cup of powdered sugar. Use an electric mixer on medium speed. Beat this mix for 3-4 minutes until it’s light and fluffy. Next, slowly add 2 cups of all-purpose flour and 1/2 teaspoon of salt. Mix on low speed until you see a crumbly dough form. Now, fold in 1 cup of chopped dried cranberries, the zest from 1 large orange, 2 tablespoons of freshly squeezed orange juice, 1 teaspoon of vanilla extract, and 1/4 teaspoon of almond extract if you want. Ensure all ingredients blend well. The dough should feel moist but not sticky. If it seems too dry, a splash of orange juice can help. If it’s too wet, sprinkle in a bit more flour. Press the dough firmly in the prepared pan. Smooth the top with a spatula or your fingers. This ensures even baking and a nice texture. To get the best texture in shortbread, use softened butter. This helps the dough mix well. Beat it with powdered sugar until fluffy. Mix in flour slowly for a crumbly dough. Do not overmix; this keeps your bars tender. The dough should hold together but not be sticky. After baking, let the bars cool in the pan for ten minutes. This makes them easier to remove. If you used parchment paper, lift the bars out gently. Place them on a wire rack to cool fully. When they are cool, use a sharp knife to cut them into even squares. Dust with powdered sugar for a pretty finish. To boost flavor, add extra orange zest or almond extract. You can also mix in nuts or dark chocolate. For a beautiful look, serve the bars on a fancy plate. Add fresh cranberries and orange slices around them. This creates a fun and colorful display. Pro Tips Chill the Dough: If the dough feels too soft to handle, chill it in the refrigerator for about 30 minutes. This will make it easier to press into the pan and help the bars maintain their shape while baking. Use Fresh Ingredients: For the best flavor, always use fresh orange juice and zest. The essential oils in the fresh zest add an aromatic touch that enhances the overall taste of the bars. Uniform Baking: To ensure even baking, try to press the dough into the pan evenly. You can use a flat-bottomed glass or spatula to smooth the surface before baking. Storage Tips: Store the cooled bars in an airtight container at room temperature for up to a week. You can also freeze them for longer storage; just make sure to wrap them tightly to prevent freezer burn. {{image_4}} You can change the flavor of these bars easily. For a nutty twist, add chopped walnuts or pecans. This adds crunch and richness. If you love chocolate, try mixing in dark chocolate chips or chunks. They pair great with the tart cranberries. You can also experiment with other dried fruits like apricots or cherries. If you need a gluten-free version, swap all-purpose flour for a gluten-free blend. Look for blends that contain a mix of rice flour, almond flour, or tapioca. This helps keep the texture light and crumbly. Just be sure to check that your baking powder is gluten-free, too! These bars shine in any season. In fall, add warm spices like cinnamon or nutmeg for a cozy flavor. For summer, consider adding lime zest and juice instead of orange. This gives a fresh, zesty twist. To serve, arrange bars on a pretty plate. Garnish with fresh cranberries or citrus slices for a festive touch. To keep your Cranberry Orange Shortbread Bars fresh, store them in an airtight container. Place parchment paper between layers to prevent sticking. These bars can last up to a week at room temperature. If you plan to keep them longer, refrigeration is a good option. Just remember to let them come to room temperature before serving. If you want to enjoy these treats later, freezing is a great choice. First, cut the bars into squares. Wrap each piece tightly in plastic wrap. Then, place them in a freezer-safe bag or container. They can stay fresh in the freezer for up to three months. When you’re ready to eat, just thaw them in the fridge overnight. To refresh your Cranberry Orange Shortbread Bars, preheat your oven to 300°F (150°C). Place the bars on a baking sheet lined with parchment paper. Heat them for about 10 minutes. This will make them warm and slightly crisp. For an extra touch, dust with powdered sugar before serving. Enjoy the delightful flavors all over again! Cranberry Orange Shortbread Bars last about one week. Keep them in an airtight container. They stay fresh at room temperature. If you want them to last longer, store them in the fridge. The cold will help keep them tasty. Yes, you can make these bars ahead of time. They are perfect for meal prep! Bake them and let them cool completely. Then, wrap them tightly in plastic wrap. This way, you can enjoy them later. Just remember to dust with powdered sugar before serving. You can serve these bars with many treats. A cup of tea or coffee pairs well. For a festive touch, add whipped cream or a scoop of vanilla ice cream. Fresh cranberries or orange slices make a colorful garnish, too. You learned how to make Cranberry Orange Shortbread Bars step by step. Using fresh ingredients is key for taste. I shared tips for perfect texture and cutting. Options like nuts and gluten-free choices add fun. Store these bars properly for lasting flavor, and enjoy them fresh. To maximize enjoyment, serve with tea or coffee. Explore variations and find your perfect match. With these tips, your baking will impress!

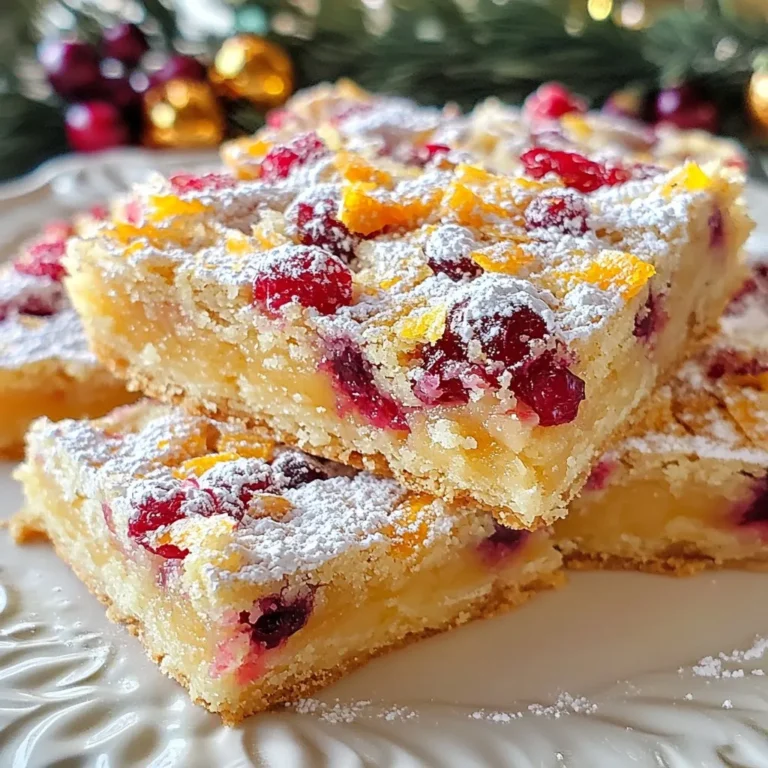
Cranberry Orange Shortbread Bars Delightful Treats

- 1 large head of cauliflower, cut into bite-sized florets - 1/2 cup all-purpose flour or gluten-free flour - 1/4 cup sweet chili sauce - 2 tablespoons soy sauce The star of this dish is the large head of cauliflower. Cauliflower has a mild taste and absorbs flavors well. This makes it perfect for our sweet chili garlic bites. You can use all-purpose flour or gluten-free flour, depending on your needs. The sweet chili sauce combined with soy sauce adds a delightful kick. - 1 teaspoon garlic powder - 1/2 teaspoon salt - 1/4 teaspoon black pepper - 2 cloves of garlic, finely minced - 1 tablespoon sesame oil - 1 tablespoon chopped green onions for garnishing - Sesame seeds for garnishing Seasonings bring out the best in our cauliflower bites. Garlic powder gives a strong garlic flavor without the fuss. Salt and black pepper enhance the taste, making each bite more savory. Fresh minced garlic adds depth to the sauce. Sesame oil gives a nutty twist, while green onions and sesame seeds add color and crunch to the final dish. These extras make your snack not just tasty but visually appealing too! {{ingredient_image_2}} First, turn on your oven to 425°F (220°C). This high heat helps the bites get crispy. Line a baking sheet with parchment paper. This step stops the bites from sticking. Next, take a large head of cauliflower and cut it into bite-sized florets. Aim for even sizes so they cook at the same rate. In a medium bowl, mix together 1/2 cup all-purpose flour, 1 teaspoon garlic powder, 1/2 teaspoon salt, and 1/4 teaspoon black pepper. This mix adds flavor to the batter. Gradually stir in 1/2 cup of water. Keep mixing until you get a smooth batter. It should not have lumps. Take each cauliflower floret and dip it into the batter. Make sure the batter coats all sides well. Place the battered florets on the baking sheet in a single layer. Do not overcrowd them; this helps them get crispy. Bake in the oven for 20-25 minutes. Flip them halfway through to ensure even browning. You want them to be golden and crispy. While the cauliflower bakes, grab a small saucepan. Combine 1/4 cup sweet chili sauce, 2 tablespoons soy sauce, and 2 cloves of finely minced garlic in the pan. Heat it over medium heat. Stir the sauce until it warms through and all the ingredients mix well. Once the cauliflower bites are golden, take them out of the oven. Toss them in the hot chili garlic sauce until they are fully coated. This step adds a sweet and spicy kick. Place the coated bites back on the baking sheet and return them to the oven. Bake for an additional 5-7 minutes to let the sauce caramelize. This makes them even tastier! After this, let them cool for a few minutes before serving. To get the best crunch, avoid overcrowding the baking sheet. Give each cauliflower bite space. This lets hot air flow around them. Use parchment paper for easy removal. It helps prevent sticking and makes cleanup a breeze. You can add spices to boost flavor. Try crushed red pepper for heat. A sprinkle of smoked paprika adds depth. For serving, place the bites on a platter. Drizzle leftover sweet chili sauce over them. Garnish with chopped green onions and sesame seeds for a colorful touch. Use a sturdy baking sheet that can handle high heat. An oven-safe baking sheet ensures even cooking. A mixing bowl for the batter is also needed. Don't forget tongs for tossing the bites in sauce. These tools help you make the process smooth and fun. Pro Tips Coating Consistency: Make sure your batter is smooth and thick enough to cling to the cauliflower, ensuring an even coating for a crispy texture. Flipping for Evenness: Flip the cauliflower bites halfway through baking to guarantee they cook evenly and develop a golden crust on all sides. Caramelization Check: Keep an eye on the cauliflower during the final 5-7 minutes of baking to achieve the perfect caramelization without burning the sauce. Garnishing for Appeal: Don’t skip the green onions and sesame seeds; they add freshness and a delightful crunch that enhances both flavor and presentation. {{image_4}} You can easily make these bites gluten-free. Just swap the all-purpose flour for gluten-free flour. This change keeps the texture and taste great. Want to mix it up? You can try different sauces. For a spicy kick, use sriracha. If you prefer tangy, mix in lime juice. You can also make homemade sauces. Blend honey, soy sauce, and garlic for a sweet twist. Feel free to add more veggies or proteins. Try bell peppers or broccoli for crunch. You can also toss in cooked chicken or shrimp for extra protein. Experimenting with herbs and spices brings new life to the dish. Add cilantro or basil for a fresh flavor boost. To store leftover Sweet Chili Garlic Cauliflower Bites, place them in an airtight container. Make sure they cool down first. Refrigerate them for up to three days. For longer storage, freeze the bites in a single layer. Once frozen, move them to a freezer bag. They can last up to three months in the freezer. Just remember to label your container with the date. When reheating, aim to keep that crispy texture. The air fryer works well for this. Preheat it to 375°F (190°C). Place the bites in a single layer and heat for about five to seven minutes. You can also use an oven. Preheat it to 350°F (175°C) and bake for 10-15 minutes. Check them often, so they don’t burn. Avoid microwaving, as it makes them soggy. When stored properly, the bites stay tasty for about three days in the fridge. In the freezer, they can last up to three months. However, their quality may drop after a while. For the best flavor and texture, eat them sooner rather than later. Sweet Chili Garlic Cauliflower Bites are crispy, flavorful snacks. They mix the heat of sweet chili sauce with garlic. The dish features roasted cauliflower florets, coated in a light batter. Each bite is crunchy outside and tender inside. The flavor is a perfect blend of sweet and savory. Yes, you can prepare these bites ahead. You can coat the cauliflower and store it in the fridge. Bake them just before serving for the best taste. If you have leftovers, reheat them in the oven. This method keeps them crispy and delicious. These bites pair well with many dips. Try serving them with soy sauce, ranch, or peanut sauce. They are great as a side dish or snack. You can also add a fresh salad or rice. The options are endless, and they make a fun meal. Yes, Sweet Chili Garlic Cauliflower Bites are vegan. All ingredients are plant-based, making them suitable for everyone. You can enjoy them even if you follow a vegan diet. This dish is perfect for parties or casual snacking. This blog post covered the recipe for Sweet Chili Garlic Cauliflower Bites. You learned about key ingredients, simple steps, and useful tips to create a tasty dish. Remember to mix up the flavors and try different sauces. It’s okay to experiment with vegetables or proteins for added nutrition. Enjoy your delicious bites right away or store them for later. This recipe is not just fun; it’s a great way to eat veggies! So, get in the kitchen and start cooking your own vibrant dish today.

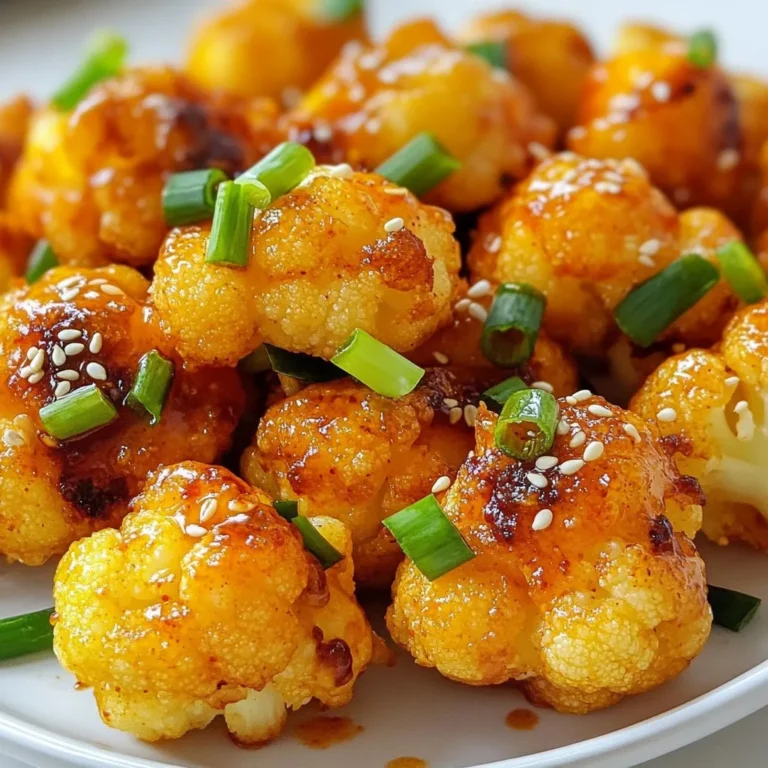
Sweet Chili Garlic Cauliflower Bites Tasty and Quick Snack

PREV 1 … 46 47 48 49 NEXT
mini chef kitchen

explore

DessertsDinnerAppetizersDrinks

Our Policies

  • Cookie Policy
  • Copyright Policy
  • Disclaimer
  • GDPR Policy
  • Terms Of Use
Back to Top
  • About
  • Contact Us
  • Privacy Policy
© 2026 mini chef kitchen