FREE DINNER EBOOK! Get your copy!
  • Cookie Policy
  • GDPR Policy
  • Disclaimer
  • Terms Of Use
  • Visit my other site: Fun Cookie Recipes
mini chef kitchen
  • Home
  • Dinner
  • Desserts
  • Drinks
  • Appetizers
  • Contact
  • About
  • Privacy Policy
  • Home
  • Dinner
  • Desserts
  • Drinks
  • Appetizers
  • Contact
  • About
  • Privacy Policy
  • Cookie Policy
  • GDPR Policy
  • Disclaimer
  • Terms Of Use
Visit my other site: Fun Cookie Recipes

HOME / CATEGORIES /

Latest

To make tasty pesto chicken stuffed peppers, gather these simple ingredients: - 4 large bell peppers - 2 cups cooked shredded chicken - 1 cup fresh basil pesto - 1 cup cooked quinoa or rice - 1 cup cherry tomatoes, halved - 1/2 cup mozzarella cheese, grated - 1/4 cup parmesan cheese, grated - Salt and pepper to taste - Olive oil for drizzling Choosing the right bell peppers makes a big difference. I like to pick colorful ones, like red, yellow, and green. They add fun to the dish and a burst of flavor. For the chicken, you can use rotisserie chicken to save time. Fresh basil pesto gives the best taste, but store-bought works too. Quinoa or rice acts as a great base, adding texture and nutrients. Cherry tomatoes bring freshness and sweetness. Mozzarella and parmesan cheese make everything creamy and delicious. Don’t forget to season with salt and pepper for that perfect taste. Finally, a drizzle of olive oil helps the peppers cook well and adds flavor. {{ingredient_image_2}} - Preheat the oven to 375°F (190°C). - Prepare the bell peppers. Slice off the tops and remove the seeds. Set them aside. - In a large bowl, combine the cooked chicken, pesto, quinoa, cherry tomatoes, half of the mozzarella, and parmesan. - Add salt and pepper to taste. Mix well to blend the flavors. - Stuff each bell pepper with this tasty chicken mixture. Press it down gently for even filling. - Place the stuffed peppers upright in a baking dish. Drizzle olive oil on top to keep them moist. - Cover the dish with foil and bake for about 25 minutes. This helps the peppers soften. - After 25 minutes, take off the foil. Add the remaining mozzarella on top of the peppers. - Bake uncovered for another 10 to 15 minutes. Look for the cheese to melt and turn golden. - Once done, let the peppers cool for a few minutes before serving. - Choosing the right bell peppers: Look for large, firm peppers without blemishes. Red, yellow, and green varieties each add unique flavors. Pick your favorites to add color and taste to your dish. - Ensuring even cooking: Cut the tops off the peppers evenly. This helps them cook uniformly. Pack the filling tightly to avoid gaps that can lead to uneven cooking. - Additional spices or herbs: Try adding garlic powder, onion powder, or Italian seasoning for extra depth. Fresh herbs like parsley or oregano can brighten the dish too. - Alternatives for pesto: If you want a twist, switch basil pesto for sun-dried tomato pesto or spinach pesto. Each option brings a new layer of taste. - Serving suggestions: Place the stuffed peppers on a colorful platter. This adds visual appeal and invites your guests to dig in. - Garnishing tips: Top each pepper with fresh basil leaves. You can also drizzle extra pesto around the platter. This adds flair and highlights the dish's flavors. Pro Tips Choose Your Peppers: Select a mix of bell pepper colors for a visually appealing dish and added flavor depth. Make It Ahead: Prepare the stuffing and fill the peppers a day in advance, then bake just before serving for a quick weeknight meal. Customize the Filling: Feel free to add other vegetables, such as spinach or zucchini, to the filling for extra nutrition and taste. Check Doneness: Ensure the peppers are tender by poking them with a fork; they should easily yield without breaking apart. {{image_4}} You can easily change the protein in your stuffed peppers. Try turkey, beef, or even plant-based meats. Turkey gives a lean option full of flavor. Ground beef adds richness and depth. If you want a vegetarian choice, use tofu or tempeh. These options work well with the pesto and keep the dish tasty. Grains are key in stuffed peppers. If you want to switch it up, use rice, couscous, or farro instead of quinoa. Rice is a classic choice and easy to find. Couscous cooks fast and adds a nice texture. Farro gives a nutty flavor and chewy bite. Each grain brings its own twist to the dish. Want to make this dish vegetarian or vegan? Replace the chicken with hearty veggies like mushrooms, spinach, or lentils. You can also use chickpeas for protein. For a vegan cheese option, try nut-based cheeses. These swaps keep the flavor bold and satisfying without meat. To keep your pesto chicken stuffed peppers fresh, refrigerate them. Place the peppers in an airtight container. They can last up to four days. If you have leftovers, you can freeze them! Wrap each stuffed pepper tightly in plastic wrap. Then, place them in a freezer bag. They will stay good for about three months. When it comes to reheating, you have options. You can use a microwave or an oven. If you choose the microwave, place the pepper on a microwave-safe plate. Heat for about two minutes, checking for warmth. The oven method takes longer but keeps the texture better. Preheat your oven to 350°F (175°C). Place the peppers in a baking dish and cover with foil. Heat for 15-20 minutes, until hot. Always check that your cheese melts nicely and the filling is warm. Enjoy your delicious meal again! To make homemade pesto, gather fresh basil, garlic, pine nuts, parmesan cheese, and olive oil. You will need about 2 cups of fresh basil, 2 cloves of garlic, 1/4 cup of pine nuts, 1/2 cup of grated parmesan, and 1/2 cup of olive oil. Blend these ingredients in a food processor until smooth. Add salt and pepper to taste. This fresh sauce adds a bright flavor to many dishes, including your stuffed peppers. Yes, you can prepare stuffed peppers ahead of time. You can assemble them and keep them in the fridge for up to 24 hours. Cover them tightly with plastic wrap or foil. When you're ready to bake them, just remove the cover and bake as directed. This makes meal prep easy and quick for busy days. Pesto chicken stuffed peppers pair well with many sides. Try a light salad with mixed greens and a simple vinaigrette. Garlic bread is another tasty option. You can also serve them with a side of roasted vegetables or a warm quinoa salad. These sides will complement the flavors in the peppers. Yes, stuffed peppers are quite healthy. They are low in calories and high in nutrients. Each pepper provides vitamins A and C, fiber, and protein. Here's a quick look at the nutritional information for one stuffed pepper: - Calories: 320 - Protein: 25g - Carbohydrates: 30g - Fiber: 6g - Fat: 15g Using chicken, quinoa, and veggies makes this dish both filling and nutritious. Enjoy the health benefits while savoring the delicious flavors! In this post, we explored tasty stuffed peppers, including all the necessary ingredients and steps. We discussed tips for cooking and variations for everyone's taste. You can even personalize it with different proteins or grains. Remember to store any leftovers properly for future meals. Stuffed peppers are not only delicious but also healthy. Try these ideas, and enjoy creating your own delicious versions of this dish!

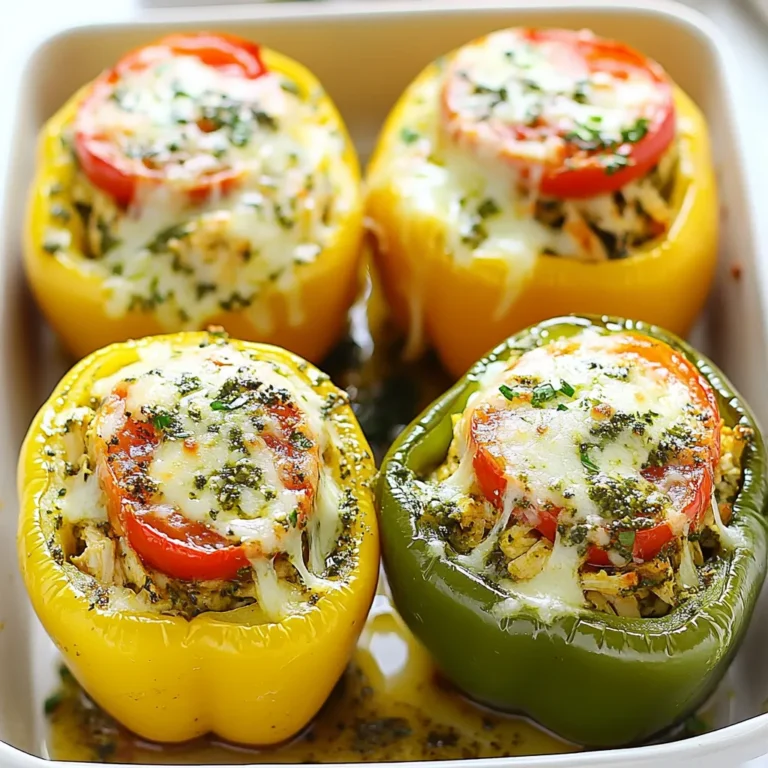
Pesto Chicken Stuffed Peppers Flavorful and Nutritious

- 1 cup quinoa, thoroughly rinsed - 2 cups vegetable broth or water - 1 cup cherry tomatoes, halved - 1 cucumber, diced into small pieces - 1 red bell pepper, diced - 1/2 red onion, finely chopped - 1 cup chickpeas, cooked (either canned, rinsed, or boiled) - 1/2 cup Kalamata olives, pitted and sliced - 1/2 cup feta cheese, crumbled - 1/4 cup fresh parsley, finely chopped Quinoa is the star of this dish. It cooks up fluffy and has a mild taste. The fresh vegetables add crunch and color. Cherry tomatoes burst with flavor, while cucumbers keep things refreshing. Red bell peppers bring sweetness. The red onion adds a little bite. Chickpeas give protein and a nice texture. Kalamata olives add a salty, briny flavor. Feta cheese crumbles beautifully, adding creaminess. Fresh parsley brightens the dish and adds a herbal note. - 1/4 cup high-quality olive oil - 2 tablespoons freshly squeezed lemon juice - Salt and black pepper, to taste The dressing is simple but packs a punch. Olive oil lends richness. Lemon juice adds brightness and acidity. Salt and pepper enhance all the flavors. You can whisk these together easily. This dressing ties all the ingredients together beautifully. - Fresh parsley - Kalamata olives Garnishes add a finishing touch. A sprinkle of fresh parsley makes the dish pop with green color. Extra Kalamata olives can give a salty bite, perfect for olive lovers. These options let you customize your bowl to your taste. {{ingredient_image_2}} Start by rinsing your quinoa. Place it in a fine-mesh strainer under cold water. Rub the grains gently with your fingers. This helps remove the bitter coating. Once rinsed, put 1 cup of quinoa in a medium saucepan. Add 2 cups of vegetable broth or water. Next, heat the mixture over medium-high heat. Bring it to a rolling boil. When it starts boiling, reduce the heat to low. Cover the saucepan and let it simmer for about 15 minutes. The quinoa will absorb the liquid and become tender. After 15 minutes, remove it from heat but keep it covered for 5 more minutes. This steaming step makes the quinoa fluffy. Fluff it gently with a fork before using. In a large mixing bowl, combine your fresh veggies and chickpeas. Add 1 cup of halved cherry tomatoes, 1 diced cucumber, 1 diced red bell pepper, and 1/2 finely chopped red onion. Toss the ingredients well to mix them evenly. Then, add 1 cup of cooked chickpeas to the bowl. Now, gently fold the cooked quinoa into your vegetable mixture. Be careful not to mash the ingredients. You want everything mixed but still whole. After that, add 1/2 cup of sliced Kalamata olives, 1/2 cup of crumbled feta cheese, and 1/4 cup of finely chopped fresh parsley. Stir lightly to combine. In a small bowl, whisk the dressing ingredients together. Combine 1/4 cup of high-quality olive oil, 2 tablespoons of freshly squeezed lemon juice, salt, and black pepper. Whisk until all the ingredients blend together well. Drizzle the dressing over your quinoa salad. Toss gently to coat all the ingredients with the dressing. Taste the salad now. If you want, adjust the seasoning by adding more salt, pepper, or lemon juice. This step helps you get your flavor just right. To cook fluffy quinoa, start with proper rinsing. Rinse the quinoa in a fine mesh strainer. This helps remove the bitter coating called saponin. Rinse it under cold water for about 2 minutes. This step is key for great flavor. Timing is also important. After rinsing, combine quinoa with vegetable broth in a pot. Bring it to a boil over medium-high heat. Once it boils, reduce the heat. Cover the pot and let it simmer for 15 minutes. After cooking, let it sit covered for 5 minutes. Then, fluff it gently with a fork. This method ensures each grain is separate and light. Adjusting seasoning can boost your quinoa bowl's flavor. Start with salt and pepper. Add more lemon juice if you want a tangy kick. Taste as you go to find the perfect balance. For added texture, consider mixing in nuts or seeds. Toasted pine nuts or sunflower seeds work well. They add a nice crunch and nutty flavor. You can also include fresh herbs, like basil or mint, for a fresh twist. Serving your Mediterranean quinoa bowls nicely can impress guests. Use deep dishes or wide bowls to show off the vibrant colors. Arrange the ingredients in sections for a beautiful look. Garnish your bowls with fresh parsley and lemon wedges. A drizzle of extra olive oil on top adds richness. This not only enhances flavor but also makes your dish more appealing. Enjoy your colorful and delicious meal! Pro Tips Perfectly Cooked Quinoa: Ensure your quinoa is thoroughly rinsed before cooking to remove its natural bitterness. Use vegetable broth instead of water for added flavor. Fresh Ingredients: Use fresh, seasonal vegetables for the best flavor and texture. This dish is versatile, so feel free to add any of your favorite Mediterranean vegetables. Customize Your Dressing: Adjust the olive oil and lemon juice to suit your taste. For a spicier kick, add a pinch of red pepper flakes or a dash of hot sauce to the dressing. Make It Ahead: This quinoa bowl can be prepared in advance and stored in the fridge for up to 3 days. The flavors will meld beautifully, making it even more delicious over time! {{image_4}} You can add grilled chicken or tofu to your quinoa bowl. Grilled chicken gives a nice flavor. Tofu adds protein for a vegan option. You can also use different legumes. Black beans or lentils work great. They add protein and fiber, making your meal more filling. Feel free to swap out seasonal vegetables. Zucchini or spinach can be tasty additions. You might also like to try roasted vegetables. They add a depth of flavor and a nice texture. Incorporating different colors makes your bowl pop. Use bright veggies like carrots or purple cabbage for a fun look. You can change up the dressing for variety. Try tahini for a creamy texture. Yogurt dressing adds a tangy taste. You can also use herbs and spices to enhance flavor. Fresh basil or dill can add zest. Experiment with what you love to keep it exciting! To keep your Mediterranean quinoa bowls fresh, store them in airtight containers. This helps prevent moisture loss and keeps flavors intact. Leftovers can stay in the fridge for 3 to 5 days. Before serving, always check for signs of spoilage. Look for off smells or changes in color. You can prepare quinoa bowls ahead of time. Cook the quinoa and chop veggies in advance. Store everything separately in the fridge. When you’re ready to eat, just mix the ingredients. To reheat, use the microwave for quick warmth. Heat it for about 1-2 minutes or until warm. Yes, you can freeze quinoa bowls! To freeze, place the cooled bowls in freezer-safe bags. Squeeze out the air before sealing. They stay good for about 2-3 months. When you’re ready to eat, thaw in the fridge overnight. Reheat in the microwave or on the stove until hot. Mediterranean quinoa bowls are packed with nutrients. They offer a good mix of protein, fiber, and healthy fats. Here are some key nutrients: - Quinoa: High in protein and gluten-free. - Chickpeas: Great source of protein and fiber. - Vegetables: Full of vitamins and minerals. - Olive oil: Contains healthy fats for your heart. - Feta cheese: Adds calcium and flavor. With these ingredients, you get a balanced meal. Each bowl supports a healthy lifestyle. Yes, you can make this recipe vegan easily. Here are some substitutions: - Feta cheese: Use tofu or vegan feta instead. - Olive oil: Keep as is; it’s vegan-friendly. - Chickpeas: Already vegan; no need to change. These swaps keep your bowl tasty and plant-based. You can easily scale the recipe for larger groups. Follow these steps: - Double the ingredients: Just multiply each item by two. - Cook in batches: If your pot is small, cook quinoa in two rounds. - Mix in larger bowls: Use big serving bowls to combine everything. This way, you can serve more people without stress. Enjoy your time cooking for friends or family! This blog post shared a tasty Mediterranean quinoa bowl recipe. You learned the key ingredients, like quinoa, veggies, and chickpeas, plus how to mix them. I offered tips for perfect cooking and flavor boosts, plus ideas for storage and variations. You can customize this dish to fit your taste or dietary needs. Enjoy making this healthy meal that everyone will love. With easy steps and bright flavors, your quinoa bowl will be a hit!

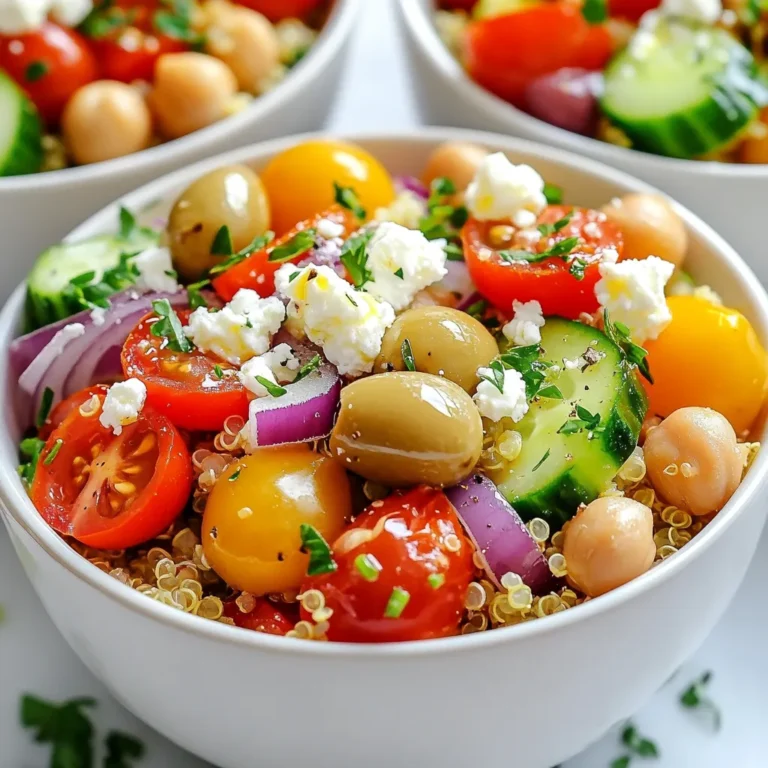
Mediterranean Quinoa Bowls Fresh and Flavorful Meal

- 4 medium sweet potatoes - 3 tablespoons extra virgin olive oil - 2 tablespoons pure maple syrup - 1 tablespoon smooth Dijon mustard - 1 teaspoon garlic powder - 1 teaspoon smoked paprika - Salt and black pepper to taste - Fresh parsley for garnish Gather these ingredients before you start. The sweet potatoes are the star of this dish. Their natural sweetness pairs perfectly with the tangy Dijon mustard and rich maple syrup. Olive oil adds a nice touch too, helping to get that golden brown color. You will want to peel and cut the sweet potatoes into 1-inch cubes. This size helps them cook evenly. The spices add depth, and using fresh parsley for garnish makes the dish pop. With these ingredients, you can create a tasty, healthy side dish. Each bite is a delightful mix of flavors. Plus, they are easy to make and great for sharing. Get ready to enjoy a savory delight! {{ingredient_image_2}} First, preheat your oven to 425°F (220°C). This step is key for even cooking. Next, line a large baking sheet with parchment paper. This will help the sweet potatoes not stick. In a big mixing bowl, combine the sweet potatoes with olive oil, maple syrup, and Dijon mustard. Add garlic powder, smoked paprika, salt, and black pepper. Use a spatula or your hands to mix well. Make sure every sweet potato cube gets coated. This mix brings out a sweet and savory flavor. Now, transfer the sweet potatoes to the lined baking sheet. Spread them out in a single layer. This helps them roast evenly. Place the baking sheet in your preheated oven. Roast for 25 to 30 minutes. About halfway through, flip the sweet potatoes. This will help them brown nicely. When done, they should be tender and golden brown. Remove them and let them cool for a few minutes. This allows the flavors to settle before serving. To boost the flavor of your maple Dijon roasted sweet potatoes, consider adding spices like cumin or cinnamon. Cumin gives a warm, earthy taste. Cinnamon adds a hint of sweetness that pairs well with maple. You can also try fresh herbs like thyme or rosemary for a fragrant touch. These additions will elevate your dish and surprise your guests. For even cooking and browning, cut sweet potatoes into uniform cubes. This helps them roast at the same rate. Make sure not to overcrowd the baking sheet; leave space between each piece. Flipping the sweet potatoes halfway through roasting ensures they caramelize evenly. This simple step makes a big difference in texture and flavor. Serving your dish in a colorful bowl makes it more appealing. For a touch of elegance, drizzle a bit of maple syrup on top. A sprinkle of fresh parsley not only adds color but also a fresh taste. You could also serve these sweet potatoes with a side of yogurt or sour cream for a creamy contrast. This will make your dish look stunning and taste delicious. Pro Tips Choose the Right Sweet Potatoes: Look for firm, smooth sweet potatoes without any blemishes. The sweeter and fresher the potatoes, the better the flavor of your dish. Adjust the Seasoning: Feel free to modify the spices according to your taste. Adding cayenne pepper can give a nice kick, while cinnamon can enhance the sweetness. Uniform Cutting: Ensure that the sweet potatoes are cut into uniform 1-inch cubes. This promotes even cooking and helps them roast perfectly. Storage Tips: Leftovers can be stored in an airtight container in the refrigerator for up to 3 days. Reheat in the oven for the best texture. {{image_4}} If you want to change up the flavor, try honey or agave syrup. Both sweeteners add a nice touch. Honey gives a floral note, while agave is milder. Just use the same amount as maple syrup. This way, you keep the sweetness, but with a new twist. Sweet potatoes are great, but you can use other root veggies too. Carrots, parsnips, or even butternut squash work well. Just cut them into similar sizes. This helps them roast evenly. Each vegetable brings its own unique flavor to the dish. Experiment and find your favorite mix. To make this dish vegan, ensure the Dijon mustard is egg-free. Most brands are, but check the label. For gluten-free diets, most Dijon mustards are safe too. Just make sure your other ingredients, like spices and oils, are also gluten-free. This way, everyone can enjoy this tasty dish! After enjoying your Maple Dijon Roasted Sweet Potatoes, you may have some leftovers. To store them, follow these simple steps: - Refrigerate: Place leftover sweet potatoes in an airtight container. They stay fresh for up to 4 days in the fridge. - Freeze: For longer storage, freeze them in a freezer-safe bag. They can last up to 3 months. Make sure to remove as much air as possible to prevent freezer burn. Reheating sweet potatoes can be tricky. You want them warm but not mushy. Here are my tips: - Oven Method: Preheat your oven to 350°F (175°C). Spread the sweet potatoes on a baking sheet. Heat for about 10 to 15 minutes, or until warm. - Microwave Method: If you're in a hurry, use the microwave. Place sweet potatoes in a microwave-safe bowl. Heat in 30-second intervals, stirring in between. This helps them heat evenly. By following these steps, you can enjoy your Maple Dijon Roasted Sweet Potatoes again without losing their great taste and texture! Roast sweet potatoes for 25 to 30 minutes at 425°F. This time gives you a soft inside and a crispy outside. Halfway through, flip them for even cooking. When they are golden brown, they are ready to eat. Yes, you can prepare sweet potatoes ahead. Cut them and toss them in the sauce. Store them in the fridge for up to 24 hours. When ready, just roast them. This saves time and keeps the flavor fresh. Maple Dijon roasted sweet potatoes pair well with many dishes. Try serving them with grilled chicken or tofu for protein. They also go great with a fresh salad or quinoa. Add a dollop of yogurt on top for creaminess. Enjoy mixing and matching to find your favorite combo! We covered a simple recipe for Maple Dijon Roasted Sweet Potatoes. You learned about the main ingredients and how to prepare them step-by-step. I shared tips for enhancing flavor and presentation. Variations let you customize this dish for your needs. Proper storage keeps leftovers fresh, and I answered common questions. Try this recipe for a tasty, healthy meal. Enjoy sweet potatoes roasted to perfection!

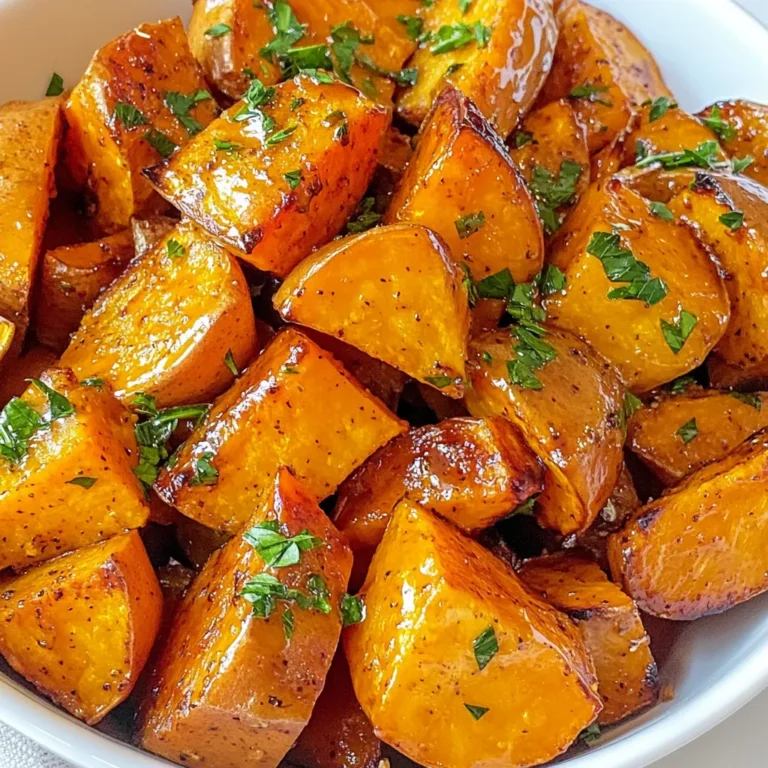
Maple Dijon Roasted Sweet Potatoes Savory Delight

To make this tasty dish, gather these key ingredients: - 300g pasta (linguine or spaghetti) - 500g cherry tomatoes, halved - 250g fresh burrata cheese - 3 cloves garlic, minced - 3 tablespoons extra-virgin olive oil - 1 teaspoon red pepper flakes (adjust to taste) - Salt and freshly ground black pepper to taste - Fresh basil leaves, for garnish - Zest of 1 lemon These ingredients create a fresh and vibrant meal. The cherry tomatoes bring sweetness, while the burrata adds creaminess. You can add a few extra ingredients for more flavor: - Grated Parmesan cheese for a salty kick - Red onion, thinly sliced, for a sharp taste - Spinach, wilted in the pan, for extra greens - Capers for a briny touch - Prosciutto, crispy and crumbled, for a savory crunch These ingredients can elevate the dish, making it even more exciting. To prepare this dish, you'll need some basic tools: - A large pot for boiling pasta - A large skillet for sautéing - A colander for draining pasta - A cutting board and chef's knife for chopping - Tongs for serving Having the right tools makes cooking easier and more enjoyable. Enjoy the process of creating this delicious meal! {{ingredient_image_2}} Start by boiling a large pot of salted water. Once the water boils, add 300g of pasta. I like using linguine or spaghetti. Cook it according to the package directions until it’s al dente. Before you drain it, save about 1 cup of that pasta water. This water helps make a creamy sauce later. After saving the water, drain the rest and put the pasta back in the pot. Now, let’s make the sauce. Grab a large skillet and heat 3 tablespoons of extra-virgin olive oil over medium heat. When the oil shimmers, add 3 cloves of minced garlic. Sauté for about 30 seconds. You want it fragrant and golden, not burnt. Burnt garlic tastes bad. Next, add 500g of halved cherry tomatoes to the skillet. Season them with salt, pepper, and 1 teaspoon of red pepper flakes. Cook for 5-7 minutes, stirring often. The tomatoes should soften and burst, releasing their sweet juices. It’s time to mix! Return the cooked pasta to the skillet with the tomatoes. Toss everything together well. Gradually add the reserved pasta water, a little at a time. This will help create a silky sauce that coats the pasta. Cook for another 1-2 minutes to heat everything through. This is where the magic happens! Your pasta will be full of flavor and ready for the next step. To cook pasta just right, start with a large pot of salted water. Bring it to a rolling boil. Add the pasta and stir it. Follow the package time for cooking. I always check if it's al dente, meaning it’s firm to the bite. Before draining, save about 1 cup of that starchy water. This water helps the sauce stick to the pasta later. Fresh ingredients make this dish sing. Use ripe cherry tomatoes; they burst with flavor. I like to add fresh garlic for that aromatic touch. Don’t skip the lemon zest! It adds a bright note. Fresh basil leaves also bring a lovely herbal taste. You can use a good quality olive oil for richness. If you enjoy heat, adjust the red pepper flakes to your liking. Serving this dish well makes it even more appealing. I recommend using shallow bowls. Place the pasta in the center and top with torn burrata. The creamy cheese looks beautiful and adds a nice contrast. Finish it off with a sprinkle of lemon zest and fresh basil. A light drizzle of olive oil adds shine and flavor. The colors should pop and invite everyone to dig in! Pro Tips Use Seasonal Tomatoes: Opt for the ripest cherry tomatoes you can find, as they will enhance the flavor of the dish significantly. If it's tomato season, consider using heirloom varieties for a burst of different flavors. Perfect Pasta Cooking: Always cook your pasta until al dente for the best texture. Remember to reserve some pasta water before draining; it helps to create a silky sauce that clings to the pasta. Enhance with Fresh Herbs: Don't skimp on the fresh basil! It adds a fragrant touch that elevates the dish. You can also experiment with other herbs like oregano or mint for a different flavor profile. Serving Temperature: Serve the pasta warm but not boiling hot to allow the burrata to soften slightly without melting completely. This creates a delightful creaminess that enhances the overall experience. {{image_4}} You can easily make this dish vegetarian by using only plant-based ingredients. Instead of burrata, try using cashew cheese or tofu. These options still offer creaminess but keep the dish dairy-free. You can also add more vegetables like spinach or zucchini for extra flavor and nutrients. Feel free to swap in different ingredients to change the taste. Instead of cherry tomatoes, use sundried tomatoes for a richer flavor. You could also try using whole wheat pasta for more fiber. If you want a hint of sweetness, add roasted red peppers. For a more savory taste, include olives or capers. Using seasonal produce makes this dish even better. In spring, try adding asparagus or peas. In summer, mix in fresh corn or bell peppers. Fall brings great options like butternut squash or roasted pumpkin. Each season offers unique flavors that can brighten your pasta dish. You can adapt this recipe to fit any fresh ingredient you find at your local market. To store leftover Cherry Tomato Burrata Pasta, let it cool first. Place it in an airtight container. This keeps the pasta fresh for up to three days in the fridge. Be sure to seal it tight to avoid drying out. For reheating, I suggest using a skillet. Add a splash of water or olive oil to the pan. Heat on medium-low and stir gently. This method warms the pasta evenly and keeps it moist. You can also use the microwave. Just cover the dish with a damp paper towel to trap steam. You can freeze Cherry Tomato Burrata Pasta too. First, cool it completely. Spoon it into freezer-safe bags or containers. Squeeze out the air before sealing. It will stay good for up to two months. When ready to eat, thaw it in the fridge overnight and reheat as mentioned above. Yes, you can prepare this dish ahead of time. Cook the pasta and sauce separately. Store them in the fridge for up to two days. When ready to serve, heat the sauce and toss it with the pasta. Add the burrata just before serving for the best taste. I recommend using linguine or spaghetti for this recipe. Both types hold sauce well and complement the creamy burrata. If you want a different texture, try penne or fusilli. Just make sure to adjust the cooking time according to the package directions. To adjust the spice level, simply change the amount of red pepper flakes. For a mild dish, use less or skip them altogether. If you love heat, add more flakes or spicy oil. Taste as you go to find your perfect balance. This dish is simple and fun to make. We covered the key ingredients and tools needed for cherry tomato burrata pasta. The step-by-step guide showed you how to cook without fuss. I shared tips for flavor and presentation to impress anyone. You can also mix it up with variations and smart storage methods. Now you can enjoy tasty meals anytime. Use what you learned to create and have fun in the kitchen!

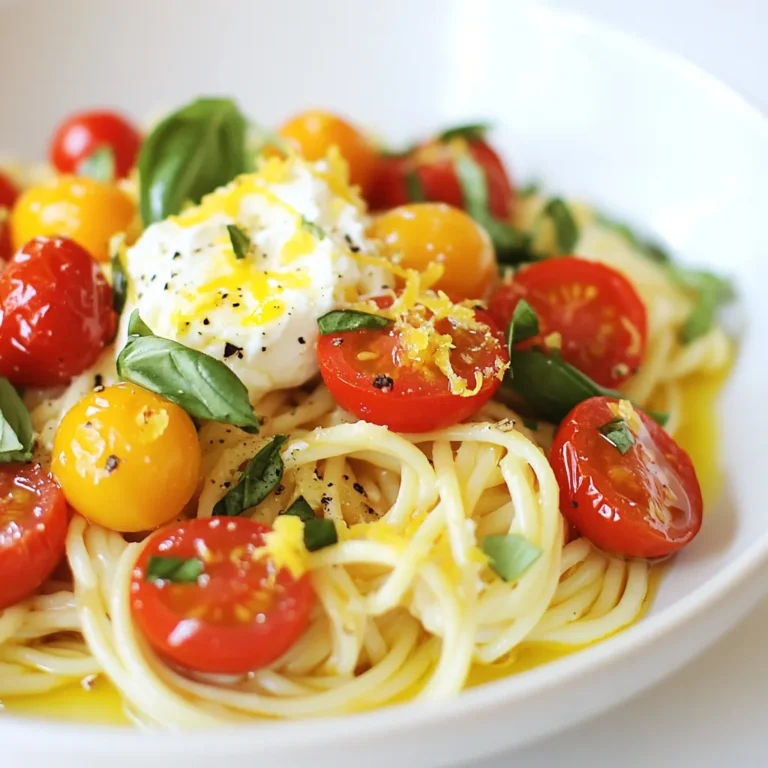
Cherry Tomato Burrata Pasta Fresh and Flavorful Dish

- 4 bell peppers (any color of your choice) - 1 cup quinoa, rinsed and drained - 2 cups vegetable broth - 1 can (15 oz) black beans, rinsed and drained - 1 cup corn (you can use fresh or frozen) - 1 small red onion, diced finely - 2 garlic cloves, minced - 1 teaspoon ground cumin - 1 teaspoon chili powder - 1 teaspoon smoked paprika - Salt and pepper, to taste - 1 cup cherry tomatoes, halved - ½ cup fresh cilantro, chopped - 1 cup shredded cheese (optional for topping) - 1 avocado, sliced (for garnish) If you don’t have quinoa, try brown rice or couscous. Both work well. For a protein boost, use lentils instead of black beans. You can swap corn for peas or diced zucchini. If you prefer a milder taste, use yellow onion instead of red. Each serving gives you a great balance of nutrients. Expect about: - Calories: 350 - Protein: 12g - Carbohydrates: 50g - Dietary Fiber: 10g - Fat: 10g These stuffed peppers are not just tasty; they are also packed with healthy ingredients. Each bite is a mix of protein, fiber, and vitamins. Enjoy the flavors while knowing you're fueling your body right! {{ingredient_image_2}} Start by preheating your oven to 375°F (190°C). While the oven warms, take your bell peppers. Cut off the tops and remove the seeds and membranes. Lightly sprinkle salt and pepper inside each pepper. Place them upright in a baking dish. Make sure they fit snugly to hold the filling later. In a medium saucepan, combine one cup of rinsed quinoa with two cups of vegetable broth. Bring this mix to a boil over medium-high heat. Once it boils, lower the heat and cover the pan. Let it simmer for about 15 minutes. The quinoa should absorb all the liquid and become fluffy. While the quinoa cooks, heat a splash of olive oil in a large skillet over medium heat. Add the diced red onion and sauté for about 3-4 minutes until it softens. Stir in two minced garlic cloves, one teaspoon of ground cumin, one teaspoon of chili powder, and one teaspoon of smoked paprika. Cook for one more minute to let the spices toast. In a large mixing bowl, combine the cooked quinoa, the sautéed onion mix, one can of rinsed black beans, one cup of corn, one cup of halved cherry tomatoes, and half a cup of chopped cilantro. Stir everything together until well mixed. Taste the filling and add salt and pepper as needed for flavor. Gently spoon the quinoa mixture into each prepared bell pepper. Pack it lightly to fill evenly. If you want cheese, sprinkle it on top of the stuffed peppers. Cover the baking dish tightly with aluminum foil. Bake for 25 minutes, then remove the foil. Bake for an extra 10 minutes to make sure the peppers are tender and the cheese is melted. After baking, let the dish cool for a few minutes. Garnish each pepper with avocado slices and a sprinkle of chopped cilantro before serving. To cook quinoa just right, follow a few simple steps: - Rinse quinoa well before cooking. This removes any bitter taste. - Use a 1:2 ratio of quinoa to vegetable broth. One cup of quinoa needs two cups of broth. - Bring the broth to a boil first. This helps the quinoa absorb flavor. - After boiling, reduce heat and cover the pot. Let it simmer for about 15 minutes. - Fluff the quinoa with a fork once it’s done. This makes it light and fluffy. Choosing cheese can elevate the flavor of your stuffed peppers: - Cheddar cheese adds a sharp, tangy taste. - Monterey Jack melts well and has a mild flavor. - Feta cheese brings a nice saltiness and pairs well with the veggies. - For a twist, try pepper jack for a spicy kick. - Use a mix of cheeses for a richer topping. Selecting the best bell peppers is easy if you know what to look for: - Pick peppers that are firm and heavy for their size. This means they are fresh. - Look for bright, even color. Avoid any with dark spots or wrinkles. - Choose peppers with smooth skin. This indicates they are ripe and juicy. - If you want sweetness, opt for red or yellow peppers. Green peppers are more bitter. - Make sure the tops are intact and green. This shows they were picked recently. Pro Tips Choose Your Peppers: Select a mix of colorful bell peppers for a vibrant presentation and flavor variety. Red, yellow, and green all add their unique sweetness. Quinoa Cooking Tip: For extra flavor, toast the quinoa in a dry pan before cooking it in broth. This enhances its nutty flavor and adds depth to your dish. Customize Your Filling: Feel free to add other vegetables or proteins like diced zucchini, mushrooms, or ground turkey to make the filling heartier. Serving Suggestion: Serve the stuffed peppers with a side of guacamole or a fresh salad to complement the flavors and add freshness to the meal. {{image_4}} If you want to keep it vegetarian, this dish shines without meat. You can add more veggies like zucchini or spinach. These ingredients boost nutrition and flavor. You can also swap black beans for kidney or pinto beans. For a different taste, mix in some diced mushrooms. They add a hearty texture and absorb flavors well. Need more protein? You can add ground turkey or beef to the filling. Cook the meat in the skillet before adding the onion and spices. This adds depth and richness. For a twist, try shredded chicken or even diced tofu. Both options blend well with the quinoa and spices. Want to change the flavor? Here are some ideas: - Mediterranean: Use feta cheese, olives, and spices like oregano. - Italian: Add marinara sauce and mozzarella cheese for a pizza twist. - Asian: Mix in soy sauce, ginger, and top with sesame seeds. These variations keep the dish exciting and allow for personal taste. Enjoy experimenting! To store leftover stuffed peppers, first let them cool. Place them in an airtight container. They will stay fresh in the fridge for about 3 to 5 days. If you have multiple peppers, stack them carefully to avoid squishing. If you want to freeze them, wrap each stuffed pepper in plastic wrap. Then place them in a freezer-safe bag. This way, they can last up to 3 months. When you’re ready to eat, just take them out and let them thaw overnight in the fridge. To reheat stuffed peppers, preheat your oven to 350°F (175°C). Place the peppers in a baking dish and cover with foil. Bake for about 20-25 minutes. If you like your cheese melty, remove the foil for the last 5 minutes. You can also microwave them for 2-3 minutes, but the oven keeps them tastier. Enjoy your delicious meal! Yes, you can make these stuffed peppers ahead of time. Prepare the filling and stuff the peppers. Cover them and keep them in the fridge. Bake them when you're ready to eat. This makes meal prep easy and saves time on busy days. If you want to swap out quinoa, you can use rice or couscous. Both options work well and will absorb the flavors. Brown rice adds a nutty taste, while couscous cooks faster. Choose what you like best for your dish. You can tell the peppers are done when they are soft. They should be tender and their skin should look slightly wrinkled. If you added cheese, it should be melted and bubbly. Use a fork to test the peppers for doneness. Yes, this recipe is already gluten-free! Quinoa, beans, and veggies are all gluten-free. Just make sure any broth you use is also gluten-free. Enjoy this healthy and colorful dish without worry! This blog post covered everything you need for fiesta quinoa stuffed peppers. We discussed the ingredients, smart substitutes, and vital nutritional facts. I outlined each step for making these tasty treats, from prepping bell peppers to cooking quinoa. You also learned tips for cooking perfectly and how to store leftovers. Remember, you can switch up flavors and add proteins for variety. With these insights, you can create delicious meals that suit your taste and lifestyle. Enjoy your cooking journey!

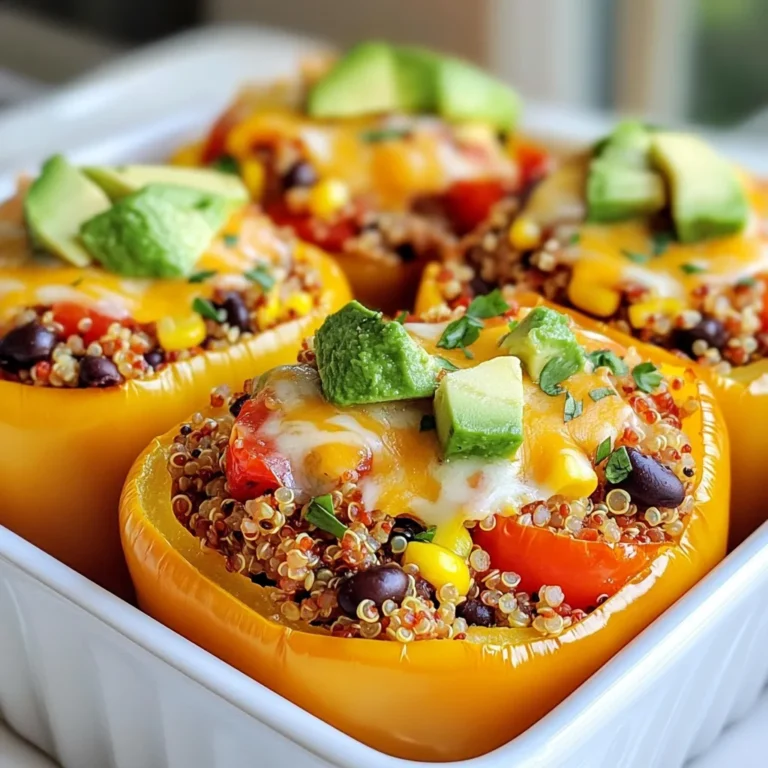
Fiesta Quinoa Stuffed Peppers Flavorful and Healthy Dish

PREV 1 … 48 49
mini chef kitchen

explore

DessertsDinnerAppetizersDrinks

Our Policies

  • Cookie Policy
  • Copyright Policy
  • Disclaimer
  • GDPR Policy
  • Terms Of Use
Back to Top
  • About
  • Contact Us
  • Privacy Policy
© 2026 mini chef kitchen