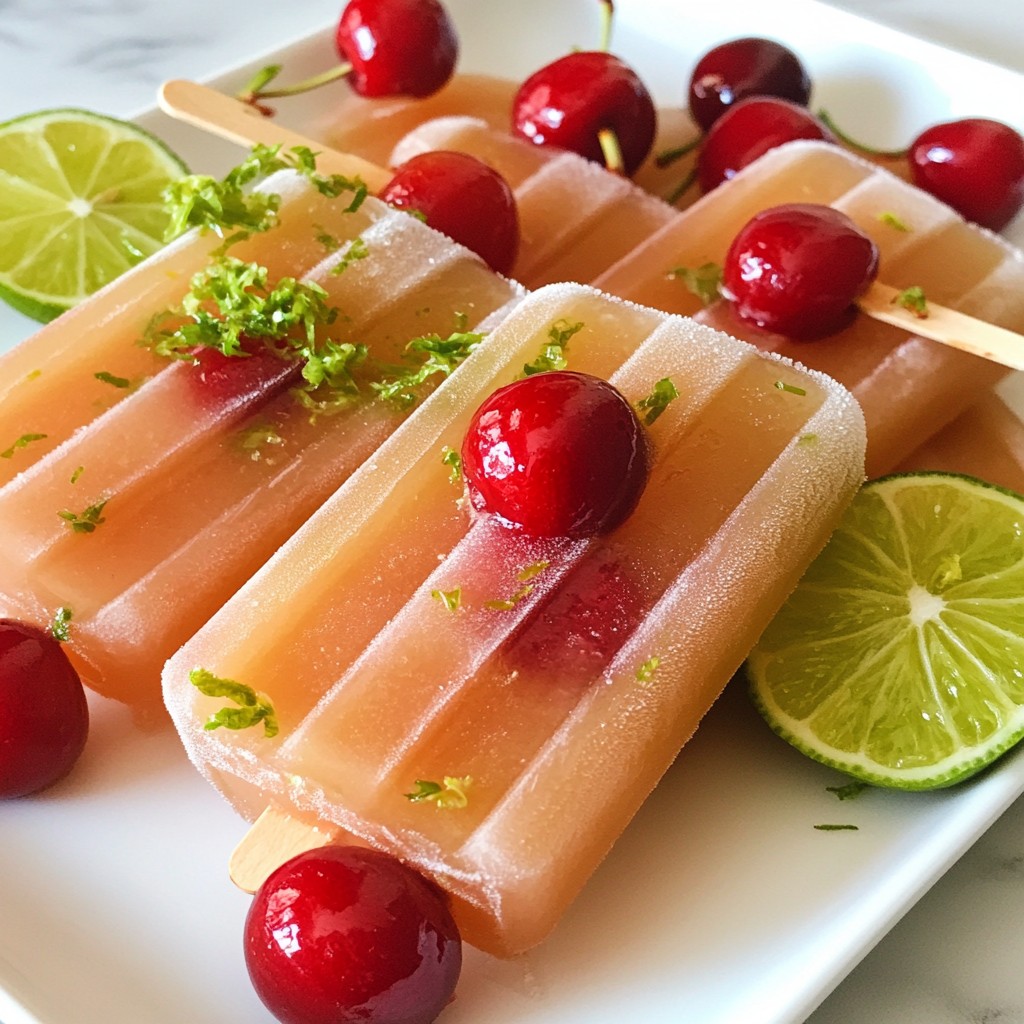
Summer is all about fun and refreshing treats! Cherry Limeade Popsicles are the perfect way to cool off. I’ll show you how to make these tasty treats using simple ingredients. You’ll love how easy they are to customize and enjoy. Find out all the steps and tips to create your own Cherry Limeade Popsicles that are bursting with flavor and fun. Get ready to impress your friends and family this summer!
Why I Love This Recipe
- Refreshing Summer Treat: These Cherry Limeade Popsicles are the perfect way to cool off during hot summer days, offering a burst of fruity flavor.
- Customizable Sweetness: You can easily adjust the sugar content to suit your taste, making these popsicles as sweet or tart as you prefer.
- Simple Ingredients: With just a handful of fresh ingredients, this recipe is straightforward and allows the natural flavors to shine through.
- Fun for Everyone: Making popsicles is a fun activity that kids and adults can enjoy together, creating a perfect summer memory!
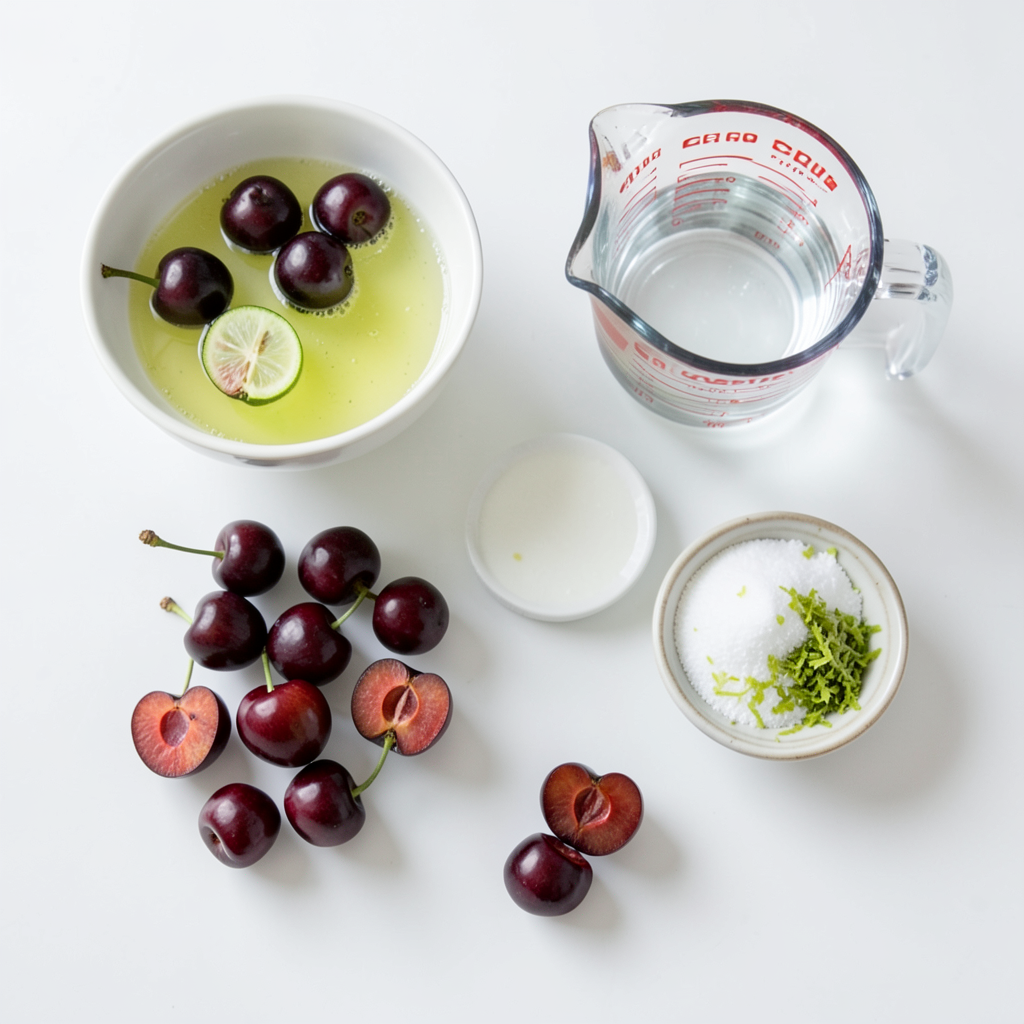
Ingredients
Fresh Cherries
You will need 2 cups of fresh cherries for this recipe. Choose ripe, juicy cherries. Remove the pits and cut them in half. Fresh cherries give your popsicles a sweet and tart flavor.
Lime Juice and Zest
You need 1 cup of freshly squeezed lime juice. This comes from about 6 to 8 limes. The zest of 2 limes adds extra zing. Lime juice balances the sweetness and makes each bite refreshing.
Sugar and Water
For the sweet base, use 1 cup of water and 1/2 cup of granulated sugar. You can adjust the sugar to match your taste. Heat the water and sugar together until the sugar dissolves. This simple syrup adds sweetness to the popsicles.
- Optional Ingredients for Customization
- Extra cherry halves for chunkiness in the popsicles.
- You can also experiment with other fruits or herbs for unique flavors.
Step-by-Step Instructions
Preparing the Sugar Mixture
Start by mixing the water and sugar. Use a medium saucepan for this. Place the saucepan over medium heat. Stir it often until the sugar melts completely. This usually takes a few minutes. Once dissolved, remove the pan from the heat. Let it cool for a bit before moving on.
Blending the Cherry-Lime Base
Next, grab your blender. Add the pitted cherries and lime juice to the blender. Blend until smooth. You want a nice, even mix. This step gives your popsicles that bright cherry-lime flavor.
Combining Ingredients
Once your sugar mixture has cooled, pour it into the blender. Blend the sugar mixture with the cherry-lime blend. Keep blending until everything is well combined. Then, add the zest from two limes into the mix. Stir gently to combine. This adds a zesty punch to your popsicles.
Pouring into Molds and Freezing
Now it’s time to pour the mixture into popsicle molds. Leave a little space at the top of each mold. This helps with expansion when freezing. Insert the wooden sticks into each mold. Place the molds in the freezer. Let them freeze for at least 4 to 6 hours. They should be solid before you take them out. When ready, run warm water over the molds to remove the popsicles. Enjoy your refreshing treat!
Tips & Tricks
Perfecting the Sweetness Level
To get your popsicles just right, taste your cherry-lime mix before freezing. Start with the 1/2 cup of sugar as a base. If you like it sweeter, add more sugar. If you want it less sweet, cut back on the sugar. Remember, the tartness of lime can change the taste, so adjust as needed.
Ways to Avoid Ice Crystals
Ice crystals can ruin the smooth texture of your popsicles. To prevent them, make sure your sugar fully dissolves in water before blending. Blend the mix well, and pour it into the molds right away. Freeze the popsicles for at least 4-6 hours to ensure they set well. Avoid opening the freezer often during this time.
Creative Serving Suggestions
For a fun twist, try serving your popsicles in a few unique ways. You can dip them in chocolate for extra sweetness. Or, roll them in crushed nuts for a crunchy texture. You could even serve them in festive cups with straws for a party vibe.
- Presentation Tips for a Festive Look:
Arrange the popsicles on a bright platter. Add lime wedges and fresh cherries around them. This makes your popsicles look as good as they taste. Use colorful napkins to match the summer theme for a fun touch!
Pro Tips
- Fresh is Best: Use fresh, ripe cherries for the sweetest flavor. Check for firmness and vibrant color when selecting cherries.
- Adjust Sweetness: Taste the mixture before freezing and adjust sugar according to your preference. You can always add more sugar, but it's hard to remove it once mixed!
- Layer Flavors: For a unique twist, add a splash of sparkling water to the mixture before pouring into molds for a fizzy effect!
- Easy Release: To remove popsicles from molds easily, run warm water over the outside of the molds for a few seconds before gently pulling them out.
Variations
Berry-Blended Versions
You can mix in other fruits for fun. Strawberries and blueberries work great. Just use 1 cup of berries along with your cherries. Blend them together with the lime juice. This gives your popsicles a colorful twist and more fruity flavor. You can try different berry combos too. Each one adds a unique taste.
Adding Herbs for Extra Flavor
Herbs can change the game for your popsicles. I love using mint or basil. Just add a few leaves into the blender with the cherries. This gives a fresh and cool taste. If you want something zesty, try adding a bit of thyme. It sounds strange, but it tastes amazing. Using herbs makes your treats stand out.
Healthier Alternatives with Natural Sweeteners
If you want a healthier version, swap sugar for honey or maple syrup. Use about 1/3 cup instead of 1/2 cup of sugar. You can also try using agave nectar. These options give a different sweetness and flavor. They are great for those who want to avoid refined sugar. Plus, they make your popsicles feel like a guilt-free treat.
Storage Info
Storing Leftover Popsicles
To store leftover popsicles, place them in a freezer-safe bag. You can wrap them in plastic wrap first. This keeps them fresh and prevents freezer burn. Make sure to squeeze out excess air from the bag before sealing it. Label the bag with the date to remember when you made them.
How Long They Last in Freezer
Cherry limeade popsicles can last in the freezer for up to two months. After that, they may lose flavor and texture. It is best to enjoy them sooner to experience their full taste. If stored properly, they will remain safe to eat beyond this time, but they may not be as enjoyable.
Best Practices for Maintain Flavor and Texture
To keep your popsicles tasting great, always store them in an airtight container or bag. This helps lock in their fruity flavor. Don’t leave popsicles out at room temperature for too long. This can cause them to melt, affecting their texture. When you’re ready to eat one, run warm water over the mold to loosen it. Enjoy your refreshing treat!
FAQs
Can I use frozen cherries instead of fresh?
Yes, you can use frozen cherries. Just thaw and drain them first. Frozen cherries work well in this recipe. They provide a similar taste and texture. However, fresh cherries offer more vibrant flavor. If you want the best taste, fresh is still better.
How can I make these popsicles less sweet?
To reduce the sweetness, cut down on sugar. You can start with 1/4 cup instead of 1/2 cup. You could also add more lime juice. The tartness of lime will balance the taste. Another option is to use a natural sweetener. Honey or agave can be good substitutes.
What are the best molds for making popsicles?
Silicone molds are my top choice. They make it easy to remove popsicles. You can also use plastic molds with sticks. Just make sure they are sturdy enough. Look for molds that hold at least 3-4 ounces. This size works well for a refreshing treat.
Can I use other fruits with this recipe?
Absolutely! You can mix in other fruits like strawberries or raspberries. These fruits pair well with lime. You can also try mango or pineapple for a tropical twist. Blend them like the cherries and adjust the sugar as needed. This recipe is flexible and fun to customize!
You learned how to make tasty cherry-lime popsicles with fresh ingredients. I shared tips on balancing sweetness and avoiding ice crystals. You can experiment with variations, like adding berries or herbs. I also covered how to store leftover popsicles for best taste.
Overall, you now have the tools to create delicious and fun treats. Enjoy making popsicles that impress your friends and family!