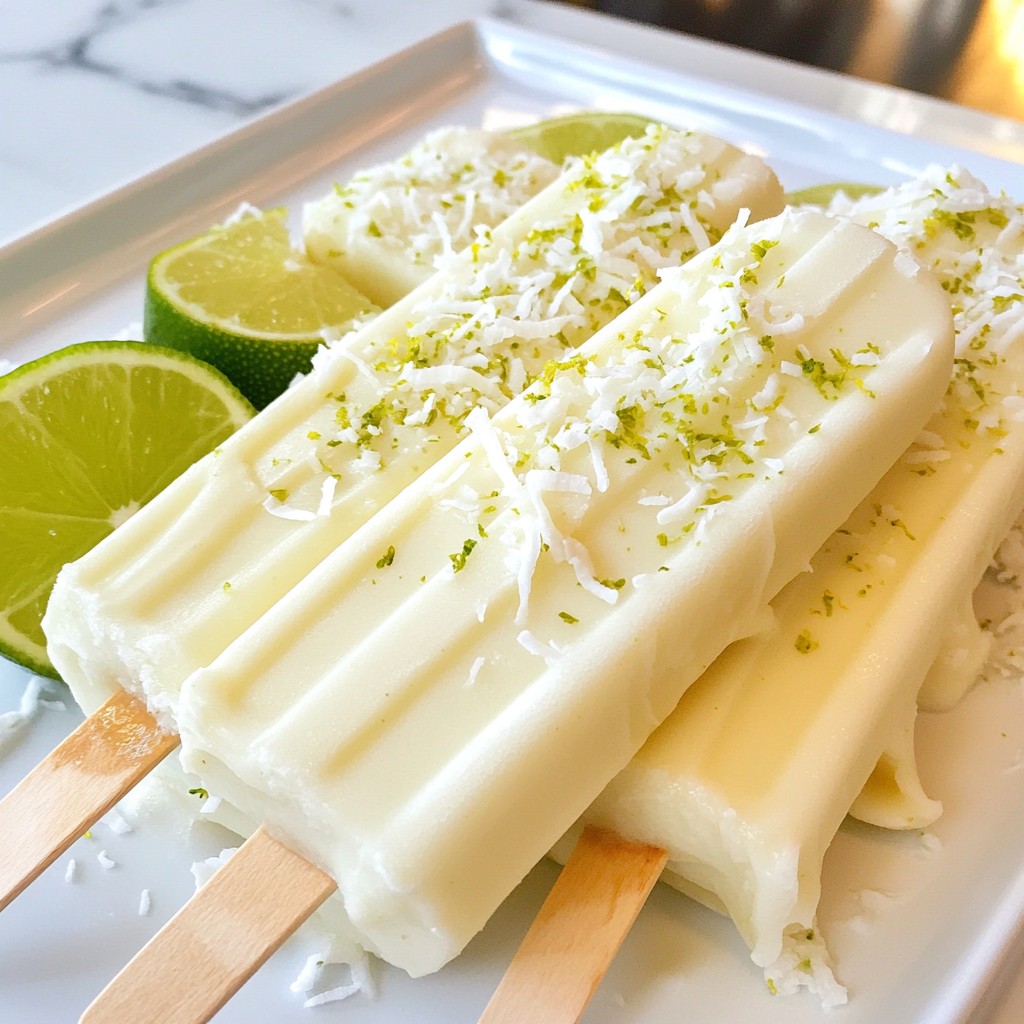
Craving a cool treat this summer? My creamy coconut lime pops are just what you need! With smooth coconut, tangy lime, and a hint of vanilla, these pops will refresh your taste buds. They’re easy to make and perfect for sunny days. Whether you enjoy them by the pool or at a picnic, this recipe will become a favorite. Let’s dive into the simple steps to create this tasty, frozen delight!
Why I Love This Recipe
- Refreshing Flavor: This popsicle offers a perfect balance of creamy coconut and zesty lime, making it a refreshing treat on a hot day.
- Simple Ingredients: With just a handful of natural ingredients, you can whip up these delightful pops in no time.
- Customizable Sweetness: Adjust the sweetness to your personal preference, using honey or maple syrup for a touch of natural sweetness.
- Beautiful Presentation: These pops look stunning on a platter, especially when garnished with fresh lime wedges and shredded coconut.
Ingredients
Required Ingredients
- 1 can (400 ml) full-fat coconut milk
- 1/2 cup creamy Greek yogurt
- 1/4 cup honey or pure maple syrup (to taste)
- Zest of 2 vibrant limes
- Juice of 3 fresh limes
- 1/2 teaspoon pure vanilla extract
- A pinch of sea salt
- Optional: shredded coconut for an enticing garnish
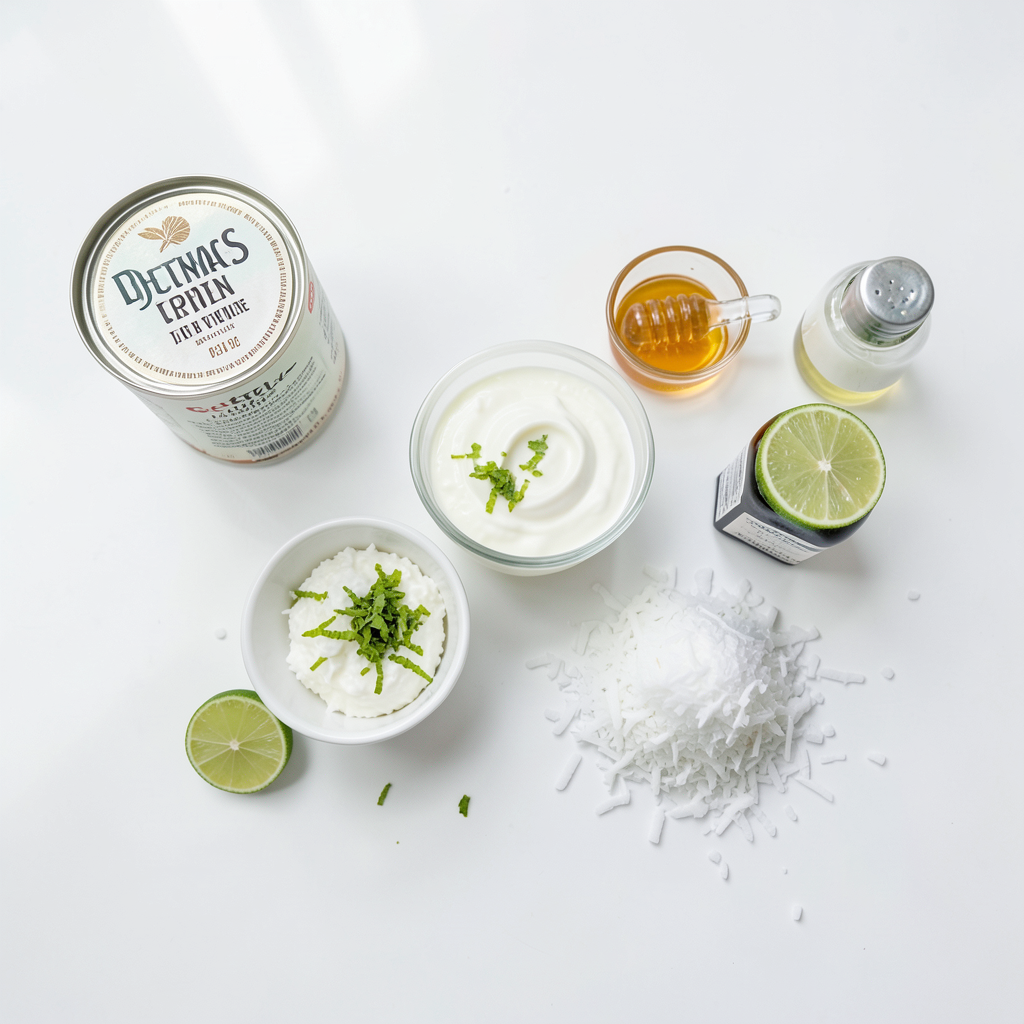
To create these creamy coconut lime pops, I use a few key ingredients. The full-fat coconut milk gives a rich and creamy base. Greek yogurt adds a nice tang and helps with texture.
For sweetness, I like to use honey or pure maple syrup. You can adjust this to your liking. The zest and juice of vibrant limes add a bright, fresh flavor.
A little vanilla extract rounds out the taste, while a tiny pinch of sea salt enhances all the flavors. If you want, you can add shredded coconut for a fun garnish. This adds texture and visual appeal to the pops.
These ingredients come together to create a delightful summer treat that is both refreshing and satisfying.
Step-by-Step Instructions
Preparation
- In a large mixing bowl, pour in 1 can (400 ml) full-fat coconut milk.
- Add 1/2 cup creamy Greek yogurt.
- Then, mix in 1/4 cup honey or pure maple syrup to taste.
- Next, add the zest of 2 vibrant limes and the juice of 3 fresh limes.
- Don't forget 1/2 teaspoon pure vanilla extract and a pinch of sea salt.
Whisk the mixture until smooth. Make sure there are no lumps. Taste it now. If you want it sweeter, add more honey or syrup. It's all about your taste!
Now, carefully pour the creamy mix into popsicle molds. Leave a small gap at the top of each mold. This gap allows for expansion when freezing. For added texture, sprinkle shredded coconut into each mold before filling.
Freezing Process
Once your molds are filled, it's time to insert popsicle sticks. Place them in the center of each mold. Make sure they stand straight.
Put the molds in the freezer. Let them freeze for at least 6 hours. You want them completely solid. For best results, avoid opening the freezer too often.
Removing from Molds
To take the pops out, run warm water over the outside of each mold. Do this for just a few seconds. Then, gently tug on the sticks. If they don’t come out, try again with a bit more warm water.
For a stunning display, serve the pops on a colorful platter. Add fresh lime wedges and a sprinkle of shredded coconut around them. This makes your treat look as good as it tastes! Enjoy your creamy coconut lime pops with family and friends.
Tips & Tricks
Achieving the Perfect Texture
To get a smooth and creamy texture, blend the coconut milk and Greek yogurt well. Use a whisk or a blender for best results. Make sure the mixture is free of lumps. If you want it creamier, add a bit more yogurt. This will make your pops even richer and more satisfying.
Flavor Variations
You can change the taste of your pops by adding other fruits. Try blending in mango, pineapple, or even berries. Each fruit adds its own twist. You can also change the sourness by using different citrus fruits. Lemons or oranges can create a unique flavor. Experiment and find your favorite mix!
Serving Suggestions
Serve your pops on a bright platter with fresh lime wedges. This adds a fun pop of color. You can also sprinkle shredded coconut on top for extra flair. Want a creative way to serve? Try putting them in a tall glass with fresh fruit slices. This makes for a fun party treat!
Pro Tips
- Chill Your Ingredients: For an extra creamy texture, chill the coconut milk and Greek yogurt in the refrigerator before mixing.
- Experiment with Sweetness: Different brands of coconut milk vary in sweetness; taste your mixture before freezing to adjust the honey or syrup as needed.
- Try Different Molds: Use fun-shaped molds to create popsicles that are visually appealing and perfect for summer parties!
- Storage Tips: If you're not consuming all the popsicles at once, store extras in a zip-top bag to prevent freezer burn.
Variations
Dairy-Free Alternatives
To make these pops dairy-free, swap the Greek yogurt for coconut yogurt. This keeps the creamy texture. For sweeteners, use agave syrup or coconut sugar. Both options work well and keep it vegan.
Alcohol-Infused Version
For a fun twist, add a splash of rum or vodka to the mix. This gives your pops a grown-up flair. Coconut pairs nicely with light rum, while vodka blends well for a more subtle taste.
Seasonal Adaptations
Change the flavors based on what fruits are in season. Try adding fresh berries or mango for a vibrant taste. If you throw a summer party, serve these pops for a refreshing treat. They fit perfectly in any festive setting!
Storage Info
Best Practices for Freezing
To keep your creamy coconut lime pops fresh, store them in the freezer. They last up to two months when sealed well. Use freezer-safe molds for best results. After pouring the mixture, leave a little space at the top. This helps the pops expand as they freeze. Seal the molds tightly to prevent ice crystals.
Thawing Tips
To enjoy your pops, you need to thaw them safely. The best way to do this is to run warm water over the outside of the molds. This method warms them just enough to release the pops. Avoid using a microwave, as it may melt the pops unevenly. Thawing takes only a few minutes, and your treat will be ready to eat.
Signs of Spoilage
Keep an eye on your pops for signs of spoilage. If you see ice crystals or frost on the surface, that’s freezer burn. Freezer burn doesn’t make the pops unsafe, but it affects texture and taste. These pops are best enjoyed within two months. After that, they may lose flavor and quality.
FAQs
How do I make creamy coconut lime pops from scratch?
To make creamy coconut lime pops, start with a bowl. Pour in one can of full-fat coconut milk. Next, add a half cup of creamy Greek yogurt. Mix in a quarter cup of honey or maple syrup, depending on your taste. Zest two limes and squeeze the juice of three limes into the bowl. Add half a teaspoon of pure vanilla extract and a pinch of sea salt. Whisk until smooth. Pour the mixture into popsicle molds, leaving a little space at the top. Insert sticks and freeze for at least six hours. To enjoy, run warm water over the molds for easy removal.
Can I use light coconut milk instead?
Yes, you can use light coconut milk, but it may change the texture. Full-fat coconut milk gives the pops a rich, creamy feel. Light coconut milk might make them less creamy. If you choose light milk, consider adding a little extra yogurt to maintain the creamy texture. This will help keep the pops delicious and refreshing.
What can I substitute for honey in this recipe?
If you want a substitute for honey, use pure maple syrup. It will give a similar sweetness. You can also use agave nectar or a sugar substitute, like stevia. If you prefer, you can skip sweeteners and let the lime's natural flavor shine. Just remember to taste and adjust as needed.
How long do these popsicles last in the freezer?
These popsicles can last about two months in the freezer. To keep them fresh, store them in an airtight container. This helps avoid freezer burn. If you notice any ice crystals on the pops, it’s best to toss them out for quality.
Are there any nut-free options for these pops?
Yes, this recipe is naturally nut-free. The main ingredients are coconut milk and yogurt, which are safe for those with nut allergies. If you want to add texture, use seeds instead of nuts. Chia seeds or sunflower seeds can be great options for a crunchy twist.
This blog post showed you how to make creamy coconut lime pops. We covered key ingredients like coconut milk and Greek yogurt. You learned step-by-step instructions for mixing, freezing, and removing your pops from molds. I shared tips for flavor variations and storage to keep them fresh.
You can enjoy these pops in many ways. Feel free to get creative with flavors and toppings. With simple ingredients, you can make delicious treats for any occasion. Enjoy your homemade pops!