Craving a tasty snack that’s healthy and easy to make? I’ve got you covered! These Crispy Garlic Butter Parmesan Zucchini Fries are the perfect treat. They pack a punch with rich flavors and are a fun twist on the classic fry. In this guide, I’ll share step-by-step instructions, handy tips, and variations to satisfy any craving. Ready to make zucchini fries that everyone will love? Let’s dive in!
Ingredients
Detailed Ingredient List
To make crispy garlic butter Parmesan zucchini fries, you’ll need the following:
– 2 medium zucchinis, sliced into fry-shaped strips
– 1/2 cup all-purpose flour
– 1/2 teaspoon garlic powder
– 1/2 teaspoon onion powder
– 1/2 teaspoon smoked paprika
– Salt and freshly ground black pepper, to taste
– 2 large eggs, thoroughly beaten
– 1 cup panko breadcrumbs
– 1/2 cup grated Parmesan cheese
– 4 tablespoons unsalted butter, melted
– Fresh parsley, finely chopped, for garnish
These fresh ingredients create a delightful flavor and texture. The zucchini gives a healthy base while the cheese and butter add richness.
Substitutions for Zucchini
If you can’t find zucchini, don’t worry! You can try:
– Yellow squash: Similar texture and taste.
– Eggplant: Cut into fries for a different flavor.
– Carrots: Crisp and sweet, but cut thinner for even cooking.
These swaps keep the dish fun and fresh. Just adjust cooking times based on the veggie you choose.
Equipment Needed
For this recipe, you will need:
– A baking sheet
– Parchment paper
– Three shallow dishes for coating
– Whisk for mixing
– Knife for slicing
– Oven for baking
Having these tools ready will make cooking smooth and enjoyable. Plus, it helps keep your kitchen organized.
Step-by-Step Instructions
Preparing the Baking Sheet and Preheating the Oven
First, turn on your oven to 425°F (220°C). This is key for crispiness. While it heats, grab a baking sheet and line it with parchment paper. This step keeps the fries from sticking and makes cleanup easy.
Coating the Zucchini Strips
Now, let’s coat those zucchini strips. In a shallow dish, mix the all-purpose flour with garlic powder, onion powder, smoked paprika, salt, and pepper. Stir until it looks even.
In a second dish, pour in the beaten eggs. Make sure they are mixed well. In a third dish, combine panko breadcrumbs and grated Parmesan cheese. Mix this until the cheese is spread out evenly.
Take a zucchini strip. First, roll it in the flour mixture. Make sure it’s fully coated and shake off extra flour. Then, dip it in the eggs. Let any extra egg drip off. Finally, coat it in the panko-Parmesan mix. Press gently so the crumbs stick. Repeat this for all strips.
Baking the Zucchini Fries
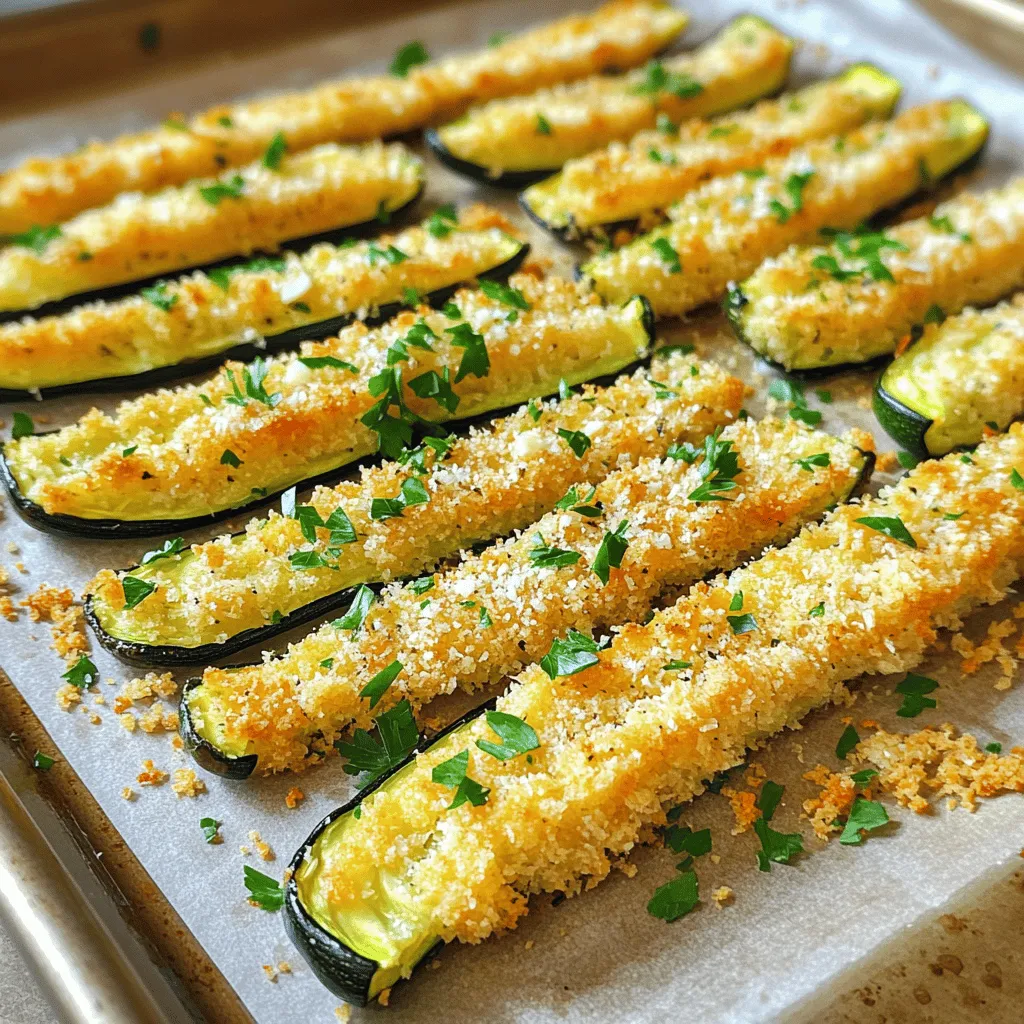
Lay the breaded zucchini fries on the lined baking sheet. Arrange them in a single layer. Do not let them touch; this helps them cook evenly. Drizzle the melted butter over the fries. This will add flavor and help them get crispy.
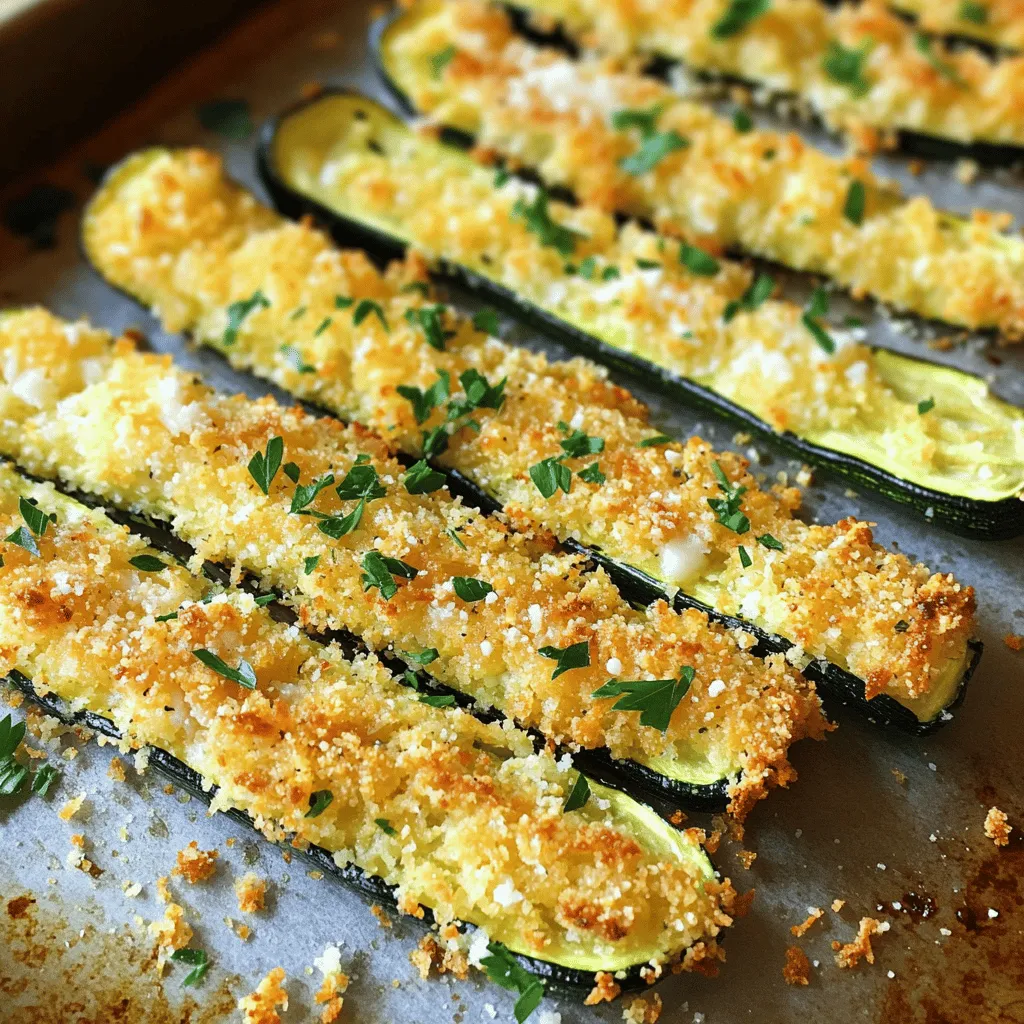
Put the baking sheet in the oven. Bake for 20-25 minutes. Flip the fries halfway through to ensure even cooking. When they look golden brown and crispy, they are ready!
Carefully take out the baking sheet and sprinkle fresh parsley on top. This adds a pop of color and flavor. Serve these fries right away for a delicious snack or side dish!
Tips & Tricks
Achieving Maximum Crispiness
To make your zucchini fries super crispy, follow these steps:
– Use fresh, firm zucchinis for the best crunch.
– Cut the zucchini into even strips. This helps them cook evenly.
– Don’t skip the panko breadcrumbs. They create a fantastic crunch.
– Drizzle the melted butter evenly. It helps the fries brown nicely.
I always recommend baking them in a single layer. This way, hot air circulates and crisps each fry.
Recommended Cooking Time Adjustments
Baking time can change based on your oven. If your fries look pale, leave them in longer.
– Check them at 20 minutes. If they aren’t golden brown, bake for 5 more minutes.
– Flip the fries halfway through. This ensures they cook evenly on both sides.
Each oven is different, so trust your eyes!
Serving Suggestions for Zucchini Fries
These fries taste great on their own, but they can shine even more.
– Serve them with ranch or marinara sauce for dipping.
– Add some fresh herbs like basil or dill for extra flavor.
– Pair them with grilled chicken or fish for a full meal.
You can make them a fun side for a party. Everyone loves a crunchy snack!
Variations
Adding Spices and Seasonings
You can change the flavor of your zucchini fries by adding spices. Try cayenne pepper for heat, or Italian seasoning for a herby taste. A pinch of cumin can give a warm, earthy flavor. For a fun twist, mix in some curry powder. Adjust the amount to fit your taste.
Cheese Variations for Extra Flavor
Cheese can make these fries even better! Swap the Parmesan for mozzarella for a gooey texture. You could also try sharp cheddar for a stronger taste. For a unique twist, use crumbled feta or blue cheese. Each cheese adds its own flavor, so have fun mixing!
Gluten-Free Options
If you need a gluten-free option, replace the all-purpose flour with gluten-free flour. Use gluten-free panko to keep that crunch. Always check labels to ensure they meet your needs. These simple swaps let everyone enjoy crispy zucchini fries without worry.
Storage Info
Best Practices for Storing Leftovers
Store any leftover zucchini fries in an airtight container. Make sure they cool down first. This helps keep them crispy. Place a paper towel at the bottom of the container. The towel absorbs moisture and keeps fries from getting soggy. You can store them in the fridge for up to three days.
Reheating Methods for Optimal Crispiness
To reheat zucchini fries, use an oven for best results. Preheat your oven to 400°F (200°C). Place the fries on a baking sheet in a single layer. Bake them for about 10 minutes. This method helps make them crispy again. You can also use an air fryer. Cook at 375°F (190°C) for about 5-7 minutes. This will keep them crunchy and flavorful.
Freezing Guidelines for Zucchini Fries
If you want to freeze zucchini fries, prep them first. Follow the recipe until they are breaded but not baked. Lay them out on a baking sheet in a single layer. Freeze them for about 1-2 hours until firm. Once they are frozen, transfer them to a freezer-safe bag. They can last in the freezer for up to three months. When ready to cook, bake them straight from the freezer. Increase the baking time by a few minutes to ensure they cook through.
FAQs
Can I use other vegetables instead of zucchini?
Yes, you can use other vegetables. Carrots, eggplant, or sweet potatoes work well. Just cut them into fry shapes. Keep in mind that cooking times may vary. Check them often to avoid burning.
How do I prevent zucchini fries from getting soggy?
To keep your zucchini fries crisp, follow these steps:
– Salt the zucchini: Sprinkle salt on the cut zucchini. Let it sit for 10-15 minutes. This draws out moisture.
– Pat them dry: Use paper towels to dry the zucchini strips after salting. This helps remove excess water.
– Use panko breadcrumbs: Panko adds extra crunch compared to regular breadcrumbs.
– Avoid overcrowding: Lay fries in a single layer on the baking sheet. This allows hot air to circulate and crisp them up.
Can these fries be made in an air fryer?
Yes, you can make these zucchini fries in an air fryer. Here’s how:
– Preheat your air fryer: Set it to 400°F (200°C).
– Arrange the fries: Place the breaded zucchini fries in a single layer in the basket.
– Adjust cooking time: Cook for about 10-15 minutes, shaking the basket halfway through. Check for a golden, crispy finish. Enjoy them fresh!
In this blog post, we explored how to make delicious zucchini fries. We covered the ingredients, including substitutions and needed equipment. The step-by-step guide showed you how to prep, coat, and bake the fries. I shared tips for extra crispiness and serving ideas. Variations included adding spices and cheese. I also discussed storing and reheating leftovers.
Now, you have everything you need to enjoy these tasty treats. Experiment and find your favorite way to make zucchini fries. Enjoy your cooking!