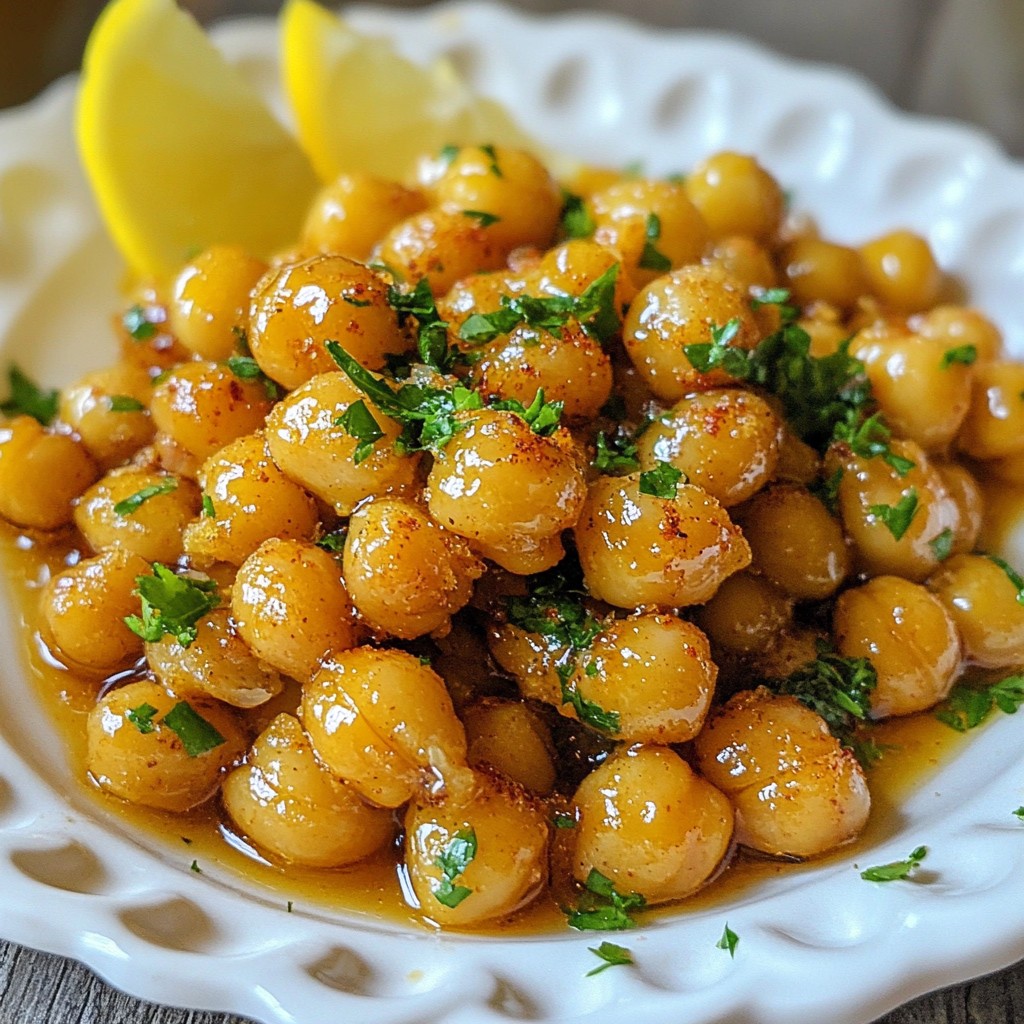
Looking for a snack that's both tasty and healthy? Try my Crispy Honey Garlic Chickpeas! They're quick to make, loaded with flavor, and perfect for munching. With just a few simple ingredients like chickpeas, honey, and garlic, you can whip up a delightful treat that satisfies your cravings without the guilt. Let’s dive into this easy recipe to discover how to make your next favorite snack!
Why I Love This Recipe
- Crispy Texture: The chickpeas achieve a delightful crunch, making them an irresistible snack or salad topping.
- Sweet and Savory: The combination of honey and garlic creates a perfect balance of sweetness and savory flavor.
- Easy to Prepare: With minimal ingredients and simple steps, this recipe is perfect for quick meal prep.
- Versatile Dish: These chickpeas can be enjoyed as a snack, salad topping, or even as a party appetizer!
Ingredients
Main Ingredients
- 1 can (15 oz) chickpeas, thoroughly drained and rinsed
- 2 tablespoons extra virgin olive oil
- 2 tablespoons raw honey
- 3 cloves garlic, finely minced
- 1 teaspoon smoked paprika
- ½ teaspoon sea salt
- ½ teaspoon freshly ground black pepper
Chickpeas are the star of this dish. They are full of protein and fiber. Rinsing them well helps remove any canning liquid. This step is key to making them crispy.
Next, we use extra virgin olive oil. This adds a nice richness and helps the chickpeas crisp up in the oven. Honey gives a sweet touch that balances the savory garlic and spices.
Speaking of garlic, freshly minced garlic brings a bold flavor. Smoked paprika adds depth and a hint of smokiness. Sea salt and black pepper enhance all these flavors, making every bite delicious.
Optional Ingredients
- ¼ teaspoon cayenne pepper (optional, for a kick of heat)
- Fresh parsley, finely chopped (for garnish)
- Lemon wedges (for serving)
Cayenne pepper adds heat, which can kick up the flavor! If you love spice, I recommend adding it. Fresh parsley not only looks nice but also adds a burst of freshness. Lemon wedges are perfect for squeezing over the warm chickpeas. This brightens the dish and adds zing.
These ingredients come together to create a tasty and healthy snack. You can mix and match, but each one plays a role in making this dish truly special.

Step-by-Step Instructions
Preparation Steps
- Preheat Oven and Prepare Baking Sheet
First, set your oven to 400°F (200°C). This helps the chickpeas crisp up well. Line a baking sheet with parchment paper. This keeps the chickpeas from sticking.
- Dry Chickpeas Thoroughly
Drain the can of chickpeas and rinse them well. Use a clean kitchen towel to dry them. This step is key to getting that perfect crunch.
Mixing and Coating
- Combine Ingredients in Mixing Bowl
In a big mixing bowl, add the dried chickpeas. Pour in 2 tablespoons of olive oil and 2 tablespoons of honey. Add 3 minced garlic cloves, 1 teaspoon of smoked paprika, ½ teaspoon of sea salt, and ½ teaspoon of black pepper. If you like heat, toss in ¼ teaspoon of cayenne pepper.
- Toss to Ensure Even Coating
Gently mix everything together. Make sure each chickpea gets a nice coat of the mixture. This helps every bite taste amazing!
Roasting Process
- Spread Chickpeas on Baking Sheet
Carefully place the chickpeas on the lined baking sheet. Spread them out so they are in a single layer. This way they roast evenly and get nice and crispy.
- Roast in the Oven
Put the baking sheet in the oven. Roast the chickpeas for 25 to 30 minutes. Halfway through, give the pan a shake or stir. This helps them brown evenly. Look for a nice golden color.
- Cool for Optimal Crispiness
Once they are done, take the baking sheet out of the oven. Let the chickpeas cool for a few minutes. They will get crunchier as they cool down. Enjoy them warm, and don’t forget to garnish with chopped parsley!
Tips & Tricks
Achieving Maximum Crispiness
- Importance of Drying Chickpeas: Drying your chickpeas is key. After draining, use a clean kitchen towel to pat them dry. This step removes excess moisture, helping them crisp up in the oven. If they are wet, they will steam instead of roast.
- Spacing Chickpeas on the Baking Sheet: Spread out the chickpeas on your baking sheet. Give them room to breathe, so they roast evenly. If they are crowded, they won't get that nice crunch. A single layer is best for maximum crispiness.
Flavor Enhancements
- Adjusting Seasoning to Taste: You can play with the spices. If you like more heat, add extra cayenne pepper. For a smoky flavor, increase the smoked paprika. Taste the mixture before roasting to find your perfect balance.
- Use of Fresh Lemon Juice Before Serving: Squeeze fresh lemon juice over the chickpeas just before serving. This brightens the flavor and adds a zesty kick. It elevates the dish and adds freshness. Enjoying them warm with lemon juice is a real treat!
Pro Tips
- Dry Chickpeas Thoroughly: Ensure the chickpeas are completely dry before roasting to achieve maximum crispiness. Use a clean kitchen towel to pat them down well.
- Even Spacing is Key: Spread the chickpeas in a single layer on the baking sheet without overcrowding. This allows them to roast evenly and prevents them from steaming.
- Shake it Up: Halfway through roasting, give the baking sheet a good shake or stir the chickpeas. This helps to promote even browning and ensures every piece gets that crispy texture.
- Serve with Fresh Lemon: A squeeze of fresh lemon juice just before serving enhances the flavors and adds a refreshing zing that pairs beautifully with the honey garlic coating.
Variations
Flavor Combinations
You can switch up the taste of crispy honey garlic chickpeas by adding different spices. Here are some ideas:
- Cumin: Add 1 teaspoon of ground cumin for a warm, earthy flavor.
- Curry Powder: Mix in 1 teaspoon of curry powder for a spicy twist.
- Italian Herbs: Use a blend of dried basil, oregano, and thyme for a fresh touch.
You can also experiment with sweeteners. Instead of honey, try:
- Maple Syrup: This adds a rich, unique flavor.
- Agave Nectar: It is a great vegan option that works well.
Serving Suggestions
These chickpeas make a great snack or appetizer. You can serve them in several fun ways:
- Party Snack: Place them in a bowl for guests to grab.
- Topping for Salads: Sprinkle them on your favorite salad for extra crunch.
Pair your chickpeas with dips and sauces to enhance their flavor:
- Hummus: This creamy dip complements the chickpeas well.
- Yogurt Sauce: A tangy yogurt sauce adds a nice balance.
Feel free to get creative with your flavors and serving ideas!
Storage Info
Short-term Storage
To keep your crispy honey garlic chickpeas fresh, place them in an airtight container. Store them at room temperature for up to three days. If you refrigerate them, use a container that allows some air flow. This helps to maintain their crunch.
Long-term Storage
For longer storage, you can freeze the chickpeas. First, let them cool completely. Then, spread them on a baking sheet and freeze them for about an hour. Once frozen, transfer them to a freezer-safe bag. They can last up to three months in the freezer.
Reheating Instructions
To reheat, preheat your oven to 350°F (175°C). Spread the frozen chickpeas on a baking sheet. Bake for about 10-15 minutes until they become warm and crispy again. This helps restore their crunch after freezing. Enjoy your snack fresh and crispy!
FAQs
Common Questions About Preparation
Can I use dried chickpeas? Yes, you can use dried chickpeas. However, they need soaking and cooking first. Start by soaking them overnight in water. The next day, boil them until tender. This way, you’ll have fresh chickpeas for your recipe!
How long do crispy chickpeas last? Crispy chickpeas can last for about three days at room temperature. Store them in an airtight container to keep them fresh. If they lose some crunch, a quick reheat in the oven can help.
Nutritional Information
Calories per Serving Each serving of crispy honey garlic chickpeas has about 150 calories. This makes them a great snack that won't break your calorie bank.
Health Benefits of Chickpeas Chickpeas are packed with protein, fiber, and vitamins. Here are some benefits:
- Protein: Great for muscle health.
- Fiber: Helps with digestion and keeps you full.
- Vitamins: Rich in B vitamins for energy.
Eating chickpeas can support heart health and help manage weight. Enjoying them as a snack is a smart choice!
In this post, we explored making crispy chickpeas using simple ingredients like chickpeas, olive oil, and spices. I shared step-by-step instructions, helpful tips for crispiness, and fun flavor variations. You can get creative with spices and serve them as snacks or appetizers. Remember to store leftovers in the fridge or freezer for later enjoyment. With these methods, you’ll enjoy tasty, healthy snacks and impress guests at your next gathering. Get cooking and enjoy your crispy chickpeas!