


LATEST RECIPES


LET'S GET COOKING!
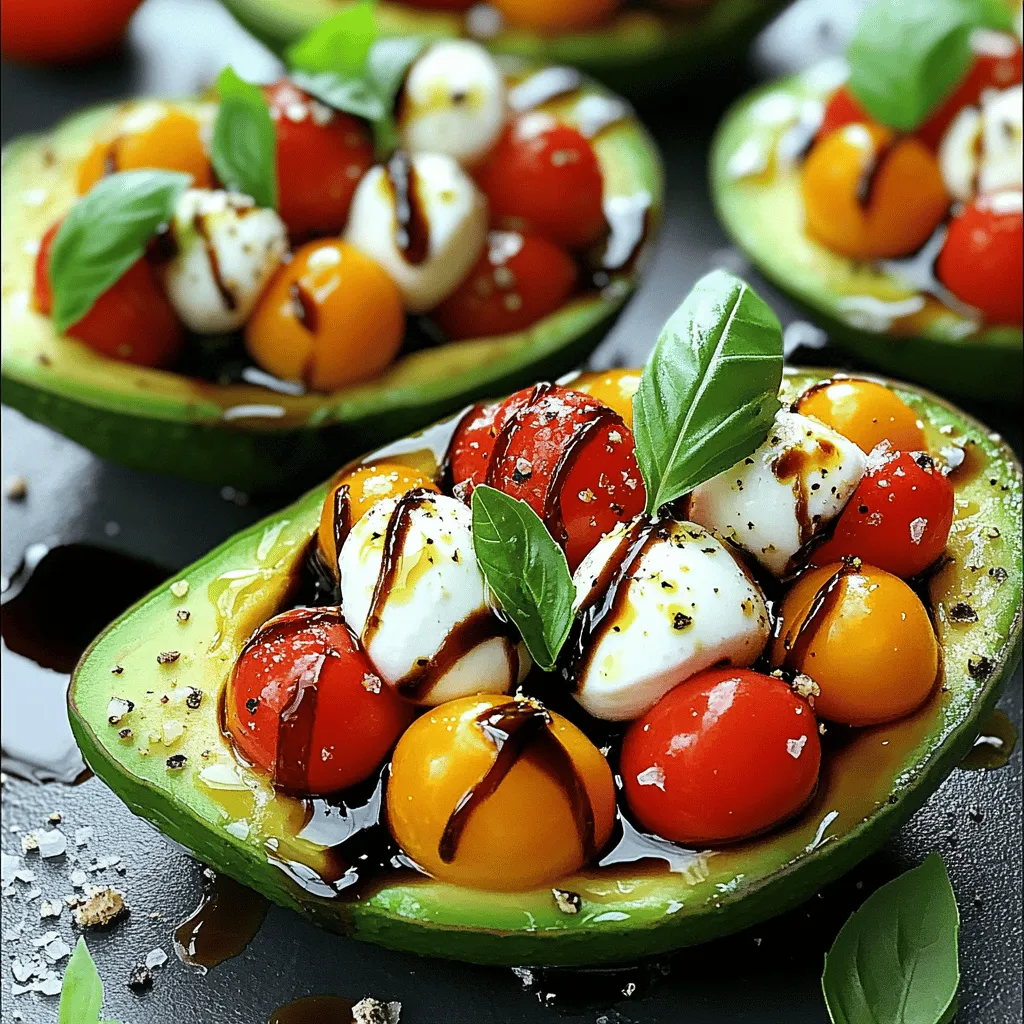
Caprese Stuffed Avocados Flavorful and Fresh Delight
Welcome to a fresh and flavorful delight—Caprese Stuffed Avocados! If you crave a meal that bursts with taste yet is simple to make, you’re in...
Read Full Recipe →