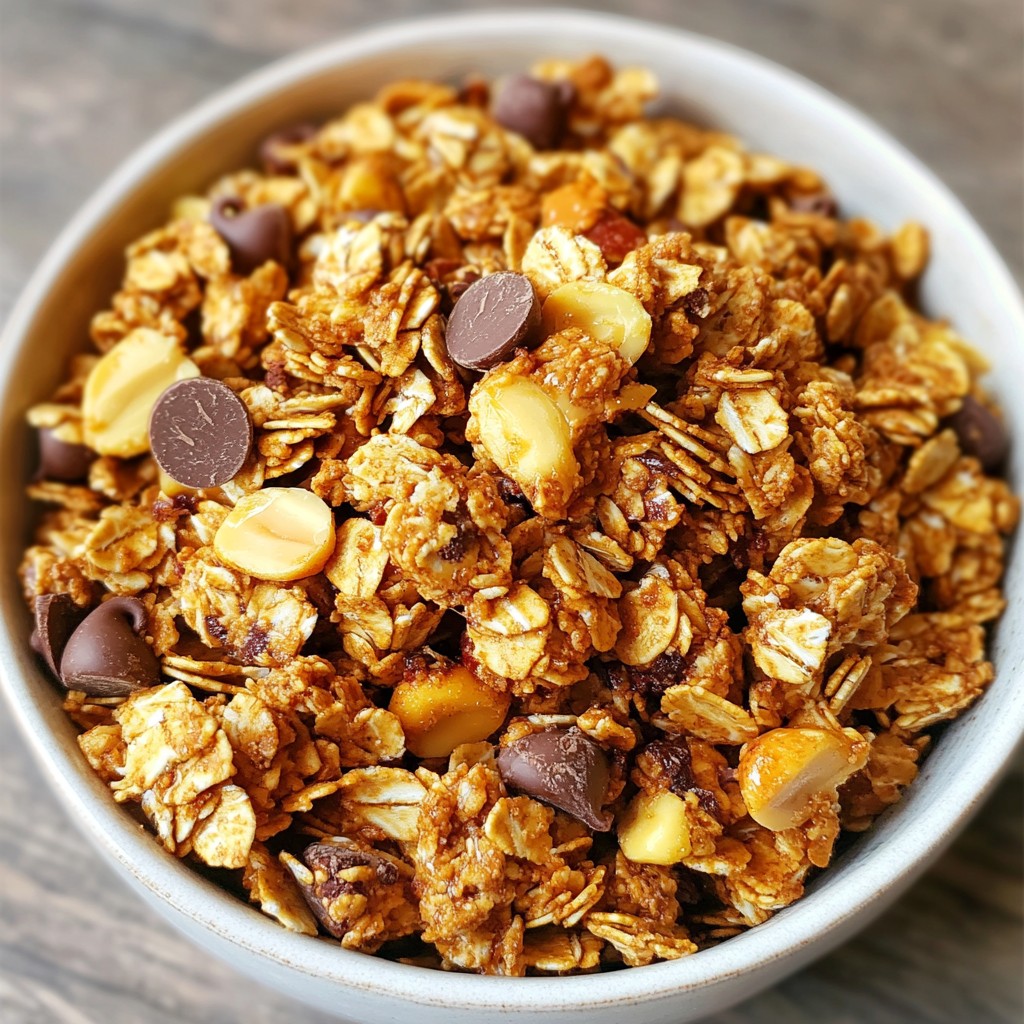
Craving a crunchy treat that’s both rich and satisfying? Look no further than my Peanut Butter Chocolate Granola! This recipe blends creamy peanut butter and rich chocolate for a snack you’ll love. Whether you enjoy it on its own, over yogurt, or as a tasty topping, this granola is sure to please. Let’s dive into the simple steps and ingredients to create your own delicious batch!
Why I Love This Recipe
- Deliciously Nutty Flavor: The combination of peanut butter and chocolate creates a rich, satisfying taste that’s hard to resist.
- Simple and Quick: This recipe takes just 30 minutes from start to finish, making it a perfect option for busy days.
- Customizable Ingredients: You can easily swap out nuts, sweeteners, or add-ins to suit your personal taste or dietary needs.
- Healthy Snack Option: With rolled oats, nuts, and no refined sugars, this granola offers a nutritious choice for breakfast or snacking.
Ingredients
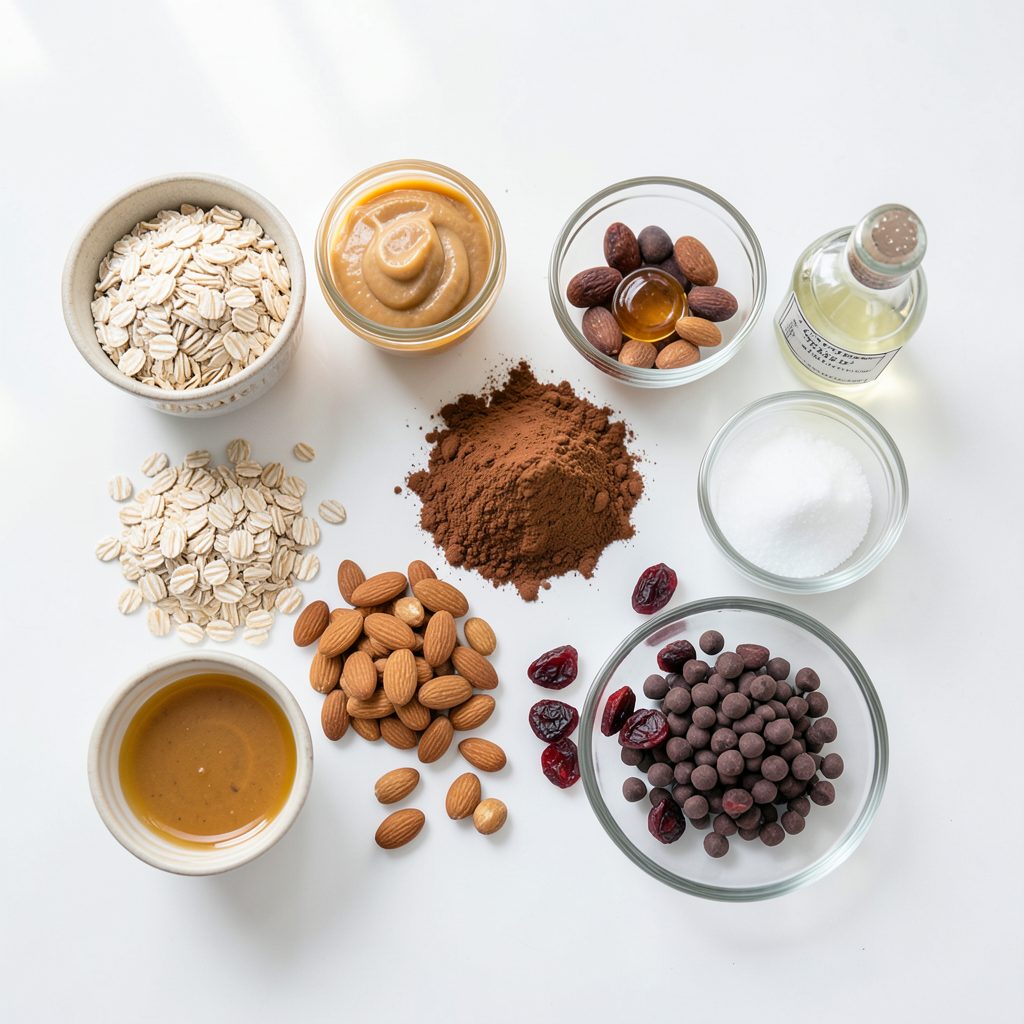
Main Ingredients for Peanut Butter Chocolate Granola
To make this tasty granola, you need simple ingredients. Here’s what you will need:
- 2 cups rolled oats
- 1/2 cup peanut butter (smooth or crunchy)
- 1/4 cup honey or maple syrup
- 1/4 cup unsweetened cocoa powder
- 1/2 cup chopped nuts (like almonds or walnuts)
- 1/2 cup mini chocolate chips
- 1 teaspoon pure vanilla extract
- 1/4 teaspoon sea salt
These ingredients come together to create a crunchy and rich treat that you will love.
Optional Ingredients for Customization
You can make your granola even better with some optional ingredients. Here are a few ideas:
- 1/2 cup dried fruits (like cranberries or raisins)
- A sprinkle of cinnamon for extra flavor
- Additional seeds like pumpkin or sunflower
Feel free to mix and match based on what you enjoy!
Ingredient Substitutions
Sometimes, you may not have everything on hand. Here are some easy swaps:
- Use almond butter instead of peanut butter.
- Maple syrup can replace honey if you prefer.
- Oats can be swapped for quinoa flakes if needed.
These substitutions keep your granola tasty while meeting your needs.
Step-by-Step Instructions
Preheat and Prepare
Start by preheating your oven to 350°F (175°C). This step is key for even baking. Next, line a baking sheet with parchment paper. This makes it easy to clean up later.
Mixing Dry Ingredients
In a large mixing bowl, add two cups of rolled oats. Toss in half a cup of chopped nuts, like almonds or walnuts. Now, add one-fourth cup of unsweetened cocoa powder and a pinch of sea salt. Mix it well until everything is combined. This blend gives your granola its crunchy texture.
Melting and Combining Wet Ingredients
In a small saucepan, combine half a cup of peanut butter with one-fourth cup of honey or maple syrup. Heat this mixture on low. Stir it constantly until it becomes smooth. Once melted, remove it from the heat. Now, add one teaspoon of pure vanilla extract and mix it in. This adds a lovely flavor to your granola.
Mixing and Spreading the Granola
Pour the smooth peanut butter mixture over the dry ingredients in your bowl. Use a spatula to stir it thoroughly. Make sure every oat and nut is coated with the peanut butter mix. Once mixed, transfer the granola to your baking sheet. Spread it evenly and press it down gently to form a flat layer.
Baking for Perfect Crunch
Place your baking sheet in the preheated oven. Bake for 15 to 20 minutes. Halfway through, stir the granola to ensure even baking. Keep an eye on it. You want a golden color and a great smell!
Cooling and Adding Extra Ingredients
After baking, take the granola out of the oven. Let it cool on the baking sheet for about 10 minutes. As it cools, it will get crunchier. Once cooled, stir in half a cup of mini chocolate chips and any dried fruits you like. This mix adds flavor and texture to your crunchy treat!
Tips & Tricks
Perfecting the Texture of Granola
To make your granola crunchy, use rolled oats. They hold texture well. If you want a different crunch, try adding nuts. Almonds and walnuts give a great mix. Press the granola down firmly before baking. This helps it clump together. Stir halfway through baking for even texture.
Flavor Enhancements
For richer flavor, use smooth peanut butter. It blends easily and gives a creamy taste. You can also add spices like cinnamon or nutmeg for warmth. If you enjoy more sweetness, add extra honey or maple syrup. Mixing in dried fruits will add a nice chewiness.
Troubleshooting Common Issues
If your granola turns out too soft, it may not have baked long enough. Ensure you check for a golden color. If it burns, lower the oven temperature next time. Sticking can happen if you skip the parchment paper. Always use it for easy removal.
Pro Tips
- Choose Your Sweetener: You can substitute honey with maple syrup for a vegan option, or adjust the amount to suit your taste preferences.
- Nut Variations: Experiment with different nuts like pecans or hazelnuts for a unique flavor profile, or try adding seeds for extra crunch.
- Cooling Time: Allow the granola to cool completely on the baking sheet to achieve maximum crunchiness before storing.
- Storage Tips: Use an airtight container to keep your granola fresh, and store it in a cool, dry place to maintain its crunch.
Variations
Alternative Nut Butters
You can change the nut butter for fun. Almond butter works well if you want a different taste. Sunflower seed butter is great for nut-free options. Both choices give you a unique flavor while keeping the crunch.
Different Sweeteners
Switch up sweeteners to fit your taste. Honey or maple syrup adds natural sweetness. You can also use agave syrup for a light touch. For a sugar-free option, try stevia or monk fruit sweetener. Each will change the flavor just a bit.
Add-Ins for Extra Flavor
Think about adding extras for more taste. Dried fruits like cranberries or apricots add sweetness and chewiness. You can mix in coconut flakes for a tropical twist. Chopped chocolate or yogurt-covered raisins boost the chocolate flavor too. Customize to make it your own!
Storage Info
Best Storage Practices
To keep your peanut butter chocolate granola fresh, use an airtight container. Glass jars or plastic containers work well. Make sure the granola is completely cool before you store it. This helps avoid moisture, which can make your granola soggy.
Shelf Life and Freshness
When stored properly, your granola can last up to three weeks. After that, it may lose its crunch. If you notice any changes in smell or texture, it’s best to toss it out. For extended freshness, you can freeze it. Just be sure to seal it well in a freezer-safe bag.
Reheating or Serving Tips
You can enjoy your granola straight from the container. For a warm treat, reheat it in the oven at 350°F for about 5 minutes. This will revive its crunchiness. Serve the granola with yogurt, milk, or as a topping on desserts. Add fresh fruit for extra flavor and nutrition.
FAQs
How to make Peanut Butter Chocolate Granola vegan?
To make this granola vegan, swap honey for maple syrup. You can also use dairy-free chocolate chips. Both changes keep the taste rich and delicious while making it vegan-friendly.
Can I use other types of oats?
Yes, you can use quick oats or steel-cut oats. Quick oats will bake faster, while steel-cut oats will create a chewier texture. Rolled oats give the best crunch, so choose what you prefer.
What are the health benefits of this granola?
This granola is packed with fiber from oats and nuts. Peanut butter adds protein and healthy fats. The cocoa powder has antioxidants, and dried fruits provide vitamins. Enjoying this granola can give you energy and keep you full.
How do I know when the granola is done baking?
Look for a golden brown color and smell the warm aroma. Give it a stir halfway through baking to ensure even cooking. Once it cools, it will get crunchier.
You’ve learned how to make a tasty Peanut Butter Chocolate Granola. We covered the key ingredients, from main to optional ones. You saw step-by-step instructions for mixing and baking. Tips helped you perfect the texture and flavor. Variations let you customize your granola with your favorite ingredients.
Now, you can store it right and enjoy it fresh. With this guide, you can make a yummy snack that fits your taste and needs. Happy cooking!