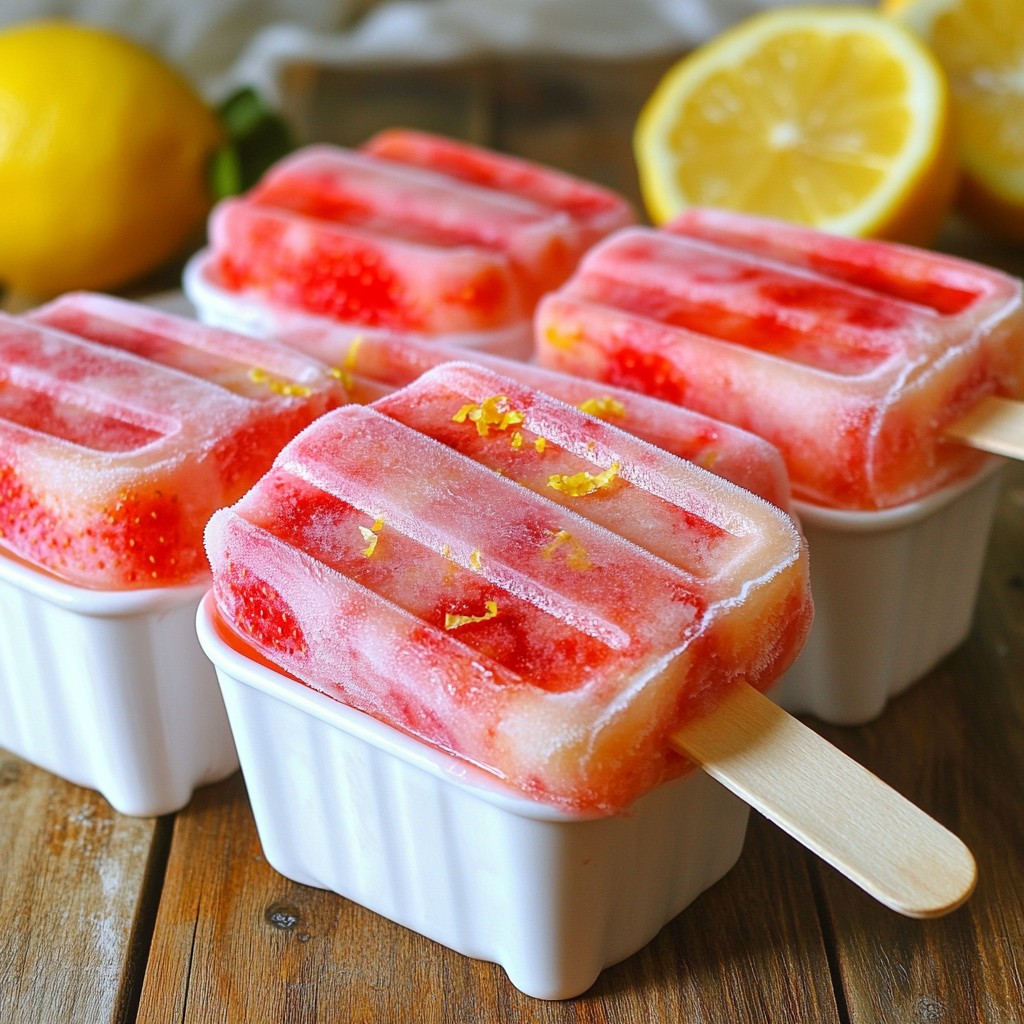
Beat the heat this summer with Strawberry Lemonade Popsicles! These cool and tasty treats are super easy to make and perfect for hot days. You’ll love how the sweet strawberries blend with tangy lemon juice. Plus, I’ll share tips for the best sweetness and ideas to serve them. Get ready to impress your friends and family with this delicious and refreshing snack! Let’s dive into how to make these popsicles today.
Why I Love This Recipe
- Refreshing Treat: These strawberry lemonade popsicles are the perfect way to cool down on a hot day, offering a delightful balance of sweet and tart flavors.
- Natural Ingredients: Made with fresh strawberries and real lemon juice, you can feel good about enjoying these popsicles without any artificial additives.
- Customizable Sweetness: The recipe allows you to adjust the sweetness to your liking, making it suitable for everyone's taste preferences.
- Easy to Make: With just a few simple steps, you can whip up these popsicles quickly and enjoy them within hours!
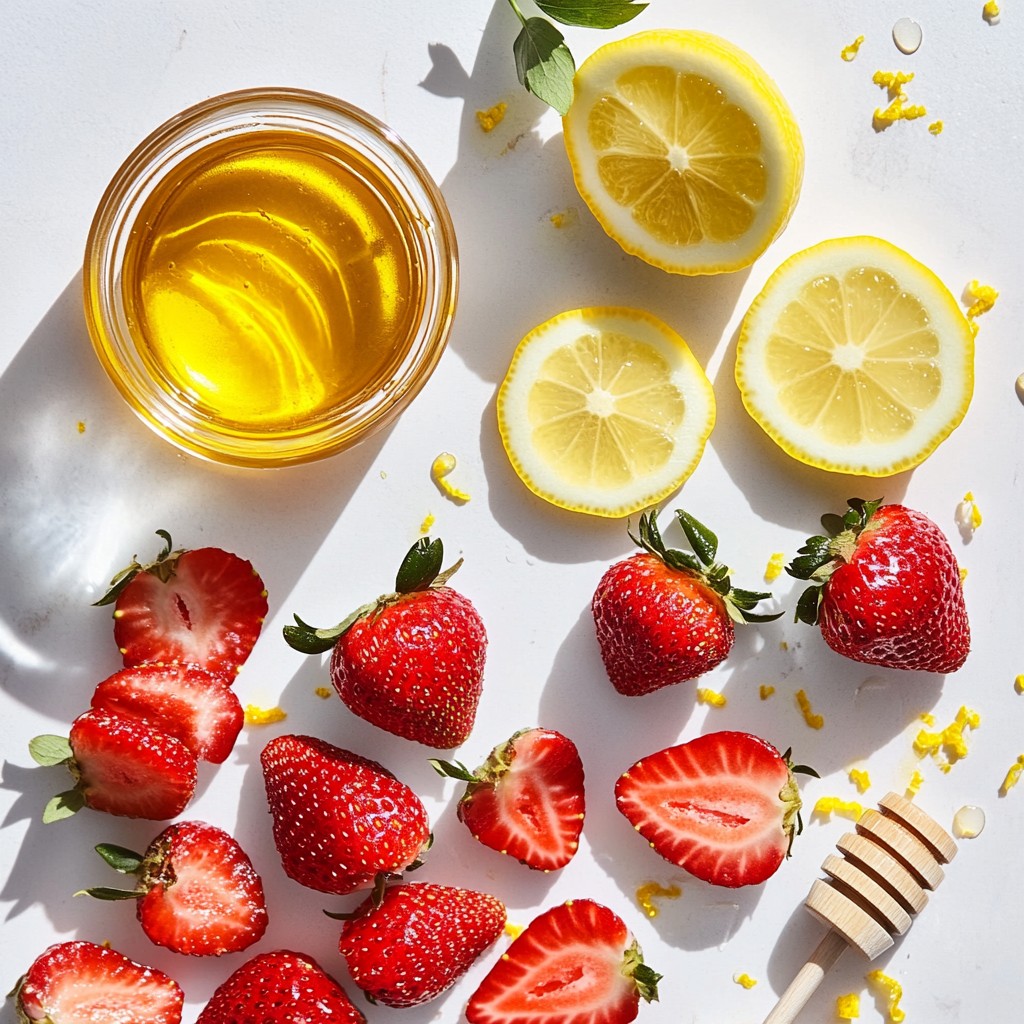
Ingredients
Fresh Strawberries
You need 2 cups of fresh strawberries. Start by hulling and slicing them. This step helps release their sweet flavor. Fresh strawberries give your popsicles a bright taste and lovely color.
Lemon Juice
You will need 1 cup of freshly squeezed lemon juice. This usually comes from about 4 to 6 lemons. Fresh lemon juice adds a tangy kick that balances the sweetness. It makes the popsicles refreshing and zesty.
Sweeteners (Honey or Agave Syrup)
Use 1/2 cup of honey or agave syrup. You can adjust this based on how sweet you want your popsicles. Honey brings a rich flavor, while agave syrup is a lighter option. Taste the mix and add more if needed.
Cold Water
Add 1 cup of cold water to the blender. This helps blend the ingredients smoothly. It also helps to lighten the mixture, making it easier to freeze.
Optional Elements (Additional Strawberries, Lemon Zest)
You can also include 1/2 cup of additional sliced strawberries. They create a pretty swirl effect in the popsicles. Lemon zest is optional but adds extra flavor. It gives a nice touch and aroma to the popsicles.
Step-by-Step Instructions
Preparing the Strawberry Lemonade Mixture
First, gather your ingredients. You need fresh strawberries, lemon juice, honey or agave syrup, and cold water. In a blender, mix the sliced strawberries, lemon juice, honey, and cold water. Blend on high until the mix is smooth. Stop and taste it. If you want it sweeter, add more honey slowly. Blend again to mix thoroughly.
Pouring into Molds
Next, take your popsicle molds. Carefully pour the strawberry lemonade mixture into each mold. Fill them about three-quarters full. This leaves room for the popsicles to expand as they freeze.
Adding Strawberry Swirls
Now comes the fun part! Take some extra sliced strawberries and gently add them into each mold. Spread them out evenly. This will create pretty swirls in your popsicles when they freeze.
Freezing Process
Insert popsicle sticks into the center of each mold. Make sure they stand straight. Place the molds in the freezer. Let them freeze for at least 4 to 6 hours. They need to be completely solid to come out easily.
Removing Popsicles from Molds
When the popsicles are frozen solid, it’s time to enjoy them. To remove them, run warm water over the outside of the molds for about 10-15 seconds. This will loosen them. Gently pull out the popsicles without breaking them. Now, you’re ready to enjoy your refreshing treat!
Tips & Tricks
Achieving the Perfect Sweetness
To get the perfect sweetness in your popsicles, start with honey or agave syrup. Both sweeteners work well. Blend them with strawberries and lemon juice. Taste the mix after blending. If it's not sweet enough, add more honey or agave. Blend again for a few seconds. This way, you can control the sweetness. You want a balance between tart and sweet.
Ensuring Even Freezing
For even freezing, don’t overfill the molds. Fill them about three-quarters full. This allows space for the mixture to expand as it freezes. If you want a swirl effect, add sliced strawberries to each mold. They should sit in the mixture, not float on top. This helps them freeze evenly and look pretty.
Creative Serving Suggestions
When serving your popsicles, you can get creative. Try garnishing with lemon zest for a bright touch. You can also serve them in fun cups or bowls. This adds a playful feel to your treat. Pair them with fresh fruit or mint leaves for added flavor. You could even blend one popsicle into a refreshing drink. Enjoy these popsicles at a picnic or by the pool. They are sure to impress!
Pro Tips
- Use Frozen Strawberries: If fresh strawberries aren't available, frozen strawberries work perfectly fine! They can help create a creamier texture when blended.
- Adjusting Sweetness: Taste your mixture before freezing. You can easily adjust the sweetness by adding more honey or agave syrup according to your preference.
- Adding Herbs: For a unique twist, consider adding fresh mint or basil to the blend for an aromatic flavor that complements the strawberries and lemons.
- Creative Swirls: Use a skewer or a small spoon to create swirls of the extra sliced strawberries for a beautiful presentation in your popsicles.
Variations
Vegan Strawberry Lemonade Popsicles
You can make these popsicles vegan by swapping honey for agave syrup. Agave syrup is plant-based and sweet. It blends well with strawberries and lemon juice. You won’t lose any flavor, and they remain just as refreshing.
Sugar-Free Options
If you want a sugar-free treat, try using a sugar substitute. Stevia or erythritol work great. These sweeteners give you the sweet taste without the sugar. Adjust the amount to fit your taste. Blend it in with the other ingredients until smooth.
Adding Other Fruits for Flavor
You can mix in other fruits for a fun twist. Try adding blueberries or raspberries for a berry blend. Another option is to mix in some mango or peach for a tropical feel. Just slice them up and blend them in. This adds color and new flavors to your popsicles. The result is a fun, fruity treat for hot days.
Storage Info
How to Store Popsicles
Store your strawberry lemonade popsicles in an airtight container. You can also wrap each popsicle in parchment paper. This keeps them fresh and prevents freezer burn. Be sure to place them in the coldest part of your freezer. This part stays at a steady temperature, which helps keep the popsicles firm.
Freezer Safety Tips
Check your freezer temperature regularly. The ideal setting is 0°F (-18°C) to keep your popsicles safe. Avoid opening the freezer too often. Each time you do, warm air enters, which can cause ice crystals. Be sure to label your container with the date. This helps you remember when you made them.
Recommended Shelf Life
These popsicles can last for about 2 to 3 months in the freezer. After that, they may lose flavor and texture. If they start to look icy or smell odd, it's best to discard them. Always trust your senses when it comes to food safety. Enjoy your popsicles while they are fresh for the best taste!
FAQs
How can I make these popsicles dairy-free?
These popsicles are already dairy-free! The recipe uses fresh strawberries and lemon juice. You do not need any dairy ingredients. Feel free to add more fruit for extra flavor.
Can I use frozen strawberries instead of fresh?
Yes, you can use frozen strawberries. Just make sure they are unsweetened. Frozen strawberries will blend well. They may make the popsicles a bit thicker, but they will still taste great!
What is the best way to clean popsicle molds?
To clean your molds, fill them with warm soapy water. Let them soak for a few minutes. Then, use a soft brush or cloth to scrub them gently. Rinse with clean water and let them air dry.
How long do these popsicles last in the freezer?
These popsicles last about 2 to 3 months in the freezer. Wrap each popsicle in parchment paper to keep them fresh. Store them in a sealed bag or container to prevent freezer burn.
We explored making delicious strawberry lemonade popsicles. We started with fresh strawberries and lemon juice, adding sweeteners and cold water. I shared simple steps to prepare, pour, and freeze your popsicles. You learned how to adjust sweetness and ensure even freezing. Variations like vegan and sugar-free options were discussed too.
In conclusion, these popsicles are fun, easy, and fit for everyone. Enjoy experimenting with flavors and share your tasty treats!