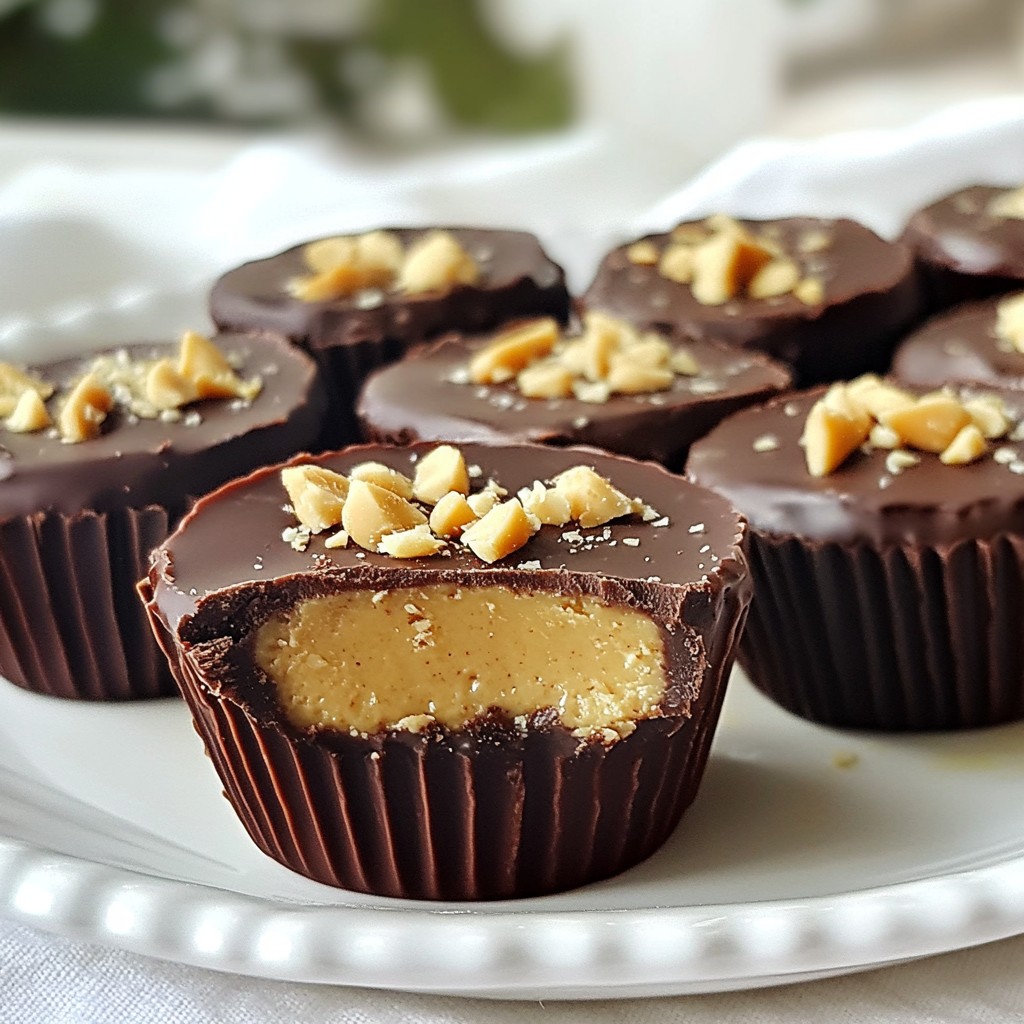
Are you craving a sweet treat that's also vegan? Look no further! I'm excited to share my easy recipe for Vegan Chocolate Peanut Butter Cups. With rich, dairy-free chocolate and creamy peanut butter, these treats are pure bliss. Plus, I'll guide you through each step, ensuring you achieve perfect results every time. Get ready to indulge in a delightful snack that satisfies your sweet tooth without any guilt!
Why I Love This Recipe
- Decadent Flavor Combination: The rich taste of dark chocolate paired with creamy peanut butter creates an irresistible treat that satisfies your sweet tooth.
- Easy to Make: This recipe requires minimal ingredients and simple steps, making it perfect for both novice and experienced bakers.
- Vegan Delight: These chocolate peanut butter cups are completely dairy-free, allowing everyone to enjoy them without compromising on flavor.
- Customizable Options: Feel free to add your favorite toppings or mix-ins, such as crushed nuts or sea salt, to personalize your treats!
Ingredients
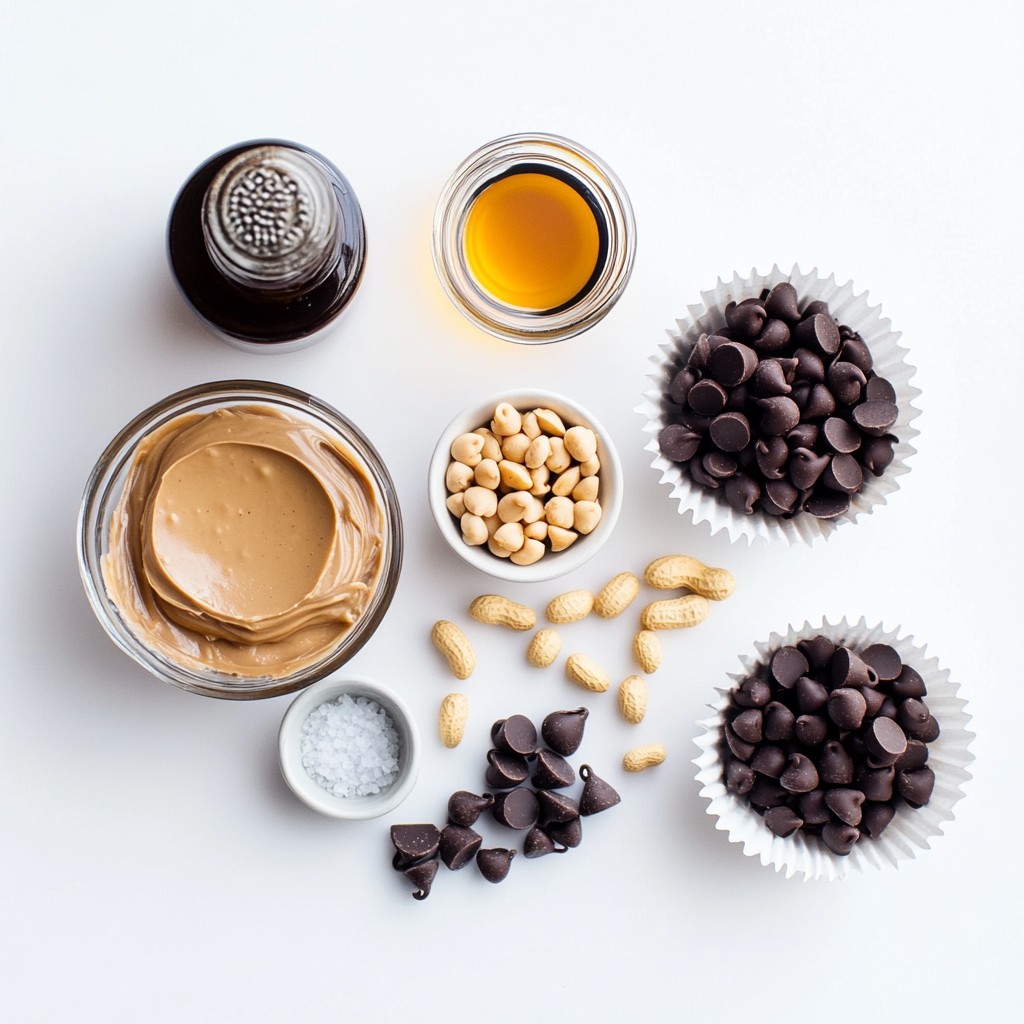
To make the vegan chocolate peanut butter cups, gather these key ingredients:
- 1 cup dairy-free dark chocolate chips
- 1/2 cup smooth natural peanut butter
- 3 tablespoons maple syrup
- 1 teaspoon vanilla extract
- 1/4 teaspoon sea salt
- 1/4 cup crushed roasted peanuts (optional, for added crunch)
These ingredients blend together to create a rich and creamy treat. The dairy-free dark chocolate chips give a deep flavor while keeping it vegan. Smooth natural peanut butter adds creaminess, making every bite delightful. Maple syrup brings just the right amount of sweetness. Vanilla extract enhances the flavor, while sea salt balances it out. If you like some crunch, the crushed roasted peanuts add a fun texture.
You can find these ingredients in most grocery stores. Make sure to check labels for vegan options. Gather them all before you start. This way, you’ll have everything ready to create this tasty treat!
Step-by-Step Instructions
Prepare the Molds
Start by placing cupcake liners in a muffin tin. You can also use silicone molds. Make sure the molds are on a flat, stable surface. This helps catch any spills later.
Melt the Chocolate
Take a microwave-safe bowl and add the dairy-free dark chocolate chips. Heat them in the microwave for 30 seconds at a time. Stir after each interval. This way, you avoid burning the chocolate. Keep going until it is smooth and creamy.
Create the Chocolate Base
Spoon about one tablespoon of melted chocolate into each cupcake liner or mold. Coat the sides if you like a thicker layer. After that, place the molds in the freezer for 10-15 minutes. This will help the chocolate set well.
Make the Peanut Butter Filling
In a mixing bowl, combine the smooth peanut butter, maple syrup, vanilla extract, and sea salt. Stir until all the ingredients are mixed well. If you want extra crunch, fold in some crushed roasted peanuts.
Fill the Cups
Once the chocolate bases are firm, carefully take them out of the freezer. Spoon about one tablespoon of the peanut butter mixture onto each chocolate base. Spread it evenly so it covers the chocolate well.
Top with Chocolate
Now, pour the rest of the melted chocolate over the peanut butter layer in each cup. Make sure to cover it all completely. Use a spoon to smooth the tops for a nice look.
Final Setting
Place the molds back in the freezer for 20-30 minutes. This helps the chocolate become firm and ready to eat. To check if they are ready, gently press the tops. They should feel solid.
Serve
Once set, peel away the cupcake liners or pop the peanut butter cups out of the silicone molds. For serving, arrange them on a nice plate. You can sprinkle crushed peanuts or cocoa powder on top for decoration. Enjoy these treats at room temperature for the best flavor!
Tips & Tricks
Best Practices for Melting Chocolate
To melt chocolate without issues, avoid high heat. Use a microwave on low power. Microwave the chocolate chips in 30-second bursts. Stir after each burst to keep it smooth. If you see any lumps, stop microwaving. You can also use a double boiler. Just place a bowl over simmering water. This method gives you more control.
Perfect Peanut Butter Consistency
Choosing the right peanut butter is key. I recommend smooth natural peanut butter. It blends well and gives a nice texture. Look for options with no added sugar or oils. To get the right texture, mix your peanut butter with maple syrup. The syrup makes it creamy and sweet. If you want some crunch, fold in crushed roasted peanuts. This adds a fun bite to every cup.
Serving and Enjoying
For the best taste, serve your cups at room temperature. This way, the chocolate stays soft. If you want to enhance the flavor, pair them with almond milk. A glass of almond milk complements the peanut butter taste. You can also enjoy them with fresh fruit. Sliced apples or bananas work well. These treats are great for sharing or a sweet snack!
Pro Tips
- Use Quality Chocolate: Choose high-quality dairy-free dark chocolate chips for the best flavor and smooth texture in your cups.
- Room Temperature Ingredients: Ensure your peanut butter and other ingredients are at room temperature for easy mixing and a creamy filling.
- Experiment with Flavors: Feel free to add a pinch of cinnamon or a splash of almond extract to the peanut butter mixture for a unique twist.
- Storage Tips: Store leftover cups in an airtight container in the refrigerator for up to a week, or freeze them for longer freshness.
Variations
Different Nut Butters
You can switch peanut butter for other nut butters. Almond butter is a tasty choice. It adds a nutty flavor and works well in this recipe. Cashew butter is another option. It has a creamy texture that blends nicely with chocolate. Both alternatives give you a unique twist!
Chocolate Varieties
Feel free to explore different types of chocolate. You can use white chocolate instead of dark chocolate. It creates a sweet and creamy flavor. Milk chocolate is another good substitute. Just check that it’s dairy-free to keep it vegan. Want to make it even more exciting? Add flavors like mint or caramel to your chocolate. These flavors bring a fun surprise to your treats!
Dietary Modifications
You can easily make these cups nut-free. Use sunflower seed butter or soy nut butter instead. These options taste great and keep the recipe vegan. If you want sugar-free treats, swap maple syrup for a sugar-free sweetener. Just make sure it’s one that melts well. This way, you can enjoy a delightful treat that fits your diet!
Storage Info
Best Storage Practices
To keep your vegan chocolate peanut butter cups fresh, use airtight containers. Glass or plastic containers work well. Make sure they are clean and completely dry before storing the cups. This will help prevent moisture and keep them tasty. Store them in a cool, dry place away from sunlight.
Shelf Life
How long do they last? These cups can last up to one week at room temperature. If you keep them in the fridge, they can last for about two weeks. Signs of spoilage include a change in color, a strange smell, or mold. If you see any of these signs, it’s best to throw them away.
Freezing Instructions
Can you freeze them? Yes, you can freeze these cups for up to three months. To freeze, place them in a single layer in a container. Add parchment paper between layers to prevent sticking. Thawing tips: When ready to enjoy, take them out and let them thaw in the fridge for a few hours. This keeps them creamy and delicious.
FAQs
How do I make vegan chocolate peanut butter cups?
To make vegan chocolate peanut butter cups, follow these steps:
1. Prepare the molds: Use cupcake liners or silicone molds in a muffin tin.
2. Melt the chocolate: Heat dairy-free dark chocolate chips in 30-second intervals.
3. Create the chocolate base: Pour melted chocolate into the molds and freeze for 10-15 minutes.
4. Make the peanut butter filling: Mix smooth peanut butter, maple syrup, vanilla, and sea salt.
5. Fill the cups: Spoon peanut butter onto the hardened chocolate base.
6. Top with chocolate: Pour more melted chocolate over the filling.
7. Final setting: Freeze for 20-30 minutes, then serve.
These steps yield rich, creamy cups that everyone will love.
Can I use other nut butters instead of peanut butter?
Yes, you can use other nut butters like almond or cashew. Each nut butter brings a unique flavor. Almond butter adds a touch of sweetness, while cashew butter gives a creamier texture. Choose what you like best.
Where can I buy pre-made vegan chocolate peanut butter cups?
You can find pre-made vegan chocolate peanut butter cups in health food stores or online. Many brands now offer these treats. Look for ones made with simple, natural ingredients.
Are these healthy vegan treats?
Vegan chocolate peanut butter cups can be a healthier treat. They contain natural ingredients and healthy fats from nut butter. However, they still have sugar from maple syrup, so enjoy them in moderation.
What can I substitute for maple syrup?
You can use agave nectar or brown rice syrup as a substitute for maple syrup. Both options are vegan and will add sweetness. Adjust the amount to your taste.
Can I make these cups without chocolate?
Yes, you can make these cups without chocolate. Instead, use a layer of coconut cream or a nut butter blend as a base. This will create a different but still tasty treat.
To create these easy vegan chocolate peanut butter cups, you need simple ingredients and clear steps. We covered everything from melting chocolate to filling and freezing. Remember, you can tweak the recipe with different nut butters or chocolate types to fit your taste. These treats are fun to make and store well for later. Enjoy them as a sweet snack or share with friends. You have the tools to make a delicious, homemade treat in no time. Get in the kitchen and have fun with your own creations!