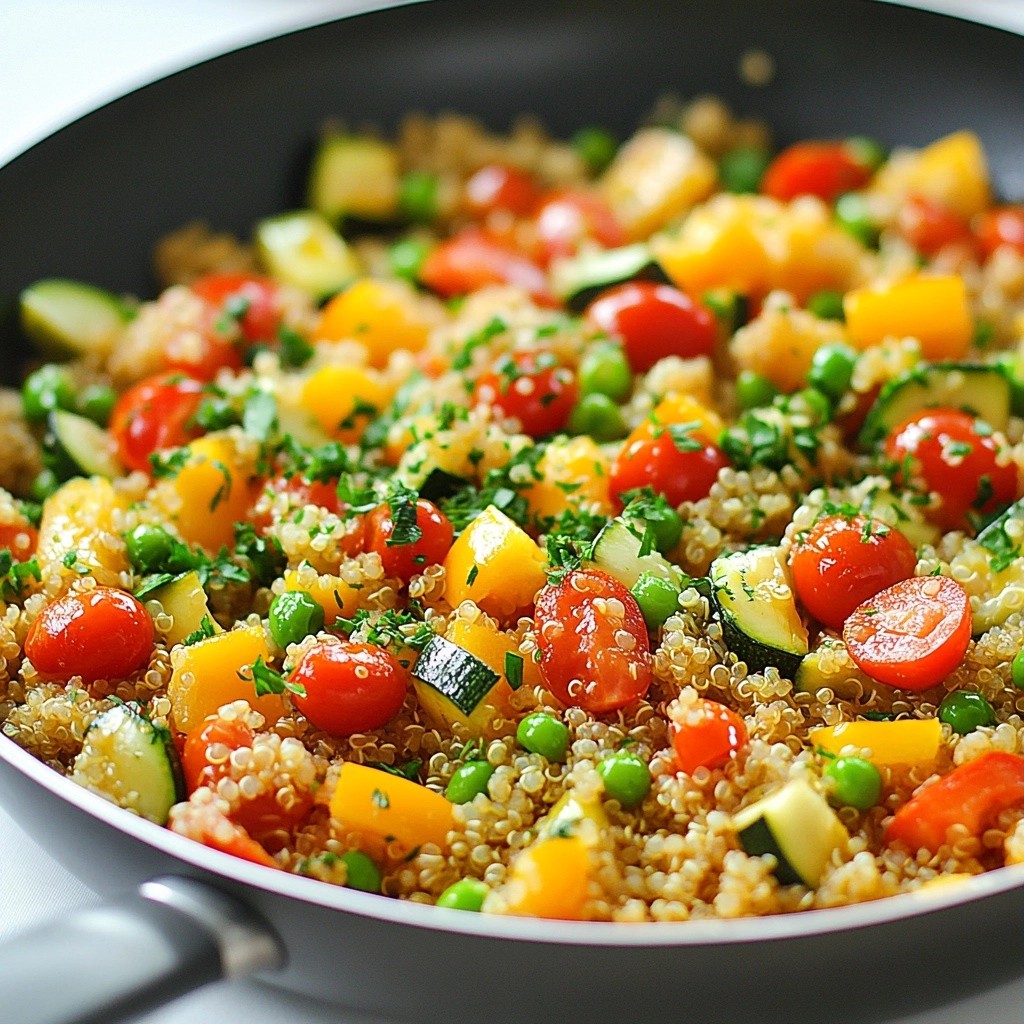
Are you looking for a quick, healthy meal that won’t break the bank? The Economical One-Pan Quinoa and Veggie Skillet is a simple, delicious dish you can whip up in no time. You’ll enjoy a colorful mix of veggies, rich flavors, and ease of clean-up—all from one pan! Let’s dive in and learn how to make this budget-friendly meal that everyone will love!
Why I Love This Recipe
- Budget-Friendly: This one-pan dish is not only delicious but also economical, making it perfect for those on a budget.
- Easy Cleanup: Cooking everything in one skillet means less mess and hassle when it's time to clean up.
- Customizable: You can easily swap in your favorite veggies or whatever you have on hand, making it a versatile recipe.
- Healthy and Nutritious: With a base of quinoa and plenty of vegetables, this dish is packed with protein and nutrients.
Ingredients
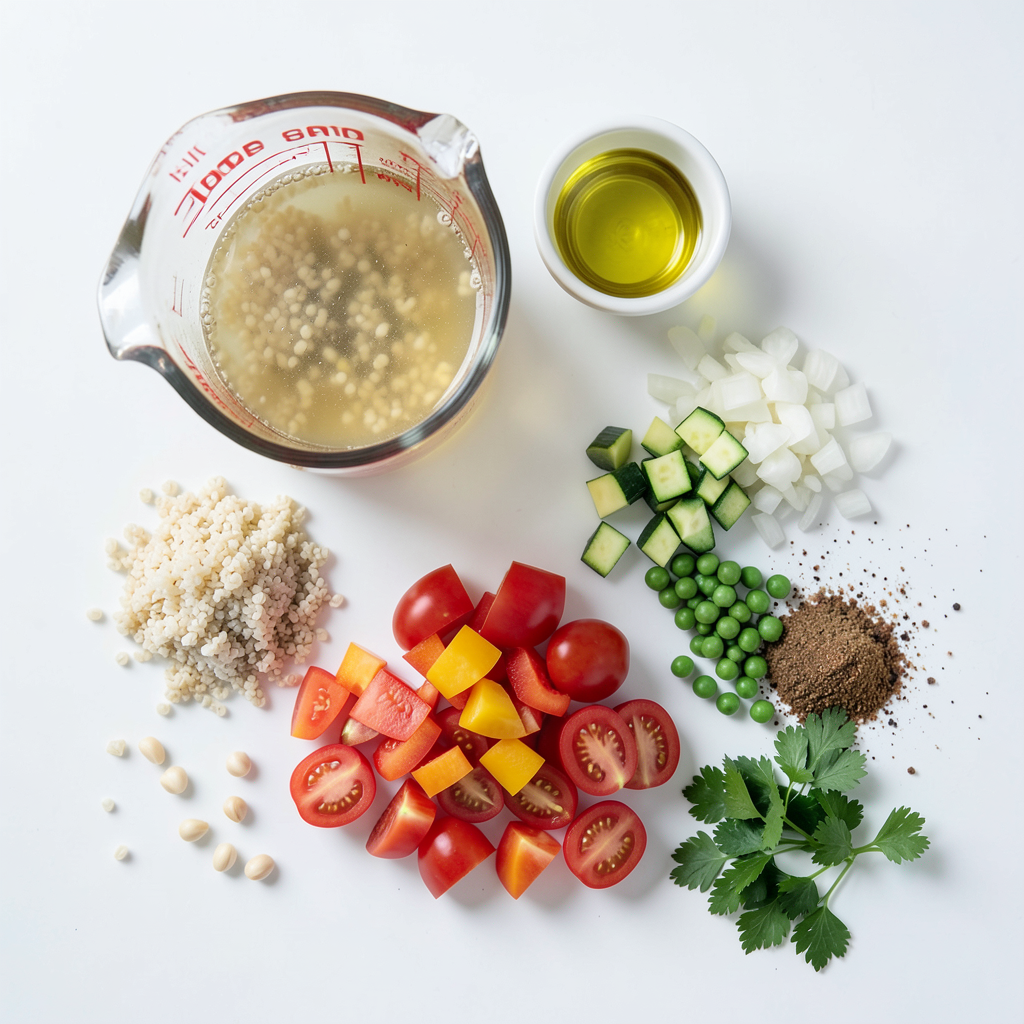
List of Ingredients
- 1 cup quinoa, thoroughly rinsed
- 2 cups vegetable broth (low sodium recommended)
- 1 tablespoon olive oil
- 1 small onion, finely chopped
- 2 cloves garlic, minced
- 1 bell pepper (any color), seeds removed and diced
- 1 medium zucchini, diced into bite-sized pieces
- 1 cup cherry tomatoes, halved
- 1 cup frozen peas
- 1 teaspoon smoked paprika
- 1 teaspoon ground cumin
- Salt and pepper, to taste
- Fresh parsley or cilantro, chopped (for garnish)
Gather these ingredients before starting. Rinsing the quinoa is key. It removes the bitter coating called saponin. Use low-sodium broth for a healthier dish. Olive oil adds flavor and helps cook the veggies. Fresh vegetables give color and taste.
Bell peppers and zucchini are great choices, but feel free to mix. Cherry tomatoes add sweetness, and peas add a pop of green.
The spices are simple but powerful. Smoked paprika gives warmth and depth. Ground cumin adds a nice earthy note. Salt and pepper balance all the flavors.
Finally, fresh parsley or cilantro brightens the dish. It makes each bite feel fresh. Once you have everything ready, you can make a delicious meal quickly.
Step-by-Step Instructions
Preparing the Vegetables
1. Heat olive oil in a large skillet over medium heat.
2. Add the finely chopped onion. Sauté for 2-3 minutes until it is soft and smells great.
3. Next, add minced garlic. Stir for about a minute to let it release its aroma.
4. Now, mix in the diced bell pepper and zucchini. Cook them for 3-4 minutes. They should be soft but still have some crunch.
Cooking the Quinoa
1. After the vegetables are tender, add the rinsed quinoa.
2. Pour in the vegetable broth.
3. Sprinkle in smoked paprika, ground cumin, salt, and pepper. Stir to mix everything well.
Simmering and Serving
1. Increase heat to bring the skillet to a gentle boil.
2. Once boiling, reduce heat to low and cover the skillet. Let it simmer for 15-20 minutes. The quinoa should soak up the broth and become fluffy.
3. When the quinoa is cooked, gently fold in halved cherry tomatoes and frozen peas.
4. Cover again and let it sit for 5 minutes. This warms the peas and tomatoes without overcooking.
5. Use a fork to fluff the quinoa. Taste and add more salt and pepper if needed.
6. Serve hot, garnished with fresh parsley or cilantro for a nice touch.
Tips & Tricks
Perfecting the Flavor
To boost the taste of your skillet, try adjusting the seasoning. If you like it spicy, add a pinch of cayenne pepper. For a zestier flavor, a squeeze of lemon juice can brighten the dish. You can swap smoked paprika for regular paprika for a milder taste.
Consider using fresh herbs like thyme or oregano to add depth. If you want a kick, add chili flakes. Each option opens up new flavor profiles.
Cooking Efficiency
Using one pan makes this dish quick and easy. It saves on clean-up time after cooking. You avoid using multiple pots, which can clutter your kitchen.
To speed things up, prep your veggies while the quinoa simmers. Chop everything before you start cooking. This way, you’ll have a smooth flow in the kitchen.
Presentation Ideas
For a beautiful presentation, serve the quinoa in shallow bowls. This helps showcase the colorful veggies. Drizzle a bit of olive oil on top for shine.
Add a lemon wedge on the side for a pop of color and flavor. Fresh herbs like parsley or cilantro make a great garnish. They add freshness and a lovely touch to the dish.
Pro Tips
- Rinse the Quinoa: Always rinse quinoa thoroughly under cold water before cooking to remove its natural coating, called saponin, which can taste bitter.
- Customize Your Veggies: Feel free to swap in any seasonal vegetables you have on hand, such as spinach, carrots, or broccoli, for added nutrition and flavor.
- Boost the Flavor: For an extra layer of flavor, consider adding a splash of lemon juice or a sprinkle of feta cheese just before serving.
- Meal Prep Friendly: This dish stores well in the fridge for up to 4 days, making it a great option for meal prep; simply reheat in the microwave or on the stove.
Variations
Protein Add-Ins
You can boost your skillet with protein for a hearty meal. Here are some great options:
- Tofu: Press and cube firm tofu. Sauté it with the onion for extra flavor.
- Chickpeas: Drain and rinse canned chickpeas. Stir them in with the quinoa and broth.
- Chicken: Use cooked chicken or add raw, diced chicken early in the cooking process.
Adding these proteins makes your dish more filling and nutritious.
Vegetable Substitutions
Feel free to swap in veggies you love or have on hand. Some tasty options include:
- Spinach: Stir in fresh spinach at the end for a vibrant green boost.
- Carrots: Dice carrots and add them with the bell pepper for sweetness.
- Broccoli: Steam or sauté small broccoli florets and mix them in.
You can also change veggies with the seasons. Use pumpkin in fall or asparagus in spring for variety.
Dietary Modifications
This quinoa skillet can fit many diets with easy swaps. Here’s how:
- Gluten-Free: Quinoa is naturally gluten-free, so you’re all set. Just ensure your broth is gluten-free.
- Vegan: The recipe is already plant-based. Just skip any animal proteins.
- Low-Carb: Reduce quinoa and add more veggies like zucchini or cauliflower rice.
These adjustments help you enjoy this dish while sticking to your dietary needs.
Storage Info
Refrigeration Tips
To store leftovers, let the skillet cool first. Use an airtight container to keep it fresh. Glass or BPA-free plastic containers work best for storage. This way, the dish stays safe and tasty.
Freezing Guidelines
You can freeze the quinoa skillet for later meals. Allow it to cool completely before packing it in freezer-safe bags or containers. When you are ready to eat, thaw it in the fridge overnight. Reheat it on the stove or in the microwave until hot. Stir it well to ensure even heating.
Shelf Life
In the fridge, this dish lasts about 3-4 days. Always check for signs of spoilage. If it smells off or looks strange, it is best to throw it away. Trust your senses; they are your best guide!
FAQs
Can I use a different grain instead of quinoa?
Yes, you can swap quinoa for other grains. Brown rice, farro, or millet work well. Each grain has a different cooking time. For brown rice, add about 10-15 minutes to the cooking time. Farro takes around 25-30 minutes. Millet cooks faster, about 15 minutes. Adjust the liquid as needed. Use 2 cups of broth for every cup of grain.
How can I make this dish spicier?
To add spice, include chopped jalapeños or red pepper flakes. Start with a small amount and taste as you go. You can also use spicy paprika instead of smoked paprika. If you love heat, drizzle sriracha or hot sauce on top before serving. This adds a nice kick!
What are some side dishes to serve with it?
Pair this dish with a simple green salad. A side of garlic bread complements it well. For something heartier, serve with roasted sweet potatoes. You could also enjoy it with a yogurt dip for freshness. These sides enhance the meal and add variety to your plate.
In this blog post, I covered how to make a delicious quinoa skillet. We went through the key ingredients, like fresh vegetables and spices. Then, I shared step-by-step cooking instructions. Tips and variations help you tailor the dish to your taste. Finally, we discussed storage methods to keep leftovers fresh.
Cook this dish your way, and enjoy every bite. Simplifying your meals can make cooking fun. Happy cooking!