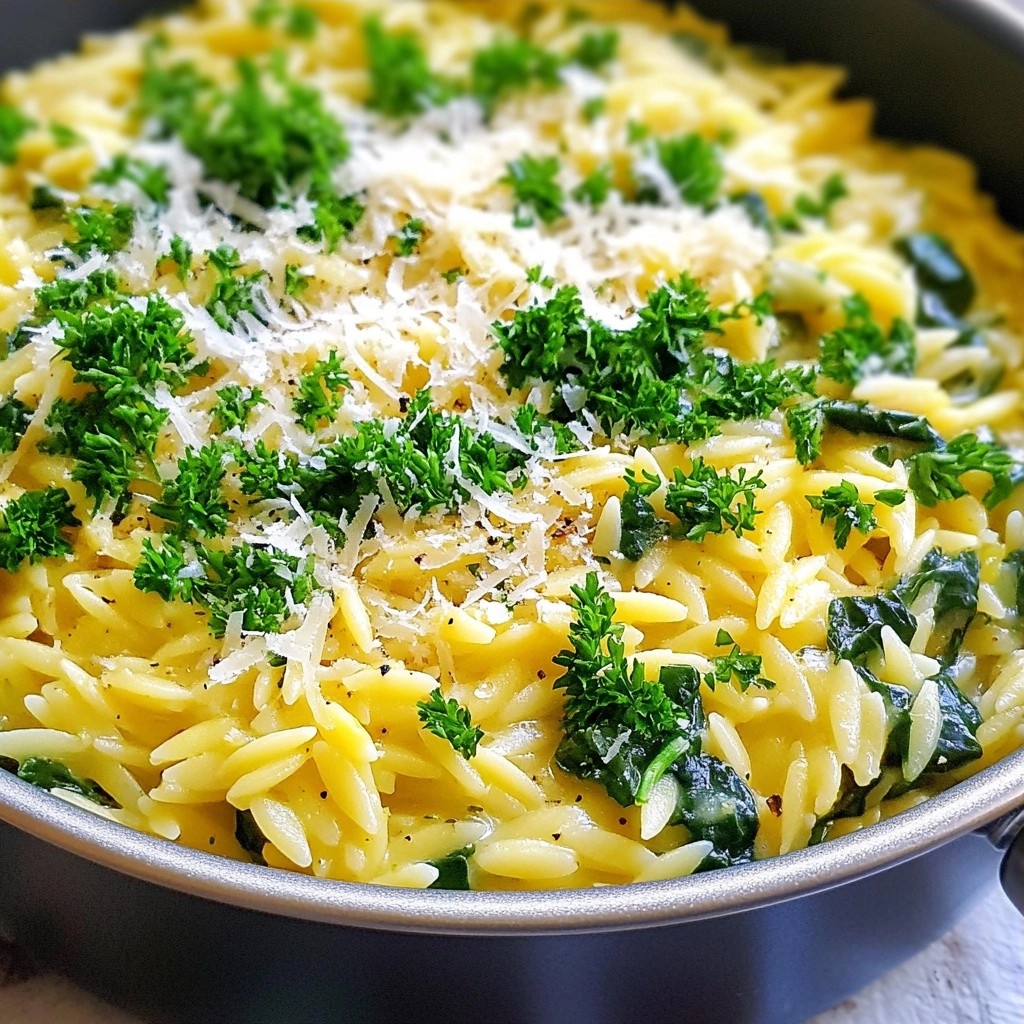
Are you craving a delicious meal that won't break the bank? Let me introduce you to my Economical One-Pot Lemon Herb Orzo! This quick and easy recipe combines fresh flavors with simple ingredients, all cooked in one pot. Whether you're a busy parent or a college student, I’ve got you covered. You’ll enjoy a tasty dish that’s perfect for any occasion. Ready to learn how to whip this up? Let’s dive in!
Why I Love This Recipe
- Quick and Easy: This one-pot meal is ready in just 25 minutes, making it perfect for busy weeknights.
- Fresh Flavors: The bright lemon and fresh herbs elevate the dish, providing a refreshing taste with every bite.
- Customizable: You can easily add your favorite vegetables or proteins to make this dish your own.
- Budget-Friendly: With simple ingredients, this recipe is economical yet delicious, perfect for feeding a crowd.
Ingredients
Detailed Ingredient List
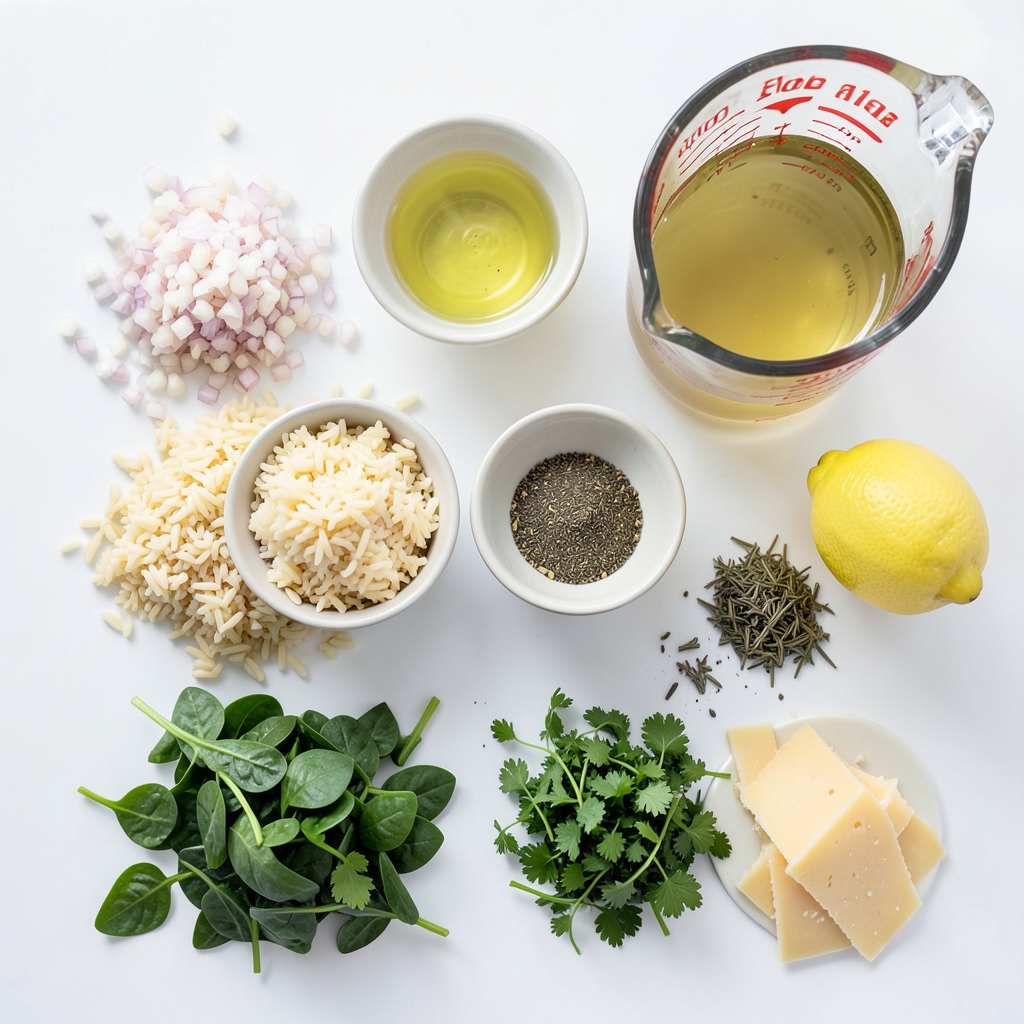
To make the Economical One-Pot Lemon Herb Orzo, gather these simple items:
- 1 cup orzo pasta
- 2 tablespoons extra virgin olive oil
- 1 small onion, finely diced
- 2 cloves garlic, minced
- 4 cups vegetable broth (or water)
- 1 large lemon (zest and juice)
- 1 teaspoon dried oregano
- 1 teaspoon dried thyme
- Salt and freshly ground black pepper, to taste
- 1 cup fresh spinach, roughly chopped
- 1/4 cup fresh parsley, finely chopped
- 1/4 cup freshly grated Parmesan cheese (optional for garnish)
Substitutions for Ingredients
You can swap some ingredients to fit your taste or what you have on hand:
- Orzo pasta can be replaced with couscous or quinoa.
- Use chicken broth instead of vegetable broth for more flavor.
- If you lack fresh spinach, try kale or Swiss chard.
- Any fresh herbs can replace parsley, like basil or dill.
- For a vegan option, skip the Parmesan or use a plant-based cheese.
How to Pick Fresh Produce
Choosing fresh produce makes your dish taste better. Here are some tips for picking:
- Onions: Look for firm onions without soft spots. The skin should be dry and papery.
- Garlic: Choose heads that feel heavy and firm. Avoid any with green sprouts.
- Spinach: Pick bright green leaves without yellow or brown spots. Fresh leaves should be crisp.
- Parsley: Select parsley that is vibrant and fragrant. Avoid wilted or slimy leaves.
- Lemons: Choose firm lemons with smooth skin. They should feel heavy for their size, indicating juiciness.
Step-by-Step Instructions
Preparing the Base: Cooking Onion and Garlic
Start by heating the olive oil in a large pot over medium heat. When the oil is hot, add the finely diced onion. Cook it for about 5 minutes. You want the onion to be soft and clear. Next, add the minced garlic. Stir it in for 1-2 minutes. You will smell the garlic become fragrant. This step builds a strong flavor base for your dish.
Toasting the Orzo: Enhancing Flavor
Now it's time to add the orzo pasta. Toss it into the pot and stir it for about 1 minute. This toasting step is key. It adds a nice depth to the flavor. Make sure to coat the orzo well with the oil. This helps it absorb the broth better later on.
Bringing it All Together: Cooking Method
After toasting the orzo, slowly pour in the vegetable broth. Stir the mixture gently to combine. Bring it to a rolling boil. Once it's boiling, add the lemon zest, lemon juice, oregano, and thyme. Stir well so the flavors mix. Lower the heat to a gentle simmer and cover the pot. Let it cook for about 10-12 minutes. Stir occasionally to stop the orzo from sticking. When the orzo is tender, fold in the chopped spinach and parsley. Add salt and pepper to taste. Cook for another 2-3 minutes until the spinach is bright and wilted. Serve warm, and if you like, sprinkle some Parmesan cheese on top.
Tips & Tricks
Perfecting the Cooking Time
To get the best orzo, timing is key. Cook the orzo for about 10 to 12 minutes. Start checking at 10 minutes. You want it tender but not mushy. The right cook time keeps the texture just right for your dish.
Enhancing Flavor with Additional Seasonings
Want to boost flavor? Consider adding a dash of red pepper flakes for heat. Fresh herbs like basil or mint can add a new twist. If you love garlic, add an extra clove or two. Taste as you go. Adjust the seasoning to match your mood.
Maintaining Texture: Stirring Techniques
Stirring is important for even cooking. Stir gently, but often. This helps prevent the orzo from sticking. Use a wooden spoon to avoid scratching your pot. If you notice it sticking, add a splash of broth. This keeps it creamy and smooth.
Pro Tips
- Use Quality Broth: For the best flavor, opt for high-quality vegetable broth or homemade stock. This will significantly enhance the dish's overall taste.
- Toast the Orzo: Toasting the orzo before adding liquid brings out its nutty flavor, adding depth to your dish. Just a minute or two in the oil will do!
- Fresh Herbs Matter: While dried herbs work well, fresh herbs like parsley can elevate the dish. Add them at the end for a burst of flavor and freshness.
- Customize Your Greens: Feel free to substitute spinach with other greens like kale or arugula, depending on your preference or what's in season.
Variations
Adding Protein: Chicken or Tofu
You can make this dish heartier by adding protein. Chicken works well. Just cook it in the pot before the onion. Dice cooked chicken and mix it in at the end. If you prefer a plant-based option, use tofu. Firm tofu is best. Cut it into small cubes and sauté it with the onion. Both options add flavor and make the meal more filling.
Vegetable Add-Ins: Seasonal Options
This recipe is great for seasonal veggies. Try adding peas, bell peppers, or zucchini. They bring color and nutrients. Just chop them up and toss them in with the garlic. You can also use frozen vegetables for ease. These add-ins make your dish unique and fun. Change them up based on what you like or what’s fresh.
Making it Creamy: Alternatives for Parmesan
If you want a creamy texture without Parmesan, there are options. Nutritional yeast offers a cheesy flavor without dairy. Stir in a few tablespoons at the end. You can also use a splash of coconut milk for creaminess. Both options keep your dish rich and satisfying. Feel free to mix and match to find what you enjoy most.
Storage Info
How to Store Leftovers
After you enjoy your Economical One-Pot Lemon Herb Orzo, store leftovers in an airtight container. Cool the orzo to room temperature first. This helps keep the flavors fresh. Place the container in the fridge. It will stay good for 3 to 4 days.
Reheating Tips
When it's time to eat leftovers, reheat the orzo gently. You can use a pot on low heat or a microwave. If using a pot, add a splash of water or broth. This helps keep it moist. Stir often until it warms through. In the microwave, heat in short bursts. Stir in between to avoid hot spots.
Freezing for Long-Term Storage
Want to save some for later? You can freeze the orzo! First, let it cool completely. Then, divide it into portions. Use freezer-safe bags or containers. Squeeze out as much air as you can. Label them with the date and type. Frozen orzo will last for up to 3 months. When ready to eat, thaw it overnight in the fridge. Reheat as noted above. Enjoy your tasty meal anytime!
FAQs
Can I make this orzo dish vegan?
Yes, you can make this orzo dish vegan. To do this, simply leave out the Parmesan cheese. Replace the vegetable broth with water or a plant-based broth for better flavor. The dish remains tasty and full of flavor without any animal products.
What can I substitute for orzo pasta?
If you don't have orzo, you can use other small pasta types. Try ditalini, couscous, or even rice. Each option will change the texture slightly, but they work well with the lemon and herbs.
How do I adjust the recipe for different servings?
To adjust the servings, you can easily scale the ingredients. For example, if you want to make this for two, use half of each ingredient. If you want to make it for six, simply double everything. This dish cooks quickly, so keeping track of time is key.
This blog post covered how to make a tasty orzo dish. You learned about key ingredients and how to select fresh produce. I shared easy step-by-step instructions for cooking and tips to enhance flavor. You also discovered fun variations to personalize your dish. Lastly, I included storage methods and answered common questions. Enjoy making this dish, and don't be afraid to get creative with your own ideas. Simple cooking can lead to great meals!